Quinoa Blueberry Bites

Quinoa Blueberry Muffins

These little bites are essentially a muffin. As they are gluten-free, dairy-free and contain cooked quinoa and rice flour, they don't rise as much as the muffins that are typically baked in my kitchen. But that's not a bad thing. They certainly are packed full of goodness and natural sweetness. And moist. Enjoy them shortly after they come out of the oven for that melt-in-your-mouth experience, when the blueberries are still warm. The applesauce also makes a bolder flavor when they are fresh.


Quinoa Blueberry BitesQuinoa Blueberry Bites
Recipe by
Published on March 3, 2015

Moist, gluten-free and dairy-free muffins packed with quinoa and seed goodness and applesauce and blueberry flavor

Print this recipePrint this recipe

Ingredients:
  • 1 cup cooked quinoa (from 1/3 cup uncooked)
  • 2 tablespoons chia seeds
  • 2 tablespoons hemp seeds
  • 1 cup almond milk
  • 1 cup unsweetened applesauce
  • 1/3 cup maple syrup or honey
  • 2 tablespoons coconut or brown sugar
  • 3 tablespoons coconut oil, melted
  • 1 1/2 teaspoons vanilla
  • 1 cup brown rice flour
  • 4 teaspoons baking powder
  • 1 teaspoon sea salt
  • 3/4 cup fresh blueberries
  • quinoa or rice flour for dusting the blueberries
Instructions:
  • Grease 12 muffin cups. Preheat an oven to 375°.

  • In a small bowl, combine the almond milk with the chia and hemp seeds and set aside.

  • In a medium bowl, combine the cooked quinoa, applesauce, maple syrup or honey, sugar, coconut oil and vanilla. Stir in the almond milk mixture.

  • In another medium bowl, stir together the rice flour, baking powder and salt. Add the quinoa mixture to the bowl and stir until just combined.

  • Toss the blueberries with the quinoa or rice flour and gently fold into the batter. Distribute the batter evenly into the prepared muffin cups.

  • Bake in the oven for 20 to 25 minutes until a cake tester comes out clean. Let sit in the pan for 10 minutes and then remove from the tin and transfer to a wire rack to cool.

Makes 12 muffins

Quinoa Blueberry Bites

More little bites from Lisa's Kitchen you are sure to enjoy:
Lime Biscuit Thins
Indian-Style Poppy Seed Wafers
Classic Blueberry Muffins
Cornmeal Honey Muffins

Gluten-Free Applesauce Raisin Muffins

vegan applesauce raisin muffins

I tend to eat small amounts throughout the day as opposed to large meals, so it's important for me to have quick solutions for breakfast and snacks. Muffins are always ideal to have on hand, especially when they are packed with protein and fiber like these cinnamon applesauce muffins with plump raisins. Eggless and made with chickpea flour, the muffins are suitable for those following gluten-free and vegan diets. Not that you have to be either vegan nor gluten-free to enjoy one or two. I could hardly wait for them to cool before I started to nibble. A little denser than muffins made with gluten flours, they are nonetheless soft and moist, with a bit of chewiness from the raisins and a slightly crisp exterior. Filling and satisfying if the urge to overindulge is resisted. My husband had two as part of his breakfast.

Gluten-Free Applesauce Raisin MuffinsGluten-Free Applesauce Raisin Muffins
Recipe by
Published on February 17, 2015

Moist dense muffins packed with protein, fiber and a wholesome applesauce and cinnamon flavor

Print this recipePrint this recipe

Ingredients:
  • 3/4 cup chickpea (besan) flour
  • 6 tablespoons coconut flour
  • 1 1/2 tablespoons corn or potato starch
  • 2 teaspoons ground cinnamon
  • 2 teaspoons baking powder
  • 1/2 teaspoon baking soda
  • 1 tablespoon sesame or hemp seeds (optional)
  • 1/4 teaspoon sea salt
  • 1/3 cup coconut or brown sugar
  • 2 tablespoons ground flax seeds
  • 1 1/2 cups unsweetened applesauce
  • 1/4 cup coconut oil, melted
  • 1 teaspoon vanilla
  • 1/2 cup raisins
Instructions:
  • Grease 12 muffin cups. Preheat an oven to 350°.

  • In a large bowl, whisk together the flours, starch, cinnamon, baking powder, baking soda, sesame or hemp seeds if using, and salt until well combined.

  • In a medium bowl, whisk together the sugar, flax seed, applesauce, coconut oil and vanilla until well blended. Let the mixture stand for 10 minutes.

  • Make a well in the center of the dry ingredients. Add the applesauce mixture and stir until just blended. Gently fold in the raisins.

  • Evenly divide the batter among the prepared muffin tin. Bake for 20 to 25 minutes or until the muffins turn golden and a cake tester comes out clean. Let cool in the pan for 10 minutes and then turn out onto a wire rack.

Makes 12 muffins

gluten-free applesauce raisin muffins

More gluten-free muffins to try from Lisa's Kitchen:
Rice Muffins
Gingerbread Muffins
Quinoa Flour Muffins with Roasted Red Peppers and Goat Cheese

APPLE, FENNEL + SAGE LENTIL LOAF

APPLE, FENNEL + SAGE LENTIL LOAF

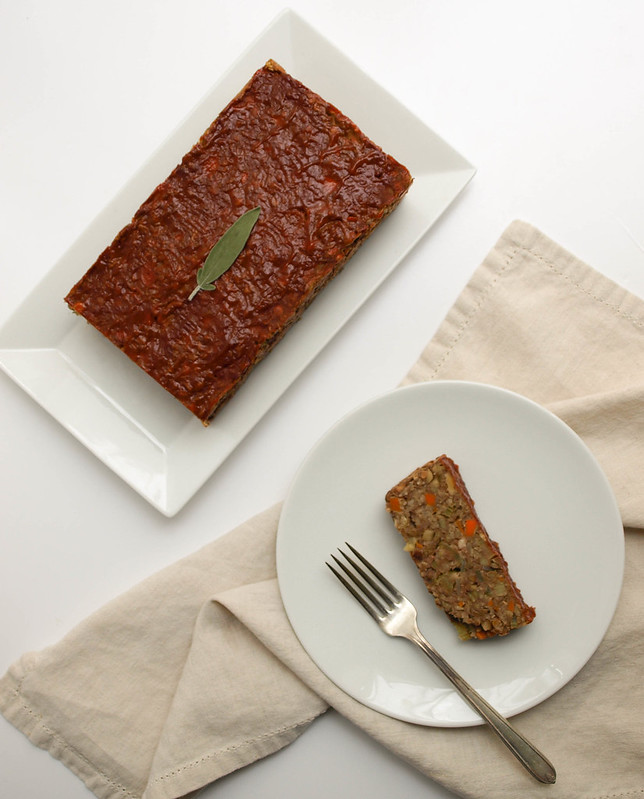
It's been two years since my last lentil loaf recipe. I thought this time I'd create something with a whole new flavor profile. I love this flavor combination and think it's a perfect fall/winter loaf or one you can rotate for variation all year long. All the flavors come through making every bite just as good as the last! A little sweetness from the apple, it's not overpowering at all. The fennel and sage are a perfect pairing of herbs. The walnuts give a little extra texture. I've kept the glaze super simple with just organic ketchup, apple cider vinegar and pure maple syrup. The glaze is tangy which is a nice contrast to the other flavors. Simple worked great here (at least I think so). I'd love to know what you think! I've adapted this new lentil loaf from my other one, The Ultimate Vegetable Lentil Loaf, which was a big hit, it's a great all-around loaf and I hope you all find this new one just as delicious!

A note on the fennel seeds. In case you're wondering what to do with your fennel seeds, I've used them in a few recipes like this Cannellini Bean & Fennel Flatbread, Mushroom and Buckwheat Soup and the Rustic Cabbage, Potato & White Bean Soup. If they are new to your pantry, you can purchase them knowing you can use them in other recipes. I love the flavor they give in each of these recipes!

APPLE FENNEL SAGE LENTIL LOAFAPPLE, FENNEL + SAGE LENTIL LOAF

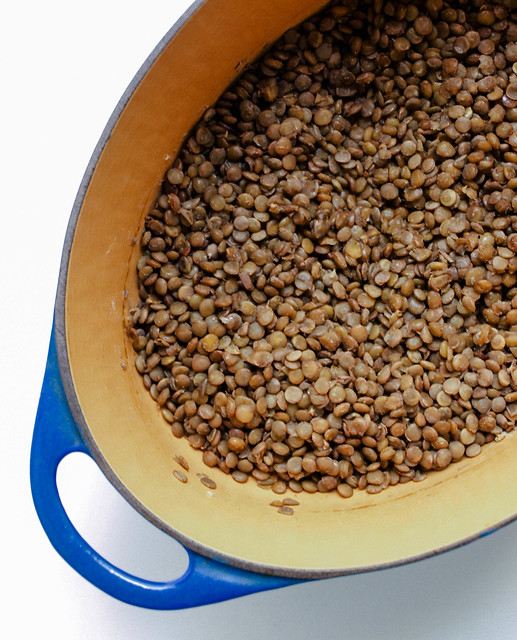
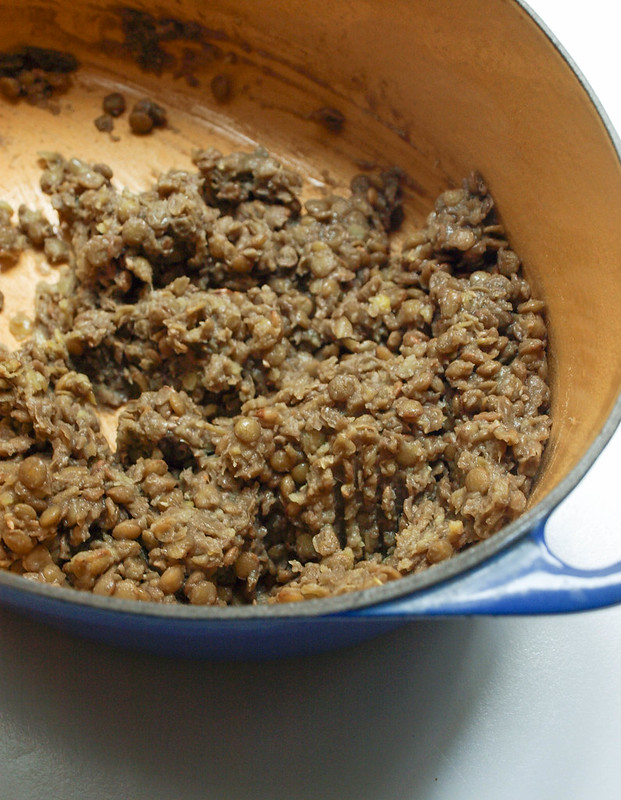
Cook your lentils, let set for about 15 minutes, most of the liquid should be absorbed. Mash or puree about 3/4 of the mixture. You should be able to easily mash the lentils with a back of a fork.

APPLE, FENNEL + SAGE LENTIL LOAFAPPLE, FENNEL + SAGE LENTIL LOAF

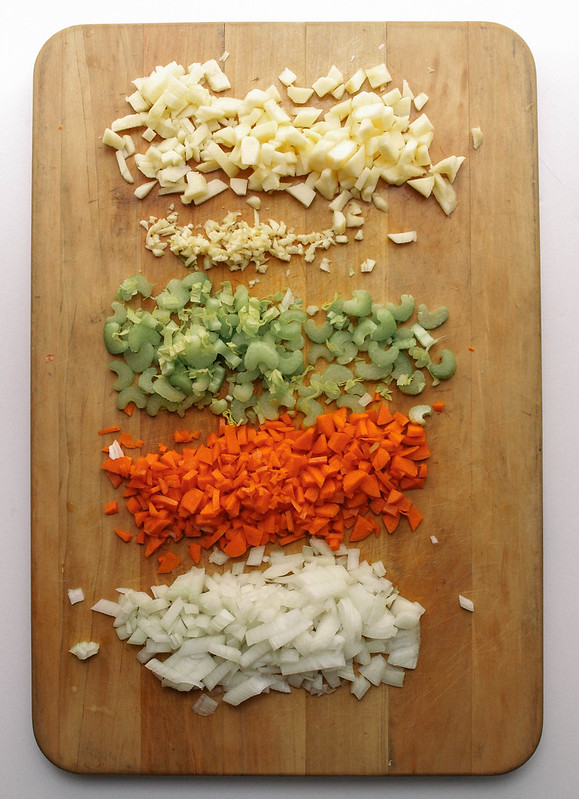
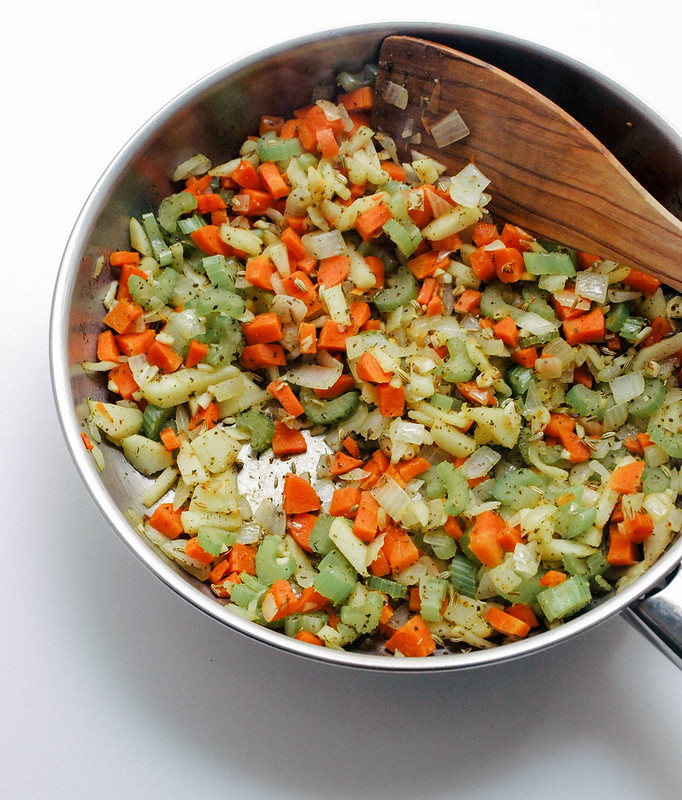
While you're working on the lentils, prepare your vegetables and apple and saute with herbs.

APPLE, FENNEL + SAGE LENTIL LOAFAPPLE FENNEL SAGE LENTIL LOAF

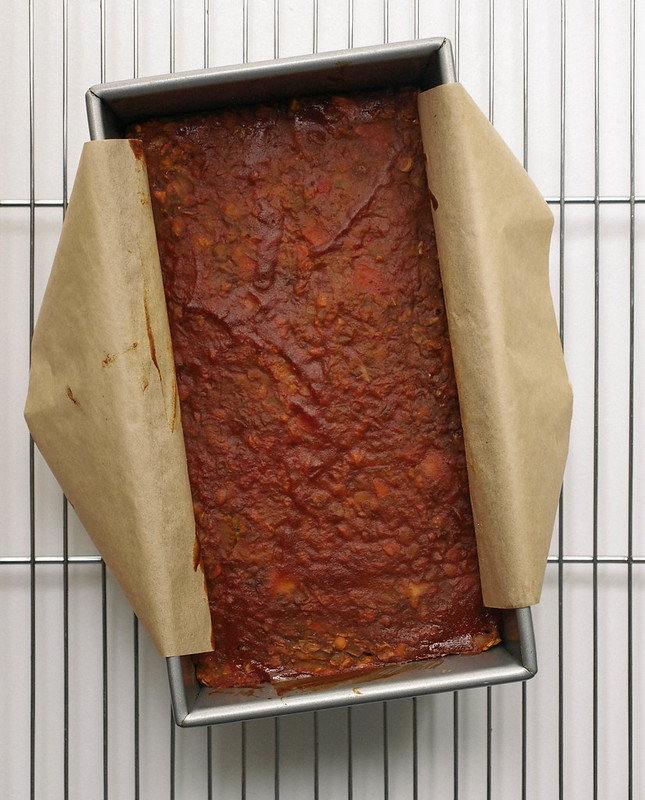
Once everything is mixed, pack mixture into a 9 x 5 loaf pan. Spread glaze over top and bake.

APPLE, FENNEL + SAGE LENTIL LOAF

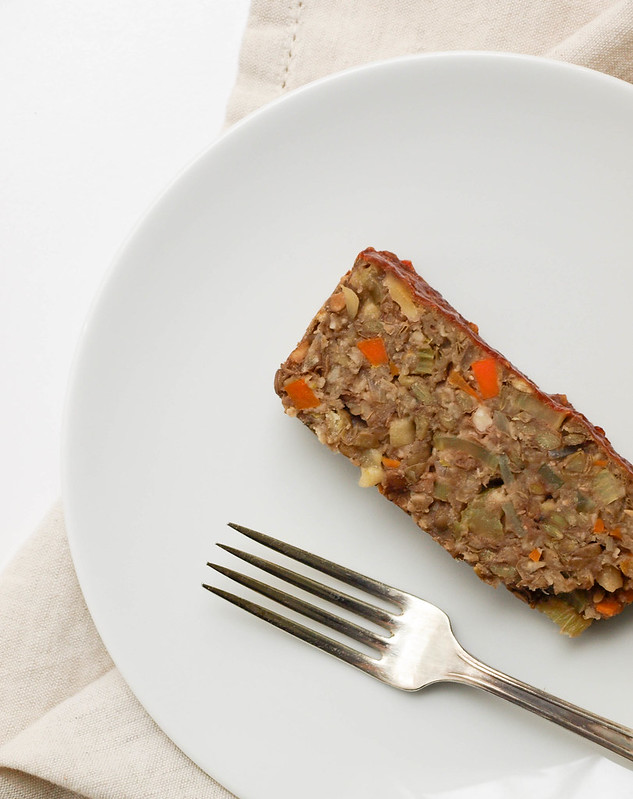
Remove from oven and let cool. You may like to add a fresh layer of glaze over top like I have in the first picture.

APPLE, FENNEL + SAGE LENTIL LOAF

APPLE, FENNEL + SAGE LENTIL LOAF

Ingredients
  • 1 cup green/brown lentils, rinsed
  • 2 1/4 cups vegetable broth or water
  • 3 garlic cloves, minced
  • 1 small onion, diced (about 1 1/4 cup)
  • 2 celery stalks, diced (about 1 cup)
  • 2 carrots, diced or grated (about 1 cup)
  • 1 small apple, cored, peeled and diced or grated (use firm crisp like fuji or gala) (about 1 cup)
  • 1 1/2 teaspoons fennel seeds, use whole or lightly crushed
  • 1 1/2 teaspoons sage or 2 tablespoons fresh minced
  • 3/4 cup oats, quick or rolled (I used quick) or bread crumbs
  • 1/4 cup flour (splet, almond, oat, GF all-purpose, etc.)
  • 1/2 - 3/4 cup unsweetened organic apple sauce
  • 3/4 cup finely chopped walnuts, optional
  • salt & pepper to taste (I used white pepper)
Glaze
  • 6 tablespoons organic ketchup
  • 3 tablespoons apple cider vinegar
  • 1 tablespoon pure maple syrup

Cook lentils: In a dutch oven or large pot, add vegetable broth and lentils, bring to a boil, cover, reduce heat to low and simmer for 40 - 45 minutes, most to all liquid should be absorbed. Lentils should be overcooked and tender. Set aside to cool, uncovered, for 15 minutes. Mash lentils with the back of a spoon or fork, or roughly puree using an immersion blender or food processor, about 2/3 - 3/4 of the lentil mixture.

Preheat oven to 350 degrees F.

Toast walnuts: Spread walnuts on a small rimmed baking pan, place in oven and toast until they are fragrant, about 10 -15 minutes. Set aside to cool..

Prepare vegetables and apple: Heat oil in a medium size pan over medium heat, add onion, celery and carrot, saute for about 5 minutes. Add apple, fennel, sage salt & pepper, heat for another 3 - 4 minutes.

Combine everything: Add the sauteed mixture with the lentils and mix. Add flour, oats, walnuts and 1/2 cup apple sauce, mix well to combine. If mixture seems to dry, add a little more apple sauce, mix again. Taste for seasoning adding extra herbs, salt and pepper as needed. 

Line a 9 x 5 loaf pan with parchment paper, (this will make for easy removal later), add mixture and press down gently but firmly filling in along the edges as well. 

Make glaze: In small bowl, mix together the glaze and spread over top lentil loaf as evenly as you can. Here you can even add a fresh sage leaf in the center of the loaf, it won't burn, it may roll a bit on the edges, and will add a nice decoration (the sage leaf I have shown was fresh). 

Bake: Place loaf in oven, on middle rack, and bake for 45 - 50 minutes. Remove from oven, let cool 10 minutes, remove from pan using the edges of the parchment paper. You may like to mix a bit more sauce and spread over top. Place loaf on serving dish, cut and serve individual slices.

Serving suggestions: Serve with roasted or mashed potatoes, or potato & cauliflower mash, a side of green beans or any combo of roasted brussels sprouts, carrots, butternut squash and beets. A simple fresh green salad with a light vinaigrette is also a great side! Left overs make for great sandwiches!

Makes 8 slices. 

Notes:

If you don't use a good vegetable broth while cooking the lentils, I recommend add in 1/2 teaspoon of onion and garlic powder, along with a big pinch of salt. The lentils are the base of the recipe and should have good flavor.

If mixture is too wet, add a tad more flour or oats/bread crumbs. If mixture is too dry, add a tad more apple sauce.

I've used both oats and bread crumbs. Both were great. I didn't notice that the oat flavor came through at all (or maybe I'm just adapted to them).

I don't recommend reheating the entire loaf at once. It will most likely become too dry, as the heat will take to long to reach the center. I recommend cutting slices and reheating, this way. If you need, you can make your lentil loaf the day before and store uncooked until ready to heat, bring to room temperature if possible, and heat according to instructions above.

If you love fennel and sage, by all means add an extra 1/2 teaspoon of each! Or an extra tablespoon of fresh minced sage.


KIMCHI

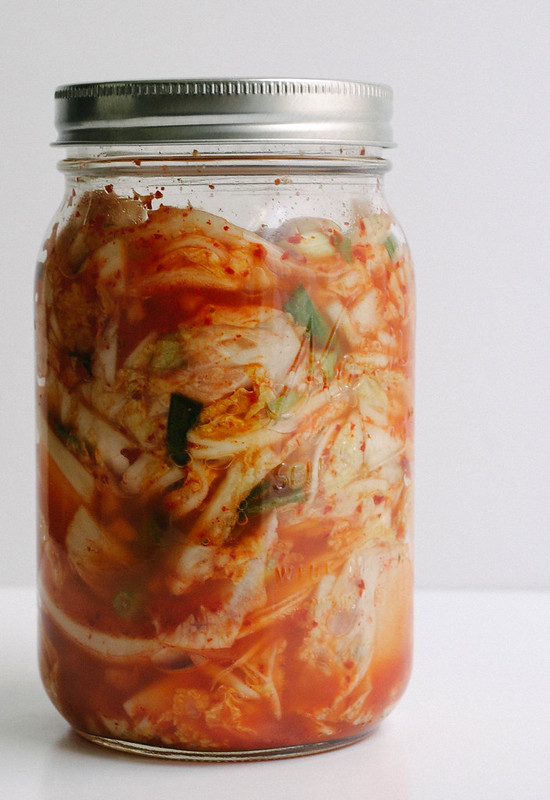
KIMCHI...Freshly packed

Welcome to the world of Kimchi! This tangy, spicy dish is a staple in the Korean culture and is typically eaten with every meal. In fact, kimchi is their national dish. Once you become accustomed to its unique characteristics, you may find yourself hooked! Kimchi is a mixture of vegetables and spices that go through a fermentation process, in our case we'll be using cabbage as our base. Fermenting foods have long been known for their health benefits. Foods like kimchi, kombucha, sauerkraut, pickles, miso and tempeh are probiotic powerhouses. The fermenting creates good bacteria which work directly in the gut to balance and regulate a variety of bodily functions. It can help with IBS, boost your immunity, aid in weight loss and even promote better skin. With kimchi being so simple to make, it's easy to add this beneficial mixture to your weekly meal plans. 

My first  experience with kimchi was with a jar I picked up at a local grocery store labeled Pickled Planet. I fell in love with the spicy flavor. I also have an affinity for all the ingredients listed on the jar and set out to make my own using the list as my guide. Basically it's cabbage, apple, green onion, red pepper, salt, garlic & ginger. After researching I found how kimchi recipes vary. I'll be playing around with different versions and sharing my experience here as I do. It's very easy to make and just takes patience to get through the first day or two. In the last couple weeks, I've tried 2 different spice blends, both delicious and noted below. I've also used different style cabbages, all great. I've even added shredded carrots but will save that for another recipe. Kimchi is a new addiction for me. Its spicy, pungent flavor and versatility keeps me coming back for more. If you've never tried kimchi, I hope this will inspire you to get in the kitchen and give it a try, or pick up a ready-made vegan version and enjoy asap! 

KIMCHIKIMCHIKIMCHI

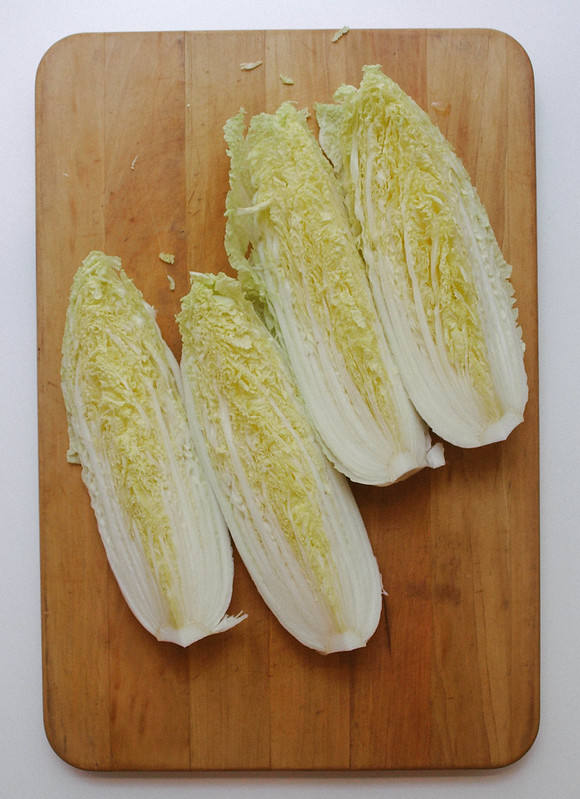
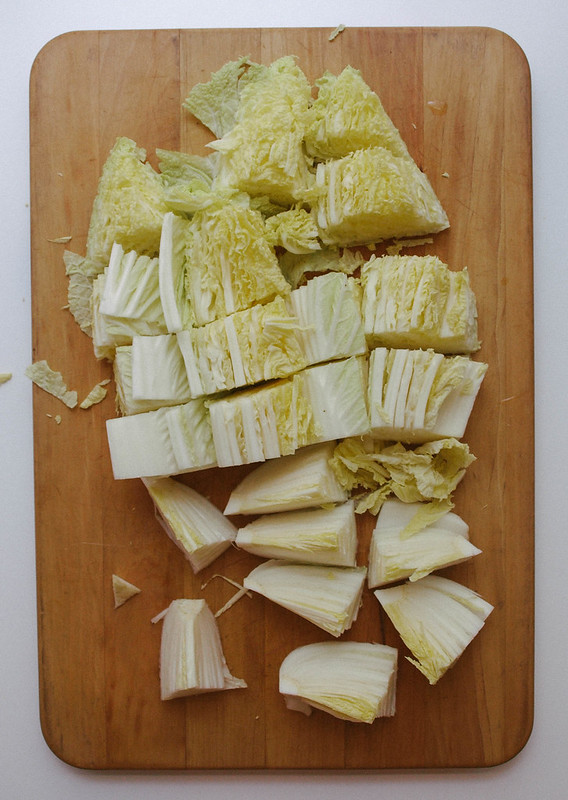
First, quarter your cabbage and slice laterally into 2" chunks. Cabbage will shrink a bit more during the fermentation process so no need to chop it too small. But you may consider slicing the pieces with thick stalks (mainly the pieces towards the bottom), slicing them in half will do fine. Here I used Napa cabbage as it is the most traditionally used cabbage but you can use green or savoy with excellent results, you may even find you like one of these better.

KIMCHIKIMCHIKIMCHIKIMCHI

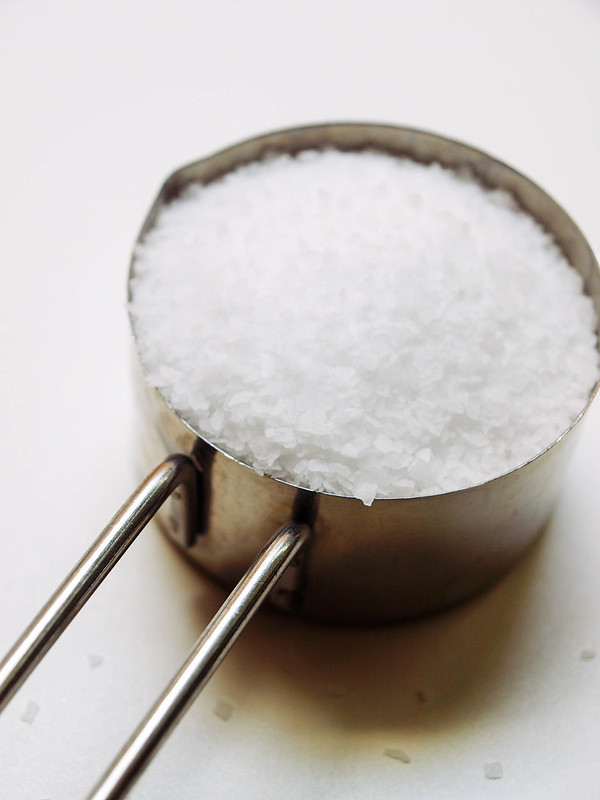
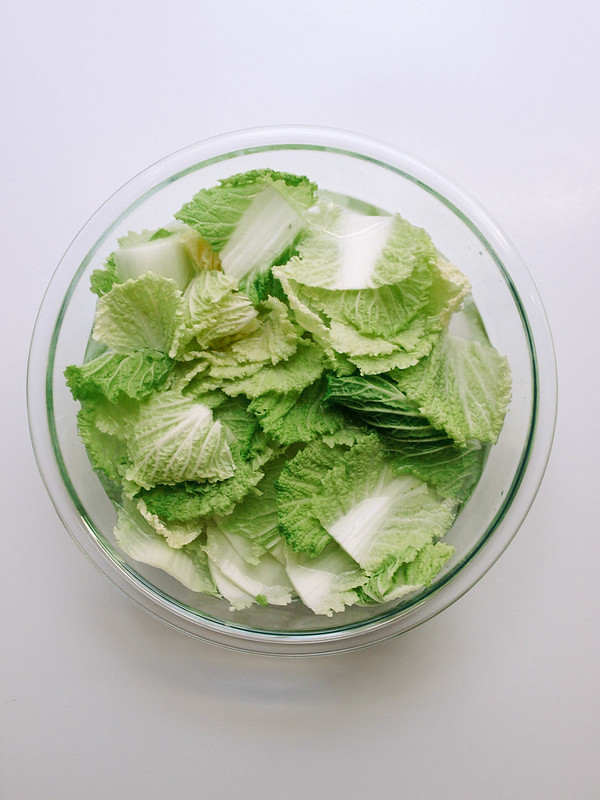
Next is the soaking of the cabbage in salt water, this will help draw moisture from the plant cells causing the leaves to wilt. Soaking the cabbage in salt water will move the preperation along a lot faster than than other methods used, it is my preferred method. For your salt, stick with using kosher, pickling or other course salts like sea or mineral salts that do not contain iodine. Iodine, with its antimicrobial properties, may interfere with proper fermentation. Place cabbage in a salted water bath, cover with dish and place weighted object on top to submerge the cabbage, let soak for at least 2 hours, up to 12 if you like but I find 2 hours is plenty.

KIMCHIKIMCHI

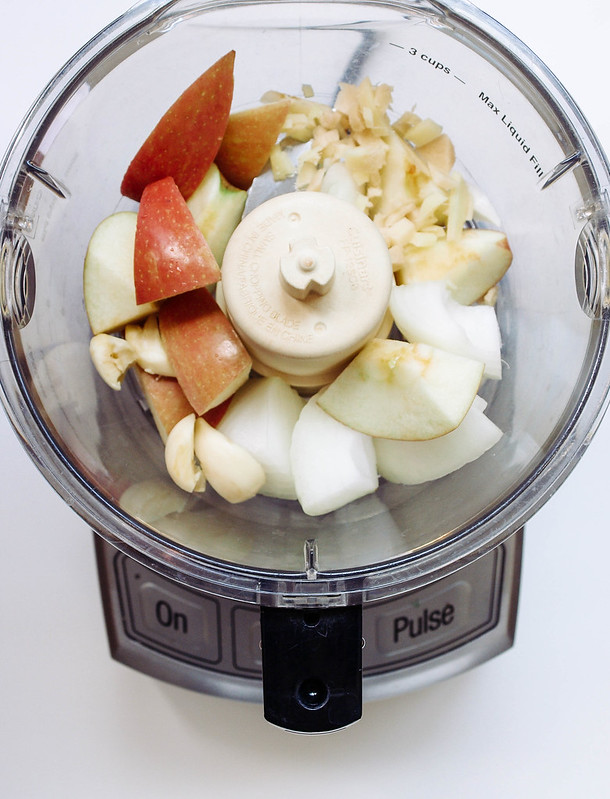
Puree the apple, onion, ginger and garlic making a sweet and zesty mixture. The sugar from the apple will help in the fermentation while adding a hint of sweetness. You can also use a pear. Some recipes call for a teaspoon or two of sugar in place of the apple (I will save that method for another kimchi recipe). I like the thought of using an apple but if you're in a pinch without an apple in sight, use 2 teaspoons of organic pure cane sugar, coconut sugar or sugar in the raw....just the puriest sugar you can find. You may like to add a bit of water to the mix as well, about 2 - 3 tablespoons. 

KIMCHI

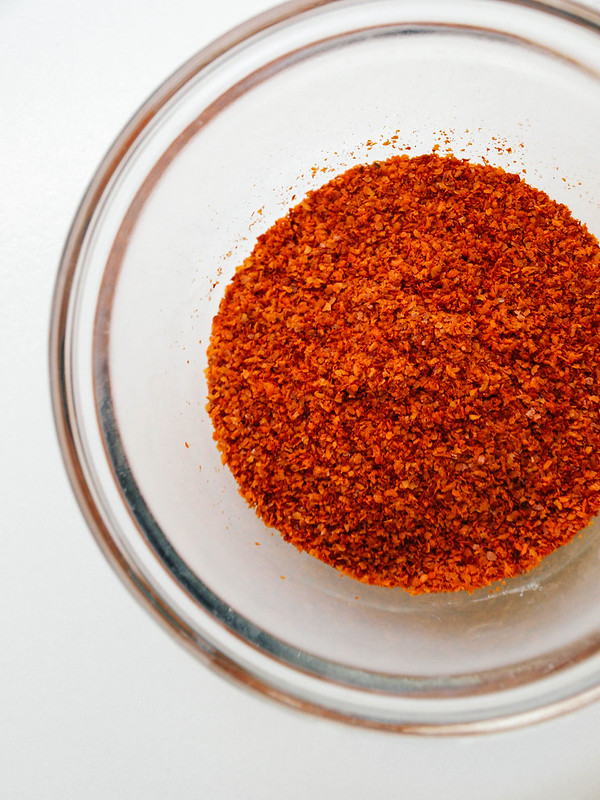
For the spice, you'll want to source out Korean red pepper powder or flakes known as gochugaru. You can find it at Asian grocery stores or online. I just tried this one from Mother In Laws Kimchi Korean red pepper flakes and thought it had an nice flavor. The peppers are not overly spicy, but I do find that the spiciness will intensify as the kimchi ages. I've also replaced the korean red pepper and used a mix of cayenne pepper and sweet Hungarian paprika, using 1 tablespoon each, and it was delicious as well.

KIMCHIKIMCHIKIMCHI

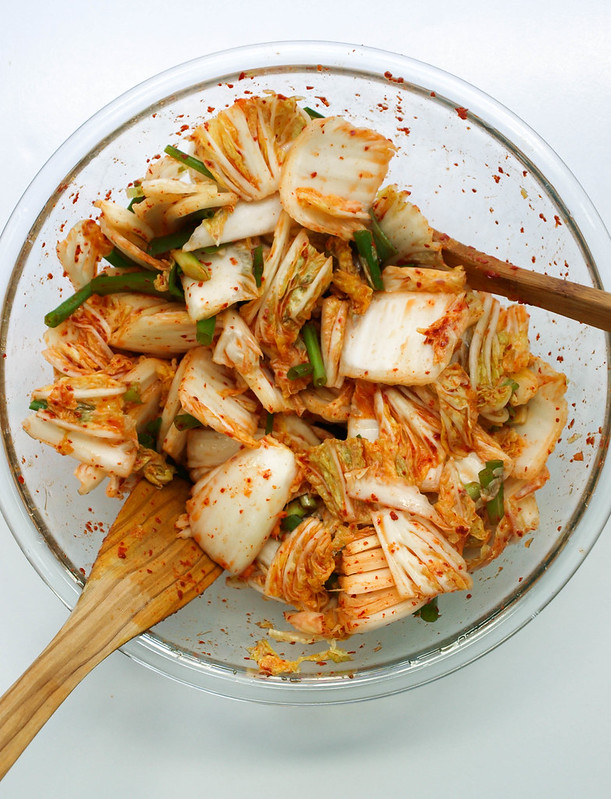
Make your spice mixtures and combine with cabbage and green onions, mix well to coat. Some use their hands (gloves recommended if you do), I used wooden spoons. Pack your mixture into glass jars or containers with a lid, leaving a little room at the top and cover. Check periodically for the next 24 - 36 hours. Move to refrigerator, kimchi will keep for at least a month, maybe 2. 

KIMCHIKimchi

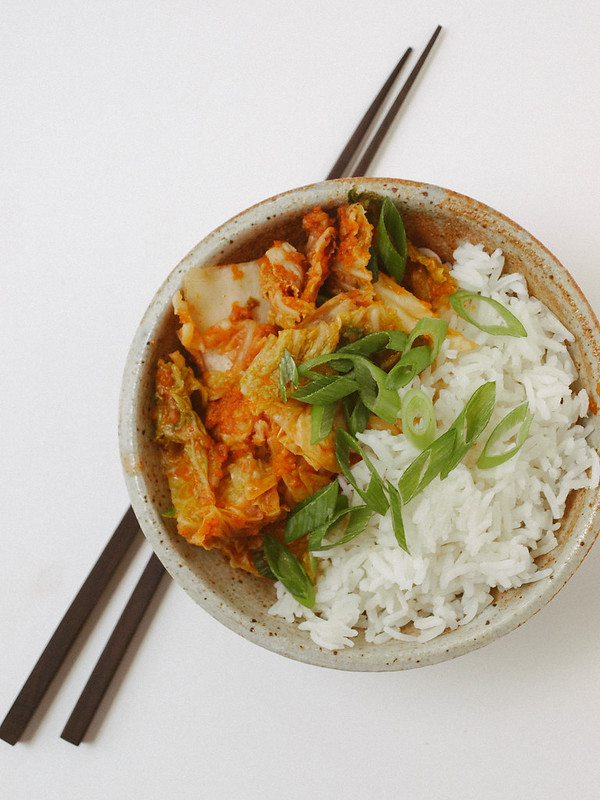
Kimchi can be served a number of ways. It's great as a simple dish with rice, a little cubed tofu would balance the meal out nicely. I have a Kimchi Tofu Scramble Taco recipe coming up next which tastes amazing! You can also be inspired by these tasty recipes: Kimchi Steamed Buns, Brussels Sprout Kimchi Tacos, Kimchi Fried Rice and Kimchi Tofu Summer Rolls. I have a few other ideas in mind as well so stay tuned...

KIMCHI

KIMCHI

Ingredients
  • 1 medium Napa cabbage, about 2 lbs (savoy, green or any combo works too)
  • 1/4 cup kosher, sea salt or other course salt 
  • 6  cups water
  • 3/4 sweet apple (I used fuji), chopped
  • 1/2 small white onion, chopped
  • 1 1/2 inch ginger, chopped
  • 1 - 2 cloves garlic
  • 3 tablespoons Korean chili powder (gochugaru) or 1 tablespoon each cayenne & Hungarian paprika
  • 3 - 4 scallions (green onions), sliced 1 inch

Preparing Cabbage: Quarter cabbage and chop laterally into about 2 inch pieces. Place cabbage in a an extra large bowl or pot. Combine salt with 2 cups of luke warm water, stir to dissolve salt. Pour salt water over the cabbage and add remaining 4 cups, stir to mix. If you can, place a plate or circular baking dish of sorts on top to submerge the cabbage (I used a pie dish), place something with a good amount of weight on top to hold down if necessary (it's not completely necessary but will help to evenly wilt the cabbage). Give cabbage a good mix every now and then. Let set for 2 hours, up to 12 if you like. I found that 2 - 4 hours was enough and didn't see much change between the two times.

Make your seasonings: While cabbage is soaking, combine apple, onion, ginger and garlic in food processor/blender and process until fairly smooth.

In a small bowl, mix the chili pepper with a small amount of water to make a wet paste. You can just as easily blend it with the apple/onion mixture adding a couple tablespoons of water as well.

Mix everything together: Once cabbage is ready, drain water, reserving 1/2 cup, and rinse well. Place cabbage back in large bowl, combine with the scallions, apple/onion mixture and chili paste. Mix well to coat all pieces. Either use your hands (with gloves on pref to protect from the chili pepper) or simply use wooden spoons to toss everything.

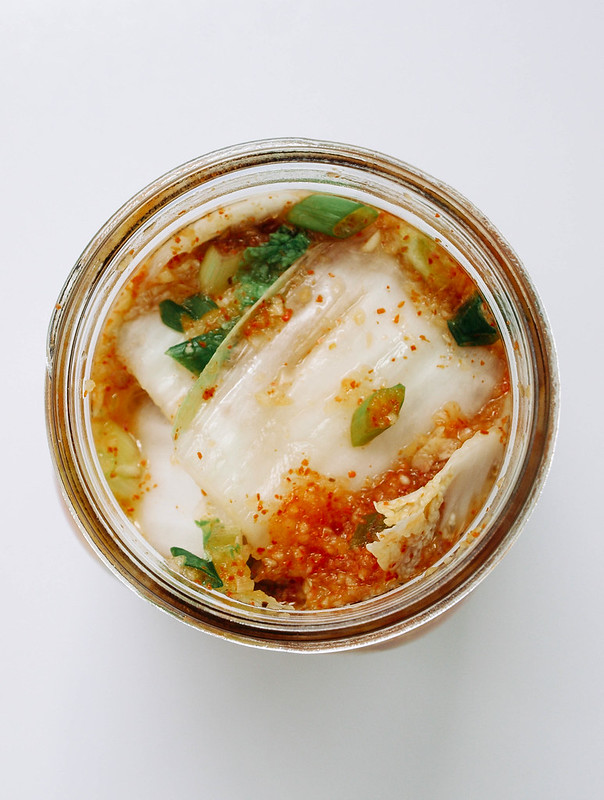
Packing: Place the kimchi in glass jars or containers with lid, pack down the best you can to close air pockets and leave about an inch at the top for air and gases. Top with remaining juices, add reserved brine if needed to cover vegetables.

Fermenting: Let kimchi set at room temp (or in a cool place like a pantry or closet if weather is extremely warm) for 24 - 36 hours. After 24 hours, open kimchi and pack the mixture down with a spoon (the cabbage will have likely shrunk and you'll have more liquids). You may notice it bubbling, this is perfectly normal as the kimchi is fermenting. As your kimchi ferments the flavors will develop, taste every 24 hours and place kimchi in the refrigerator once you're happy with the taste and to slow fermentation, usually after 48 - 36 hours. It should be tangy, spicy and slightly sweet. After moving to the fridge, it's best used within a month, maybe two.

Makes about 3 - 4 cups.

Notes:

Practice makes perfect with kimchi. You may find you like it more or less spicy. After a few tries you'll find the perfect mix to suit your taste. Also, how fermented you like your kimchi will take practice as well. The weather will also play a role in how fast/slow your mixture will ferment. Higher temperatures will progress fermentation while cooler will slow it down.

If you're in a pinch without an apple in sight, use 2 teaspoons of organic pure cane sugar, coconut sugar or sugar in the raw....just the puriest sugar you can find. You may like to add a bit of water to the mix as well, about 2 - 3 tablespoons. 

You can also enjoy kimchi fresh right after you mix it and store it straight in the fridge. You may like to experiment by putting half the recipe in the fridge and the other half in the pantry to ferment & sour to see which flavor is your favorite.

Optional ingredients for color and variation: carrots and/or daikon radish (grated or julienned), about a 1/2 cup of each. If using these, add to cabbage when mixing scallions and wet mixtures together.

If using savoy or green cabbage, quarter cabbage, remove core and roughly slice.

If you don't have glass jars, plastic containers with lids will work just as well. If you have too much room, more than and inch, place plastic wrap over top but sinking it close to the surface of the kimchi and cover with lid.


I'd love to see your noms...
#thesimpleveganista


CURRY ROASTED CAULIFLOWER & QUINOA SALAD

CURRIED ROASTED CAULIFLOWER & QUINOA SALAD

Get ready for a different flavor sensation! It's a nice balance of sweet, a bit of tang and curry flavor that I just can't get enough of. If you love roasted cauliflower and the combination of ingredients in this salad, I have no doubt you will find this to be a great addition to your meal rotations.

This recipe came about from a recent trip to a small grocery store near me. I picked up a version they had and thought it was good enough to recreate for the recipe collection. The quinoa is my own addition, I wanted to add some protein and extra fullness to the salad. The remaining ingredients are almost the same. I did have to guess at the dressing but it came out perfect, even better than theirs I think...much less oily. This can easily be a side salad or a full meal. Great for to-go lunches as well, can be served at room temp or chilled. 

To all of those who have picked up a copy of THE ARCHIVES VOL 1, thank you so much! :)

CURRIED ROASTED CAULIFLOWER & QUINOA SALADCURRIED ROASTED CAULIFLOWER & QUINOA SALAD

Roast your cauliflower and prepare your quinoa...

CURRIED ROASTED CAULIFLOWER & QUINOA SALAD

Mix the dressing and gather the rest of the ingredients...

CURRIED ROASTED CAULIFLOWER & QUINOA SALAD

toss everything together and you're ready for a flavorful and filling salad!

CURRIED ROASTED CAULIFLOWER & QUINOA SALAD

CURRY ROASTED CAULIFLOWER & QUINOA SALAD

Ingredients
  • 1/2 cup dried quinoa
  • 1 cup water (or just under)
  • 1 large head of cauliflower
  • 1 medium apple (I used Fuji), cored and diced
  • 1/2 cup golden raisins
  • 1/3 cup shredded coconut

Dressing
  • 3 tablespoons grapeseed or olive oil
  • 2 - 3 tablespoons apple cider vinegar 
  • 1 tablespoon dijon mustard
  • 1 tablespoon pure maple syrup
  • 1 tablespoon lemon or orange juice
  • 1 tablespoon water
  • 2 teaspoons curry powder
  • mineral salt & fresh cracked pepper, to taste

Preheat oven to 425 degrees F. Cut cauliflower into florets. Lay in a single layer on a large rimmed baking sheet. Add a drizzle of oil and toss to coat. Roast in the oven for 40 minutes, mixing the cauliflower around half way through. Remove from oven, let cool. 

Rinse your quinoa using a fine mesh sieve (honestly, I usually skip this part but have it here for good measure. Don't feel you have to do it but you may find that you prefer it that way.) In a medium pot/pan, add quinoa and water, bring to a boil, cover, reduce heat to low and simmer for 15 minutes. Once done, turn heat off, uncover and let rest for 15 minutes. Fluff with a fork and set aside.

In a small bowl, mix together the ingredients for the dressing. Set aside to let the flavors develop. Taste for seasoning adding anything extra you might like. 

In a large mixing bowl, combine quinoa, cauliflower, apple, raisins, shredded coconut and dressing, toss well to coat. 

Serve at room temperature or chilled.

Serves 4

Notes:

If you know and love the Orange Muscat Champagne Vinegar from Trader Joe's, or elsewhere, this is a great place to use it! Use it in place of the apple cider vinegar.

Sub in a tablespoon or so of water for the oil. Try using 1 tablespoon oil and 2 - 3 tablespoons water.

Feel free to use regular raisins or currants. Cranberries may even be a nice change up.

For my quinoa, I buy one bag each of white and tri-color and mix them together creating a nice blend of color and texture.

Enjoy this flavor combination, it's delicious!


APPLE NACHOS

Apple Nachos
Gather some of your favorite apples and get ready to enjoy a simple, fun and delicious treat! I'm not sure why I haven't made this yet, I guess it's true that everything has its time. I've seen apple nachos here and there on the web over the last couple years, a quick google search will pull up all kinds of similar versions, but I never put it on my immediate to do list. With all the busyness going on in life right now, I was thinking of something easy to share here and this popped into mind. I'm so glad that the time has come because these are absolutely delicious! A well loved classic, and I can see why. It's fresh, sweet (if using a sweet apple), with bits of chocolate and coconut flakes all topped with warm nut butter and cinnamon. What's not to love?! I easily ate two apples and could've eaten more if in the end I felt like slicing up more. But really two was enough, and maybe one will be enough for you, but I highly recommend going ahead and slicing up 2 per person, just in case. If you don't end up eating all the apple slices, the lemon juice will keep them from turning brown so you can make it with the leftovers the next day. This is also a great way to get in some protein that everyone seems to fuse over about a vegan diet. Where do you get your protein? How many times have I heard that. ;) Have no fear, this treat will give you about 8 grams of protein for every 2 tablespoons of nut butter you use (different butters may vary). Not too bad at all! This is a great snack for kids, as well as adults. I can see myself indulging in this quite often!

APPLE NACHOS

If you can circle your apples similar to this, you'll be sure to have a little of everything on every apple slice without causing too much mess when eating. But I sure didn't mind liking my fingers clean and I'm sure you won't mind either!

Apple Nachos
APPLE NACHOSAPPLE NACHOS

I was asked if I'd like to try out this gourmet raw almond butter from Dastony, and being that it's from a small family business I said of course. I'm all about promoting small family run businesses, and they deliver a wonderful product that's smooth & creamy! They have a quite a few butters to choose from, even a couple sprouted ones that look delicious, all of which may work well in this recipe. Their butters are 100% organic, stone ground, raw, vegan, and free from additives and preservatives. If you're looking for that special nut butter as a gift or one for yourself to use every day, this is it!

APPLE NACHOSAPPLE NACHOSAPPLE NACHOS

APPLE NACHOS

Ingredients
  • 2 apples of choice 
  • 1/4 cup natural nut butter of choice
  • small handful chocolate chips (I used Enjoy Life Mini Chips)
  • small handful shredded coconut
  • small handful slivered almonds
  • sprinkle of cinnamon
  • 1 tablespoon lemon juice

Optional toppings:
  • hemp hearts
  • cacao nibs
  • raisins or currants
  • ground cardamom
  • pure maple syrup

Wash, core and cut your apples into 1/4 inch slices. I like to cut mine into quarters, take a small paring knife and carefully remove the core and upper and lower end where dirt may still be collected (even after washing). Lay apple quarters on a flat surface with the inside of the apple facing up, carefully slice your apple into 1/4 inch slices, you may even be able to get them into 1/8 inch slices if your extremely patient, even 1/2 inch slices is good too. Whatever thickness you prefer, no rules here! Place apple slices in a small bowl with the lemon juice, toss to coat.

Heat your nut butter just until warmed and somewhat runny. I like to heat mine by using a small silicon bowl placed in a small pot with just enough water to reach half way up the side of the silicon bowl, heat water on low and gently heat the nut butter until warm and drizzable.

On a serving plate, lay your apple slices in a single layer around the outside edge, then layer another small layer over those but towards the inside center of the plate (like shown in the picture above). Drizzle the nut butter in a circular motion, from the middle of the plate to the outside edge. You can also just zig zag the almond butter from one side to the other if you like. Again, no rules...just do what you feel is best! Top with choco chips, coconut flakes, almonds and sprinkle of cinnamon (or whatever you've chosen to use as your toppings). Enjoy this simple yet delicious treat!

Serves one generously, or two as a small plate.

Notes: 

Use red or green apples, you may even consider using one of each for a combination of sweet & tart.

Make this 100% raw by using raw nut butters, raw cacao chips and unsweetened shredded coconut.

Live well & thrive!

I'd love to see your masterpieces...
#thesimpleveganista


GRILLED PEANUT BUTTER & APPLE SANDWICH

GRILLED PEANUT BUTTER & APPLE SANDWICH

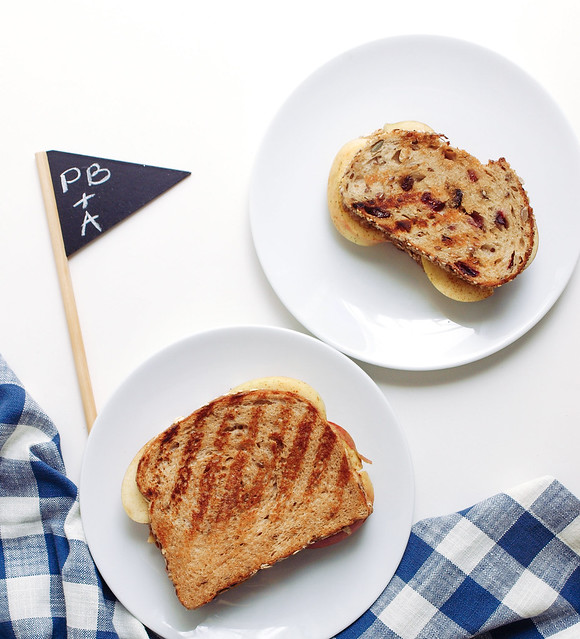
I do love a good sandwich every now and then. And one with sweet crisp apple, warmed nut butter, hints of cinnamon and maple are right up my alley! This sandwich includes plenty of protein, fiber and other good nutritional values to keep us running and happy. I set out to put this into the collection as a nice twist on the old classic PB & J. It could also go as a PB & B if you have some bananas on hand. How great would that be? Very I think! I happen to love versatility when preparing a meal and decided to showcase it here. I've used different breads, mainly because of the various tastes we have in our home. I love the fruit, nut and seed loaf while my daughter prefers a simpler maple oat loaf. Both breads are wonderful giving their own special flavor to the sandwich. I love what the fruit and nut loaf adds to this sandwich and recommend finding one, it really adds a nice touch and pairs perfectly with the ingredients. I used fuji apples as they are our favorites. I think the tart green apples would be great here too. I also varied up the nut butters. I love my almond butter and my daughter loves her peanut butter. So it goes, we have variations and each one of us had our own special version to suit us perfectly... and it was delicious! I encourage you to use your favorite of everything here, this is more of a template than a recipe. You may also consider adding some Coconut Bacon to the middle of this sandwich. Happy creating and eating. Cheers!

GRILLED PEANUT BUTTER & APPLE SANDWICHGRILLED PEANUT BUTTER & APPLE SANDWICH

Spread nut butter on all slices, top with apple slices, dash or two of cinnamon and a drizzle of pure maple syrup...

GRILLED PEANUT BUTTER & APPLE SANDWICH

Cover with top slice and grill until nice and golden on each side...

GRILLED PEANUT BUTTER & APPLE SANDWICHGRILLED PEANUT BUTTER & APPLE SANDWICHGRILLED PEANUT BUTTER & APPLE SANDWICH

Slice in half and enjoy the simples!

GRILLED PEANUT BUTTER & APPLE SANDWICH

GRILLED PEANUT BUTTER & APPLE SANDWICH

Ingredients
  • 2 apples of choice 
  • nut butter of choice
  • cinnamon
  • maple syrup
  • 4 slices bread of choice 
  • coconut oil

Wash your apples and slice in half. Using a teaspoon, scoop out the core. Remove any area from the stem and calyx (bottom indentation) of the apple. Place sliced apple half in standing position and cut into 1/4 inch slices. You should get 3 or 4 slices per half, depending on the size of your apple. Cut the slices in half, vertically.

Add a nice layer of nut butter to both slices of your sandwich, layer one slice with apples, sprinkle with cinnamon and add a light drizzle of maple syrup over top. Place top half on sandwich.

Grease your griddle/skillet with coconut oil and heat over medium. You can also add a very light coating of coconut oil to the top of your bread slice using a silicon brush, or whatever method you prefer. Place sandwich, oil side down, and cook for about 2 - 4 minutes. Brush top half lightly with coconut oil, flip and cook another 2 - 4 minutes. Remove from heat and serve with any remaining fresh apple slices on the side.

Serves two.

Notes:

This would be great with a little Coconut Bacon in the middle.

Make gluten free by using your favorite gluten free bread.

This sandwich can be breakfast, lunch or dinner.

Enjoy the simples!


I'd love to see your masterpeices!
#thesimpleveganista


Back to top