Turkish Feta-Potato Rolls

Sigara Böreği literally means "cigarette pastry" in Turkish and they are usually deep fried. However, I didn't want to have a heavy snack, so instead I baked them with instructions from my mom.

Yufka, Turkish filo dough, is not as thin as the Greek one that you can find frozen at the stores here in States; it is usually round 15-20 inches in diameter. It is not easy to find Turkish filo dough here, but the Greek one is too thin and delicate for me to handle. So I decided to go online; the Turkish filo dough I used for these cigarette pastries is available at Tulumba.

1 pack of Turkish triangle filo dough (there were 28 pieces)
1/2 cup olive oil
2 tbsp yogurt
2 eggs (put aside one egg yolk to brush the tops)

for stuffing
2 medium size potatoes, peeled and boiled
1/2 cup crumbled feta
1/3 bunch parsley, finely chopped
1 tsp pepper flakes (optional)
1/2 tsp black pepper (optional)

black seeds
sesame seeds

-Mash the potato, feta, parsley, and spices with the back of a fork (you can use only potato or feta for stuffing. you don't need to salt the stuffing if you'll use feta, but if not, make sure you salt it)
-Mix olive oil, yogurt, and 2 eggs(-1 egg yolk; we're saving one egg yolk for brushing). Put one layer of filo dough and brush with the mixture. Put the second one on top and brush it again (not to have dry pastries, we need two layers of filo dough wetted with oily yogurt sauce). Place one spoonful of stuffing on the wide side of filo dough. Fold the sides and roll. (Wet the tiny end with the yoogurty sauce if it doesn't stick) Place them on a greased oven tray.
-After you roll all of them, beat the egg yolk that you set aside. Brush it on top of rolls and sprinkle sesame or black seeds, or both.
-Bake in a preheated oven at 375 F for 20-30 minutes until they're golden brown.


If you want to try them deep fried, you don't need the olive oil+yogurt+egg sauce. Take only one layer of filo dough, put the stuffing, roll, and deep fry it in a ligther oil like vegetable, corn, or canola oil until golden brown. ( Wet the tiny end of filo dough with water to stick) Place on a paper towel to soak excessive oil.

These pastries are good for breakfast or/and with tea. They're good for storing for emergencies, too. Just put them in the freezer seperately until frozen, then gather them in a bag/box until they're needed.

I don't know if you like savory and sweet things together, but you should try dipping your cigarette pastry in any kind of jam (my favorite is cherry), which is, I guess, a very Thracian thing to do in Turkey.

Antalya Bean Salad


Piyaz
is what we call bean salads in Turkey, but the term is actually Persian and means "onion." Piyaz is usually prepared with northern beans and kneaded onion; dressed with olive oil and vinegar; spiced up with pepper flakes; and decorated with tomatoes, parsley, and hard-boiled eggs. Depending on the region, piyaz might have green onions or sumac. However, in Antalya, a beautiful city with magnificent beaches and historical places on the Mediterranean coast, piyaz is made differently than the rest of Turkey. The difference is tahini and garlic, which, to my surprise since I'm not a great tahini fan, enriches the taste incredibly. In Tekirdag, my hometown, piyaz is served always with Tekirdag Meatballs. However, with tahini it can be a main dish as well.
2 cups of cooked northern beans
1 onion, cut finely in half-moons
1/2 cup parsley, finely chopped
1 tsp crushed pepper
1 or two hard boiled eggs, sliced
1 tomato, diced

1/4 cup tahini
1/4 cup vinegar
1/4 cup lemon juice
2 cloves of garlic, minced


-Soak the beans over night. Bring them to a boil and then on medium heat cook them until soft. Or use canned beans.
-In a bowl mix tahini, vinegar, lemon juice, and garlic for the sauce/dressing. It shouldn't be too runny or thick. Since different tahini brands have different density, it's hard to find the perfect mixture. If the dressing you make with the measures above is thick, add some of the water that you used to cook the beans or use the juice in the can. If it's runny than you can thicken it with more tahini.
-Pour the tahini dressing over the beans and mix them well.
-Slice the onion thinly julienne style in half moon shape. In a bowl knead it with 1 tsp salt. Rinse.
-Mix the beans with onion and parsley.
-Decorate the bean salad with tomatoes and slices of hard-boiled eggs.

KIMCHI

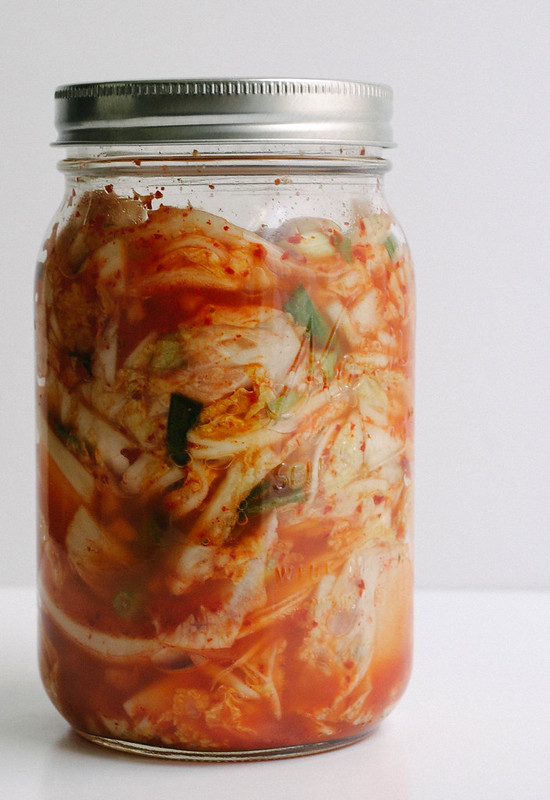
KIMCHI...Freshly packed

Welcome to the world of Kimchi! This tangy, spicy dish is a staple in the Korean culture and is typically eaten with every meal. In fact, kimchi is their national dish. Once you become accustomed to its unique characteristics, you may find yourself hooked! Kimchi is a mixture of vegetables and spices that go through a fermentation process, in our case we'll be using cabbage as our base. Fermenting foods have long been known for their health benefits. Foods like kimchi, kombucha, sauerkraut, pickles, miso and tempeh are probiotic powerhouses. The fermenting creates good bacteria which work directly in the gut to balance and regulate a variety of bodily functions. It can help with IBS, boost your immunity, aid in weight loss and even promote better skin. With kimchi being so simple to make, it's easy to add this beneficial mixture to your weekly meal plans. 

My first  experience with kimchi was with a jar I picked up at a local grocery store labeled Pickled Planet. I fell in love with the spicy flavor. I also have an affinity for all the ingredients listed on the jar and set out to make my own using the list as my guide. Basically it's cabbage, apple, green onion, red pepper, salt, garlic & ginger. After researching I found how kimchi recipes vary. I'll be playing around with different versions and sharing my experience here as I do. It's very easy to make and just takes patience to get through the first day or two. In the last couple weeks, I've tried 2 different spice blends, both delicious and noted below. I've also used different style cabbages, all great. I've even added shredded carrots but will save that for another recipe. Kimchi is a new addiction for me. Its spicy, pungent flavor and versatility keeps me coming back for more. If you've never tried kimchi, I hope this will inspire you to get in the kitchen and give it a try, or pick up a ready-made vegan version and enjoy asap! 

KIMCHIKIMCHIKIMCHI

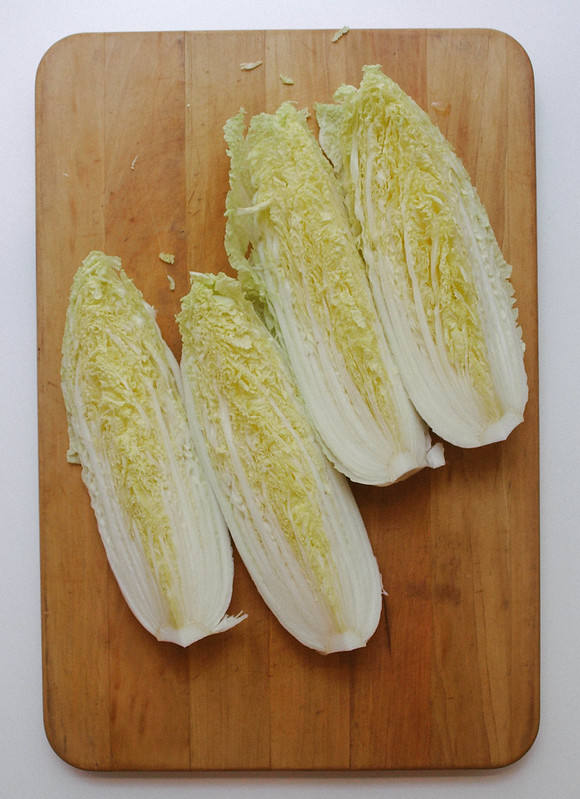
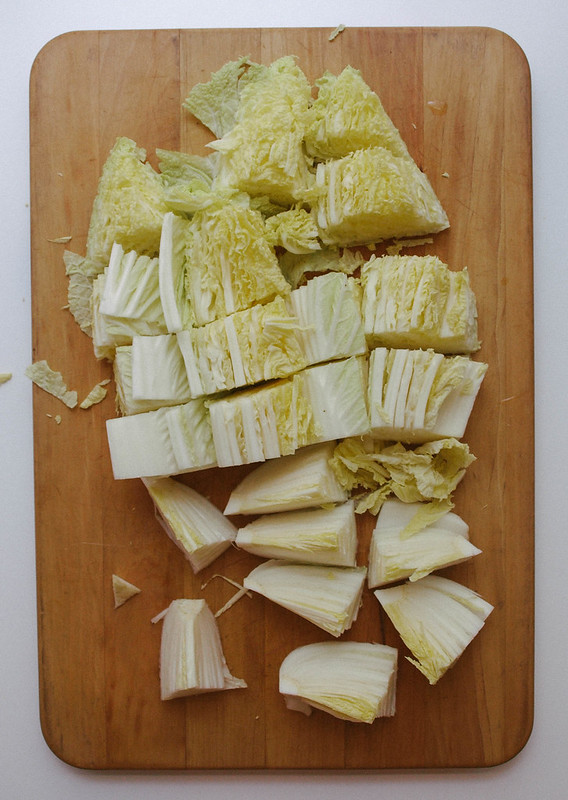
First, quarter your cabbage and slice laterally into 2" chunks. Cabbage will shrink a bit more during the fermentation process so no need to chop it too small. But you may consider slicing the pieces with thick stalks (mainly the pieces towards the bottom), slicing them in half will do fine. Here I used Napa cabbage as it is the most traditionally used cabbage but you can use green or savoy with excellent results, you may even find you like one of these better.

KIMCHIKIMCHIKIMCHIKIMCHI

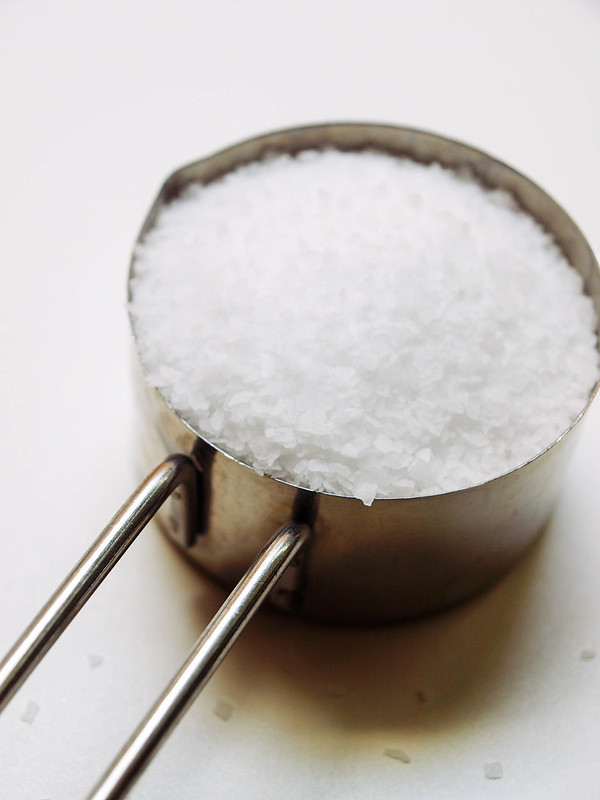
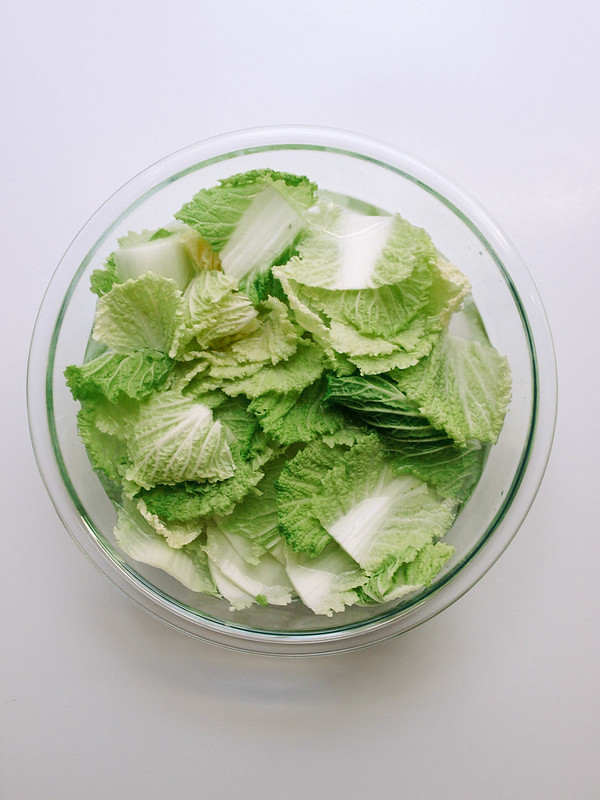
Next is the soaking of the cabbage in salt water, this will help draw moisture from the plant cells causing the leaves to wilt. Soaking the cabbage in salt water will move the preperation along a lot faster than than other methods used, it is my preferred method. For your salt, stick with using kosher, pickling or other course salts like sea or mineral salts that do not contain iodine. Iodine, with its antimicrobial properties, may interfere with proper fermentation. Place cabbage in a salted water bath, cover with dish and place weighted object on top to submerge the cabbage, let soak for at least 2 hours, up to 12 if you like but I find 2 hours is plenty.

KIMCHIKIMCHI

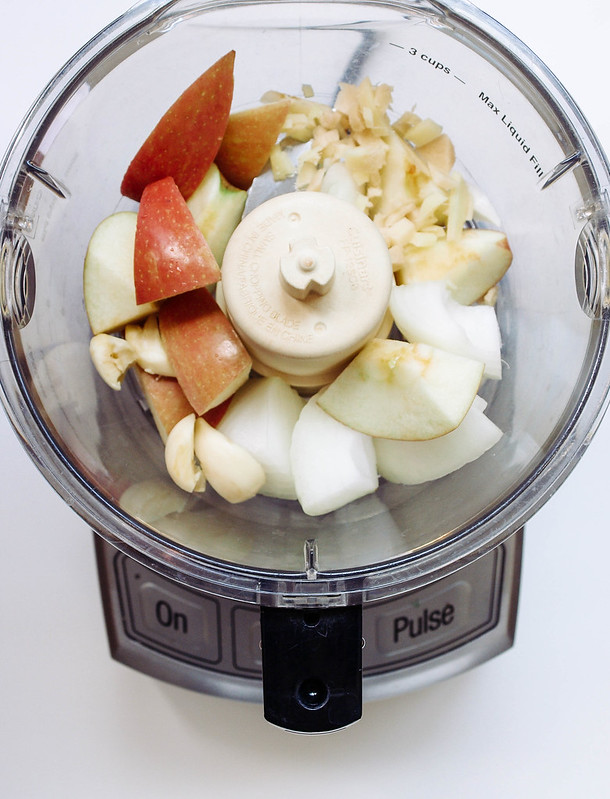
Puree the apple, onion, ginger and garlic making a sweet and zesty mixture. The sugar from the apple will help in the fermentation while adding a hint of sweetness. You can also use a pear. Some recipes call for a teaspoon or two of sugar in place of the apple (I will save that method for another kimchi recipe). I like the thought of using an apple but if you're in a pinch without an apple in sight, use 2 teaspoons of organic pure cane sugar, coconut sugar or sugar in the raw....just the puriest sugar you can find. You may like to add a bit of water to the mix as well, about 2 - 3 tablespoons. 

KIMCHI

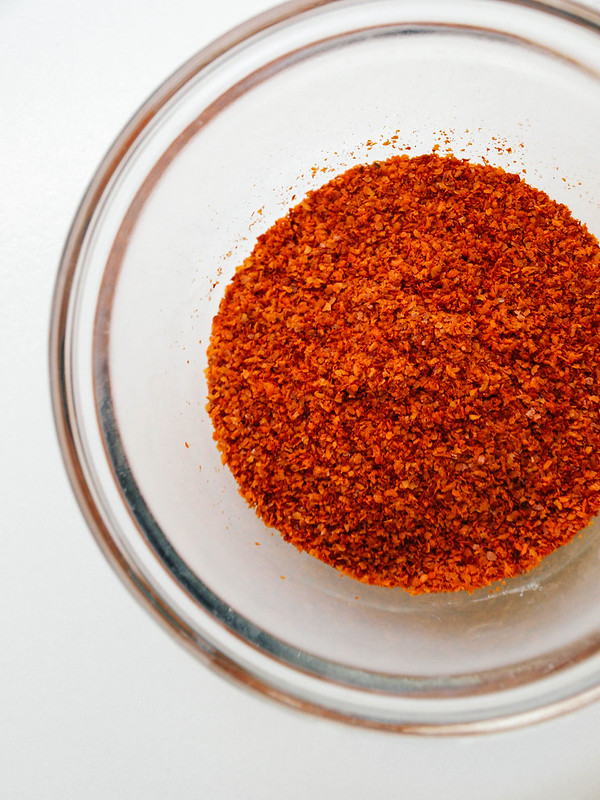
For the spice, you'll want to source out Korean red pepper powder or flakes known as gochugaru. You can find it at Asian grocery stores or online. I just tried this one from Mother In Laws Kimchi Korean red pepper flakes and thought it had an nice flavor. The peppers are not overly spicy, but I do find that the spiciness will intensify as the kimchi ages. I've also replaced the korean red pepper and used a mix of cayenne pepper and sweet Hungarian paprika, using 1 tablespoon each, and it was delicious as well.

KIMCHIKIMCHIKIMCHI

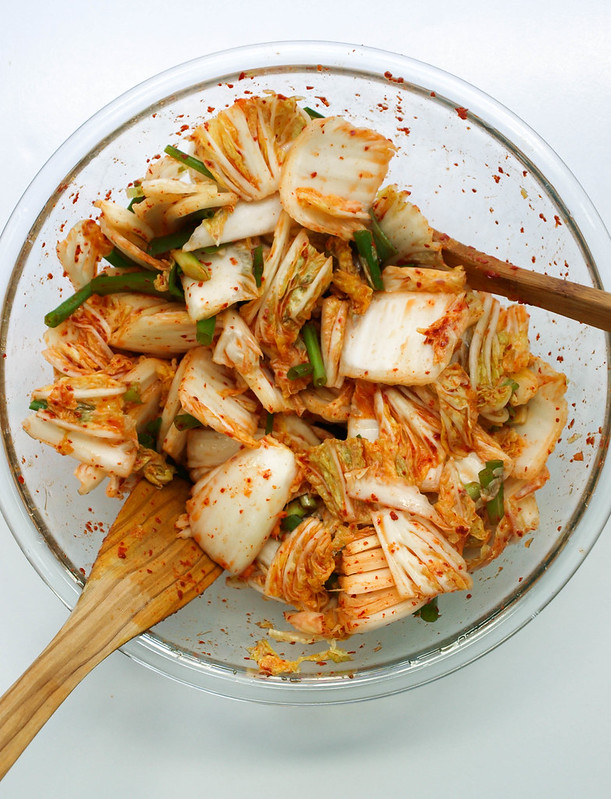
Make your spice mixtures and combine with cabbage and green onions, mix well to coat. Some use their hands (gloves recommended if you do), I used wooden spoons. Pack your mixture into glass jars or containers with a lid, leaving a little room at the top and cover. Check periodically for the next 24 - 36 hours. Move to refrigerator, kimchi will keep for at least a month, maybe 2. 

KIMCHIKimchi

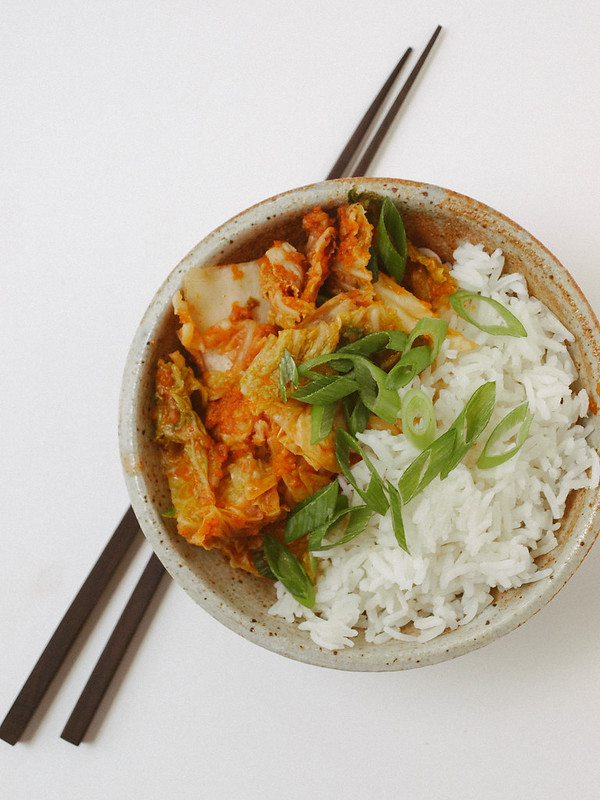
Kimchi can be served a number of ways. It's great as a simple dish with rice, a little cubed tofu would balance the meal out nicely. I have a Kimchi Tofu Scramble Taco recipe coming up next which tastes amazing! You can also be inspired by these tasty recipes: Kimchi Steamed Buns, Brussels Sprout Kimchi Tacos, Kimchi Fried Rice and Kimchi Tofu Summer Rolls. I have a few other ideas in mind as well so stay tuned...

KIMCHI

KIMCHI

Ingredients
  • 1 medium Napa cabbage, about 2 lbs (savoy, green or any combo works too)
  • 1/4 cup kosher, sea salt or other course salt 
  • 6  cups water
  • 3/4 sweet apple (I used fuji), chopped
  • 1/2 small white onion, chopped
  • 1 1/2 inch ginger, chopped
  • 1 - 2 cloves garlic
  • 3 tablespoons Korean chili powder (gochugaru) or 1 tablespoon each cayenne & Hungarian paprika
  • 3 - 4 scallions (green onions), sliced 1 inch

Preparing Cabbage: Quarter cabbage and chop laterally into about 2 inch pieces. Place cabbage in a an extra large bowl or pot. Combine salt with 2 cups of luke warm water, stir to dissolve salt. Pour salt water over the cabbage and add remaining 4 cups, stir to mix. If you can, place a plate or circular baking dish of sorts on top to submerge the cabbage (I used a pie dish), place something with a good amount of weight on top to hold down if necessary (it's not completely necessary but will help to evenly wilt the cabbage). Give cabbage a good mix every now and then. Let set for 2 hours, up to 12 if you like. I found that 2 - 4 hours was enough and didn't see much change between the two times.

Make your seasonings: While cabbage is soaking, combine apple, onion, ginger and garlic in food processor/blender and process until fairly smooth.

In a small bowl, mix the chili pepper with a small amount of water to make a wet paste. You can just as easily blend it with the apple/onion mixture adding a couple tablespoons of water as well.

Mix everything together: Once cabbage is ready, drain water, reserving 1/2 cup, and rinse well. Place cabbage back in large bowl, combine with the scallions, apple/onion mixture and chili paste. Mix well to coat all pieces. Either use your hands (with gloves on pref to protect from the chili pepper) or simply use wooden spoons to toss everything.

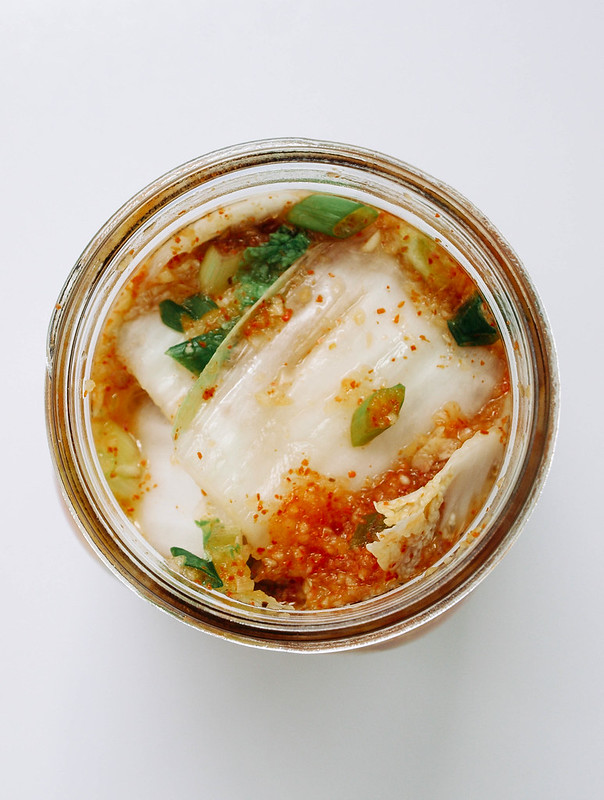
Packing: Place the kimchi in glass jars or containers with lid, pack down the best you can to close air pockets and leave about an inch at the top for air and gases. Top with remaining juices, add reserved brine if needed to cover vegetables.

Fermenting: Let kimchi set at room temp (or in a cool place like a pantry or closet if weather is extremely warm) for 24 - 36 hours. After 24 hours, open kimchi and pack the mixture down with a spoon (the cabbage will have likely shrunk and you'll have more liquids). You may notice it bubbling, this is perfectly normal as the kimchi is fermenting. As your kimchi ferments the flavors will develop, taste every 24 hours and place kimchi in the refrigerator once you're happy with the taste and to slow fermentation, usually after 48 - 36 hours. It should be tangy, spicy and slightly sweet. After moving to the fridge, it's best used within a month, maybe two.

Makes about 3 - 4 cups.

Notes:

Practice makes perfect with kimchi. You may find you like it more or less spicy. After a few tries you'll find the perfect mix to suit your taste. Also, how fermented you like your kimchi will take practice as well. The weather will also play a role in how fast/slow your mixture will ferment. Higher temperatures will progress fermentation while cooler will slow it down.

If you're in a pinch without an apple in sight, use 2 teaspoons of organic pure cane sugar, coconut sugar or sugar in the raw....just the puriest sugar you can find. You may like to add a bit of water to the mix as well, about 2 - 3 tablespoons. 

You can also enjoy kimchi fresh right after you mix it and store it straight in the fridge. You may like to experiment by putting half the recipe in the fridge and the other half in the pantry to ferment & sour to see which flavor is your favorite.

Optional ingredients for color and variation: carrots and/or daikon radish (grated or julienned), about a 1/2 cup of each. If using these, add to cabbage when mixing scallions and wet mixtures together.

If using savoy or green cabbage, quarter cabbage, remove core and roughly slice.

If you don't have glass jars, plastic containers with lids will work just as well. If you have too much room, more than and inch, place plastic wrap over top but sinking it close to the surface of the kimchi and cover with lid.


I'd love to see your noms...
#thesimpleveganista


RUSTIC CABBAGE, POTATO & WHITE BEAN SOUP

RUSTIC CABBAGE, POTATO & WHITE BEAN SOUP

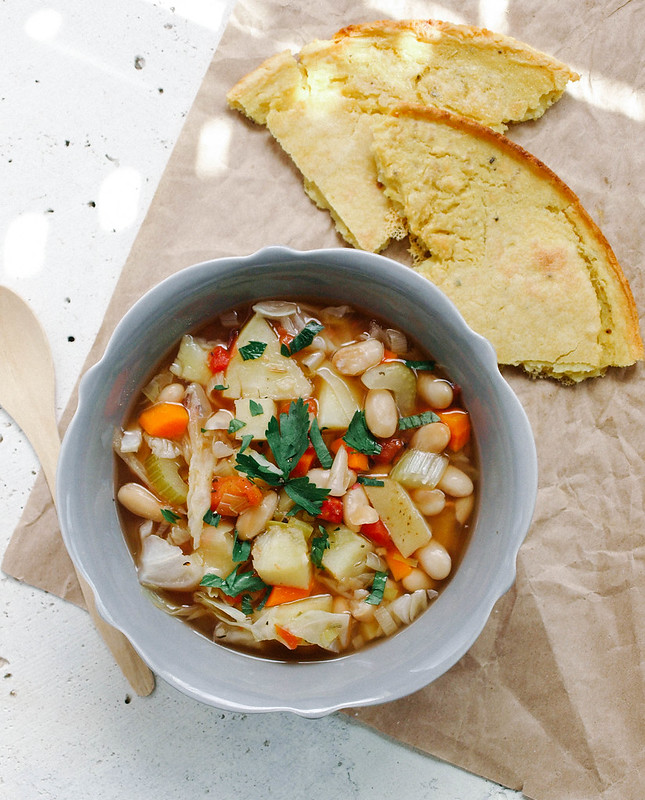
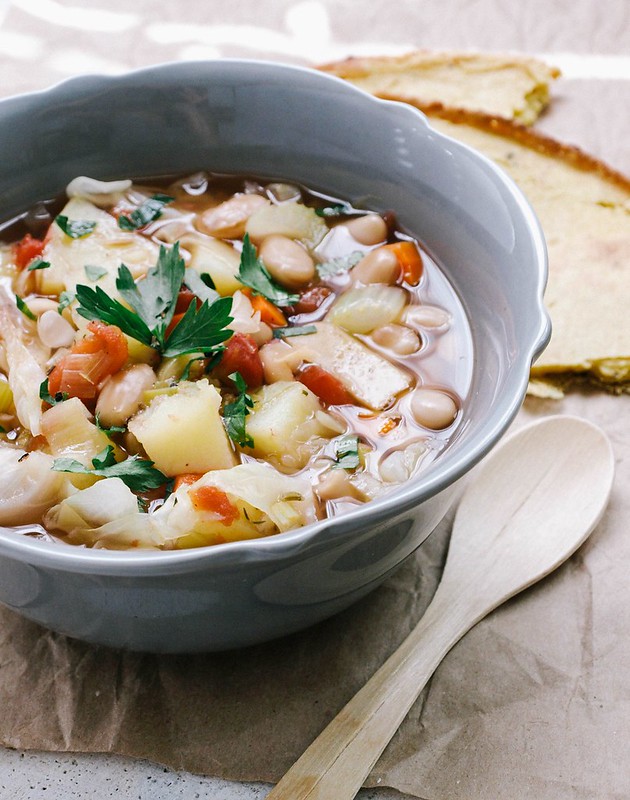
Wondering what to do with a half head of cabbage and potatoes I had sitting around brought about this hearty soup. It's brimming with vegetables, white beans and spices and is enough to feed a small crowd. Add some socca or crusty bread to the meal and you're all set. The socca I made here was seasoned simply with salt & pepper and can be whipped up while the soup is cooking. It's a nice accompaniment, not so much of a soaking bread like crusty bread, but delicious and filling. The soup in itself makes for a complete, nutritious meal with the beans adding a good amount of protein. I used leeks in this recipe, they lend a nice mellow onion flavor, but you can sub in an onion if you like. This turned out to be a great place to use up the leftover produce. I love cabbage in soups, this will be made many times to come. I'm happy to share another hearty soup for the recipe collection to inspire your senses, keeping you plant strong and loving it! 

RUSTIC CABBAGE, POTATO & WHITE BEAN SOUP

Feel free to change up the vegetables. If you're missing one or two, you can still pull this together and have a wonderful soup. If you can't find leeks, use 1 medium onion, diced, in its place. For the cabbage, use your favorite here. I happen to have regular green cabbage on hand but savoy cabbage would be great too. 

RUSTIC CABBAGE, POTATO & WHITE BEAN SOUP

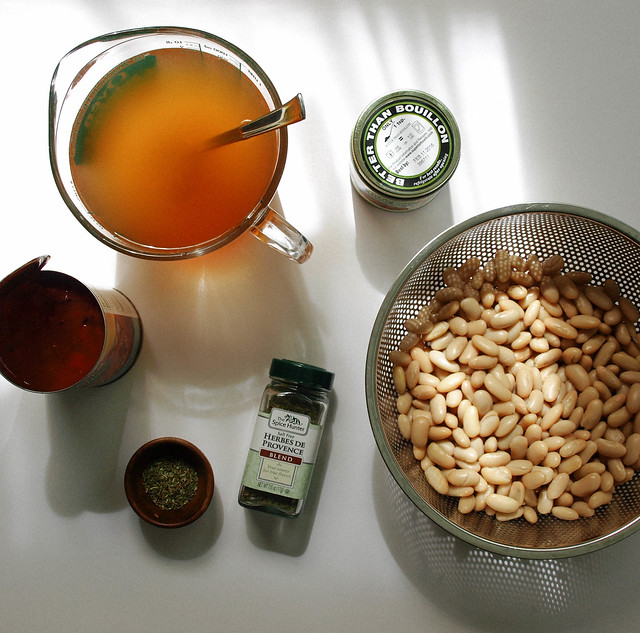
For this time around I chose to use herbes de provence. I love the combination of spices, especially the fennel that I find in this blend from The Spice Hunter. I also added in a teaspoon of fennel here because I love it. Feel free to use any spices you like as most of them will work well here. You can use 2 - 3 teaspoons of an Italian blend or combine a few herbs using 1 teaspoon each: thyme, oregano, rosemary. You can also use sage, marjoram or parsley, savory, etc...in any combination as long it equals about 1 tablespoon. 

When using Better Than Bouillon vegetable broth base, I never use the recommended serving size. I use just enough to flavor the water. For this recipe I used just under 2 teaspoons. This makes my jar last a lot longer and reduces the 'would be' sodium content per recipe. I've just recently (the last six months or so) been using their vegetable broth base and love it!

RUSTIC CABBAGE, POTATO & WHITE BEAN SOUPRUSTIC CABBAGE, POTATO & WHITE BEAN SOUP

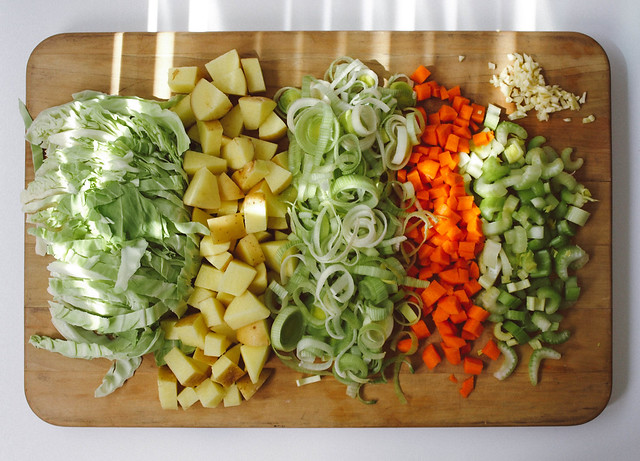
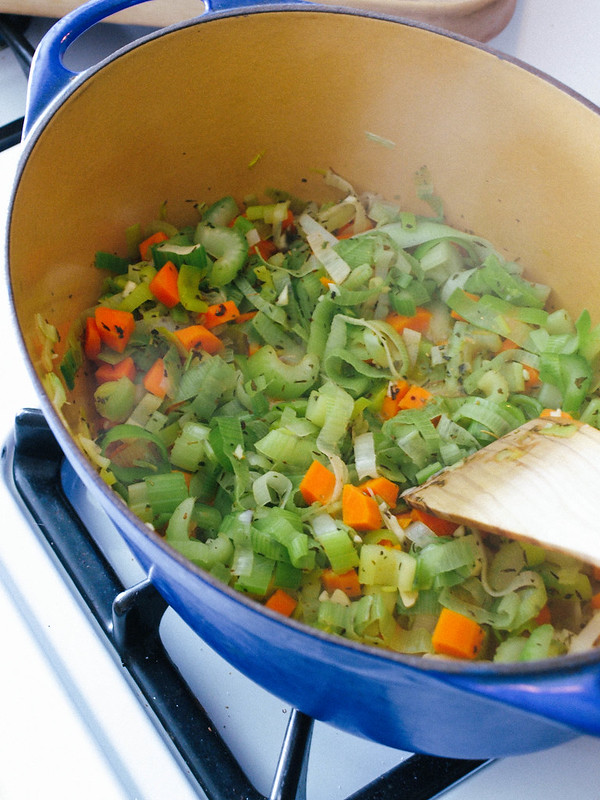
This is a one pot soup that's so easy to pull together. Saute the leeks, celery and carrots, add spices and garlic, cook a bit more. Add remaining ingredients ending with cabbage and white beans last as pictured above. Cover and simmer until cabbage and potatoes are tender, about 30 minutes. Serve with bread of choice. Enjoy often!

RUSTIC CABBAGE, POTATO & WHITE BEAN SOUP

RUSTIC CABBAGE, POTATO & WHITE BEAN SOUP


Ingredients
  • 1/4 cup water or 2 tablespoons olive or grapeseed oil (for sauteing)
  • 2 leeks (use white & pale green parts), sliced and rinsed 
  • 2 carrots, diced
  • 2 stalks celery, diced
  • 2 - 3 cloves garlic, minced
  • 1 tablespoon herbs de Provence OR 1 teaspoon each thyme, rosemary, oregano
  • 1 can (15oz) diced tomatoes 
  • 6 - 7 cups vegetable broth or water
  • 2 medium gold potatoes, diced
  • 1/2 head large cabbage, sliced (savoy or green)
  • 3 cups cooked white beans or 2 cans (15oz), drained and rinsed (use cannellini, great northern or navy) 
  • mineral salt & fresh cracked pepper, to taste
  • 1/4 cup chopped parsley, to garnish

Prepare your vegetables. After slicing your leeks, be sure to place them in a colander and rinse them well under cool running water to remove any dirt and sand that may have collected between the leaf sheaths. If there's a lot of dirt, place sliced leeks in a bowl of cool water and gently swish the leeks around to dislodge any unwanted remnants. Drain water by gently tilting the bowl with one hand and holding your hand over the leeks with the other so they don't fall out, or simply drain into a colander. Repeat until leeks are clear of dirt and sand. Here is a good tutorial from, The Kitchn, on how to wash and prep your leeks. Lastly, another method you may try is this: Slice off the root and the dark green parts. Slice in half vertically. Run under cold running water, opening up the layers as you rinse. Lay on flat surface and slice thinly hortizontally. 

In a large dutch oven or stock pot, heat water/oil over medium to medium-high heat, add leeks, carrots and celery, saute for 5 minutes. Smells delicious already! Add garlic and spices, saute for 1 minute more or until fragrant. Add tomatoes, broth, potatoes, cabbage and beans, bring to a boil, cover, reduce heat to low and simmer for 30 minutes, until potatoes and cabbage are tender. Taste for seasoning adding salt & pepper as needed. 

Serve topped with parsley and a serving of socca or crusty bread. Enjoy!

Serves 6 - 8.

Notes: 

As noted above, change the herbs to whatever you have on hand. You could also use an Italian blend seasoning if you like. I also like to add in a sprinkle of red pepper flakes.

I would suggest using the biggest pot you have for ease, this makes quite a bit of soup.

If leeks are not available, sub in 1 medium onion, diced.

Cabbage and Egg Noodle Kugel

kugel

I will confess that until now I was unfamiliar with kugel. It is a baked Jewish dish, somewhat like a casserole or pudding, made with noodles and eggs and sometimes potatoes. There are endless variations with different vegetables, seasonings and sweeteners — sometimes nuts or dried fruit and cinnamon are included. Depending on how sweet they are, they can be served as a side, for dessert or for breakfast or brunch. These savory and slightly sweet cabbage and leek snack-size kugels make for an excellent breakfast.

cabbage kugel

The recipe is adapted from Cooking Inspired by Estee Kafra. I received a copy for possible review and this is one of the first recipes I tried because it was new to me. I don't often eat eggs, but I was intrigued. My husband does happen to enjoy eggs, so these were a perfect breakfast for him. I must say, I enjoyed them too. Crispy on the outside and soft and creamy inside, they really are rather easy to make and certainly an economical dish. They are also very portable, making them an ideal choice for gatherings.

cabbage egg kugel

Cabbage and Egg Noodle KugelCabbage and Egg Noodle Kugel
Recipe by
Adapted from Cooking Inspired
Cuisine: Jewish
Published on August 29, 2014

Savory and slightly sweet, snack-size cabbage and leek versions of a traditional Jewish baked noodle pudding — great for snacks or breakfast, or even for a dinner side

Print this recipePrint this recipe

Ingredients:
  • 5 tablespoons olive oil
  • 1 lb (450 g) green cabbage, shredded
  • 3 leeks, white and light green parts, finely chopped
  • 1/2 cup + teaspoon coconut sugar
  • 12 oz (340 g) fine egg noodles
  • 5 large eggs
  • 2/3 cup + 1 tablespoon olive oil
  • 1/4 cup breadcrumbs
  • 1 teaspoon sea salt
  • fresh cracked black pepper to taste
Instructions:
  • Heat 4 tablespoons of the oil in a large saucepan over low heat. When hot, add the cabbage and leeks and cook, stirring often, for 20 minutes. Stir in 1 teaspoon of the sugar and continue to cook, stirring occasionally, for 20 to 25 minutes or until the vegetables are tender. Remove from heat.

  • Preheat an oven to 450° and grease 24 muffin cups.

  • Bring a large pot of salted water to a boil. Stir in the egg noodles and cook for 5 minutes. Strain and rinse with cold water. Transfer to a bowl and toss with 1 tablespoon of the olive oil.

  • In a large bowl, lightly beat the eggs. Add the remaining 1/2 cup of sugar, 2/3 cup of olive oil, breadcrumbs, salt and pepper, and stir until well combined. Now stir in the noodles and vegetables and mix well.

  • Spoon the mixture evenly into the cups. Bake in the preheated oven for 15 minutes and then reduce the heat to 350°. Bake for another 30 minutes. Remove from the oven, gently run a sharp knife along the edges of the kugel, and let stand for a few minutes before transfering to a wire rack to cool.

  • Note: You may make these in 9" round baking pans, but I was attracted to the idea of making them in muffin tins for little bites. I found I had enough of the mixture to get 24 of them, but adjust accordingly. I baked them in two batches so I could position the pan in the center of the oven without crowding. If you choose to use round baking pans, cook them the same as the ones made in the muffin tins, but increase the baking time by 15 minutes.

Makes 24 muffin-size kugels

cabbage kugel

I'm sharing this with Jacqueline's Bookmarked recipes and Haffa's Back to School Lunch Ideas.

Other cabbage dishes you may enjoy:
Chopped Cabbage with a Crumbly Chana Dal Sauce
Cabbage Poriyal
Whole Cabbage Stuffed with Coleslaw
Red Cabbage with Blueberries and Mushrooms

On the top of the reading stack: Short stories by Dostoevsky

Audio Accompaniment: silence

QUICK & EASY CHICKPEA TACOS

QUICK & EASY CHICKPEA TACOS

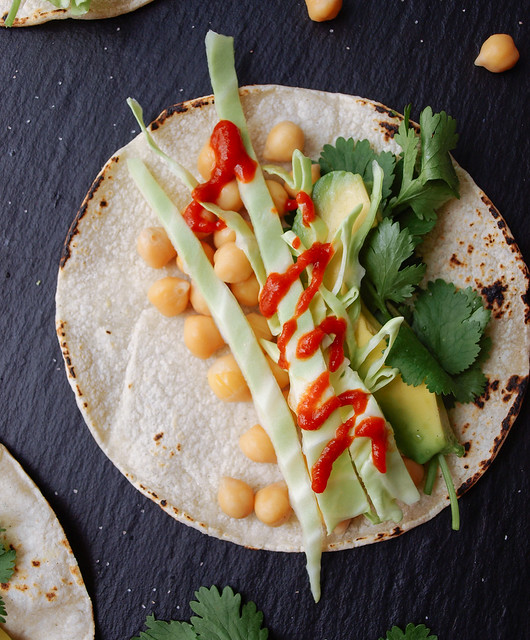
I have been eating these tacos on a fairly regular basis. I shared a similar version of this on Instagram and Facebook about seven months ago (my how time flies!). It went over very well, especially on Facebook! I don't know why it took me so long for but I finally decided it was time to put this simple taco here as a valuable veggie resource. They are so quick and easy to pull together. They can be eaten as a snack or a meal. Usually I skip the cabbage and cilantro if I don't have it on hand. I love it simply with chickpeas, mashed avocado and sriracha but for the recipe I decided to add a few extras for your consideration making it a heartier taco. Chickpeas are one of my favorite beans and are about the most versatile bean in existence! They work well here served at room temp so there's no heating involved making your taco preparation speed along. Of course, if you prefer your beans heated, by all means heat them up. These tacos have been a useful creation and a complete meal to boot. I hope you enjoy them as much as I do! Cheers :)

QUICK & EASY CHICKPEA TACOSQUICK & EASY CHICKPEA TACOSQUICK & EASY CHICKPEA TACOS

QUICK & EASY CHICKPEA TACOS

Ingredients
  • 1 1/2 cups cooked chickpeas (garbanzo beans) or 1 can (15oz.), drained and rinsed
  • 1/4 head green cabbage, shredded
  • avocado, sliced
  • cilantro
  • corn tortillas, warmed
  • sriracha, sambal oelek or your favorite hot sauce
  • lime wedges, to serve
  • mineral salt

I'll let you do the measuring on most of the ingredients. I usually eat about 3 of these tacos at one sitting...sometimes 5. I will have left over chickpeas and cabbage with both of those amounts. If serving 7 or more tacos, add a bit more chickpeas to your list just to be on the safe side.

Warm your tortillas. I do this carefully on the stove top over an open flame to give it some charring on the edges.

Layer your tacos with chickpeas, cabbage, avocado and cilantro. Top with mineral salt, sriracha and a squeeze of lime. You may also opt to mash some avocado as your first layer and then add the chickpeas, cabbage and cilantro. This will help hold the chickpeas in place a little better.

So quick and easy...enjoy!


I'd love to see your masterpieces!
#thesimpleveganista


Indian-Style Coleslaw

Indian Coleslaw

Although I enjoy cabbage, I do find that one head is often more than I really need for my immediate menu plans unless I want to serve cabbage for an entire week or longer — and usually that's not the case, as I desire a wide variety of foods. Thankfully, cabbage keeps well, so it's not often that it goes to waste. I can't always say the same for the head that rests upon my shoulders.

This refreshing salad addressed just that problem after I had over half a head left after making a mixed vegetable and avocado salad with almond herbed flatbreads. It so happened that I was serving an Indian-themed meal not too long after and wanted an additional vegetable component. My cabbage was still crisp and inviting. Perhaps not exactly what you might think of when the subject of coleslaw comes up, this Indian influenced preparation features plenty of crisp vegetables and a creamy yogurt dressing with some complimentary heat and tang. This twist on an old classic didn't last long enough for me to tire of. Not at all.

This is my contribution to No Croutons Required. I am hosting this month. Submissions are excepted until the 20th of May.

Indian-style Coleslaw with yogurt dressing

For a pleasantly thick and creamy dressing, use full fat Greek yogurt. You'll find that it adds richness and zesty vibrancy to the earthy and sweet vegetables.

Indian-Style ColeslawIndian-Style Coleslaw
Recipe by
Cuisine: Indian
Published on May 2, 2014

Fresh, colorful and crunchy "grown up" coleslaw loaded with a variety of vegetables and tossed with a zesty and tangy Indian spiced yogurt dressing

Print this recipePrint this recipe

Dressing:
  • 1 cup plain yogurt
  • juice from 1 lime (2 tablespoons)
  • 2 fresh green chilies, seeded and minced
  • 1 tablespoon fresh ginger, minced or grated
  • 1 teaspoon chat masala
  • 1/2 teaspoon paprika
  • 1/4 teaspoon ground cumin
  • 1/4 teaspoon ground coriander
  • a few sprinkles of dried red chili flakes
  • 2/3 teaspoon Dijon mustard
  • 1/2 teaspoon dried mint
  • sea salt and fresh cracked black pepper to taste
Salad:
  • 2 cups red cabbage, shredded or cut into fine strips
  • 2 cups Napa cabbage, white part cut into fine strips and green part torn into pieces
  • 1 large carrot, shredded or cut into fine strips
  • 1 medium red bell pepper, seeded and cut into fine strips or diced
  • 1/2 English cucumber, thinly sliced into half moon shapes
  • 5 to 6 green onions, white and pale green parts, sliced into thin rounds
  • 1/4 cup fresh parsley or cilantro, chopped
Instructions:
  • To make the dressing, whisk the yogurt until smooth. Whisk in the rest of the ingredients until well combined.

  • In a large salad bowl, toss all of the ingredients together. Add as much of the dressing as desired and toss well to coat all of the vegetables.

Makes 8 servings

colorful coleslaw

Other cabbage recipes to try:
Cabbage Poriyal
Coleslaw Bites with Jalapeno Dip
Chopped Cabbage with a Crumbly Chana Dal Sauce

On the top of the reading stack: Gogol

Audio Accompaniment: Black Smoker by Tom Opdahl

TEMPEH CHOW MEIN

Tempeh Chow Mein

This recipe has been on the back burner for a while. I shared a version of this on Instagram back in January of this year and meant to put together a recipe sooner. I find myself getting side tracked often as a food blogger. There are seriously 1000+ recipes that I have in mind and sometimes can't figure which one to do next. All in due time! Fortunately, the time has come and I'm happy to add this to the recipe collection. It's a classic dish and a very welcome addition! It's absolutely delicious and I polished the whole thing off by the end of the day...yes, it was lunch and dinner...no leftovers. ;) You can keep this simple or go all out with a few extra vegetables if you like. If you're not a fan of tempeh, omit it altogether or add some cubed tofu instead. This simple chow mein can be ready for the dinner table in less than 30 minutes for your enjoyment.

Tempeh Chow Mein

For the tempeh, I used this three grain tempeh that is available locally. Tempeh is a great source of protein for the plant based eater. It contains 19 grams of protein per serving (4 oz.) and 13 grams of fiber. It's also an excellent source of manganese, copper, phosphorus and vitamin B2. If you can't find tempeh, this recipe will do just fine without it. For me, I have added the tempeh primarily for protein purposes but I do love the flavor as well. Tofu would work here too, just be sure to use extra firm so it doesn't fall apart while cooking. Or omit the tempeh/tofu altogether and make yourself a nice protein shake or smoothie later. 

The noodles I chose are a Japanese version of Chinese egg noodles, but without the eggs. Chuka soba noodles are great for soups, stir fry’s and cold noodles salads. They cook up fast, about 4 minutes, making things go a little quicker. They shouldn't be confused with the Japanese soba noodles that are tan colored, straight and made from buckwheat flour. Ingredients for the shuka soba noodles are: wheat, water, salt & turmeric. Those looking to go gluten free should use rice noodles or 100% soba noodles. If you're not gluten intolerant feel free to use any thin spaghetti noodles or vegan chow mein noodles. The chuka soba and chow mein noodles can be found in the Asian section of your grocery store, at your local Asian grocery stores or purchased online.

Tempeh Chow Mein

The vegetables here can vary to suit your taste. You can add in bean sprouts, sliced shitake mushrooms, green onions, broccoli florets, etc. Lots of cabbage is a must for me. I could just as well use a whole head of cabbage in this recipe but decided to only call for 1/2 head. Feel free to adjust any of the ingredients to your liking. 

Tempeh Chow Mein

Super easy to put together! Cook your noodles, rinse and set aside.

Tempeh Chow Mein

 Next, start your stir fry by first adding the tempeh, celery, onion and some of the sauce. Cook a few minutes. Then add the carrots and cabbage, cook until everything is softened, add the noodles, remaining sauce and toss well. Continue cooking until noodles are warmed through amd serve.

Tempeh Chow Mein

Tempeh Chow MeinTempeh Chow Mein

Once served, I topped with sliced scallions, red pepper flakes and cilantro. I'm a huge fan of these last ingredients but feel free to omit anything you don't care for. Toasted sesame seeds would be a great topper too! 

Tempeh Chow Mein

Tempeh Chow Mein

Ingredients
  • 8 oz. package chow mein noodles or thin spaghetti noodles
  • 2 (8oz.) packages tempeh
  • 1 tablespoon sesame or grapeseed oil
  • 1/2 head green cabbage (about 4 cups), shredded
  • 1 large celery stalk, sliced diagonally
  • 1 large carrot, peeled and sliced diagonally
  • 1/2 onion, sliced
Sauce
  • 1/4 cup tamari or soy sauce
  • 2 tablespoons maple syrup
  • 2 tablespoons water
  • 1 tablespoon rice wine vinegar, optional
  • 1- 2 cloves garlic, minced or 1 teaspoon garlic powder
  • 1 inch knob of ginger, grated or 1/2 teaspoon ground ginger
  • mineral salt and pepper to taste (white pepper would be great here)

If using chuka soba or chow mein noodles, bring a pot of water to a boil, add noodles, reduce heat to medium and cook for 4 minutes. Drain, rinse and set aside. If using other noodles, cook as directed on package.

In a small bowl, whisk together the sauce, set aside.

In a large wok, heat olive oil over medium to medium-high heat, add tempeh, crumbling it between your fingers, onion and celery, cook 1 minute. Add a couple tablespoons of sauce mixture, continue to cook for another 2 -3 minutes. Add in cabbage and carrot, stir to mix, cover and cook another 5 - 7minutes, stirring occasionally until cabbage has shrunk down and softened. Add in noodles and remaining sauce, toss to coat, continue cooking until noodles are warmed through. Add additional tamari or other seasoning to taste.

Serve warm topped with scallions, red pepper flakes and cilantro. Sesame seeds and/or chili sauce would also be great!

Serves four.

Notes:

Feel free to use only one package of tempeh instead of two. The two packages does serve four but one package will still add a fair amount of protein to each serving.

I love the added sweet from the maple syrup using 2 tablespoons. Feel free to use 1 tablespoon instead of 2 and add more vinegar or tamari in its place.

Enjoy!

Back to top