Roasted Vegetables + Chickpeas with Lemon-Cannellini Sauce

Roasted Vegetables + Chickpeas with Lemon-Cannellini Sauce

This recipe is adapted from one of the very first vegan meals I used to make on a regular basis when starting my new lifestyle. This was before I started blogging and then was off trying everything else I could. Nice to come back to this recipe once again. I have only slightly changed it from the original by adding chickpeas for boost of protein and texture, as well as mixing up the veggies a bit. The original recipe can be found here on One Green Planet by its author Robin Robertson. I love this recipe because of the versatility and ease. The vegetables can be pretty much anything you like. Use red or Yukon gold potatoes in place the sweet potato, just be sure to use about 2 cups worth. You can add, or sub in, butternut squash, pumpkin or any other winter squash you might like. You may like to add earthiness by using cubed beets. Try cauliflower florets in place of broccoli. Really anything goes here. As for the sauce, I find it's not something to write home about on its own but that changes once added like gravy to the top of your vegetables and grain, all the flavors come together and you'll be in comfort food heaven! This recipe is easy to pull together and makes for a great hearty meal in these cooler months. It's full of protein and fiber, is low in fat and has plenty of essential nutrients needed to maintain a healthy plant based diet! 

Roasted Vegetables + Chickpeas with Lemon-Cannellini Sauce

Clean, vibrant, healthy and satisfying!

By all means load your plate with two to three times the vegetables you see here. Enjoy freely!

Roasted Vegetables + Chickpeas with Lemon-Cannellini Sauce

Roasted Vegetables + Chickpeas with Lemon-Cannellini Sauce

Ingredients (serves 4-6)
  • 1 large sweet potato, cut into 1 inch cubes
  • 2 cups broccoli florets
  • 2 large carrots, sliced
  • 2 cups brussels sprouts, halved lengthwise
  • 1 onion, sliced (use your favorite onion or what you have on hand)
  • 1 can (15 oz.) garbanzo beans (chickpeas), drained  and rinsed
  • 1 tablespoon olive oil
  • mineral salt & fresh cracked pepper or lemon-pepper, to taste
  • 2 -3 cups cooked quinoa or grain of choice (about 1/2 cup per person)
Sauce
  • 2 cans (15 oz.) cannellini beans, drained and rinsed
  • 1/4 cup nutritional yeast
  • 1 teaspoon garlic powder
  • 3/4 - 1 cup vegetable broth (start low and add as needed)
  • juice of 1 good size lemon
  • generous pinch of red pepper flakes
  • mineral salt, to taste
  • 1 tablespoon fresh chopped basil, thyme, parsley, chives, sage, tarragon 

Preheat oven to 425 degrees F.

Line roasting pan/baking dish with silpat, parchment paper or grease lightly with neutral oil. Add vegetables to roasting pan and toss to coat with olive oil. Arrange vegetables in a single layer (as much as possible), sprinkle with salt and pepper to taste. Roast vegetables until tender and lightly browned, about 45 minutes, mixing once halfway through.

Start your grain of choice while vegetables are cooking. Quinoa will take about 30 minutes.

Prepare your sauce by placing all the ingredients into your food processor/blender, except for the herbs, and process until smooth. Add extra broth as needed to thin. Add in herbs and pulse once or twice. Place sauce in a small saucepan and heat over low heat, uncovered, until warm, stirring occasionally.

Serve vegetables over grain of choice with a nice helping of sauce over top. Serve warm.

Serves 4 generously.

Store leftovers in refrigerator for up to a week. Leftovers are just as delicious!

Enjoy!
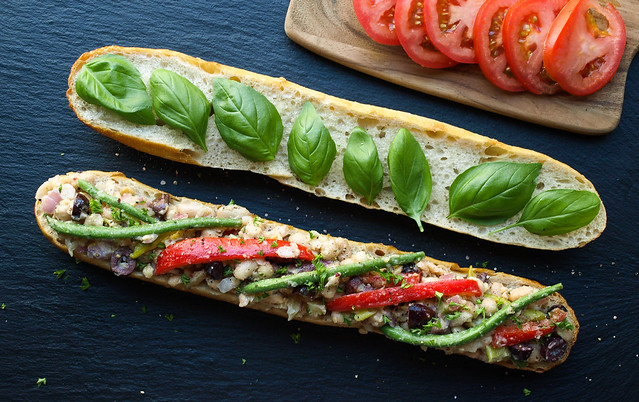

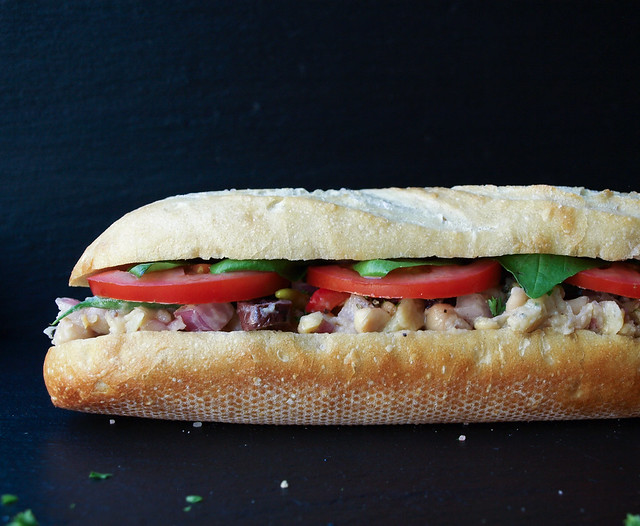
Pan Bagnat (White Bean Niçoise Salad Sandwich)

Pan Bagnat (White Bean Niçoise Salad Sandwich)

This recipe was inspired by a recent post on BuzzFeed for 27 Awesome Easy Lunches To Bring To Work. I'm thrilled to have been included in the roundup with the Mashed Chickpea Salad Sandwich! There is also a few other great vegan options as well so be sure to take a look. In it I saw a Pan Bagnat from Food 52 and had to recreate it for us plant powered lovers. I love Food 52, and have always been inspired by the simplicity and beauty of their photography. And of course the recipes are great too! I have a few in my collection that were inspired from there like this Mushroom Bourguignon and these Gluten Free Banana Flap Jacks. It's a great community if you haven't heard of it yet! In fact, they have a vegan column called The New Veganism with Gena Hamshaw of Choosing Raw as the recipe creator. Be sure to take a look and be inspired by both the recipes and photography!

Pan Bagnat (White Bean Niçoise Salad Sandwich)

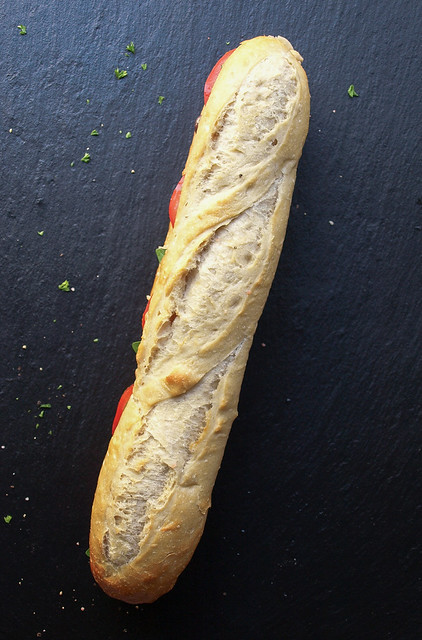
The pan bagnat (meaning 'bathed bread') is a classic specialty sandwich served in and around the region of Nice, France. It's a sandwich version of the salade niçoise which is a combination of tuna, anchovies and/or sliced hard boiled egg mixed with raw vegetables like red bell pepper, green beans, radishes, olives and onion. You will also find there to be olive oil and possibly vinegar, salt and pepper. Here we'll be using a few of these traditional ingredients but veganizing this classic using white beans as our protein. And I can guarantee you this is just as delicious if not better than the traditional version! Not only does the salad make for a great sandwich filler but it would be just as good on a bed of leafy greens as well. This recipe may give you leftovers, and that's a good thing because it only gets better in the next day. One day make a sandwich for work, home or a picnic and the next top it on some leafy greens or just eat as is. It's pretty amazing on its own!

Pan Bagnat (White Bean Niçoise Salad Sandwich)Pan Bagnat (White Bean Niçoise Salad Sandwich)
Pan Bagnat (White Bean Niçoise Salad Sandwich)

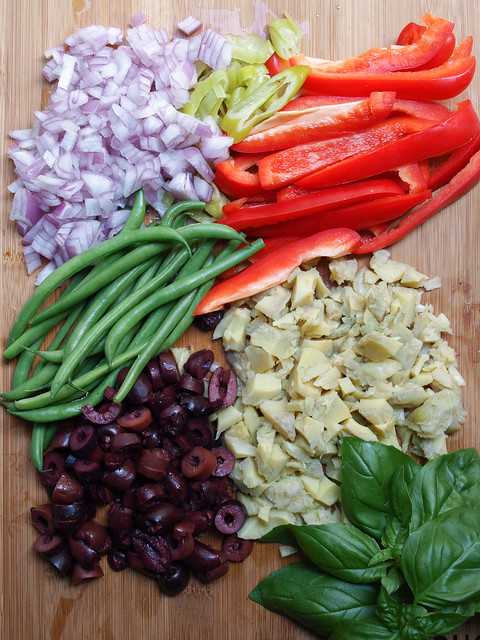
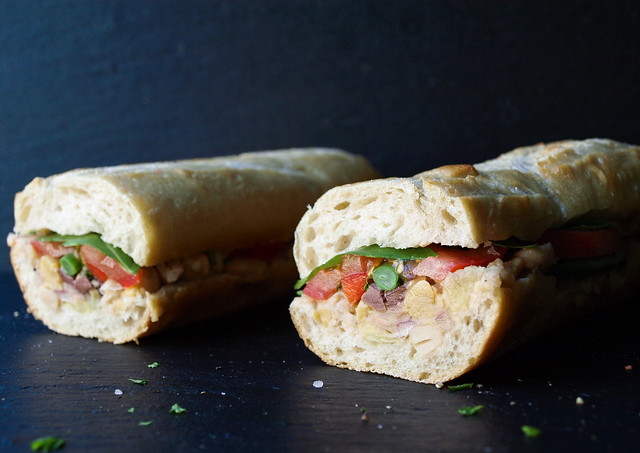
I love the saltiness from the olives here, you can add a tablespoon of capers if you like. The fresh bell pepper and blanched green beans add a nice crunch and sweetness while the onion and artichokes add another layer of flavor. Tie the vegetables together with the white beans, dressing made of olive oil, lemon and mustard, add a good sprinkling of mineral salt & plenty of cracked pepper and this salad will be another favorite to come back to time and time again!

Pan Bagnat (White Bean Niçoise Salad Sandwich)

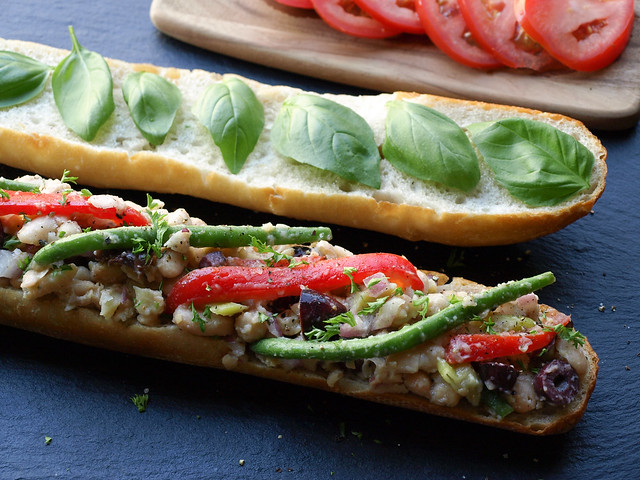
To create the traditional pan bagnet you'll first want to hollow out the insides of your bread. I left the top on this alone but from now on will hollow it out as well. It gives more room for your salad, helping to hold it together better while using less bread at the same time which is great too. Brush the insides of the bread with olive oil. Layer your bottom half with the salad. Since we're going to press the sandwich you can pile it on pretty good making a very hearty sandwich. Add your tomatoes across the top. Then layer basil, top with mineral salt & cracked pepper and remaining slice.

Pan Bagnat (White Bean Niçoise Salad Sandwich)

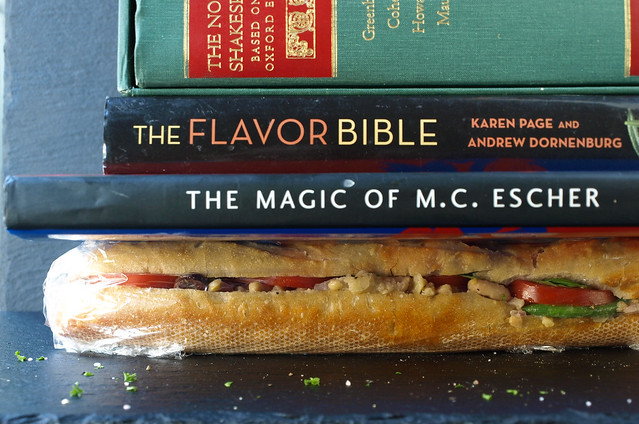
Wrap your sandwich tightly in saran wrap, fold ends under and press with a few heavy books or pots. This is an important part or your sandwich will be very messy and fall all over. Trust me, I know this from first hand experience. Plus, this helps the bread soak up the moisture of the salad dressing making for 'bathing the bread'. So be sure to press your sandwich, even if just for an hour, it will make all the difference...although overnight is even better. This makes a perfect grab and go sandwich for lunches and picnics, once pressed it's ready to go!

Pan Bagnat (White Bean Niçoise Salad Sandwich)

 Pan Bagnat (White Bean Niçoise Salad Sandwich) 

Ingredients 
  • 1 can (15 oz.) cannellini or chickpeas (garbanzo beans), drained and rinsed well or 1 1/2 cups cooked white beans
  • 1/2 red bell pepper, thinly sliced
  • 1/4 cup blanched French green beans, cut into half or thirds
  • 1 jar artichoke hearts in water, drained and chopped
  • 1/2 red onion, diced
  • 3/4 cup kalamata olives, pitted and sliced
  • 2 tablespoons parsley, finely chopped
  • 1 -2 greek pepperoncinis, diced (optional, not a traditional ingredient)
  • mineral salt & fresh cracked pepper, to taste
Dressing
  • 2 - 3 tablespoons extra virgin olive oil
  • juice of 1 large lemon (about 2 tablespoons)
  • 1 heaping teaspoon Dijon mustard
To assemble
  • 1 French baguette, ciabatta loaf, Pain de campagne, boule or artisan loaf of choice (even good sized rolls would be great)
  • extra virgin olive oil, to brush
  • 8 - 10 basil leaves
  • 1 medium tomato, thinly sliced
  • mineral salt & cracked pepper

Cut bread in half lengthwise. Remove some of the insides of each half making a trough for the filling (this will help keep the filling inside the sandwich when eating). Brush both halves with extra virgin olive oil.

In a small bowl, mix the dressing ingredients together until dijon has emulsified. Set aside to let the flavors develop.

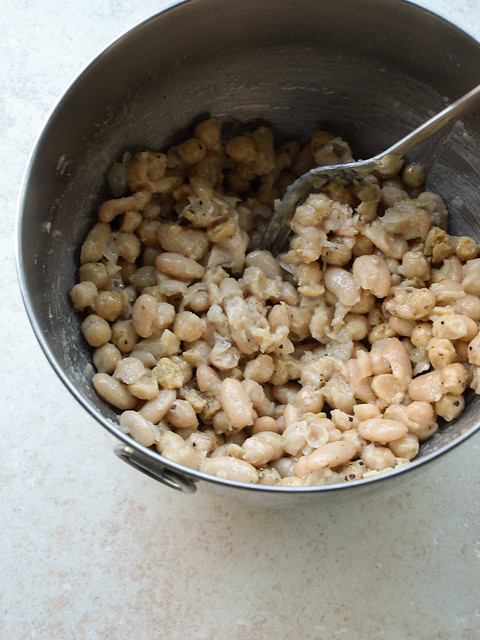
In a medium/large mixing bowl, add beans and roughly mash leaving about 2/3 whole beans. Add in dressing to the beans and mix well. Add in the bell pepper, green beans, artichokes, red onion, olives, parsley, optional pepperoncini and salt & pepper. Mix to combine.

Layer your bottom half of bread with a good serving of the mixed salad. Add tomatoes across the top, then top with basil leaves and salt & pepper. Top with other slice of bread. (You can also vice versa this layer order starting with the basil and tomato on the bottom and salad on top.)

Wrap sandwich tightly in saran wrap and press with a few heavy books/pots for at least an hour to overnight. If overnight, be sure to press in the refrigerator.

When ready to serve, slice in half or make as many slices as you like. Serve chilled or at room temperature.

Store any leftover salad mixture covered in the refrigerator for up to 5 days. 

Notes:

The cannellini beans have more protein and fiber than chickpeas so if that is a priority use them. Otherwise use your preferred white bean.

Try adding a splash of red or white wine vinegar to the dressing if you like.

As with all my recipes, add/subtract ingredients to your liking. Try adding a tablespoon or so of capers. I've had someone sub in asparagus for the green beans. Add sliced radishes along the top.

I edited this recipe on 11/10/13 at 12:15pm so it wouldn't make so much leftovers. The old recipe called for 2 cans white beans, 1 red bell pepper, 1/2 cup French green beans, 1 cup kalamata olives and 4 tablespoons olive oil. The old recipe was delicious, it just made a bit too much but of course feel free to use the old version instead so you'll have plenty of leftovers!

Enjoy!


MUSHROOM, BELL PEPPER & BASIL STIR FRY

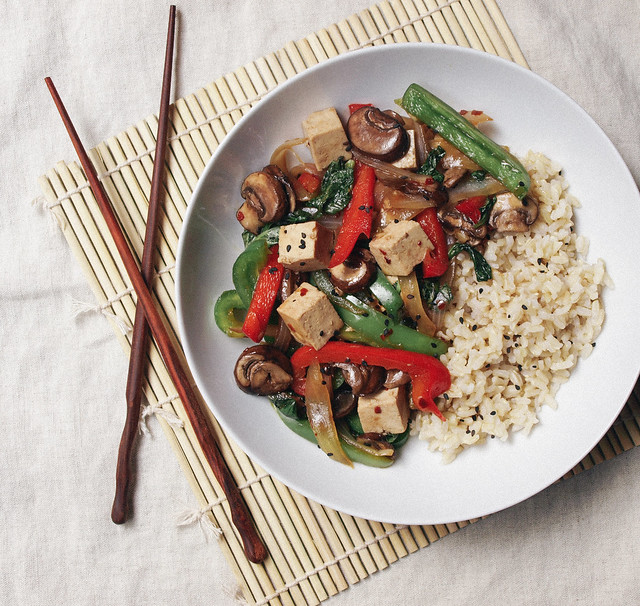
Mushroom, Pepper & Basil Stir Fry

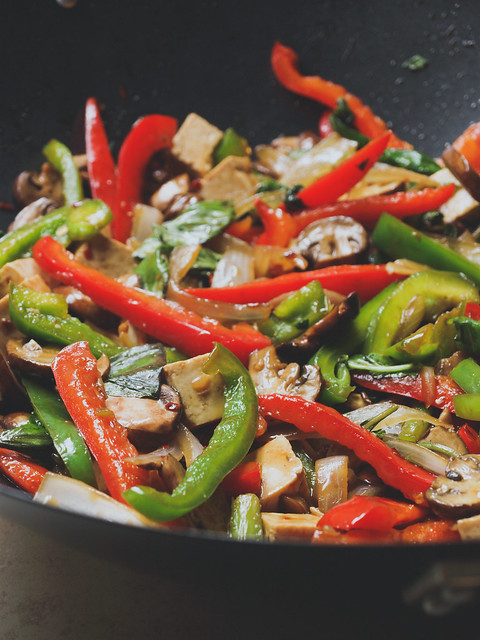
This recipe is one of those on a whim recipes that just came about from cleaning out the fridge. I had all the ingredients in my kitchen, put them together and even shared my dish on Facebook and Instagram last week. It went well and I decided to put it into the recipe collection. I originally made this without any oil, using water to stir fry my vegetables. I simply forget that you can do that with great tasting results and will do it more often from now on. You could also use veggie broth for extra flavor if you like. In this recipe you'll have the option to either use oil or the water as you like. Since then I've been buying the ingredients to make this because it's just that good. I love basil and this stir fry is really all about the basil! I'm lucky enough to live in So Cal and have access to fresh basil year round. I use two cups in this recipe but feel free to add more if you like! I hope you're able to find it readily available too. As for the other vegetables, you can mix them up using whatever you like. That's what I love about stir-fry's is that they are so versatile. Try using different colored bell peppers, zucchini, bean sprouts, broccoli or carrots adding or replacing anything you don't care for...pretty much anything will work here. 

Mushroom, Pepper & Basil Stir FryMushroom, Pepper & Basil Stir Fry

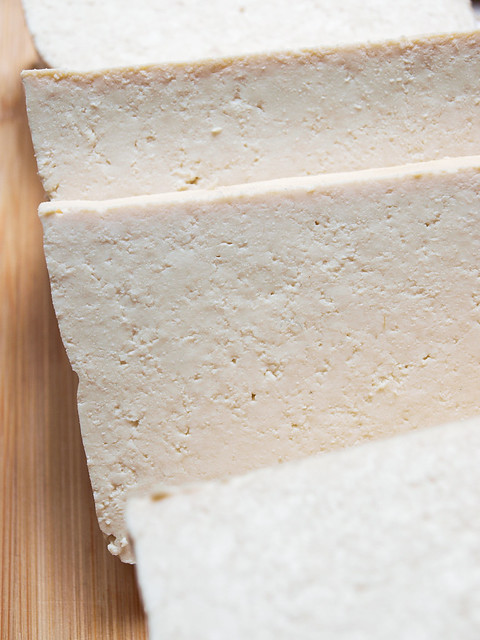
Lately, I've been buying tofu labeled either 'Sproutofu' from Wildwood or 'High Protein' from Trader Joe's. Both are high protein and extra firm. I find these do not need to be pressed making them a bit easier to work with in that you can skip the pressing process. They are so dense that there is no room for water to collect. Simply open your package, cut as desired and cook. It takes on the flavors surrounding it very well and has a nice tender texture. If you can find these in your local store, I highly recommend giving them a try. If you can't find these then you will still want to press your tofu for this recipe to release as much water as possible. 

Mushroom, Pepper & Basil Stir Fry

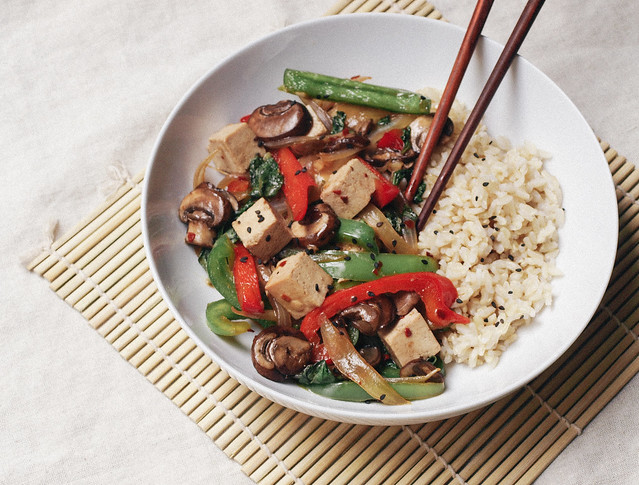
So simple to assemble and serve!

Mushroom, Pepper & Basil Stir Fry

MUSHROOM, BELL PEPPER & BASIL STIR FRY

Ingredients
  • 8 oz. mushrooms, sliced
  • 1 red & green bell pepper, julienned
  • 1 large onion, sliced
  • 3 cloves garlic, chopped
  • 2 cups basil, lightly packed
  • 1/4 cup tamari, coconut aminos or soy sauce
  • 1 tablespoon maple syrup
  • 1 tablespoon corn starch
  • red pepper flakes, to taste (I used 2 teaspoons)
  • 1 - 2 tablespoons sesame, coconut, olive or grapeseed oil OR water stir fry (see notes)
  • 10 oz. extra firm tofu, cubed (high protein pref), cut into 3/4 inch cubes
  • cooked grain of choice to serve (brown, basmati or jasmine rice...quinoa or soba noodles would be great too)
  • black or white sesame seeds, for garnish

If using non-high protein tofu, start by pressing your tofu (if using high protein tofu as mentioned above there is no need to press). Place your block of tofu either between a few sheets/or folded paper towel OR between a clean folded dish cloth. Place a heavy book, or pot, on top and let sit for about 20 minutes. Remove weight and cube your tofu. 

Prepare your vegetables. In a small bowl, combine the tamari, maple syrup, corn starch and red pepper flakes. Set aside.

In large skillet/wok, heat oil/water over medium high, add onions, garlic, bell peppers and mushrooms. Stir fry for 5 minutes. Add in the wet mixture and toss to coat. Add in basil and tofu, mix well and cook another 5 minutes, or until vegetables are just softened, tofu is warmed and sauce has thickened. Add more tamari and pepper flakes to taste.

Serve over grain of choice (I used a sprouted brown rice here) with a sprinkle of sesame seeds on top.

Notes:

Feel free to use a larger block of tofu if you like. No need to buy a larger block and not use it all. It will just make your meal more protein packed. Feel free to omit the tofu all together if you like!

Try doing a water or vegetable broth stir fry in place of using oil. Use 1/4 cup water/broth in place of the 1-2 tablespoon oil.

Bon Appetit!


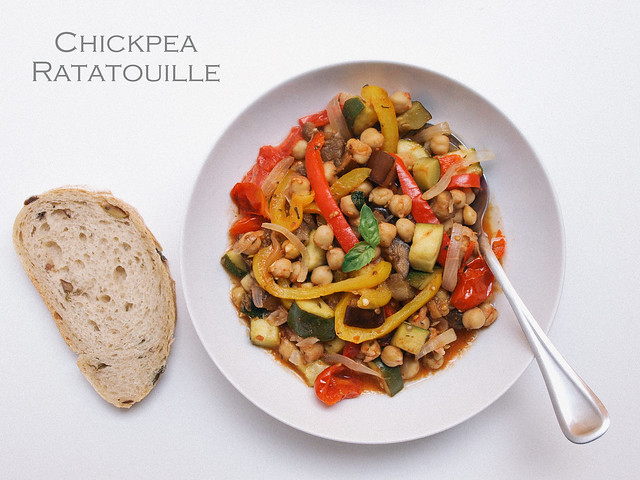
Chickpea Ratatouille Niçoise

Chickpea Ratatouille Niçoise

Ratatouille, a rustic farm to table style dish. It's a summer/early fall recipe for those who appreciate big flavor and simplicity while using the seasons harvest. Originating in Nice, it's a traditional French Provençal stewed vegetable dish. Ratatouille is often served as a side dish but it is a recipe that can undoubtedly stand alone, especially with the addition of chickpeas adding a fair amount of protein to this colorful array of garden vegetables. There is much debate as to how to prepare ratatouille, but I chose to adapt my recipe from this one at La Tartine Gourmade, she also has a nice story with hers. It's a fairly simple approach to preparing this dish involving sauteeing and stewing on the stove top which resulted in a wonderful finish. And it tastes even better the next day! You may also like to see other cooking styles of ratatouille, I recommend looking at these for more inspiration: Saveur (I'll for sure be doing this one, it's perfectly old world rustic and comfy looking),  86 Lemons (a simple roasted version using chickpeas as well) and Olives For Dinner (a 'confit byaldi', a little more tidy looking making for a beautiful presentation). 

I know ratatouille isn't anything new but this classic sure deserves a place in the simple veganista collection!

Chickpea Ratatouille Niçoise

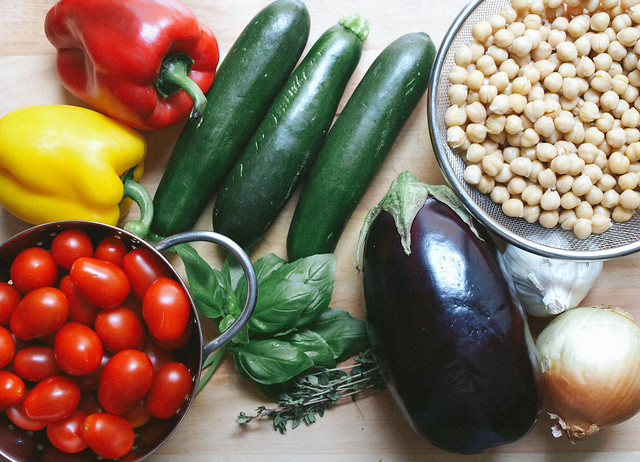
Gather your ingredients. These are all common vegetables, and fruits ie, tomato, and available year round here in Southern California. Eggplant is the only produce that seems to be more seasonal here, or maybe I just don't notice it as much as I don't use it often. For the garbanzo beans, you can start with dried beans cooking them according to this guide or use canned for extra ease. Herbs can be varied to suit your taste. Bea, author of the original recipe, uses a bay leaf and tarragon in her recipe. Here I have used fresh basil, thyme and some herbes de Provence. I even threw in some red pepper flakes. Go with what you feel, there is no wrong way to season your ratatouille as long as you like it! It's also a great way to change it up. I think I'll try some tarragon next time myself.

Chickpea Ratatouille Niçoise

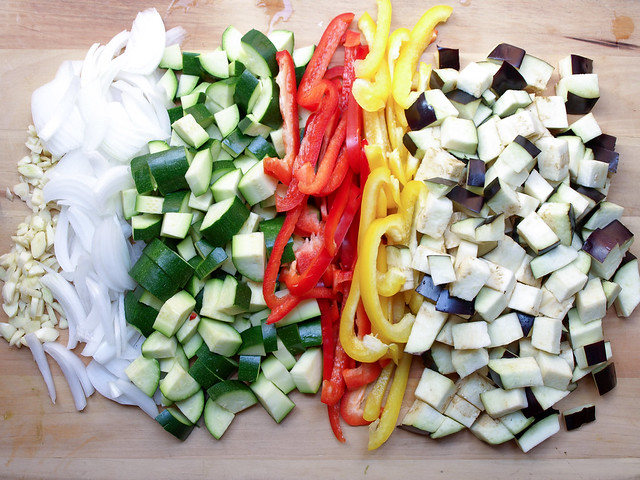
Dice your vegetables. Next time, I'll be sure to chop the bell peppers the same size as the zucchini and eggplant, about 1/2 inch cubes. It makes it a bit easier to eat when they are uniform in size. I do like the onion sliced here but feel free to dice that instead too. It may seem as though you have too much produce (the tomatoes aren't even shown) and won't fit in the pot but the eggplant will shrink down and the rest of the veggies will soften and you'll be fine. You may even consider adding extra next time to make sure you have leftovers.

Chickpea Ratatouille Niçoise

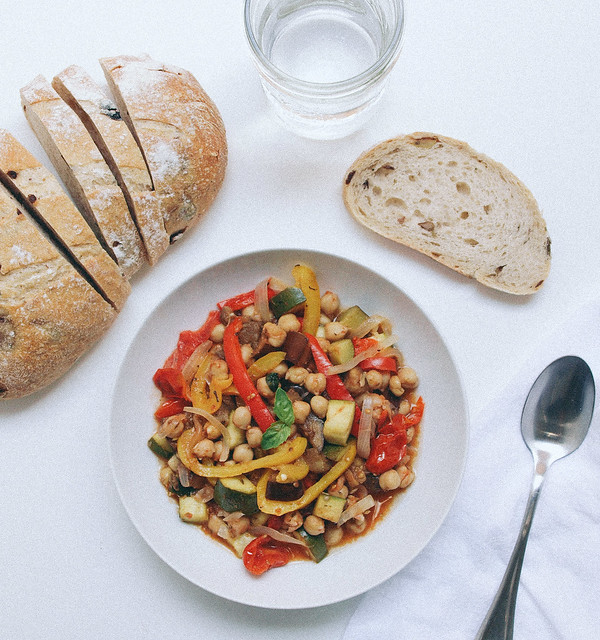
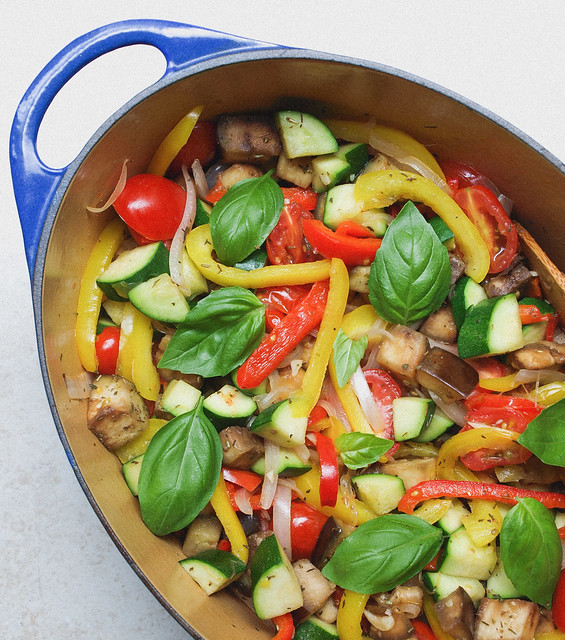
Vegetables have been sauteed and the ratatouille is ready for the first round of simmering before adding in the chickpeas. Still nice and colorful.

Chickpea Ratatouille Niçoise


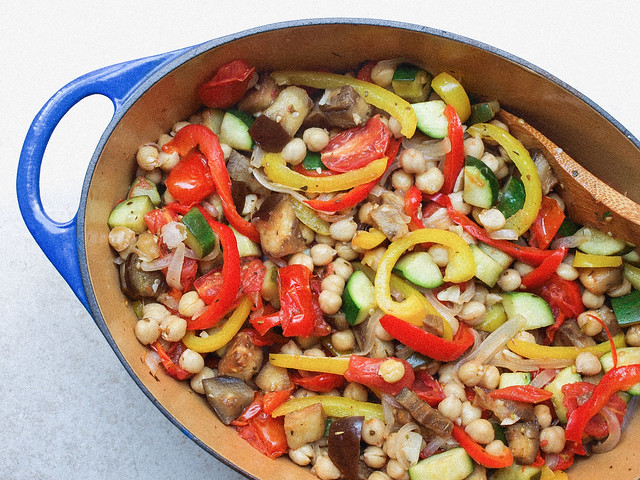
Chickpeas have been added and will simmer awhile longer. Depending on how you like your vegetables will depend on the length of time you allow your ratatouille to simmer. The longer you leave it, the more juices will form making for a great dipping sauce for a slice of good artisan bread. I preferred simmering mine for a total of about 35 minutes, I like the color and crisper texture but I didn't get as much of the juices. Go for a full hour or more to really let the ingredients sweat and get the juices going. Again, still colorful here. Your colors may become muted the longer you stew but the result with be delicious!

Chickpea Ratatouille Niçoise

Chickpea Ratatouille Niçoise

Ingredients
  • 3 cups cooked chickpeas (2 cans (15oz) garbanzo beans, drained and rinsed)
  • 4 tablespoon olive oil, divided
  • 1 eggplant, diced
  • 3 small zucchini or 2 medium, diced
  • 2 bell peppers (1 yellow & 1 red pref.), seeds removed, sliced
  • 1 onion, sliced
  • 4 garlic cloves, chopped
  • 1 lb. grape tomatoes, cut in half 
  • 2 teaspoons herbes de Provence or fresh thyme (I added a bit of both)
  • a few fresh basil leaves (left whole or chopped)
  • mineral salt, to taste
  • pinch of red pepper flakes, optional

In a heavy bottom pot or dutch oven, heat 2 tablespoons olive oil over medium heat, add eggplant and zucchini, saute for 5 minutes. Remove from pot and set aside.

Heat remaining 2 tablespoons olive oil over medium heat, add onions, garlic and bell peppers, saute for 3-4 minutes. Add tomatoes, mix well and cook 5 minutes. Add in eggplant, zucchini, herbs, spices and season with salt and pepper. Reduce heat to a low and simmer uncovered for 15 minutes. Add in chickpeas and simmer anywhere from 45 minutes to 1 hour, depending on your personal preference (less time for crisper vegetables, more time for softer vegetables and more juices). Stir occasionally until ready.

Serve topped with chopped fresh herbs. Pair it with a gluten free or favorite artisan loaf of bread. I have it here with a wonderful olive loaf. Try serving it on a bed of quinoa, rice or pasta to make it go further.

Serve warm, cold or at room temperature.

Notes:

To make this virtually fat free, try water sauteeing your vegetables using about 3 - 4 tablespoons of water instead of oil. Total amount of water for this recipe would be 6 - 8 tablespoons, divided.

I would dice my bell peppers next time, it's easier to eat them when they are the same size as the zucchini and eggplant pieces.

For the spices, try mixing and matching marjoram, thyme, rosemary, fennel and/or savory. Or use a bay leaf and tarragon.

The longer you simmer the more juices will accumulate.

Enjoy!

Pizza Pie + Balsamic Tomato Sauce + Roasted Vegetables

Pizza Pie + Balsamic Tomato Sauce + Roasted Vegetables

It's been awhile since I've indulged in pizza. I was so inspired by this post from the Minimalist Baker and decided it was time to add another pizza recipe to the list. Not only does Minimalist Baker have nice simple recipes, a lot of them are vegan too, but the photography is superb! Take a look and find some inspiration for yourself through both the recipes and photography. Of course for this recipe we aren't using cheese, only almond parmesan which is fantastic served on top of your slice of pizza pie. We are dousing this pizza with a nice balsamic tomato sauce and lots of beautiful veggies making this a colorful pizza with lot's of wonderful flavor. I just thought it was so cool to cook your pizza in a skillet but feel free to use your normal method such as a pizza stone, which I also love, or other baking dish that your accustomed too (just adjust directions to your baking vessel).

Pizza Pie + Balsamic Tomato Sauce + Roasted Vegetables

We'll be broiling our veggies in the stove under the flame, or roasting as some countries call it. One side of the baking sheet is for the toppings. I used zucchini, bell peppers, tomatoes, asparagus and red onion for this pizza. Feel free to add/subtract other veggies to suit your taste. I imagine mushrooms would be divine too! The other side is for the whole grape tomatoes we will be using for our tomato sauce. Also, if you would like to add some broiled onion to your sauce be sure to add a few pieces along with your grape tomatoes.

Pizza Pie Sauce

Once veggies are ready after 5 to 6 minutes under the broiler...your ready to carefully transfer your tomatoes to the food processor to make the tomato sauce. 

Pizza Pie Sauce 1Pizza Pie + Balsamic Tomato Sauce + Roasted Vegetables

Your sauce should come out with a nice semi-thick consistency. If you find it's too runny, add a little more tomato paste. This tomato sauce is delicious and would be great on pasta too!

Assemble your pizza, cook and voila...pizza pie! 

Pizza Pie Slice

Pizza Pie + Balsamic Tomato Sauce + Roasted Vegetables 

Ingredients
  • 1 ready made pizza dough (pref. whole wheat)
  • fresh basil leaves, to serve
  • red pepper flakes, to serve
  • almond parmesan, to serve

Topping
  • 1/2 small zucchini, sliced thin and halved
  • 1/2 cup aspargus, cut into 1 inch pieces
  • 1/2 orange bell pepper
  • 1/4 red onion, diced
  • 3/4 cup cherry tomatoes (red & yellow), halved
  • a few large basil leaves, chopped
  • a guzzle of balsamic vinegar
  • pinch or two mineral salt

Balsamic Tomato Sauce
  • 1 dry pint (about 8 oz package or 1 1/2 cups) grape tomatoes
  • 3 rounded tablespoons tomato paste
  • 1 - 2 tablespoons balsamic vinegar
  • 1 garlic clove or 1/2 teaspoon garlic powder
  • 1 teaspoon Italian seasonings or a mix of oregano, basil, thyme, etc.
  • mineral salt & cracked pepper to taste

  1. Preheat oven to 450 degrees or heat oven to dough directions. (We'll start with this high temp to move the pizza cooking along as quickly as possible.)
  2. While oven is heating, prepare your vegetables, place them in a medium size bowl along with the tomatoes for the tomato sauce and add a guzzle of  your favorite balsamic vinegar. You can also add a tad of olive oil if you wish. Toss to coat. Place vegetables on a baking sheet keeping the cut topping and whole tomatoes separate for ease later on. 
  3. Coat your cast iron skillet with olive oil, place your dough in the center, flatten out along the bottom and bring a small bit up the edges. Let set to rest until ready to layer.
  4. Once oven has heated to 450, turn off oven and turn on the broiler (I had mine set on high but medium is good too), place vegetables under the flame and cook for about 6 minutes checking every so often. Remove and set aside. 
  5. Turn oven back on to 450 degrees. The heat sensor should go off right away letting you know the oven is ready. If you skip the first heating at 450, this step will take around 15-20 minutes.
  6. In a food processor or blender, being careful not to burn yourself, add the uncut grape tomatoes along with the other ingredients for the tomato sauce and process until blended and fairly smooth. Taste for flavor adding anything extra you might like. Your sauce should be a semi-thick consistency. If you find it's too runny, try adding an extra tablespoon or two of tomato paste. 
  7. Finally, add a nice layer of your tomato sauce and veggies to the pizza dough. Place in oven and bake for 20-25 minutes, until crust is golden. Remove from oven and let cool a few minutes before cutting to serve. Serve with red pepper flakes and a good dusting of almond parmesan. 
Notes:

I found that I needed to cook my pizza longer than the directions on the pizza dough package, about 20 -25 minutes worked for me but each oven is different.

If your crust doesn't become golden enough for you, place the skillet pizza under the broiler for a minute or so checking often so it doesn't burn.

If you have a hard time with your crust being soggy under the tomato sauce and veggies, try cooking your dough first for about 15 minutes, then add your sauce and veggies and cook another 5 minutes or so.

I would love to recommend a good pizza dough recipe but I haven't made one yet and find the ready made dough is quick and works great for me. If you have a good whole wheat pizza dough recipe I'd love know about it!

Hope this inspires you...Enjoy!


Curry Tomato Soup + Zucchini Noodles

Curry Tomato Soup + Zucchini Noodles 2

Growing up I was a Campbell's tomato soup girl, thanks to my mom who introduced me to this soup while pairing it with spaghetti noodles. For a teenager it was easy, fast, filling and I just plain loved it! Sometimes I would add milk making it a creamy version but most of the time I just simply added water. Now that I'm a little more grown up, I decided to take my old favorite and give it a much deserved homemade redo with a grown up flair. My inspiration comes from this recipe at 101 Cookbooks and also the recipe from Love & Lemons (I liked the zucchini noodles in place of pasta...how perfect for this redo!)

Curry Tomato Soup + Zucchini Noodles

For this soup you can either use fresh or canned tomatoes (preferably fire roasted if using canned). Add to that some sweet onion, curry, basil, a bit of salt, red pepper flakes, lime and some coconut milk/cream and you have yourself a very wonderful tomato soup that pairs well with zucchini noodles, or any noodle of your choice! You can also use farro, rice or some other grain instead of noodles like Heidi suggests in her recipe at 101 Cookbooks.

Curry Tomato Soup + Zucchini NoodlesCurry Tomato Soup + Zucchini Noodles

Simple, flavorful and good to the very last bite, or sip if you will. Once the zucchini noodles are gone you will be tilting the bowl to finish! I do recommend using a non rimmed bowl for this soup unless you want to finish with a spoon.

Curry Tomato Soup + Zucchini Noodles

Curry Tomato Soup + Zucchini Noodles

Ingredients (serves four)
  • 4 small/medium zucchini
  • 1 large sweet onion, thinly sliced
  • 1 tablespoon coconut oil or olive oil
  • 3 cups tomatoes (about 5 large), diced or 1 can (28oz) tomatoes + juices (pref. fired roasted)
  • 2 cups water or vegetable broth
  • 1 tablespoon curry (red curry paste or yellow curry powder)
  • 1/4 teaspoon cumin, or to taste
  • 1/4 cup fresh basil, loosely packed
  • 1/2 teaspoon red pepper flakes, or to taste
  • salt to taste
  • 1 can (14oz) coconut milk or cream or 1 cup unsweetened almond milk
  • limes, to serve

In a large pot, heat oil on medium, add onions and saute for five minutes, or until softened. Add tomatoes, water, curry, basil, red pepper flakes and salt, turn heat to medium high, bring to boil, reduce heat, cover and simmer for 15 minutes. If you want a creamy soup, add the coconut milk/cream after 10 minutes of simmering, continue to simmer for five more minutes. Or you can do as I did and add a few spoonfuls to your serving bowl. Once done, taste for flavor adding extra spices as needed. 

Once soup is done, remove from heat, let cool a few minutes and puree using a submersion blender or food processor (if using a food processor you may have to puree in a couple batches). 

While soup is cooking or cooling, julienne or spiralize your zucchini. No need to cook as these will be served raw and warm a bit once the soup is served over top. 

Serve with lime wedges, fresh basil and/or oregano and coconut milk/cream. 

Notes: 

Replace the coconut milk/cream with one cup unsweetened almond milk if your watching you're fat intake, or use lite coconut milk instead of full fat. I tried with the almond milk and loved it but the coconut milk is my personal favorite.

Also, try using soba noodles, brown rice, farro, quinoa or rice noodles in place of the zucchini noodles for something different.

• • •

For the spiralizer, I personally use this one. I have also seen this one recommended by Gena Hamshaw of Choosing Raw. 

For the julienne tool, I use one like this. It will create the noodles you see below and store nicely in your utensil drawer.


Enjoy!

Summer Rolls + Two Dipping Sauces

Summer Rolls + Two Dipping Sauces

Well hello again, I have missed you terribly! A lot has happened in the last couple weeks. After my last post Soba Noodles with Tofu, Broccoli & Carrots, I left for vacation to the beautiful Kings Canyon. The area we visited is located in the eastern sierra's located between Mammoth and Bishop just off the 395 called Rock Creek Lake. It's gorgeous up there with clean air, nice temperatures and nature all around. How does it get any better than that? You can see many of my pictures here. In that time, the 4th of July also came and went. I extreme cleaned the house, you know the unclutter, going behind closed doors and rearranging the furniture kind...feels good to be done with that! I did all those things I have put off doing while focusing my energy on this blog the last year. Speaking of which, The Simple Veganista also turned 1 on July 1st. I can't believe it's been a year already. I really wanted to do a special post for this occasion but it just didn't happen so it was a quiet celebration. When I first started this blog I had no idea where things would go but thanks to everyone who has a love for clean vegan food...this blog has done remarkably well in that short amount of time and I thank you all for following along with my passion. I intend to keep it going as long as it stays fun for me. I love all the aspects of being here...from testing and preparing the food, taking pictures, editing, writing (a few of these I'd like to improve on), sharing, getting feedback from everyone. It's truly fun for me and I'm so happy to be a part of your lives and hope you get lots of inspiration for clean, healthy eating habits along the way. And remember, that's all it is...creating NEW habits and making them healthy habits! Cheers to another year of creating those healthy habits that stick... 

So without further ado...let's eat!

Summer Rolls + Two Dipping Sauces

Summer, spring or salad rolls, known as Goi Cuon in Vietnamese, are fresh, versatile and so easy to put together. You can use all kinds of vegetables to suit your taste...make them simple with just a few ingredients like the first picture or add more for a variation and rainbow effect like the picture above. I love these rolls and you can be sure that this is the first of many I will like to try out and share. The recipe today is a very basic, all around summer roll. Nothing complicated, everything should be readily available and easy to find. For a great tutorial on rolling a closed end roll like the image just above (they were cut in half) go here: How to Roll Fresh Vietnamese Spring Rolls – A Photo Tutorial

Summer Rolls + Two Dipping SaucesSummer Rolls + Two Dipping Sauces

You can find rice paper in the Asian section of your grocery store. There are different shapes and sizes so if you're new to this be sure to experiment with a few to see what works best for you. 

I have included two different dipping sauces because some of you may be allergic to nuts. One will be a peanut or almond butter based dipping sauce and the other will be rice vinegar based. A sauce for everyone here. Both are excellent. I love my peanut sauce but was very pleased with the vinegar based sauce I adapted from Martha Stewart. Even though I'm not much of a vinegar lover...it was delicious! 

Summer Rolls + Two Dipping Sauces

Summer rolls are commonly filled with a few herbs like mint, cilantro and/or Thai basil. Feel free to use one or a combination. I find in these rolls that they all taste great together. If you can't find Thai basil, regular basil will be just as good! I especially love the basil with the peanut dipping sauce...the flavors pair so well.

Summer Rolls + Two Dipping Sauces

Next you can choose from a variety of greens to add to your rolls. Use one or a combination if you like. Depending on what style roll I'm making, I may use two types of greens.

Summer Rolls + Two Dipping Sauces

Lastly, choose your veggies and cut them into thin strips by hand or using a julienne tool. These are just a few of the veggies you can use. Try adding avocado, green onions, bean sprouts, etc. Many recipes for these rolls also use rice noodles, and you can too, but I prefer a roll full of veggies instead having one or two extra if needed. I can eat two or three of these and be completely satisfied for a few hours. 

Adding in some sliced tofu is an option. I do like to add it to my rolls when not using the peanut sauce as it adds some protein to the meal. 

Summer Rolls + Two Dipping Sauces

Summer Rolls + Two Dipping Sauces 

Ingredients (2 - 3 servings)
  • 6 rice papers (preferably the circular sheets)
  • 2-3 medium carrots, cut into match sticks or 1/4 inch sticks
  • 1/2 cucumber, cut into match sticks or 1/4 inch sticks
  • 1/2 bell pepper (yellow, red and/or orange), thinly sliced
  • 1/4 red cabbage, thinly sliced
  • greens of choice: leafy lettuce, pea shoots, spring salad mix or micro greens
  • radishes, thinly sliced (optional)
  • organic tofu (firm or extra firm), sliced (optional)
  • mint, small handful of leaves
  • cilantro, small bunch of sprigs
  • basil, small handful leaves

Sweet Chili Sauce (2 servings)
  • 1/4 cup unseasoned rice vinegar
  • 2 tablespoons tamari or soy sauce
  • 2 tablespoons warm water
  • 2 tablespoon maple syrup
  • 1 clove garlic, minced or grated
  • 1 teaspoon red pepper flakes, or to taste
  • juice of 1 lime

Peanut Sauce (2 servings)
  • 3 heaping tablespoons peanut or almond butter
  • 1 tablespoon tamari or soy sauce
  • 2 tablespoon maple syrup
  • 2 tablespoon warm water
  • 1 - 2 tablespoon rice vinegar, optional
  • juice of 1 lime
  • 1 teaspoon red pepper flakes, optional

Mix your dipping sauce together first, let set so the flavors can mingle. It will taste much different after a few minutes. Taste for flavor before serving.

This summer roll direction will be for the open end roll as shown above. For the closed end roll please see the tutorial here. 

Fill a large shallow bowl 1/2 way with warm water...a large pie dish works great for the circular rice sheets which is what this recipe will use. Making one roll at a time, dip the rice sheet into the water making sure to get both sides and all edges, no need to let it soak until completely soft. Lay on a flat surface and fold in half, the rounded side will be the top and the flat side the bottom. The paper will still seem a bit stiff but will keep absorbing the water and soften as you layer your veggies. In the center, layer your ingredients...greens, herbs, tofu and veggies. Fold the end corner over the layer of veggies, give a nice tuck and roll. 

Serve with choice of dipping sauce. 

Enjoy!


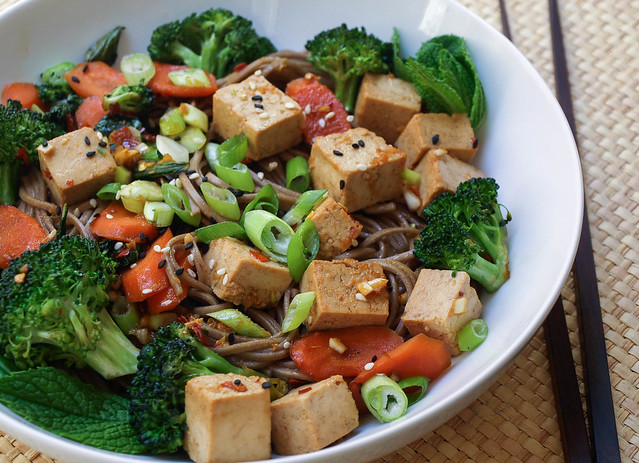
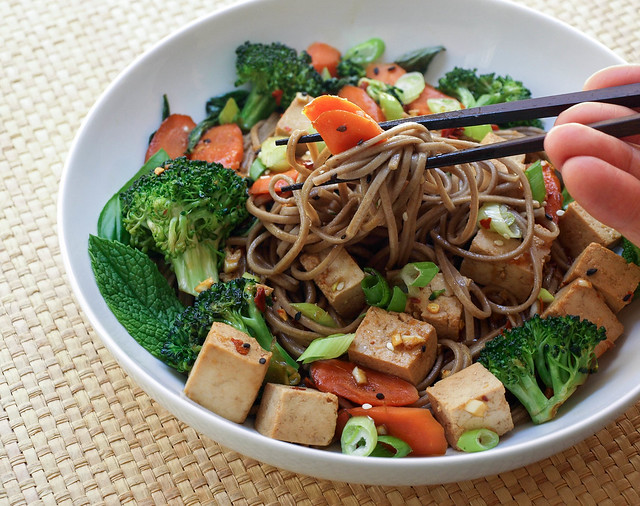
    Soba Noodles with Tofu, Broccoli & Carrots

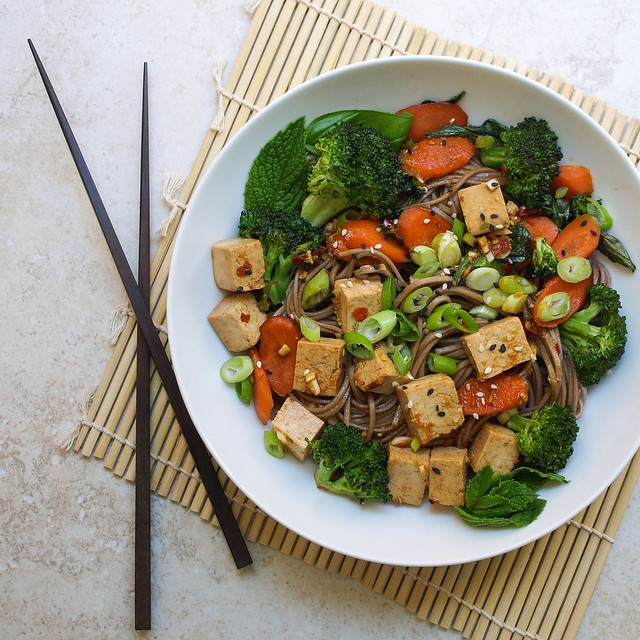
    Soba Noodles with Tofu, Broccoli & Carrots
    Soba Noodles with Tofu, Broccoli & CarrotsSoba Noodles with Tofu, Broccoli & Carrots
    Soba Noodles with Tofu, Broccoli & Carrots

    “To keep the body in good health is a duty, for otherwise we shall not be able to trim the lamp of wisdom, and keep our mind strong and clear. Water surrounds the lotus flower, but does not wet its petals.”  ~Buddha

    I've always been hardwired for the healthy lifestyle. I know it's difficult for some to follow this path as they shine in other ways. It's just always been natural for me to gravitate in this direction. Don't get me wrong though, I've eaten my share of  fast foods in my lifetime and still indulge in french fries, potato chips and various other not so healthy choices from time to time. It's just simply that I truly enjoy the good clean foods, the way they taste and the way they make me feel. But I also want to point out that even some healthy foods if over indulged in on a regular basis can cause problems. So as the old saying goes... moderation is key. It is my hope that you all find the recipes within this site to keep you inspired and eating good clean foods for the most part!

    A healthy lifestyle also includes keeping your stress levels down. That is something I've worked on throughout my life. My life my seem a bit dull to most, but it suits me very well at this point in time. I choose to keep my stress levels to a minimum. With mistakes I've made in the past, I do my best to leave them there and pick up the pieces as best I can while moving forward. I have personally experienced what stress can do to the body, and it can be devastating!  I now pick and choose carefully what I let into my life, letting go of the unnecessary baggage. I like the quote by Jonatan Martensson...

    "Feelings are much like waves, you can't stop them from coming but we can choose which ones to surf"...

    I am much wiser with this perspective! We are only human and can only do so much...but what we can do is pay attention to the foods we eat and the thoughts we indulge in. And get plenty of rest in between!

    Soba Noodles with Tofu, Broccoli & Carrots

    So today I share with you this lovely soba noodle dish with tofu and vegetables. Tofu is one of those plant based foods that should be eaten in moderation. It is not something that you want to eat on a daily basis. And if you do, keep it in very small portions. But for this dish we are going to enjoy a good dose of this marinated tofu. I find this meal to fulfill many senses. The basil and mint work together well here. Sometimes you get a bite of mint, another time a bite of basil and every now and then you'll get the flavor sensation of both. But by all means use one or the other if you only can find one. The marinade is so good and will make the plain tasting tofu come to life. Paired all together with the soba noodles and sautéed vegetables and this is completely healthy, satisfying and stress free meal. 

    Soba Noodles with Tofu, Broccoli & Carrots

    Soba Noodles with Tofu, Broccoli & Carrots

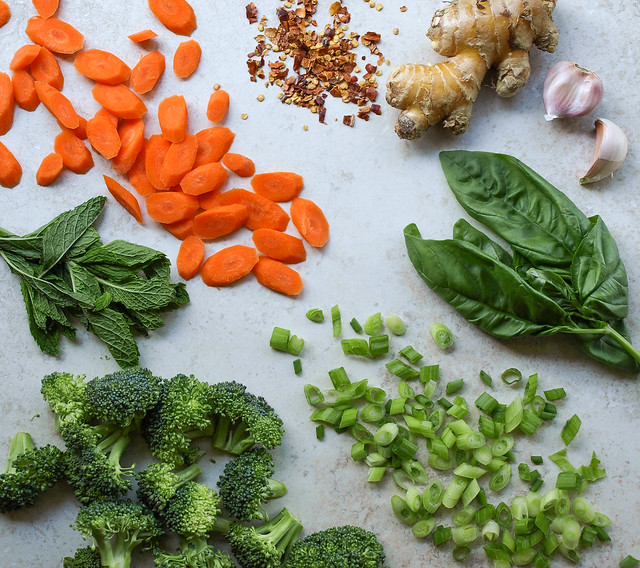
    Ingredients (serves 3)
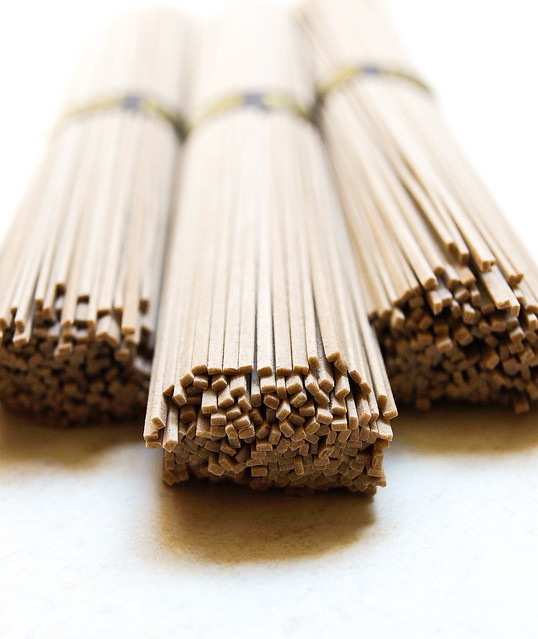
    • soba noodles (about 8 oz)
    • 10 oz. extra firm tofu (I used Wildwood), cubed or sliced
    • handful broccoli florets
    • 2 carrots, sliced diagonally
    • 2 scallions, green and white parts, thinly sliced
    • small handful mint leaves
    • small handful basil leaves
    • 1 tablespoon sesame oil, for sauteing
    • white & black sesame seeds for garnish, optional
    • a few fresh basil & mint leaves for garnish, optional

    marinade
    • 1/4 cup tamari, soy sauce or bragg's aminos
    • 2 tablespoons rice wine vinegar
    • 2 tablespoons pure maple syrup
    • 1 tablespoon sesame oil
    • 2 garlic cloves, minced
    • 1 inch knob ginger, grated or minced
    • 1 tablespoon red pepper flakes, or to taste
    • a dash or two of sriracha, optional

    In a medium size shallow dish, combine the ingredients of the marinade.

    Next prepare your tofu. Let me start by saying that I don't drain my tofu when I use extra firm but if you feel that yours is holding a lot of water, you may like to press your tofu between the ends of a double folded dish towel. Either use the palms of your hands or lay on a hard flat surface and set a heavy book on top for a few minutes. Slice or cube your tofu, however you like best. Place tofu in the marinade and let set for at least 20 minutes, flipping every so often. The tofu is meant to be served at room temp straight from the marinade. Feel free to warm the tofu by adding it to the skillet while sauteing the veggies.

    In a medium size pot filled 2/3 of the way with water (or salted water if you wish), bring water to a boil, add desired amount of soba noodles, lower heat to medium high and cook noodles, uncovered, for 4 minutes. When done drain, rinse and set aside.

    In a medium size pan/skillet, heat sesame oil over medium heat, add the carrots and broccoli (and tofu if you would like it warmed), cook for about 3 minutes. Carefully add in a large spoonful tablespoon of the marinade along with the mint and basil and cook for another 2 - 3 minutes. I prefer my vegetables to be al dente and will remove from heat as soon as they brighten in color. Feel free to cook a little longer if you wish.

    Serve soba noodles in individual dishes with marinated tofu, sauteed carrots, broccoli and herbs. Top with marinade, scallions, sesame seeds and additional fresh herbs.

    This can be served warm or cooled. I ate this after taking the photos, it was on the cool side but still absolutely delicious!

    Enjoy!


    Heirloom Tomato Salad + Olive Bagna Cauda

    Heirloom Tomato Salad + Bagna Cauda

    Let's explore this wonderful salad for a moment...

    First gather some of the season's heirloom tomatoes...big or small...red, yellow or orange...

    Add in some endive, or arugula, and a nice handful of chickpeas...then top it off this wonderful thing called Bagna Cauda. This is one salad that will knock your socks off...Seriously!


    So what is this Bagna Cauda?

    Bagna Cauda, meaning 'hot bath' (etymologically related to Italian root bagn-, meaning "wet") and pronounced bayn-ya code-a, originated in the Peidmont region of Italy and dates back to the 16th century. It is traditionally used as a dip and served somewhat like a fondue for raw, broiled or roasted vegetables. It can also be used to dip your freshly sliced bread. And let me tell you it was so good with this fresh Italian loaf! A sourdough, whole grain or artisan loaf would be heavenly too. For this recipe we will be using the Bagna Cauda as a warm dressing, an ever so wonderful dressing to top this salad filled with heirloom tomatoes, chickpeas and endive. Traditionally Bagna Cauda is made with anchovies, olive oil, butter and garlic. Here we are veganizing this dish and using the saltiness of olives and/or capers as a replacement for the anchovies and omitting the butter all together. I used kalamata olives as they are my favorite but you can use regular black olives as well, or your favorite olives. I also added the chickpeas into this salad as a way to add more protein to the dish. Everything paired together beautifully and I have really enjoyed this salad a few times since sharing it here! 

    I hope you will enjoy this salad and Bagna Cauda as much as I did, garlic breath and all. Keep this dressing/dip in mind for other uses as it will pair well with most vegetables. It's a simple and wonderful recipe...a true keeper! Now, bon appetit...

    Heirloom Tomato Salad + Bagna Cauda

    Heirloom Tomato Salad + Olive Bagna Cauda

    Salad (serves two)
    • 2 medium heirloom tomatoes (any color), sliced into wedges
    • 1/2 cup grape heirloom tomatoes, sliced in halve 
    • 1 cup cooked chickpeas
    • 2 endive, sliced (arugula would be great too)
    • lemon wedges for serving

    Olive Bagna Cauda
    • 1/4 cup good olive oil
    • 1/4 cup black olives and/or capers (I used a mix), pitted and minced, or diced
    • 3 large cloves garlic, minced
    • pinch of red pepper flakes, optional
    • juice of 1/2 lemon
    • salt and freshly cracked pepper to taste

    Prepare your salad ingredients and set aside.

    In a small saucepan over low heat, add the garlic, black olives/capers and optional red pepper flakes and cook, stirring often, for about 7 minutes. The garlic should soften and the flavors will permeate the olive oil nicely. Add in the lemon juice and gently cook for another 2-3 minutes. Taste for seasoning adding salt and pepper as needed. Remove from heat.

    Arrange your salad on serving dishes and top with the warm bagna cauda and a squeeze of lemon juice.

    Please keep in mind that the bagna cauda can also be made raw and served at room temperature. Combine the bagna cauda ingredients in a small bowl. Mash the olives and capers a bit to allow the juices to escape,  let the mixture sit for an hour or two before serving. Serve as a dip or dressing with raw vegetables like fennel, zucchini, tomatoes, endive, arugula, radishes, carrots, cauliflower, celery and bell peppers to name a few.

    Simple, easy and beautiful...

    Enjoy!

    Back to top