POTATO + LEEK + WHITE BEAN SOUP

POTATO + LEEK + WHITE BEAN SOUP

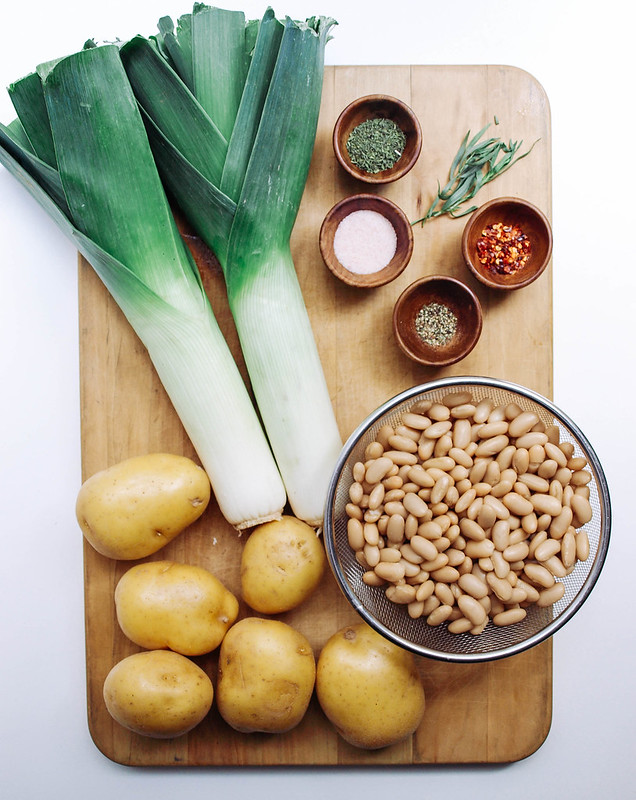
I love soups this time of year! I've been making them like crazy lately. They're just so easy to throw together. And when it's time to clean out the fridge, I can almost always pull something together with a few stocked canned goods. They've made life a little easier around here with all the hustle and bustle over the holidays. So in comes this crazy good soup loaded with leeks, potatoes & white beans. I'm in love with leeks at the moment and used two large ones here. They add a wonderful mellow onion flavor that pairs perfectly with the other ingredients. I've made this soup a few times over the past couple of weeks and found that I love tarragon as my herb, along with savory. But don't worry, if you don't have either of these two herbs on hand, thyme and/or herbs de provence will work perfectly in their place. The latter are two herbs I always have stocked! The preferred potato to use would be red or Yukon gold. For the beans, I would stick with cannellini or great northern but chickpeas (garbanzo beans) would be ok too. If you manage to have left overs, the flavors get even better. Soup will thicken a bit after a couple of hours (here) from the potatoes which is nice (soup shown here is right after cooking and broth is thin). So gather your ingredients and get ready for a simple and flavorful soup to keep you warm and feeling your best any time of year!

POTATO + LEEK + WHITE BEAN SOUPPOTATO + LEEK + WHITE BEAN SOUP

Sauté your leeks, add spices and cook a minute more. Add the remaining ingredients and cook until potatoes are fork tender. And voila...soups on! It's that easy...

POTATO + LEEK + WHITE BEAN SOUP

 POTATO + LEEK + WHITE BEAN SOUP

Ingredients
  • 3 lbs. yukon gold potatoes, cubed 1/2 inch
  • 2 medium/large leeks, sliced and dirt removed (white & pale green parts only)
  • 1 tablespoon olive oil or 1/4 cup water (water saute)
  • 1 1/2 teaspoons each dried tarragon & savory or 1 tablespoon herbes de provence or thyme
  • pinch of red pepper flakes
  • 3 cups cooked or 2 cans (15 oz.) cannellini beans (drained and rinsed)
  • 5 cups vegetable broth
  • mineral salt & fresh cracked pepper to taste

In a large pot or dutch oven, heat oil/water over medium-high. Add leeks and saute until softened, about 5 minutes. Add in herbs and spices, cook until fragrant, about 1 minute. Add in potatoes, beans, broth and salt & pepper to taste. Bring to a boil, cover, reduce heat to low and simmer for about 20 minutes, or until potatoes are fork tender. Let cool a few minutes before serving.

Serve with topped with chopped parsley if you like and a slice of crusty bread to soak up the juices.

Serves 4 - 6

Notes:

You can change up the herbs here with what you have on hand. I really love the tarragon and savory here but starter cooks may not have them on hand so the herbs de provence and thyme will be great too!

Here is a simple guide to slicing and cleaning leeks: How To Clean Leeks 


Smoky Lentil & Quinoa Soup

Smoky Lentil + Quinoa Soup

I happen to pick up a soup from Trader Joe's a couple weeks ago called, 'Lentils with Ancient Grains'. It's a great ready-made soup to pick up when you're on the go. The flavor was so wonderful I could eat two containers full. Since then, I have been trying to recreate this same soup with it's deep flavors in my kitchen without much luck. But I did manage to come up with this recipe for a smoky lentil and quinoa soup that is pretty darn good in my book. I've made several versions of this soup and have finally settled on the recipe you see here. 

Smoky Lentil + Quinoa SoupSmoky Lentil + Quinoa Soup

Lentils rank #3 in the legume and nut family for protein content by weight, soy and hemp come in ahead. Per 1/4 cup dried, about 1/2 cup cooked, lentils you will find 12 grams of protein, 156 calories and 14 grams of fiber. While lentils are not a complete protein, the addition of quinoa, a complete protein, is a great way to round this soup out perfectly making sure all essential proteins are covered. Like lentils, quinoa is not only a great source of protein but also has plenty of fiber containing 7 grams per 1/4 cup and is low in fat. Together they are a great source of iron, magnesium and vitamin B-6. 

Smoky Lentil + Quinoa Soup

Feel free to use either French, beluga, green or brown lentils. I haven't used beluga lentils (aka black lentils) yet which is why they aren't pictured here but they cook just like the others mentioned. I used French lentils, otherwise known as lentilles du Puy, for this batch of soup but have used green/brown lentils as well. Both work well and are delicious in the recipe. As for the quinoa, use your favorite. I love using the tri-colored in my cooking. I like the different characteristics of each color. 

Smoky Lentil + Quinoa Soup

The produce for this soup is simple staple items that you may already have on hand. Not a lot of chopping either making it an easy soup to put together quickly. Dice the onion and carrot on the smaller side as shown in the picture above or cut on the chunky side if you prefer as in the first picture. I especially enjoy sauteing these ingredients together...smells so good from the get go! 

Smoky Lentil + Quinoa Soup

Smoky Lentil & Quinoa Soup

Ingredients
  • 1 cup lentils (french, beluga or green/brown)
  • 1/2 cup quinoa
  • 2 large carrots, diced 1/4"
  • 2 stalks celery, diced
  • 1 small onion, diced
  • 2 cloves garlic, minced
  • 2 tablespoons grapeseed or olive oil or 1/4 cup water for water saute
  • 1 can (15 oz) diced tomatoes (I used fire roasted) or 2 fresh tomatoes, diced
  • 6-7 cups vegetable broth or water
  • 2 - 3 bay leafs
  • 2 teaspoons smoked sweet paprika (if using hot use 1 teaspoon or to taste)
  • 1 teaspoon cumin
  • 1 teaspoon dried thyme or 1 tablespoon fresh 
  • 1 teaspoon dried basil
  • 1/8 teaspoon nutmeg
  • mineral salt and pepper, to taste
  • 2 tablespoons balsamic vinegar
  • chopped parsley for garnish

Rinse your lentils well and pick through removing any oddly shaped or colored lentils. Rinse quinoa using a fine mesh strainer to remove any powdery residue.

In a large pot/dutch oven, heat olive oil over medium-high heat. Add onions, celery, carrots and garlic, saute for 5 minutes, until onions are tender. Add smoked paprika, cumin, thyme and nutmeg, cook until fragrant, about 1 - 2 minutes. Add in tomatoes, broth, lentils, quinoa, bay leaves, salt and pepper. Bring to a boil, cover, reduce heat and simmer for 40 minutes, stirring occasionally and tasting for flavor as you go. Once done, remove from heat, add balsamic vinegar and stir. Remove bay leaves before serving.

Spoon soup into serving dishes and top with chopped parsley.

You may like to serve this with some fresh homemade naan bread, like this one from Vegan Richa or this gluten free one from Golubka Kitchen

Soup serves 4 - 6

Notes:

Feel free to add 1 cup of quinoa instead of 1/2 cup. Just be sure to add the full 7 cups of liquids when cooking, adding more at the end if needed. You can also try using 1 1/2 cup lentils and 1/2 cup quinoa if you like.

For me, using a good vegetable broth in this soup was key to flavor. I used 4 cups of broth and 2 1/2 cups water.

Use 2 teaspoons of thyme if you don't have any dried basil on hand.

If you're a tomato lover, try using 1 can (28 oz) of diced tomatoes or 3-4 fresh tomatoes.

If you feel the soup is on the sweet side, add the juice of one lemon to cut the sweetness.

Enjoy!


MUSHROOM & BUCKWHEAT SOUP

Mushroom & Buckwheat Soup

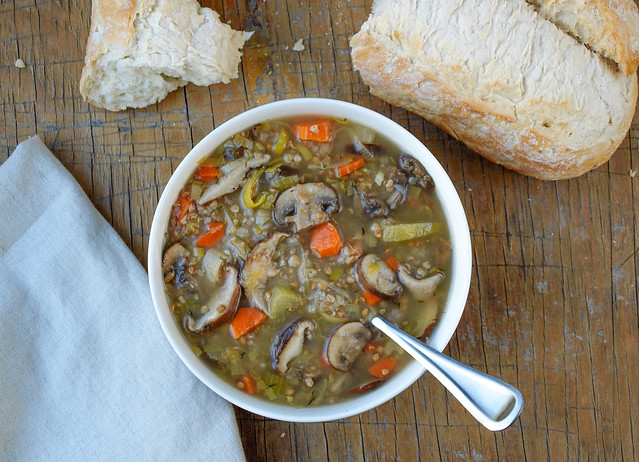
The temperatures here have been steadily on the cool side. It's been rainy, windy and chilly but absolutely beautiful! We had our first dusting of snow on the mountains a couple days ago. I love this time of year when the temperatures drop. It's time for beanie’s, sweaters and snuggling up with a bowl of soup or chili to keep warm. I've been making a lot of chili lately and decided it was time to add another soup to the recipe collection. This soup was inspired by a friend of mine who shared a picture of her mushroom & buckwheat soup on Facebook and I fell in love. Off I went googling to research and pull together this recipe. 

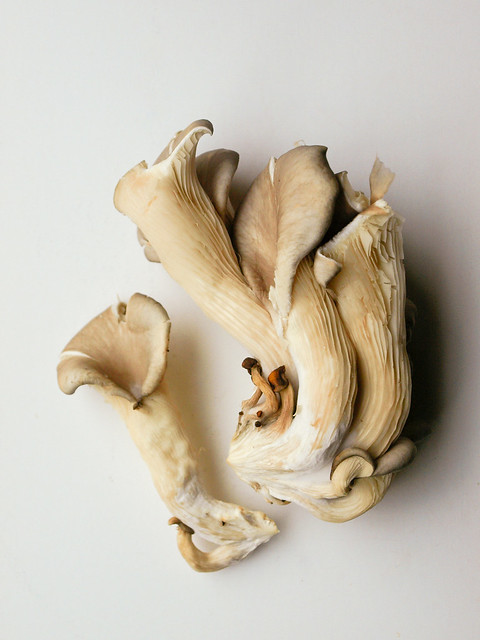
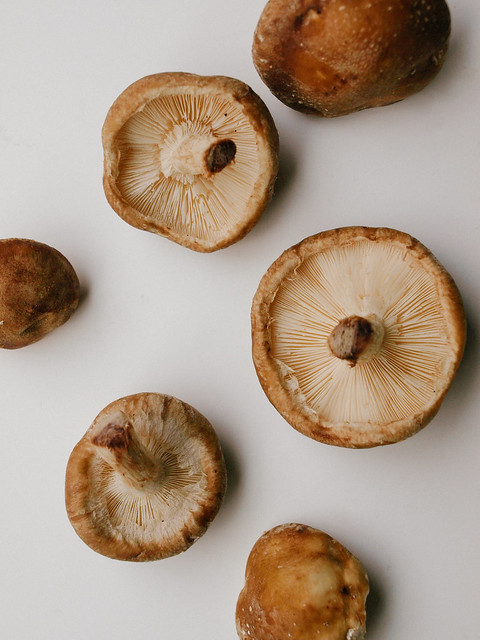
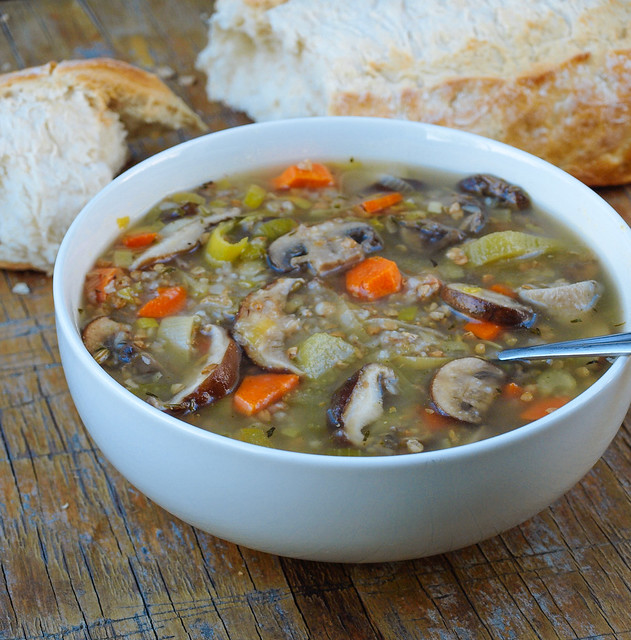
I have two firsts here, for one I am using toasted buckwheat groats, aka kasha, (usually I use raw) and the other I will be trying out oyster mushrooms. I also get a chance to use fennel seeds which I am in love with right now! But don't worry if you don't have any on hand, the thyme called for will do just fine. In fact you can play around with the herbs using sage, smoked paprika, a bay leaf while cooking, a pinch of cayenne or simply use no herbs and opt for salt & pepper to taste. As for the mushrooms, you can use a variety or keep it simple with just one type. If you’re feeling exotic, try using some wild mushrooms. If you’re feeling simple, use regular button mushrooms for convenience and ease. No matter what kind of mushrooms you use I'm sure you'll enjoy this simple honest soup!

Mushroom & Buckwheat Soup - Oyster MushroomMushroom & Buckwheat Soup - shitake Mushroom
Mushroom & Buckwheat Soup

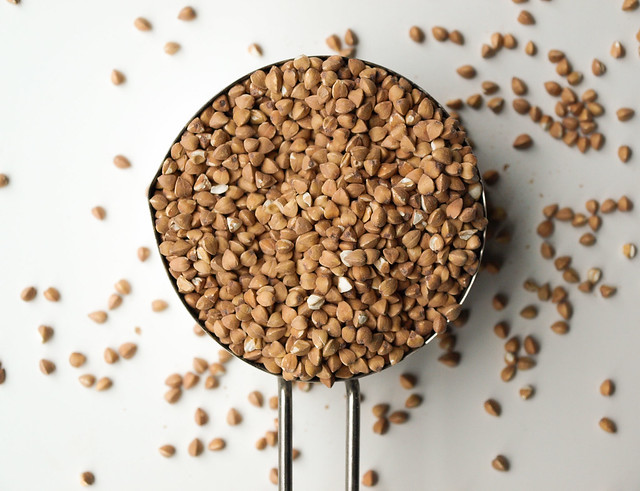
Let's talk a little about buckwheat before we get to the recipe. Despite its name, buckwheat, aka kasha once toasted, does not contain wheat or belong to the wheat family. It's a gluten free seed, sometimes considered a grain, with a good amount of protein, containing 6 grams per 1/4 cup dry. They have a mild, earthy flavor. Once roasted, the flavor will intensify lending a nuttier flavor. Buckwheat groats work great in soups, cereals and raw cookies so far that I have tried. I'm sure there are many more uses for this nutritious seed. In this recipe they will plump up and soften making them a great replacement for the traditional barley that is served in this soup. You can purchase these raw buckwheat groats from Bob's Red Mill or these toasted buckwheat groats from Arrowhead Mills. I made the mistake of buying the latter but wasn't too disappointed as they are great as well, but I prefer the raw ones for cereals like this Bircher Muesli and raw dessert truffles like these Coconut Lemon Bombs. I used the toasted ones here with a first time success but I'm sure the raw buckwheat groats would be just as tasty, if not better!

Mushroom & Buckwheat Soup

MUSHROOM & BUCKWHEAT SOUP

Ingredients
  • 2 tablespoons olive or grapeseed oil
  • 2 leeks, sliced lengthwise and thinly sliced (green and white part only) or 1 large onion, diced
  • 2 celery stalks, sliced (a few chopped leaves is great too)
  • 2 large carrots, peeled and diced
  • 1 1b. (16 oz) mushrooms, sliced
  • 1 cup buckwheat groats (use either raw or toasted), rinsed
  • 2 teaspoons thyme
  • 2 teaspoons fennel seeds
  • 7 - 8 cups vegetable or mushroom broth, or 7 - 8 cups water with 2 vegetable boullion cubes
  • juice of 1 lemon, optional
  • mineral salt & fresh cracked pepper, to taste
  • 1/2 cup flat leaf parsley, chopped to garnish

In a large dutch oven or stock pot, heat oil over medium heat, add leeks and celery, cook, stirring occasionally until softened, about 5 minutes. Add in carrots and mushrooms, cook another 4 minutes. Add in groats, thyme, fennel seeds, broth, lemon juice and salt & pepper, bring to a boil, partially cover, reduce heat to low and simmer for 15 minutes.

Serve garnished with a sprinkle of parsley and a side of crusty artisan bread or gluten free bread of choice.

Serves 4 - 6

Notes:

For the mushrooms, feel free to use one or more of the following...shitake, oyster, porcini, button, cremini or baby bella's. I used a combination of shitake, oyster and baby bella's but all one kind would be great too! Feel free to add extra mushrooms to the soup if you like!

For the liquid I used about 8 cups. Start with the smaller amount and add more as you see fit.

I completely forgot to top with parsley for the photos. It will add a nice fresh bright flavor to the soup!

Feel free to use pearl barley, which is not gluten free, in place of the buckwheat groats. Just be sure to cook your soup for about 20 to 30 minutes, until barley is tender.

Enjoy!

Stuffed Winter Squash + Quinoa, Cranberry & Pistachio

Stuffed Winter Squash + Quinoa, Cranberry & Pistachio

This is the time for winter squashes and all their wonderful flavors. These stuffed squashes would make for a pretty presentation on any holiday table, or simply enjoy anytime during the season for a flavorful and filling meal. This recipe can be dressed up fancy or kept simple, depending on your mood or occasion. Keep it to a few ingredients while adding more to add complexity to the dish. I've made this with just six ingredients (squash, quinoa, cranberries, pistachios, oil and salt) and it was great, adding a few other components give it more depth and flavor. This recipe is more of a template for you to create a quinoa stuffing to your liking. I encourage you to play around with the ingredients adjusting to your personal tastes. 

Stuffed Winter Squash + Quinoa, Cranberry & Pistachio

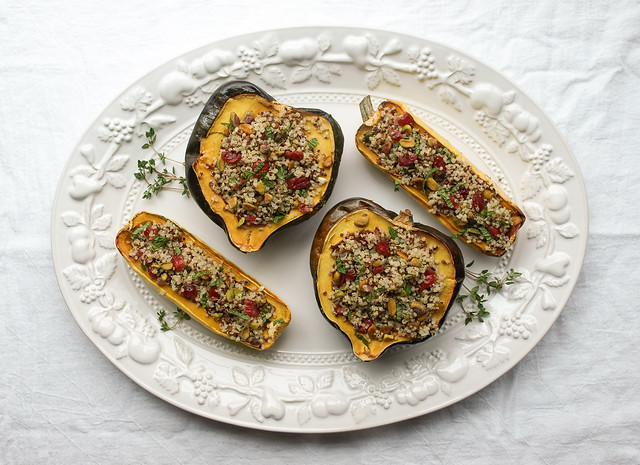
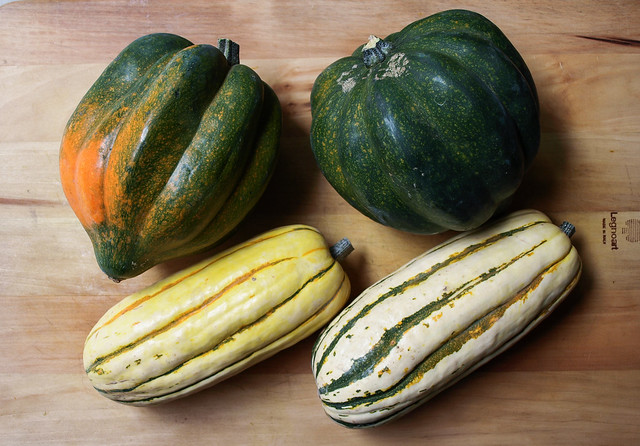
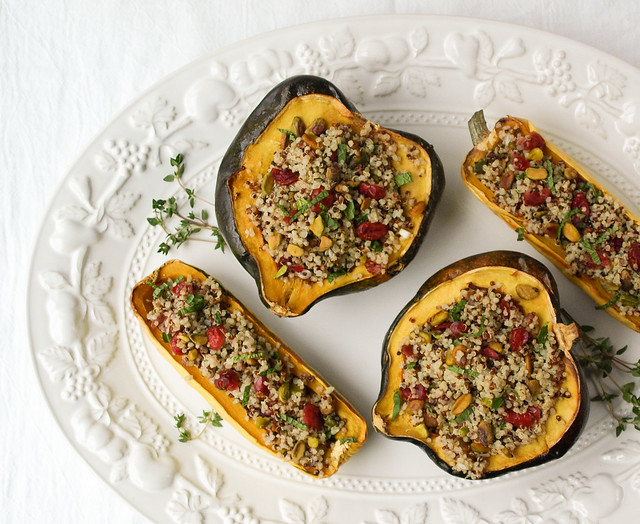
I decided to do both the acorn and delicata squash with this because they both work so well here. You can use one or the other, or both for variation at the table. I love the delicata squash because the skin is edible. The acorn squash on the other hand may have a tougher, and possibly bitter, skin making it less likely that you'll be able to eat it but it does make for a great bowl. So either way, they both are great and can cook together if doing both. 

Stuffed Winter Squash + Quinoa, Cranberry & Pistachio

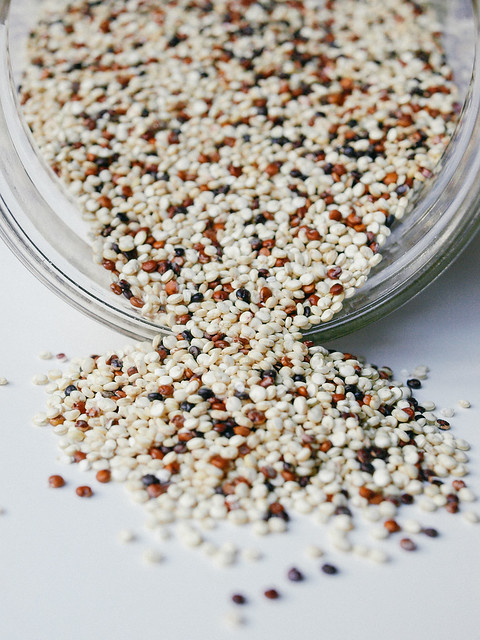
Quinoa is my favorite grain, well technically it's a seed but can be prepared like a grain. It's a complete protein, full of fiber and a good source of calcium, magnesium and iron making it a great alternative to grains. And it's gluten free. It's perfect for those on a plant based diet and those seeking nutritionally dense foods. Served warm or cool, quinoa tastes great and is such a versatile grain. Here I used a blend of pearl and tri-colored quinoa. I like blending the two so there is just a few specks of the darker quinoa.

Stuffed Winter Squash + Quinoa, Cranberry & PistachioStuffed Winter Squash + Quinoa, Cranberry & Pistachio

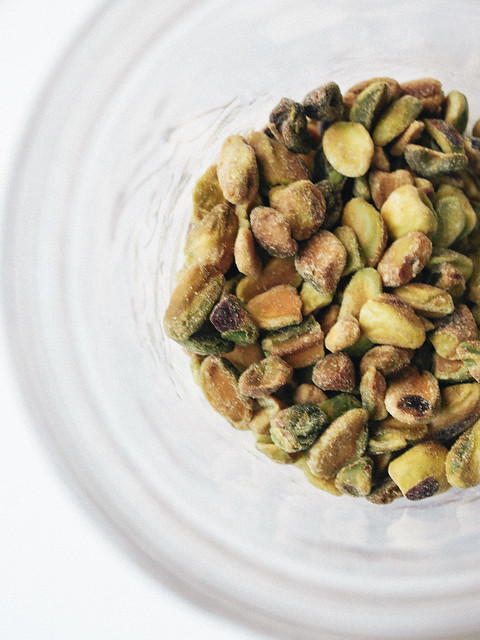
Add in some festive colors from the pistachios and cranberries and this dish is as appealing looking as it is good, and good for you!

Stuffed Winter Squash + Quinoa, Cranberry & Pistachio

Stuffed Winter Squash + Quinoa, Cranberry & Pistachio

Ingredients
  • 2 large or 3 small acorn or delicata squash
  • maple syrup
  • olive oil
  • 1 cup quinoa, rinsed well 
  • 1 3/4  cup water
  • 1/2 cup dried cranberries
  • 1/2 cup pistachios
  • 2 tablespoons finely minced shallot, optional
  • mineral salt & freshly ground pepper to taste
  • juice of 1 lemon

add complexity to the quinoa by adding one or more of the following to suit your taste:
  • pinch red pepper flakes
  • 1/2 cup chopped parsley (if your a mint fan, try 1/4 cup fresh mint)
  • 1 - 2 teaspoons fresh thyme 
  • drizzle of olive oil

Preheat oven to 375 degrees F.

Wash and dry squash. Slice each squash in half lengthwise, remove seeds. The seeds should come out easily by scraping the inside of the squash with a spoon. Lightly brush the inside of each squash with a little oil and/or maple syrup. sprinkle with a bit of mineral salt. Place on baking sheet cut side up. Bake in oven for 35 - 40 minutes, or until squash is tender and pierces easily with a fork.

While squash is cooking add 1 3/4 cup water and 1 cup quinoa to a medium size pot. Bring to a boil, cover, reduce heat to low and simmer for 15 minutes. Remove lid and let set 15 minutes. Add pistachios, cranberries, shallots, salt, juice of lemon, and any other optional ingredients. Toss to combine.

Scoop quinoa into squash halves, place back in the oven for 10 minutes to warm if needed, and serve.

Notes: 

For the quinoa I used a blend of 1/2 cup white and 1/2 cup tri-color quinoa. Feel free to use all of one type or mix and match to your preference.

Seek out organic cranberries if possible. Unsweetened is best but can be hard to find. The ones I have here are from Trader Joe's which are organic but sweetened.

Enjoy!

    Chickpea Ratatouille Niçoise

    Chickpea Ratatouille Niçoise

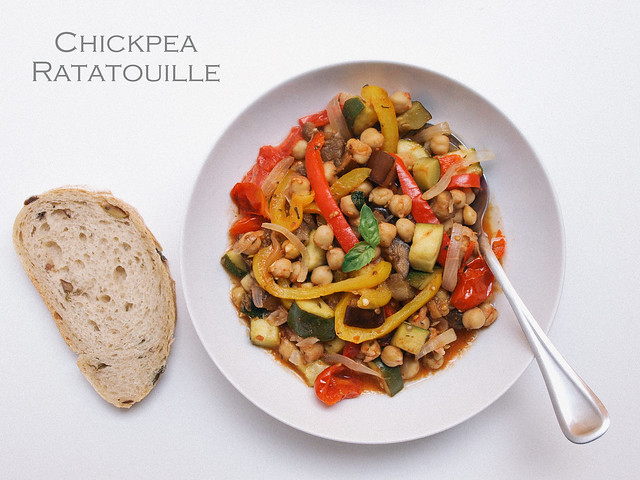
    Ratatouille, a rustic farm to table style dish. It's a summer/early fall recipe for those who appreciate big flavor and simplicity while using the seasons harvest. Originating in Nice, it's a traditional French Provençal stewed vegetable dish. Ratatouille is often served as a side dish but it is a recipe that can undoubtedly stand alone, especially with the addition of chickpeas adding a fair amount of protein to this colorful array of garden vegetables. There is much debate as to how to prepare ratatouille, but I chose to adapt my recipe from this one at La Tartine Gourmade, she also has a nice story with hers. It's a fairly simple approach to preparing this dish involving sauteeing and stewing on the stove top which resulted in a wonderful finish. And it tastes even better the next day! You may also like to see other cooking styles of ratatouille, I recommend looking at these for more inspiration: Saveur (I'll for sure be doing this one, it's perfectly old world rustic and comfy looking),  86 Lemons (a simple roasted version using chickpeas as well) and Olives For Dinner (a 'confit byaldi', a little more tidy looking making for a beautiful presentation). 

    I know ratatouille isn't anything new but this classic sure deserves a place in the simple veganista collection!

    Chickpea Ratatouille Niçoise

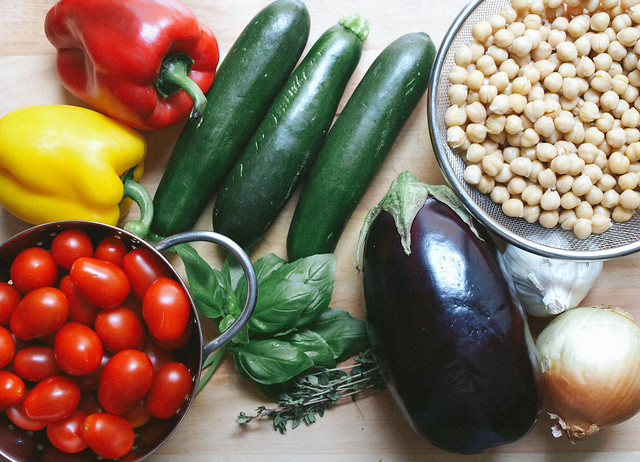
    Gather your ingredients. These are all common vegetables, and fruits ie, tomato, and available year round here in Southern California. Eggplant is the only produce that seems to be more seasonal here, or maybe I just don't notice it as much as I don't use it often. For the garbanzo beans, you can start with dried beans cooking them according to this guide or use canned for extra ease. Herbs can be varied to suit your taste. Bea, author of the original recipe, uses a bay leaf and tarragon in her recipe. Here I have used fresh basil, thyme and some herbes de Provence. I even threw in some red pepper flakes. Go with what you feel, there is no wrong way to season your ratatouille as long as you like it! It's also a great way to change it up. I think I'll try some tarragon next time myself.

    Chickpea Ratatouille Niçoise

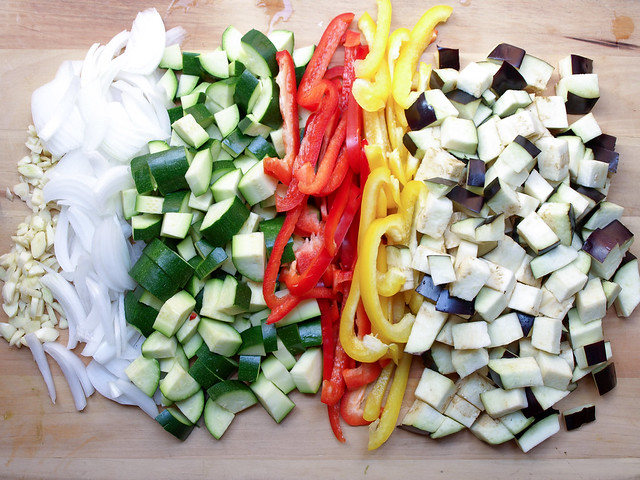
    Dice your vegetables. Next time, I'll be sure to chop the bell peppers the same size as the zucchini and eggplant, about 1/2 inch cubes. It makes it a bit easier to eat when they are uniform in size. I do like the onion sliced here but feel free to dice that instead too. It may seem as though you have too much produce (the tomatoes aren't even shown) and won't fit in the pot but the eggplant will shrink down and the rest of the veggies will soften and you'll be fine. You may even consider adding extra next time to make sure you have leftovers.

    Chickpea Ratatouille Niçoise

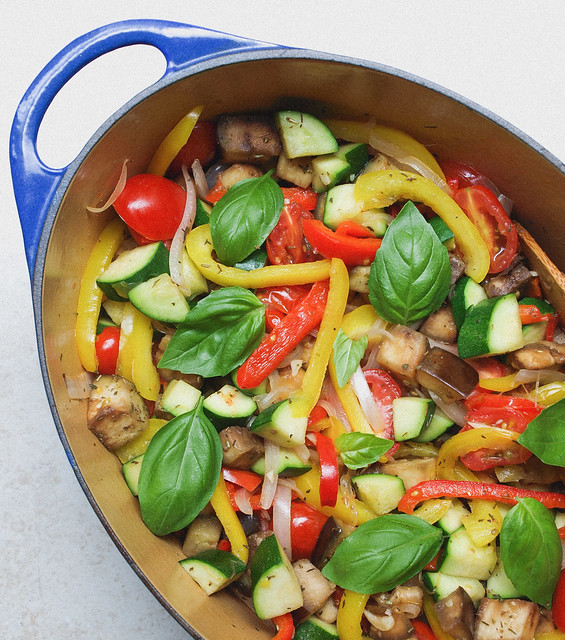
    Vegetables have been sauteed and the ratatouille is ready for the first round of simmering before adding in the chickpeas. Still nice and colorful.

    Chickpea Ratatouille Niçoise


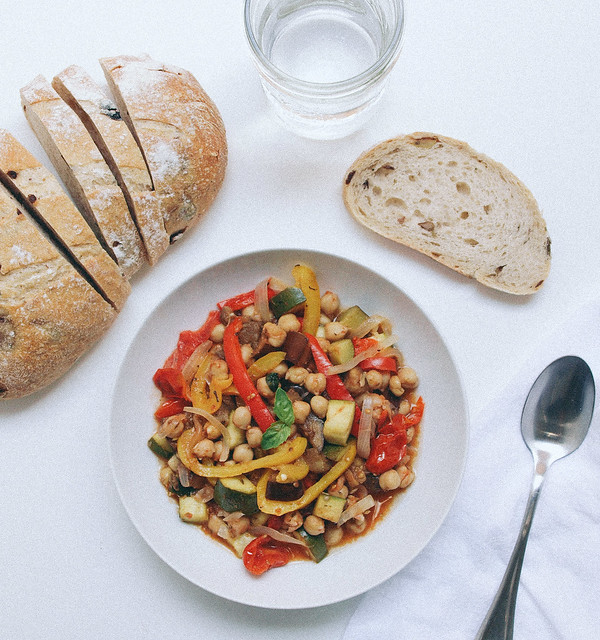
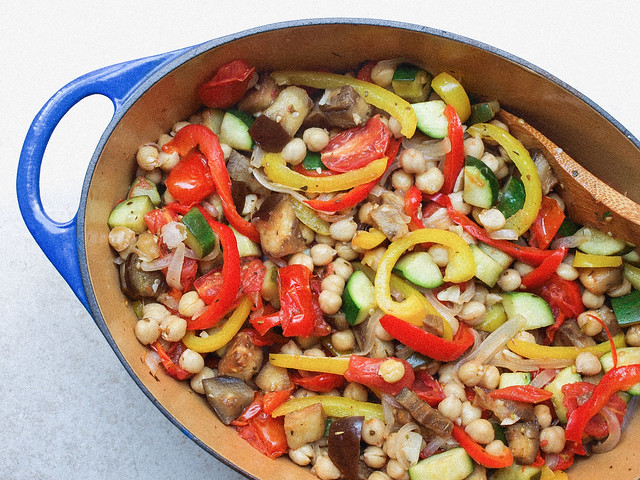
    Chickpeas have been added and will simmer awhile longer. Depending on how you like your vegetables will depend on the length of time you allow your ratatouille to simmer. The longer you leave it, the more juices will form making for a great dipping sauce for a slice of good artisan bread. I preferred simmering mine for a total of about 35 minutes, I like the color and crisper texture but I didn't get as much of the juices. Go for a full hour or more to really let the ingredients sweat and get the juices going. Again, still colorful here. Your colors may become muted the longer you stew but the result with be delicious!

    Chickpea Ratatouille Niçoise

    Chickpea Ratatouille Niçoise

    Ingredients
    • 3 cups cooked chickpeas (2 cans (15oz) garbanzo beans, drained and rinsed)
    • 4 tablespoon olive oil, divided
    • 1 eggplant, diced
    • 3 small zucchini or 2 medium, diced
    • 2 bell peppers (1 yellow & 1 red pref.), seeds removed, sliced
    • 1 onion, sliced
    • 4 garlic cloves, chopped
    • 1 lb. grape tomatoes, cut in half 
    • 2 teaspoons herbes de Provence or fresh thyme (I added a bit of both)
    • a few fresh basil leaves (left whole or chopped)
    • mineral salt, to taste
    • pinch of red pepper flakes, optional

    In a heavy bottom pot or dutch oven, heat 2 tablespoons olive oil over medium heat, add eggplant and zucchini, saute for 5 minutes. Remove from pot and set aside.

    Heat remaining 2 tablespoons olive oil over medium heat, add onions, garlic and bell peppers, saute for 3-4 minutes. Add tomatoes, mix well and cook 5 minutes. Add in eggplant, zucchini, herbs, spices and season with salt and pepper. Reduce heat to a low and simmer uncovered for 15 minutes. Add in chickpeas and simmer anywhere from 45 minutes to 1 hour, depending on your personal preference (less time for crisper vegetables, more time for softer vegetables and more juices). Stir occasionally until ready.

    Serve topped with chopped fresh herbs. Pair it with a gluten free or favorite artisan loaf of bread. I have it here with a wonderful olive loaf. Try serving it on a bed of quinoa, rice or pasta to make it go further.

    Serve warm, cold or at room temperature.

    Notes:

    To make this virtually fat free, try water sauteeing your vegetables using about 3 - 4 tablespoons of water instead of oil. Total amount of water for this recipe would be 6 - 8 tablespoons, divided.

    I would dice my bell peppers next time, it's easier to eat them when they are the same size as the zucchini and eggplant pieces.

    For the spices, try mixing and matching marjoram, thyme, rosemary, fennel and/or savory. Or use a bay leaf and tarragon.

    The longer you simmer the more juices will accumulate.

    Enjoy!

    Quinoa & White Bean Veggie Burger

    Quinoa & White Bean Veggie Burger

    It's burger time...

    Quinoa & White Bean Veggie Burger

    Quinoa & White Bean Veggie BurgerQuinoa & White Bean Veggie Burger
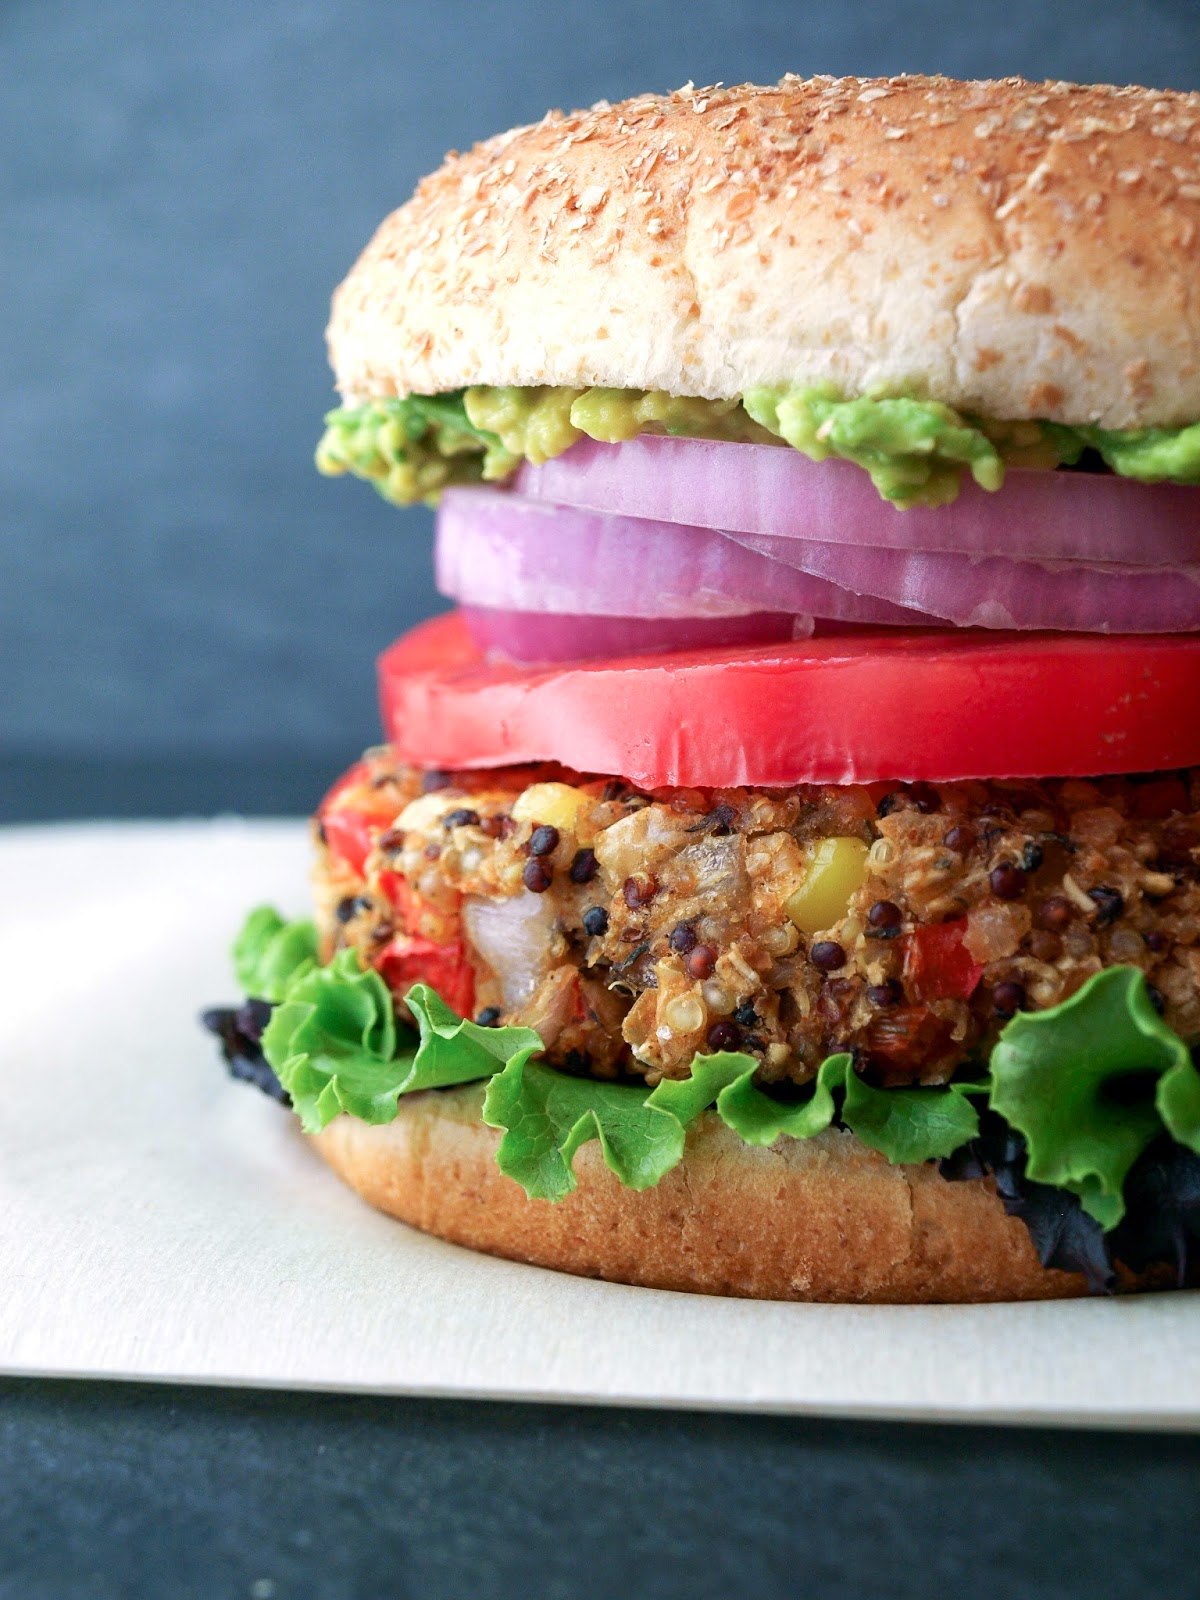
    I haven't done a veggie burger in almost a year. It was time to add a new one to the list and this one is as delicious as it gets. These patties are loaded with protein and fiber as well as other beneficial nutrients, and they are very filling. As far as veggie burgers go this is fairly easy. I have to admit that I'm a pretty lazy cook and don't like a lot of steps. I prefer to spend as little time as possible preparing a meal as well as cleaning it up. Fyi, you can make this recipe even simpler by using a pre-made flour instead of processing oats like I did. The patties came out fantastic and held up great without falling apart, and they were not dry at all, nor were they mushy. The texture, taste and visual appeal all hit the mark. Once layered with all the extra goodies this burger was supreme and the best veggie burger I've ever had...am I biased...maybe, but these were divine! And, if you don't feel like having it on a bun, by all means top your veggie burger on a bed of fresh leafy greens with a squeeze of lemon, some avocado, salt and pepper...so good just like that! 

    Quinoa & White Bean Veggie Burger

    I loaded this beauty up with leafy greens, slice of heirloom tomato, sliced red onion, whole grain mustard, mashed avocado and a nice drizzle of sriracha. Lot's of flavors going on and I loved it. As the saying goes, "Eat like you mean it!" 

    Quinoa & White Bean Veggie BurgerQuinoa & White Bean Veggie Burger

    Quinoa & White Bean Veggie BurgerQuinoa & White Bean Veggie Burger

    Quinoa & White Bean Veggie BurgerQuinoa & White Bean Veggie Burger
    Quinoa & White Bean Veggie BurgerQuinoa & White Bean Veggie Burger

    And now for the money shot! Having fun with my iphone and the VSCO Cam app (it's free), managed to create this final mouthwatering picture...veggie love at first sight!

    Choose your cooking style...stove top

    Quinoa & White Bean Veggie Burger

    Ingredients (makes four patties)
    • 1/2 cup quinoa (I used tri-color)
    • 1 cup water
    • 1 teaspoon garlic powder
    • 3 teaspoons thyme, divided (oregano would be good too)
    • 1/2 - 1 teaspoon smoked paprika 
    • 1/2 teaspoon ground chipotle pepper, optional
    • 1 can (15 oz.) white beans (I used cannellini), drained and rinsed
    • 1/2 cup corn, fresh or frozen (about 1/2 fresh corn off the cob)
    • 1/2 cup red bell pepper, finely diced (about 1/2 bell pepper)
    • 1/2 cup shallot, finely diced (about 1 medium) or red onion
    • juice of one lemon
    • 1/3 cup oat flour, or flour of choice 
    • 1 Ener-G egg replacer or 1 flax egg (1 Tbs flaxseed meal + 3 Tbs water), optional*
    • mineral salt & cracked pepper, to taste
    • coconut or olive oil, to grease

    To Serve:
    • tomato, sliced
    • leafy greens
    • avocado, sliced or mashed
    • red onion, sliced
    • whole grain or dijon mustard (hummus or vegan mayo is great too)
    • sriracha or Sriracha Cashew Cream (use the sriracha cream in place of mustard)
    • burger buns of choice

    Start by making your flax egg or ener-g egg replacer and set aside. If baking in the oven, turn oven to 375 degrees F. (It's helpful to read instructions first before making the patties)  

    In a medium pot, bring water, quinoa, garlic powder and 1 teaspoon thyme to a boil. Cover, reduce heat and simmer for 15 minutes. Once done, remove cover and let set for 10 minutes.

    While quinoa is cooking, prepare your corn, shallot and red pepper. Be sure to dice your onion and red pepper fairly fine, they should be about the same size as the corn kernels.

    Next, mash your beans. I mashed about 3/4 of the beans leaving a quarter of the batch whole or somewhat whole.

    Once quinoa is ready, add the quinoa to the beans along with the shallots, red pepper, corn, remaining 2 teaspoons thyme, smoked paprika and optional chipotle powder and lemon juice. Mix well. Add in the flour and egg replacer, mix well again. Season to taste with salt, pepper and more of the other spices. We all vary on how strong we like our spices...you can't take out but you can always put in.

    Now to divide and make your patties. I like to pat my mixture into the bowl a little and divide it with a knife into 4 sections, making a plus sign if you will. Take each section and pack it tightly into a ball in the palm of your hands. It should be about the size of your hand. Flatten with your palms and place on hard surface. Cup the edges with your palms and tighten them in a bit and flatten the top to the desired size. Mine were about 1/2 inch thick by 3 1/2 - 4 inches.

    Cook one of two ways:

    In the oven at 375 degrees on a greased or parchment lined cookie sheet for 30 minutes, turning once after 15 minutes. I also added a sprinkle of himalayan salt to the top before baking.

    OR

    In a large skillet, heat 1 tablespoon coconut oil or olive oil over medium to medium high heat. Cook patties about 4 - 5 minutes on each side.

    I cooked both ways and had no preference. They both held up well and cooked great. (pic shows skillet cooked)

    Serve on bun or bed of leafy greens with choice of toppings!

    Notes:

    The patties can be made ahead of time and stored covered in the refrigerator for a couple days prior to cooking.

    *I have a sneaky feeling that this can be made without the use of any egg replacer if you don't have it available. I have it here for good measure until I try without (in the comments you will see that it has been done). If you decide not to use an egg replacer, when adding the flour, just try adding two - three tablespoons of water instead if needed...the amount may depend on the flour you're using.

    For mashed avocado, cut open avocado, remove seed and using a fork, mash the flesh right in the skin...it's like a bowl. Spread on bun for a great creamy condiment!

    I hope this makes you want to get in the kitchen and cook.
    I encourage you to make these soon and often...

    Enjoy!

    Skillet Asparagus & Tomato Medley

    Skillet Asparagus & Tomato Medley

    The simples are my favorite. Full of color and flavor, this is one of those easy dishes I could eat almost everyday. The tomatoes are bursting with juiciness and the sautéed lemon adds a wonderful touch. Something about adding lemon to the skillet brings out their sweetness in a most delicious way. Pairing all of this goodness over a grain of choice, as well as a bean, rounds this meal out by giving you extra protein and fiber to leave you satisfied without feeling weighed down. Feel free to add other vegetables to this as well. This is just a template. 

    Skillet Asparagus & Tomato Medley

    Skillet Asparagus & Tomato Medley

    Ingredients
    • 1 1/2 cups cherry tomatoes
    • 10 oz. asparagus
    • 1/2 red onion, roughly chopped
    • whole garlic cloves, as many as you like
    • 2 lemons, quartered and seeds removed
    • 1 tablespoon or so olive oil
    • himalayan salt & cracked pepper, to taste
    • 1 teaspoon or so thyme
    • 1 can (15oz) white beans (I used cannellini)
    • cooked quinoa, farro, barley, brown, jasmine or basmati rice (I used quinoa)

    Prep your veggies and place in medium size bowl. Drizzle with olive oil, mix to coat. Add salt, pepper and a sprinkle of thyme, mix again. Heat skillet on medium to medium high. Add vegetables and cook for about 8 to 10 minutes stirring occasionally, or until tomatoes soften. Serve on a bed of grains and beans...or however you like it! Serves two generously.

    Enjoy the simples!

    Portobello & Kale Calzone with Garlic Miso Cream

    portobello & kale calzone with garlic miso cream

    I can't remember the last time I had a calzone. They are delicious! This recipe was inspired from Leafy Greens and Me...I could barely wait to get this one underway. I've had a few of these the last few days trying to get good pictures...what a tough job right! :) What I really loved about this is the roasted garlic cream sauce....roasted garlic is amazing and actually mellows out after roasting leaving wonderful mild flavors, a little nutty, sweet, almost caramel like. I added some miso to the garlic sauce, giving it that little extra something. Miso is a staple in my refrigerator and lasts up to a year, you can find more uses for miso by searching my site in the box on the right or by scrolling down to the ingredients list. I have a couple recipes that you might enjoy. Be sure to pick up some miso and get this calzone into your life, and if you don't have miso this will still be a great roasted garlic cream sauce!

    There is quite a bit of high heat oven time going on so this is definitely a great meal during the cooler months....perfect for this time of year. You don't want the oven on like this in the summer, especially in the hotter regions....400 & 500 degrees for an hour or two and someone is bound to get slapped upside the head. ;) This is also not an energy saving recipe for those ultra conservatives, but we do a bit here and a bit there so I think we'll be alright to enjoy this scrumptious calzone every now and then. As a matter of fact while were on the subject of the environment, did you know the global warming we are experiencing is a natural part of the earth's cycle. Yes indeed, it would happen no matter what...with us or without us...just ask and I will forward you some interesting information! Of course, it definitely doesn't help creating new canister hairsprays, or having herds of cars, or herds of factory farmed animals contributing to the already warming trend, but what are we going to do...little by little, step by step everything will come to light...in the meantime let's relax & eat...

    Portobello & Kale Calzone with Garlic Miso Cream

    Ingredients (makes 4)
    • 1 1b. whole wheat/grain pizza dough (I used Trader Joe's), divided into 4 sections
    • 1/2 onion, diced
    • 2 -3 garlic cloves, minced
    • 1 tablespoon thyme
    • 2 portobello mushrooms, sliced
    • 1 1/2 cups broccoli florets, cut somewhat small
    • four large leaves of kale, stems removed and roughly chopped or left somewhat whole (I used curly kale) or a bundle of spinach
    • large handful cherry or grape tomatoes, sliced in half
    • olive oil, to brush on top of calzone
    • himalayan salt and cracked pepper to taste
    • cornmeal for dusting the pizza wheel

    Garlic Cream Sauce
    • 1 cup cashews, soaked for at least two hours or over night
    • 1/2 cup to 1 cup water, if you soaked the cashew for two hours use 1 cup, if soaked overnight use 1/2 cup water
    • 1 head garlic
    • 1 tablespoon olive oil
    • 2 teaspoons white miso
    • juice of 1 lemon
    • himalayan salt & pepper to taste

    Preheat oven to 400 degrees.

    First, roast the garlic for the garlic cream sauce. Remove most of the outer layer of skin on the garlic leaving enough to hold them in place, lay sideways and cut the tops off. Place garlic cut side up on a piece of tinfoil, drizzle with olive oil and top with sea salt & cracked pepper. Fold ends of foil up and squeeze together and crimp the edge. Place on cookie sheet and cook for 40-45 minutes. Let cool. Check here for a great visual tutorial from Oh She Glows: How To Roast Garlic

    Once garlic is done, turn the oven up to 475-500 degrees. Place pizza stone inside the oven for about 45 minutes before cooking.

    While garlic is roasting, let pizza dough come to room temp in its package away from oven heat for 30 minutes. Remove from package, place on a lightly floured surface, flatten out a bit with your hands, cut dough into four equal portions, roll each portion into a ball, cover with light towel and let set for another 30 minutes away from oven heat to let the gluten relax....if the gluten isn't relaxed you may have a hard time rolling out your dough properly.

    Next onto the garlic cream sauce. Drain cashews and place all ingredients into food processor/blender and process until creamy, about 3 to 4 minutes. If cream is too thick and extra water 1 tablespoon at a time until desired consistency being careful not to thin it out too much making it runny, if in doubt leave it on the thick side. Taste for seasoning, set aside.

    Slice your grape/cherry tomatoes in half, place in small bowl and set aside. You may even want to dip a tomato half into the garlic cream sauce, just to make sure it tastes good! 

    In large skillet, heat olive oil over medium high heat. Add onion, garlic and cook until onions become soft. Add in mushrooms, broccoli, kale/spinach, thyme and salt & pepper to taste, cook for another 5 minutes or so. Turn off heat and cover ajar to help steam and soften the veggies a little more while working on the next step. 

    On a lightly floured surface, roll each portion out into an eight inch oval, rectangle, circle, ...whatever works easiest for you. Lay on some of the veggie mixture, add a few heaping tablespoons of the garlic miso cream and top with some of the kale and tomatoes (or layer however you like, this is just a suggestion, my emphasize is to keep the cream in the middle of the calzone as much as possible). Fold the other half over and seal the edges by rolling them up and sealing or by pressing with a fork, or both. Top with a light coat of olive oil and a sprinkle of salt, pepper and thyme.

    Portobello & Kale Calzone with Garlic Miso Cream

    Dust the heated pizza stone with cornmeal, place calzone on the pizza stone and bake for 7 - 10 minutes, until crust is puffy and golden brown. Let cool a few minutes and serve. Serve with some garlic miso sauce on the side.
    Note: Pizza stones are a really nice item to have...they work great for pizza of course, and this calzone, as well as baking artisan bread. Some of my favorite loaves of artisan bread were baked using a pizza stone. 

    Enjoy!

    I would love to see your masterpieces! #thesimpleveganista


    WINTER POTATO, WHITE BEAN & KALE SOUP

    Winter Potato, White Bean & Kale Soup

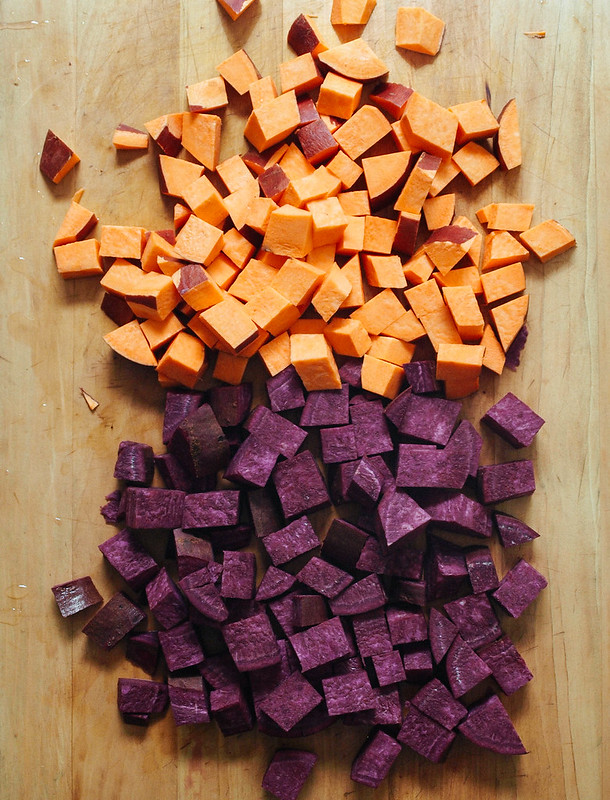
    Another soup is born! I love soups...plus it's raining here today and I wanted something easy and warm. I've been on the computer most of the day too setting up my Instagram account and playing with my phone, linking everything together with social media. All that stuff takes time and I'm glad to be done with that. It's time well spent as it's a new experience for me...and your more than welcome to join me if you like to see what else is going on in my kitchen, as well as out and about in the big wide world. This was a perfect soup to accompany the weather and my geek day. It's also great for it's healing, relaxing, warming and flavorful qualities. All the vegetables and spices came together so well. The purplish hue of the broth comes from the purple sweet potato I used. With all this color, you know it's full of nutrients. The sweet potato and sun-dried tomatoes add a nice sweetness to the soup. If you can't find purple potatoes, you can sub with any color you can find. If you don't care for sweet potatoes, use Yukon gold, red or purple or blue potatoes. This is a perfect hearty and nutrient dense soup for those cool afternoon days and chilly nights. It was so good and filling! 

    Winter Potato, White Bean & Kale Soup
    Winter Potato, White Bean & Kale SoupWinter Potato, White Bean & Kale SoupWinter Potato, White Bean & Kale Soup

    WINTER POTATO, WHITE BEAN & KALE SOUP

    Ingredients
    • 2 large sweet potatoes, diced (orange, purple, white or combo)
    • 1 tablespoon grapeseed or olive oil OR 1/4 cup water
    • 1 onion, diced
    • 2 garlic cloves, minced
    • 2 cans (15 oz) cannellini beans, drained and rinsed or 3 cups cooked
    • small handful sun-dried tomatoes, chopped 
    • 4 - 5 cups vegetable broth
    • 2 teaspoons herbes de provence or thyme
    • 3 or 4 handfuls kale, chopped (I used tuscan)
    • 2 tablespoons nutritional yeast
    • sea salt & fresh cracked pepper to taste

    In large pot or dutch oven, heat oil/water over medium heat, add onion and saute for 5 minutes, until onion becomes translucent. Add garlic, sun-dried tomatoes and herbes de provence, saute 1 minute.

    Add broth, potatoes, beans and kale, bring to a boil, cover, turn down heat to low and simmer for 15 to 20 minutes...just until potatoes are tender. Remove from heat add nutritional and give a good stir. 

    Serve with crusty bread and a light dusting of  almond parmesan. 

    Makes about 4 - 6 servings.

    Notes: 

    Use any potatoes you like, just use about 5 cups worth. Leave the skin on or remove it according to your preference. 

    *Herbes de provence is a great herb blend for the pantry. I use them quite often in my soups, like this Parsnip & Split Soup and Chickpea Ratatouille. It won't go to waste if you love soups and cook often enough. And if you can't find it, the thyme is a great herb all by itself!


    Recipe adapted from Elizabeth Antionette


    Back to top