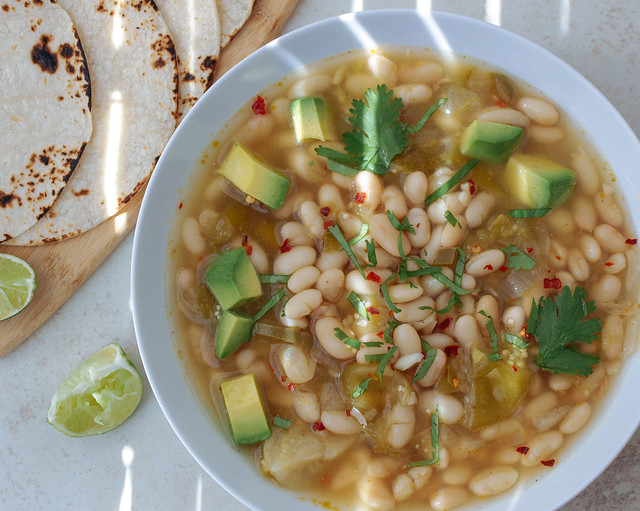
White Bean + Tomatillo Soup

White Bean + Tomatillo Soup

Today is a celebration of tomatillos and white beans...
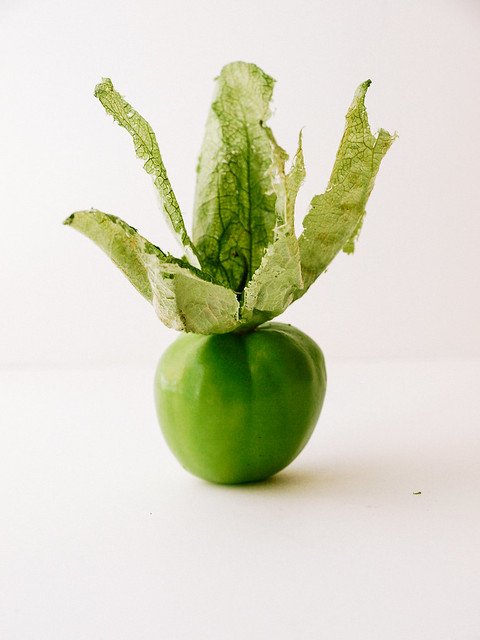
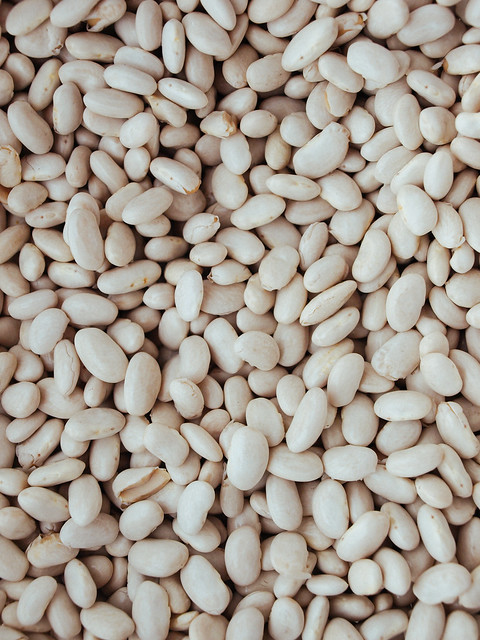
White Bean + Tomatillo SoupWhite Bean + Tomatillo Soup

 Summer is coming to an end and cooler weather is setting in. It seems a good time to put some of the season's tomatillos to good use and this soup is a great way to use this wonderful fruit. Eaten raw tomatillos have a bright, somewhat lemony flavor about them. Once cooked, they soften in texture and their flavor mellows making them a wonderful complement to the white beans and other ingredients in this hearty soup. White beans are a great source of protein, and together the tomatillos and beans have plenty of fiber to keep you feeling full and keep your digestive track running smoothly. If you find you are gassy with beans, take a look at this article from Care 2, 7 Ways To Avoid Gas From Beans, to see if it can help you. Once you start to add beans to your diet on a regular basis your body will naturally adjust and ease itself of those unwanted symptoms. Beans should be a staple in your healthy vegan diet...they are accessible, affordable, versatile and contain plenty of nutrients to keep the body healthy and satisfied. 
White Bean + Tomatillo Soup

So as the seasons are changing and the sun will soon be hidden from my window until next year, we are catching the last rays of summer here. I'm ready to bring on the fall and bundle up with a nice bowl of soup. Cheers to the cooler temperatures, bundling up and keeping our food pure and clean as possible! 
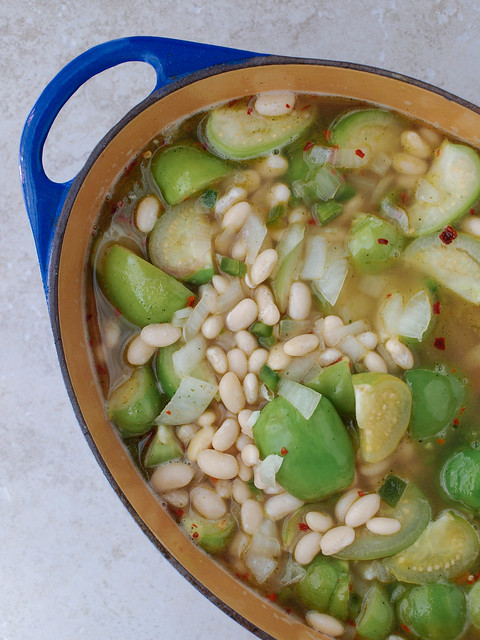
White Bean + Tomatillo Soup

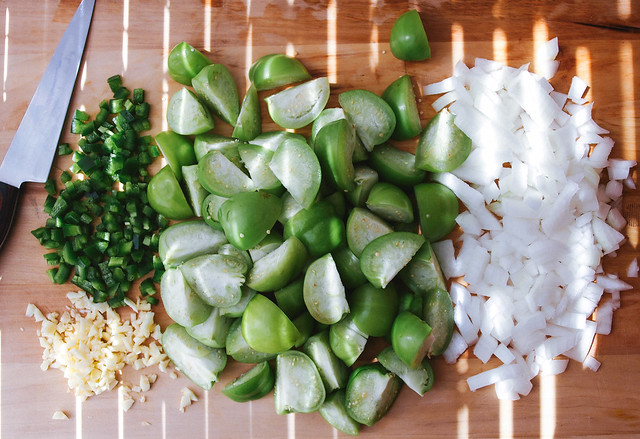
A look at the soup before it's put on the flame to simmer. So fresh and colorful!
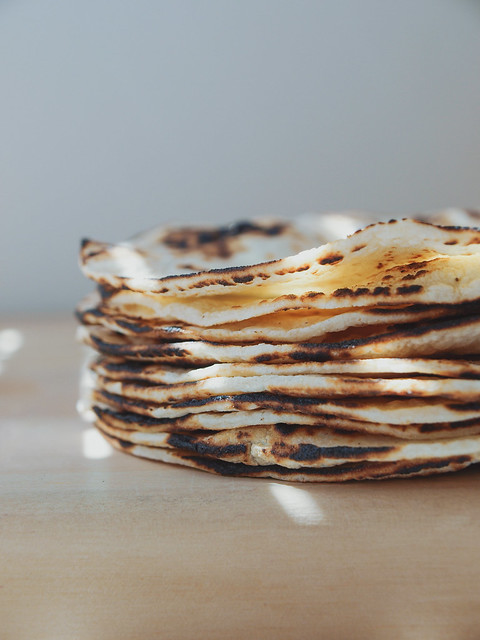
White Bean + Tomatillo Soup - Corn TortillasWhite Bean + Tomatillo Soup

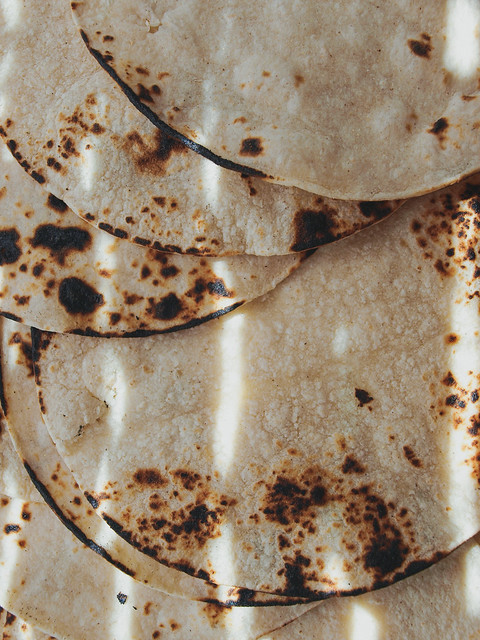
Adding some warmed tortillas will round this soup out making for a very satisfying meal. 
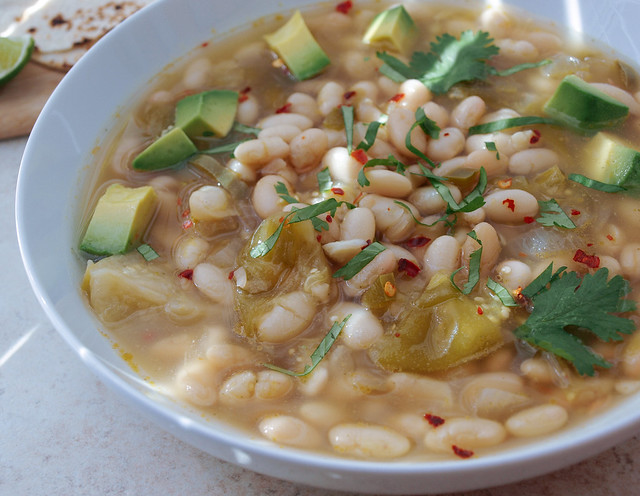
White Bean + Tomatillo Soup

White Bean + Tomatillo Soup

Ingredients
  • 1 lb. dry northern beans or 3 cans (15 oz) cannellini beans or navy beans, drained and rinsed
  • 1 onion, diced
  • 2 - 3 garlic cloves, diced
  • 1 1/2  lb. tomatillos (about 13-15), husks removed, washed and quartered or cut into 6 pieces
  • 1 jalapeno, seeds removed and diced
  • 4 cups (32 oz) vegetable broth or 4 cups water with 3 repunzel vegetable cubes
  • 2 cups water
  • 1/2 teaspoon cumin
  • 1/2 teaspoon coriander
  • mineral salt to taste
  • pinch or two red pepper flakes (I like it for a little color)
  • small glug of olive oil
  • 1/4 cup cilantro, chopped
  • avocado, diced, to serve
  • lime wedges, to serve
  • corn or flour tortillas, to serve (organic tortilla chips would be great too)

If using dried beans, wash and pick through removing any unsightly beans or pebbles. Soak beans overnight or quick soak them according to package directions. Drain and rinse beans well. Place in a medium size bowl until ready to use. If using canned beans go to next step and add the drained and rinsed canned beans as called for below.

Prepare your tomatillos by removing the husks and washing them well to remove any of the sticky residue. Chop into quarters or six pieces depending on the size of your fruits. Cut and remove seeds from your jalapeno, and dice. Dice your onion and garlic.

In a large pot, heat oil over medium high heat, add onion, saute for 5 minutes. Add in the garlic, tomatillos, jalapeno, cumin, coriander, and a pinch or two of salt, saute another 5 minutes. Add in the beans and liquids, bring to a boil, cover, reduce heat and simmer for one hour. If using canned beans, cook for 30 minutes.

Serve with diced avocado, cilantro, lime wedges and tortillas. Serves 4 - 6

Notes:
Make this fat free by opting to add all the ingredients to the pot without sauteing the vegetables in oil. I did this on my first batch of this soup and it was still very delicious without any added oils.

I used dried northern beans for this recipe. If you have the time I recommend using dried beans but canned beans are great too.

Add more cumin if you like, or none at all. I just wanted a hint of the spice but if you're a cumin lover by all means add more to your liking.

Add an ear or two of chucked corn to the soup to make it even heartier. It will add a touch of sweetness and more color.

This soup could also benefit from a dollop of Lime Cilantro Cashew Cream

Enjoy!


This recipe was first inspired by photographer/photo stylist Kate Lewis from her Instagram account. After some internet googling I ran across this recipe at Running with Tweezers which I adapted from.
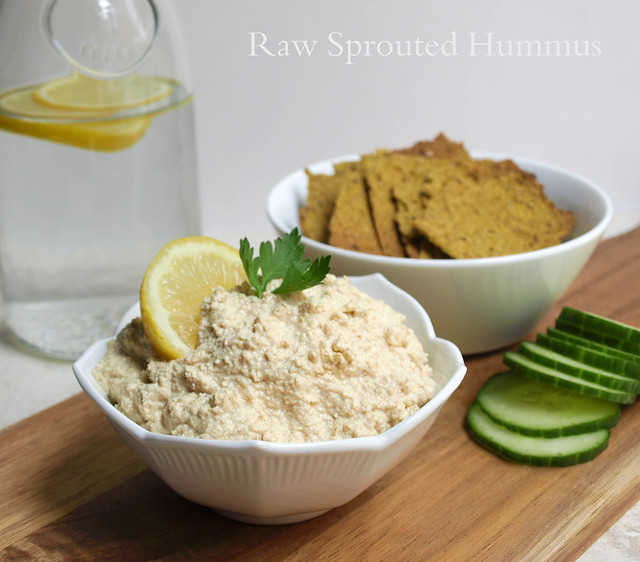

    Raw Sprouted Hummus

    Raw Sprouted Hummus

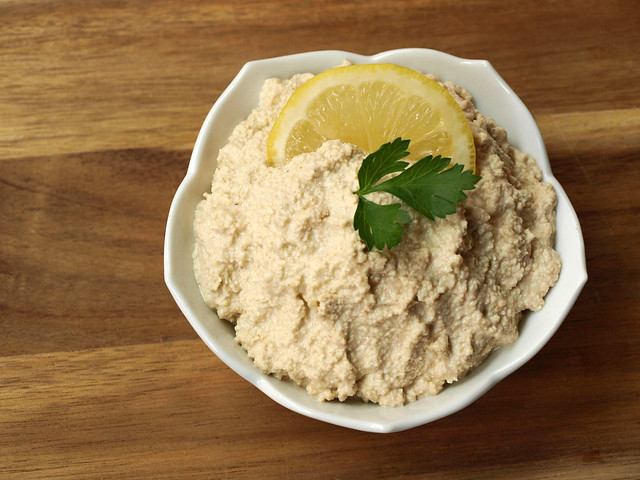
    Yes, another chickpea recipe. I've wanted to do a raw hummus for awhile and thought it was time. Raw chickpeas have a much different flavor than the cooked ones I'm used too and at first I wasn't sure if I would like this. But you know what? It came out really well. Will I make this again...absolutely! They have a nice flavor alone but in a hummus they are spectacular! I've also been playing around with my juice pulp making crackers and this raw hummus was a perfect complement to my new obsession! I made this hummus about the same as I would regular hummus, except I added extra of everything to really get a good and flavorful raw sprouted chickpea hummus. 

    Raw Sprouted Hummus

    We know cooked chickpeas are good for us but they are even better after sprouting. Sprouting unleashes their full potential. Water is the key to unlocking their rich source of nutrition. Germination is a life force and we can benefit by adding sprouted nuts and seeds into our daily lives. Once sprouted the protein content will increase by as much as 20%, nucliec acids by 30% and many vitamins by as much as 500% ...yes 500%. Pretty amazing! 

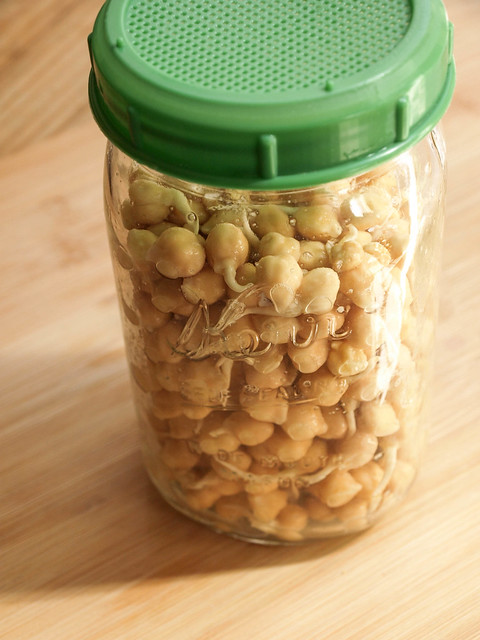
    Best of all, it's really easy to sprout...it just takes a couple days of patience but it's worth watching your little seeds come to life and do their magic. You don't really need any special tools to sprout your chickpeas. I used a mason jar with a sprouting lid but any bowl or jar will do. Cheesecloth rubber banded around the top of a jar will work too if you don't have a sprouting lid. I've also sprouted without any lids and did just fine using my hand & fingers as a strainer. You could just as well use a simple colander after the initial soaking process; this will ensure maximum air flow and allow you to really rinse them well. The main points to sprouting is the initial overnight soaking, then rinsing thoroughly 2 - 3 times a day with purified water for two days. 

    Raw Sprouted Hummus

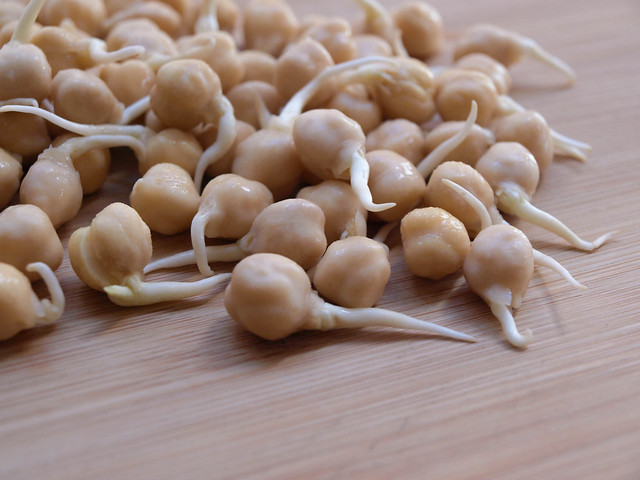
    Once sprouted the beans will be at their highest potential and will give you excellent nutrition along with a wonderful hummus once everything is put together. The above picture is two days after the initial soak. Most of my beans sprouted very well, some only had little sprouts and some had none. You can expect various stages of sprouting and that is perfectly fine.

    Raw Sprouted Hummus

    Raw Sprouted Hummus

    Ingredients
    • 1 cup dried garbanzo beans or 2 cups sprouted chickpeas 
    • 2 heaping tablespoons tahini
    • 2 heaping tablespoons extra virgin olive oil
    • 2 large cloves garlic
    • juice of 2 medium lemons
    • 1/4 cup purified water, + more as needed to thin
    • 1 tablespoon cumin
    • 2 teaspoons coriander
    • dash or two cayenne pepper, optional
    • himalayan salt to taste

    If starting with dried beans, place your beans in a large bowl and fill with purified water. The beans will double in size so be sure to cover and leave plenty of extra water for them to soak up, about 2 to 3 times as much water. Soak for 8 -12 hours. Rinse and drain thoroughly. Leave your beans anywhere at room temp and rinse and drain once every 8 - 12 hours for two days. Here is a great guide to sprouting garbanzo beans from the Sprout People for reference.

    Place all your ingredients into your food processor/blender and blend until creamy. Taste for flavor adding anything extra you like. If adding more water, add 1 tablespoon at a time until desired consistency.

    Enjoy however you like!


    Baked Falafel Salad + Two Creamy Dressings

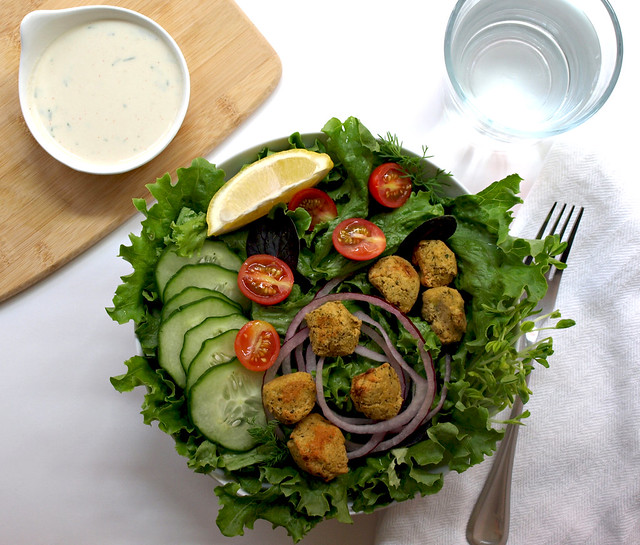
    Baked Falafel + Two Creamy Dressings

    Chickpeas are an amazing bean and I'm finding out just how versatile they are. I've used chickpea's in a lentil stew, roasted them with spices for snacking on and used them on top of salads. They are the main ingredient in hummus, which is just as versatile as the chickpea itself. They are great freshly cooked and I have no problem snacking on them just like that. They also make good things like socca bread and chickpea omelets (recipes coming soon). Its flour can be used and combined with other gluten free flours to make gluten free baked items too. And now, I come across the falafel, another great way to use chickpeas. High in protein and full of fiber, anything made with chickpeas is a great addition to a healthy lifestyle.

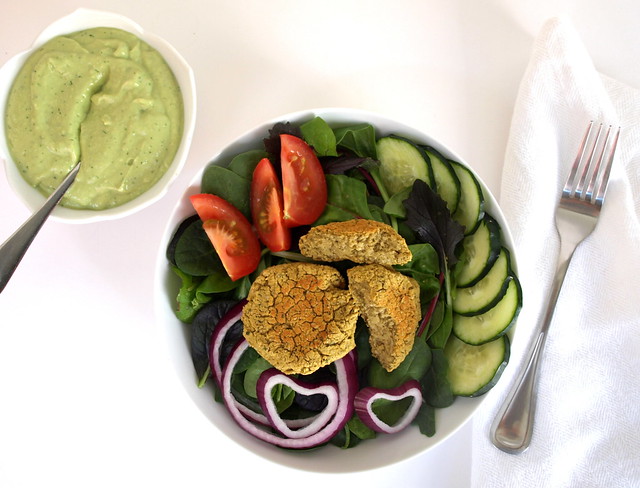
    This last week I've been falafel making and am here to share with you my experiences. Falafels are a Mediterranean food and can be used in various ways like in salads, or made into sandwiches using pita bread and the ingredients of the salad base within this recipe along with a nice drizzle of dressing. You can also enjoy them by simply pairing your falafels with hummus, a flat bread and fruit (fresh grapes come to mind) for a great snack or simple meal. Along with the falafel recipe are two creamy style dressings. One is a more traditional dressing using tahini as the base while the other is not so traditional using avocado and cucumber. The avocado and cucumber dressing is inspired by my Avocado & Cucumber Soup and works great as a dressing too. I loved them both and decided to add them together for varying tastes. Hope you enjoy them!

    Baked Falafel Salad + Two Creamy Dressings

    Let me share with you a bit about my trials of falafel making. I have used canned beans and dried beans that have been soaked. It's important to soak them for at least 12 hours so they soften all the way through, but it's ideal to soak for 18 + hours and rinse well (this will help with gassiness and allow your body to absorb more of their nutrients). For me, both the canned and soaked beans worked out great without any issues. Use whatever style bean you prefer, or is convenient. You may like to try both for yourself to see which one you like best, I had no preference. I also made them with added flour and/or oil like some recipes call for. I personally found the flour and oil to not be necessary. I've baked my falafels in a skillet and on cookie sheets, both work great. I've also added a few extra ingredients like coriander which is nice but have omitted it here just to keep it simple as possible (although I do have the garlic & onion powder...I like them for good measure). But by all means, if you have coriander on hand go ahead and throw in a teaspoon if you like. As for the greens, feel free to use only parsley or cilantro if you like. That's a little about my experiences. I'm sure there is more to learn and each of us will have varying outcomes due to our kitchen appliances, tools and taste. All in all, these were great falafels and I see them being made fairly regularly around here!

    Baked Falafel + Two Creamy Dressings

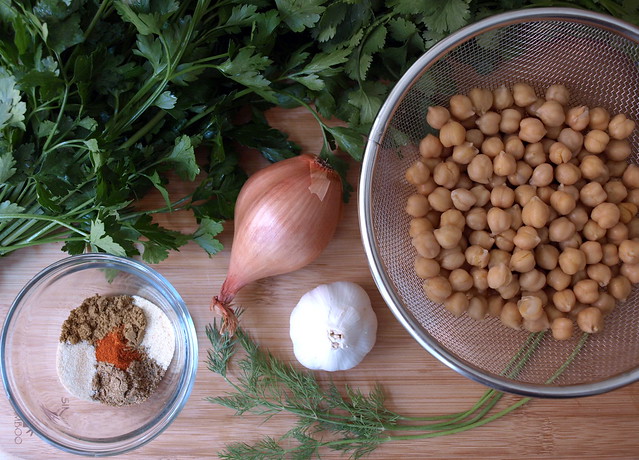
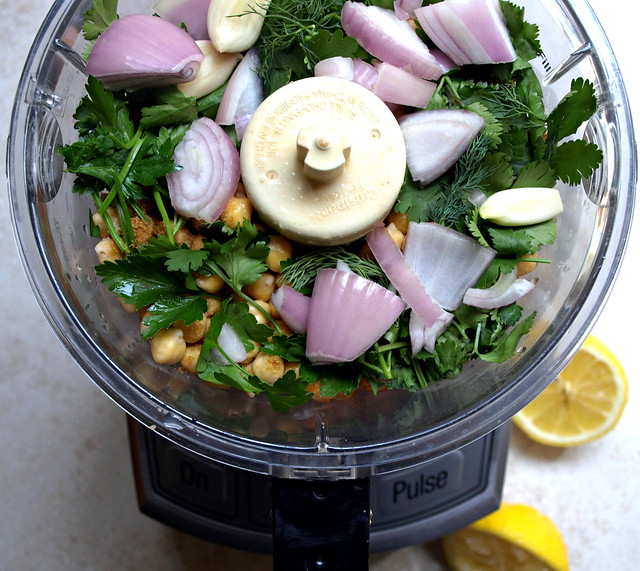
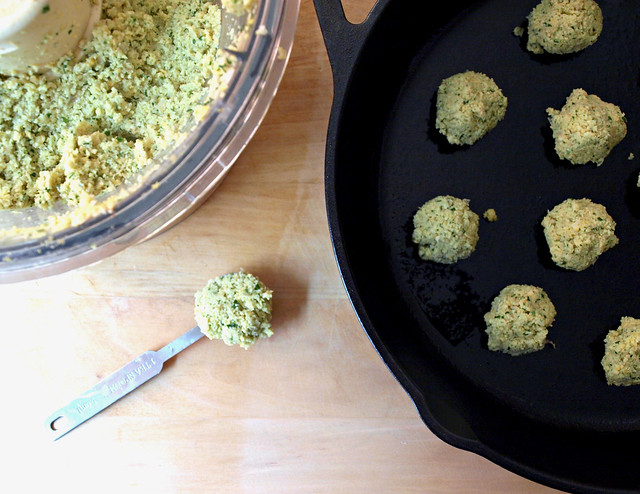
    Start by adding the ingredients to your food processor/blender...

    Baked Falafel + Two Creamy Dressings

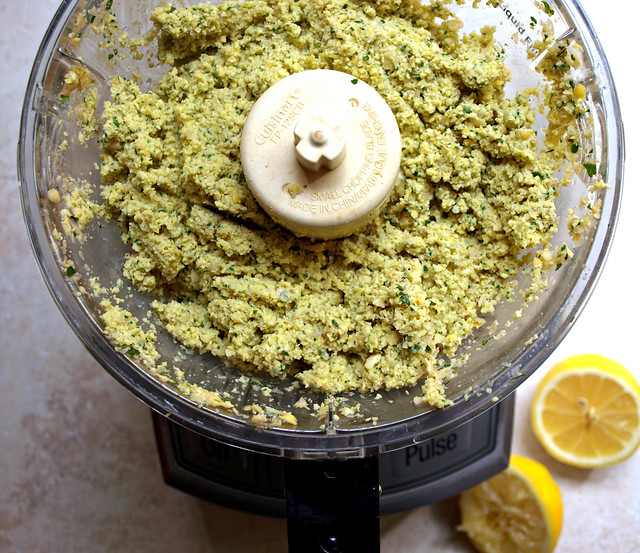
    Blend until fairly smooth, stopping every now and then to scrap down the sides. And then your on to shaping your falafels into whatever size you like.

    Baked Falafel + Two Creamy Dressings

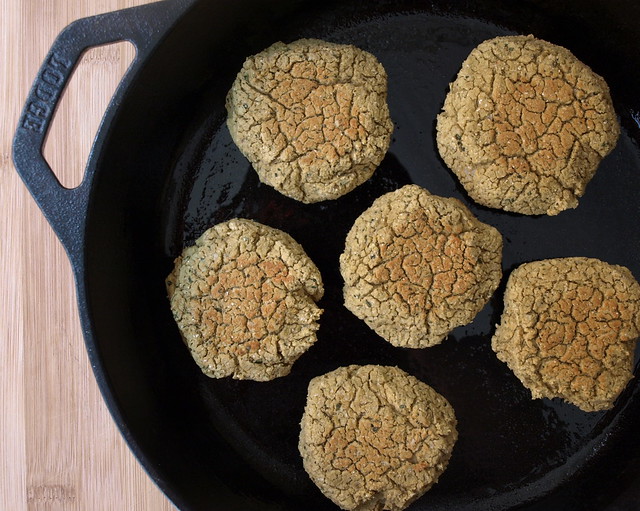
    These were some bite size falafels I made using a heaping teaspoon to scoop up the mixture, this yielded about 24 or so mini falafels. The ones below are the larger patties which I used approx 3 tablespoons per patty and yielded about 6. You can vary your size according to your needs and uses. All the ways I baked them they came out nicely firm on the outside and perfectly cooked on the inside, soft and tender. I know the ones below looked like a parched desert but trust me they weren't dry on the inside.

    Baked Falafel + Two Creamy Dressings

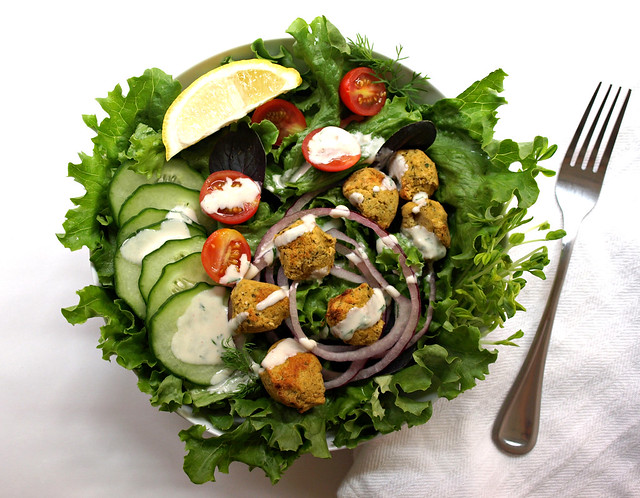
    Once your falafels are baked...make your salad or enjoy them however you like!

    Baked Falafel + Two Creamy Dressings

    Baked Falafal Salad + Two Creamy Dressings

    Salad Base
    • spring mix or choice of leafy greens
    • red onion, thinly sliced
    • tomatoes, sliced 
    • cucumber, thinly sliced

    Falafals
    • 1 can (15oz) garbanzo beans, drained and rinsed OR 3/4 heaping cup garbanzo beans soaked for at least 18 hours and drained (they will double in size)
    • 1/4 cup loosely packed cilantro, chopped
    • 1/4 cup loosely packed parsley, chopped
    • 3 tablespoons fresh dill, chopped (optional)
    • 1 small shallot or 1/2 small onion, roughly chopped
    • 3 garlic cloves
    • 1 teaspoon cumin
    • 1/2 teaspoon garlic powder
    • 1/2 teaspoon onion powder
    • pinch or two cayenne pepper, chili powder or smoked paprika (depending on your mood)
    • himalayan salt & freshly cracked pepper to taste

    Preheat oven to 400. Coat your cast iron skillet or cookie sheet with coconut oil, or oil of choice.

    In food processor/blender, combine all the ingredients for the falafels. Blend until fairly smooth. Form patties into whatever size you like....

    For larger patties: Scoop 3 tablespoons per patty...will yield approx. 6.

    For small patties: Scoop 1 heaping tablespoon per patty...will yield approx. 12.

    For mini patties: Scoop 1 heaping teaspoon...will yield approx. 24.

    Place patties on greased skillet/cookie sheet and bake for 10 minutes. Flip and bake for 15 minutes.  Total cooking time 25 minutes. If you find that your falafels are not as browned as you like, place them under the broiler for a minute or two, just be sure to keep an eye on them so they don't burn.

    Store leftover falafels in an air tight container. They will soften overnight. To warm them up and return crispness again to the outside, place under broiler or in a toaster oven at a high temp for a minute or two while keeping an eye on them so they don't burn. 


    Lemon-Tahini Dressing 
    • 4 tablespoons tahini
    • 1 garlic clove, pressed OR a dash or two garlic powder
    • juice of 1 large lemon
    • few dill fronds, cilantro or parsley, minced 
    • himalayan salt to taste
    • 1/3 cup water, + more to thin
    • pinch of cayenne

    In a small bowl, combine all ingredients and mix until well combined. Taste for seasoning and add more water as needed 1 tablespoon at a time or add more lemon juice. Store leftovers in an air tight container in the refrigerator for up to five days.


    OR, for something different and refreshing...


    Baked Falafel + Two Creamy Dressings

    Avocado-Cucumber Dressing 
    • 1 avocado
    • 1 cucumber, peeled
    • a few springs cilantro and dill fronds
    • 1 clove garlic
    • juice of 1/2 lemon
    • dash of onion powder
    • salt to taste
    • water as needed to thin

    In food processor/blender, combine all the ingredients except for the water. Blend until smooth. Taste for seasoning. Add water a tablespoon or two at a time until desired consistency. Best chilled in the refrigerator before serving. Leftovers will hold up a day or two in a sealed container in the refrigerator. It may last a little longer but it's gone by day two around my house.


    Once patties are ready, make your salad, top with falafels and dressing.

    Enjoy!

    How do you like your falafels? I like to experiment and would love to hear any suggestions and ideas!

    Raw Veggie Chili with Taco Nut Meat

    Raw Veggie Chili with Taco Nut Meat

    This is a welcome meal after all the Thanksgiving festivities. Nothing like adding a raw meal into the mix and this was superb! I have to hand it to Ani Phyo for not being afraid to use spices, this packs great flavor with fresh produce to create a raw chili that I absolutely adore and am craving already. Adapted from this recipe 'Fresh Tomato Chili with Taco Nut Meat'. I will definitely be adding this to my to go lunches as well as my at home meals. Feel free to add/subtract any vegetable you wish. Get in as many as you can to really make this a well rounded garden chili recipe. Use as much or as little as you like of each ingredient. This could've really used a dollop of raw Sour Cream or this flavorful Lime Cilantro Cashew 'Sour Cream', it would've added that final touch.

    Raw Veggie Chili with Taco Nut Meat

    Mine didn't seem to come out with as much soupyness as Ani's photo shows. But never the less, this is so very fresh, hearty and delicious...simply great! Be sure to take a peek at her photo to see what I mean. You can find it here, just scroll down a bit. She also has other recipes you may be interested in. Her focus in on raw food only.

    Raw Veggie Chili with Taco Nut Meat

    Dice up your vegetables and fresh oregano (if using fresh)...

    Raw Veggie Chili with Taco Nut Meat

    Combine with seasoning, I also added in some cilantro as an after thought...

    Raw Veggie Chili with Taco Nut Meat

    Using a food processor, puree half of the mixture... 

    Raw Veggie Chili with Taco Nut Meat

    Bring back pureed vegetables to diced vegetables and combine. Then, onto your nut meat...

    Raw Veggie Chili with Taco Nut Meat

    Add nut meat ingredients to food processor and pulse just until crumbly...

    Fairly simple...just slicing, dicing, pureeing and pulsing. So fresh and good. I always feel the best after eating meals like this! Don't forget to add some raw Sour Cream or Lime Cilantro Cashew 'Sour Cream' on top for even more added deliciousness, or simply add some avocado slices to round it out even more.

    Raw Veggie Chili with Taco Nut Meat

    Vegetable Chili
    • 3 cups tomatoes (I used roma and grape)
    • 1 small red bell pepper (orange would be great too), diced
    • 1 large celery stalk, diced
    • 1/2 yellow or red onion, diced
    • 1 small zucchini, diced
    • 1 corn off the cob
    • 1 - 2 garlic cloves, minced
    • cilantro (as much as you like), chopped
    • 1 - 2 teaspoon chili powder, to taste
    • 1 teaspoon cumin
    • 3/4 teaspoon oregano, fresh or dried
    • 1/4 teaspoon sea salt, to taste

    Prepare vegetables and combine all ingredients in large size bowl. Place 1/2 or so of the mix into a food processor and blend until pureed. Return puree to diced vegetables and toss well.


    Nut Meat
    • 1 cup walnuts
    • 1 cup mushrooms
    • 1 tablespoon cumin
    • 2 teaspoons coriander
    • 1 teaspoon tamari, bragg's or nama shoyu, or 1/4 teaspoon sea salt, to taste

    Place all ingredients into food processor and pulse until crumbly. You don't want to over blend or it will be a paste.

    To serve, place vegetable chili in bowls and top with nut meat adding any additional garnishes you like. Serves four, or two generously. Store left overs, if there is any, in an air tight container in the refrigerator. Chili will last for five to six days. Nut meat will last up to two to three days, depending on the freshness of the mushrooms. Before eating let sit at room temp as it tastes best this way.


    Enjoy the freshness!


    CUBAN BLACK BEAN SOUP

    Cuban Black Bean Soup

    Was a nice weekend to do some cooking. I decided to make a black bean soup that I've been wanting to do. Black beans are a 'superfood' containing good amounts of fiber, protein and other trace minerals so important to good health. I want to incorporate more of them into my diet and this is great recipe for that. This is a dish that you will need to begin a day ahead but I have also included a shorter version for those who would rather have it within an hour. Although using the dried beans does take longer to put together, it's simple and so very good. It's especially good with the cashew cream's. I'm finding many uses for these. I have it pictured here with a Cashew Sour Cream, but feel free to use this Lime Cilantro Cashew Cream or Paprika Cashew Crema that would be just as well adding some great flavors.

    Cuban Black Bean Soup

    CUBAN BLACK BEAN SOUP

    Ingredients
    • black beans, 1 lb. dried or 3 cans (15 oz.), rinsed and drained (see notes)
    • 2-3 bay leafs
    • 4 garlic cloves, chopped
    • 1 tablespoon cumin
    • 1 -2 teaspoons smoked paprika
    • 1 large white onion, chopped
    • 2 stalks celery, chopped
    • 2 medium carrots, chopped
    • 1 medium red bell pepper, chopped
    • 2 medium tomatoes, chopped
    • 3 cups water or vegetable broth
    • juice of one orange + remainders
    • himalayan salt and pepper to taste

      Soak beans: The night before, rinse beans in colander with cold running water. Pick through and remove any broken or shriveled beans. Place beans in large pot with 5 or 6 cups water and cover to soak overnight.

      Cook: Next day, drain beans and rinse again. Place beans back in pot, add water, bring to a boil and simmer covered for 1 hour. Add in the remaining ingredients except juice of the orange. Bring to a boil, simmer for 40 minutes to one hour, or until beans and vegetables are tender, stirring occasionally. Add extra water as necessary.

      Puree: Once beans are tender, remove orange halves and bay leaves. Use an immersion blender to blend soup to desired consistency. I blended about 3/4, leaving some chunkiness. You could also use a food processor/blender (this method may take two batches to complete). Blending is optional, you may like it chunky as is. Add orange juice and cook another 5-10 minutes.

      Serve alone or over a bed of cooked buckwheat, farro or brown rice. Top soup with a dollop of Sour Cream, Lime Cilantro Cashew 'Sour Cream' or Paprika Cashew Crema. You may also like to top it with diced onion, tomatoes, bell peppers, avocado, jalapeno's, a squeeze of lime and cilantro. Serves four to six.

      Notes: 

      If you decide to use canned beans, be sure to drain and rinse them. Put ingredients in pot as in the instructions for Cook but only use 2 cups water to start, bring to boil and simmer for 40 minutes, or until vegetables are tender. Add more water as needed. Continue with step 3. You may also decide to saute your onions, celery, carrots & bell pepper first on medium high heat using oil of choice for about 5 min before you start with your canned beans.

      Enjoy!

      SPICY LENTIL DAL

      SPICY LENTIL DAL

      Anyone who gardens and has tomato plants, especially here in California, will know that our plants are blooming with tomatoes at the moment. I set out to use some of my tomatoes and incorporate some lentils into my recipe collection. Lentils are a great source of protein and fiber for any lifestyle, and they are a low fat food. Nice to make up for all the higher fat foods I eat frequently like avocados and nut butters, albeit they are good fats but still nice to balance it out. One cup of lentils boosts 18 grams of protein and 16 grams of fiber. Adding cooked tomatoes to any dish is also healthy as cooking increases the level of phytochemicals, such as lycopene to do it's magic. Altogether, this was a great place to use a few garden tomatoes and add a good dose of lentils to my day. I've made lentil dishes in the past but easily tired of them. This recipe is perfect, not overly spicy with nice hints of cinnamon, cumin and ginger. I could easily eat this on a regular basis and will next time double the recipe so I have plenty of leftovers. I encourage you to gather your ingredients, get in the kitchen and make yourself some spicy lentil Dal. If you don't care for spice, you can omit the cayenne altogether...but do trust me when I say it's very low heat. Happy chopping, dicing, cooking and most of all eating!

      SPICY LENTIL DAL

       A very easy ingredient list, you may have all of them on hand already. A simple, delicious dish to enjoy often!

      SPICY LENTIL DAL

      Dal is an Indian dish that's traditionally served over rice but I LOVED it on a bed of arugula. The nutty flavor paired beautifully while adding freshness. Even if you decide to serve this with a grain, I highly recommend adding in some sort of fresh leafy greens.

      SPICY LENTIL DAL

      SPICY LENTIL DAL

      Ingredients
      • 1 cup red lentils (if using green/brown, see notes)
      • 4 cups water or vegetable broth
      • 1 tablespoon olive or grapeseed oil or 3 tablespoons water (for water saute)
      • 2 medium yellow onions, diced
      • 2 cloves garlic, minced
      • 1 tablespoon ginger, minced
      • 3-4 medium tomatoes, diced or 1 can (28oz) diced tomatoes, drained
      • 1 teaspoon cumin
      • 1 teaspoon coriander
      • 1 teaspoon turmeric
      • 1/4 teaspoon cinnamon
      • 1/4 teaspoon cayenne pepper
      • 1/2 teaspoon mineral salt, or to taste

      Place lentils, liquid, and dry spices in a large pot, cover, and bring to boil over medium high heat. Reduce heat to low and simmer 20 minutes, stirring occasionally, until lentils are tender, not mushy. 

      Meanwhile, saute onions, ginger & garlic in oil over moderate heat until onions are translucent, about 5 minutes. Add tomatoes and stir-fry 4-5 minutes. Set aside. 

      When lentils are tender, stir in onions and tomato mixture, cover and simmer 5 minutes. Serve over arugula, brown rice, whole wheat pasta or as is with some of your favorite bread.

      Notes:

      I happen to love this with fresh greens, it adds so much freshness to the dish. Even if you serve this with a grain, fresh arugula or cilantro will do wonders.

      If you happen to not have a spice or two you will still have a flavorful dish. Adjust ingredients to suit your taste.

      If using green or brown lentils, cook about 45 minutes, or until tender. 

      If two medium onions is too much onion for you, one will do fine.

      Enjoy !

      Back to top