ROASTED VEGETABLE MISO SOUP + SOBA NOODLES

ROASTED VEGETABLE MISO SOUP + SOBA NOODLES

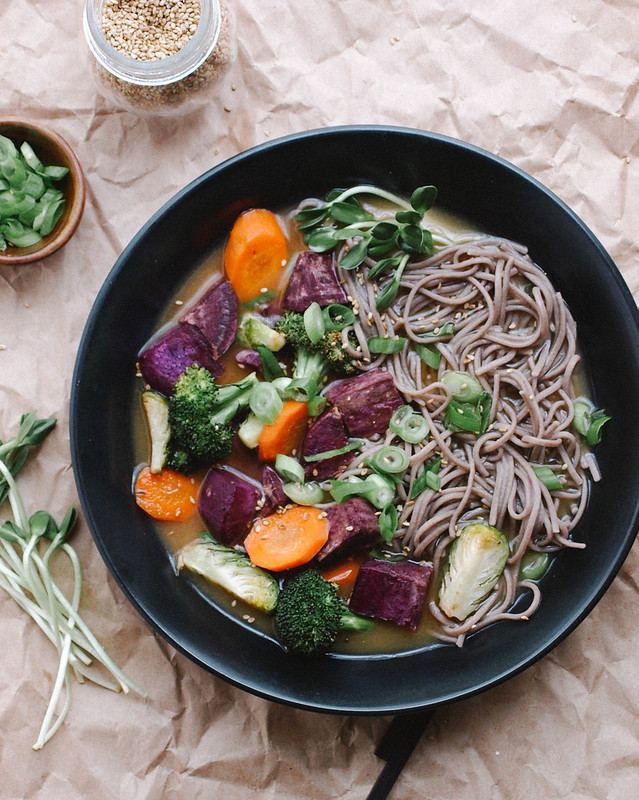
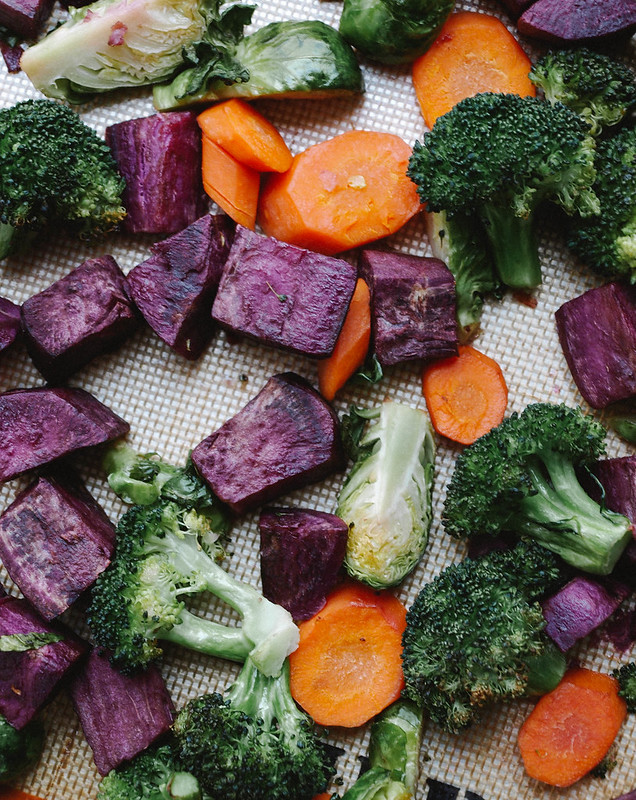
Soups really have been a big part of my winter meals, although I've been really loving a few new vegetables bowls that I'll be sharing soon! They're so easy to throw together and will last me a good day or two. This soup happened to come about as a combination of ingredients I've never had together. It was something I threw together on a whim. I shared my first attempt here (this one looks better) and thought it was ultimately good enough to make it to the recipe collection. So here it is! It fits my criteria for being simple to pull together, has versatility and is fairly well-balanced. Now, I know that roasting vegetables and serving them in soup is not really typical but I'll be darned if it didn't taste great and make my life simple. I gently roasted them just until softened, about 20 - 25 minutes. It helps to cook your vegetables faster if they're chopped on the smaller side. You don't have to use all the vegetables I have here either, maybe just 3 of the 4 opting between the broccoli or brussels sprouts. I wasn't sure what direction I was going to go in, using the broccoli or brussels sprouts and decided to just add them both using 4 vegetables. Suits me perfectly! The miso broth is super simple. I'm in love with red miso at the moment (it's robust & flavorful) but you can use your favorite. You may even like to add a tablespoon or so of tahini to the broth for something different. Making the miso broth as suggested with keep the integrity (health benefits) of the miso paste at it's highest. The soba noodles are easy too and cook pretty much the same as any other noodle. Add some freshness to the soup with sliced scallions, a few greens and cilantro if you have it on hand. A dash (or two) of sriracha isn't a bad idea either! And if you feel the need for some added protien, add a serving of cubed organic tofu (firm or extra firm). If you have a few veggies left over, save and serve them with a grain like rice or quinoa and a protein like lentil or beans (or make more soup!). Enjoy this soup....it's filling, flavorful and easy. Win, win, win!
ROASTED VEGETABLE MISO SOUP + SOBA NOODLESROASTED VEGETABLE MISO SOUP + SOBA NOODLESROASTED VEGETABLE MISO SOUP + SOBA NOODLESROASTED VEGETABLE MISO SOUP + SOBA NOODLESROASTED VEGETABLE MISO SOUP + SOBA NOODLESROASTED VEGETABLE MISO SOUP + SOBA NOODLES

ROASTED VEGETABLE MISO SOUP + SOBA NOODLES

Ingredients
  • 1 purple sweet potato (or any color), peeled and cubed 
  • 2 carrots, sliced
  • handful brussels sprouts, quartered
  • handful broccoli florets
  • drizzle of sesame, olive or grapeseed oil
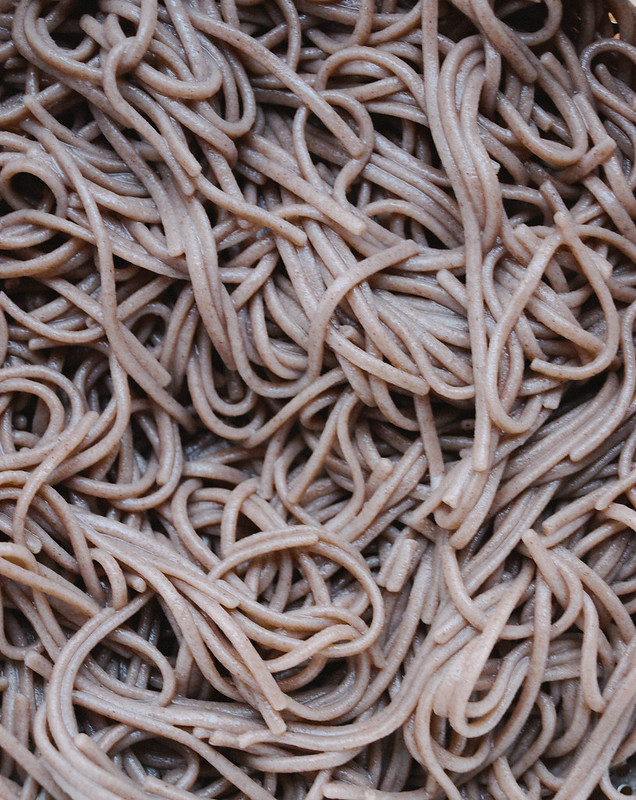
  • 1 package 100% soba noodles
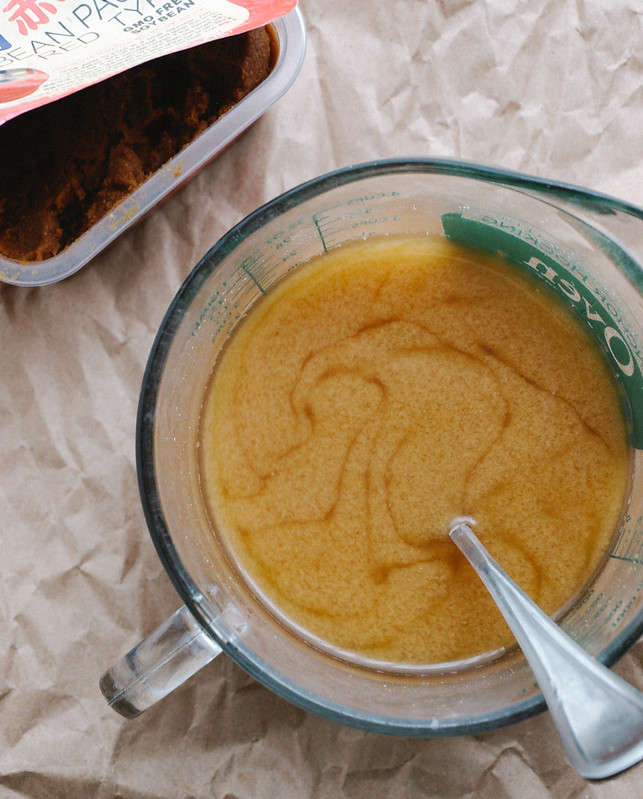
  • 5-6 tablespoons miso (I used red, use your favorite)
  • 4 cups water
garnish
  • 2 scallions, sliced
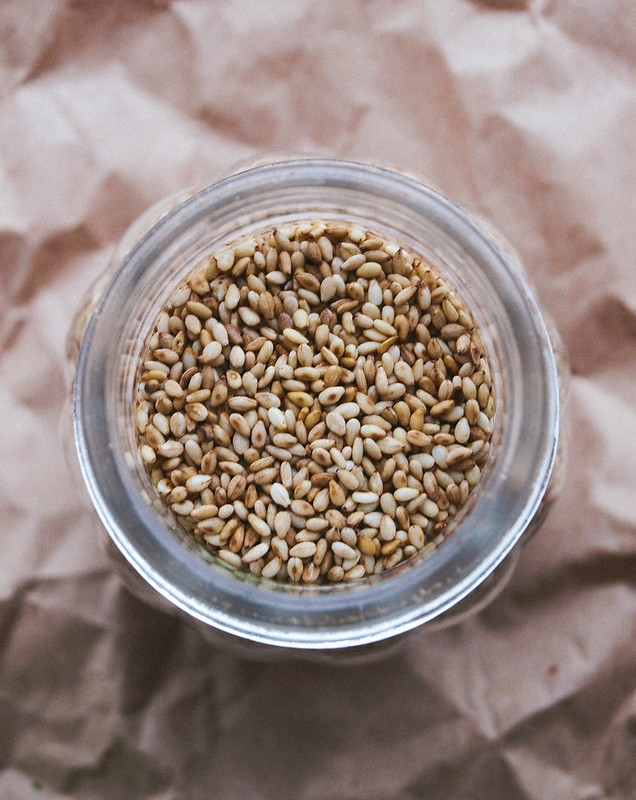
  • toasted sesame seeds (raw black and/or white are great too)
  • handful of shoots, sprouts or greens and/or cilantro

Preheat oven to 400 degrees F.

Prepare vegetables and place on a large rimmed baking sheet that's lightly greased or lined with a silpat or parchment paper. Add a drizzle of oil and toss well. Add a sprinkle of salt over top. Place sheet on the middle rack and cook for 20-30 minutes stirring every 10 minutes, vegetables are done when just fork tender.

Cook your soba noodles according to the package directions. Be sure to use a large pot filled just under half way when cooking soba noodles. Once the noodles have come to a boil, the water tends to foam up quickly and overflow (ugg, I've learned from experience). Pay attention and reduce the heat as needed to prevent the water from boiling over while keeping the water at a gentle rolling boil.

For the miso broth, heat your water until nicely warmed, but not boiling, in a small pan or use the pot the noodles were cooked in. Remove from heat, add miso and mix until miso is dissolved. For me, I fill my 4 cup measuring cup using my hot water dispenser, add the miso and mix (works great for me!). 

Add noodles and vegetables to your serving bowl, top with broth and add a few of the garnishes. Some other optional garnishes would be a dash or two of sriracha or red pepper flakes.

Serves 2-3.

Notes:

Try adding a tablespoon or so of tahini to the broth for something different.

No need to use all these vegetables, three is enough. You may opt to use either the brussels sprouts or broccoli. My Vegetarian Flavor Bible didn't suggest that broccoli was a match for miso, but I liked it and it's available all year long. You can also try using butternut or kabocha squash in place or along with the sweet potato. I used butternut squash in my first attempt and it was delicous!

The smaller you cube your vegetables the quicker they cook. 

Add a serving of cubed organic tofu (firm or exta firm) for added protein.

For the noodles, it's 4 servings per package but I can easily eat half a package myself which is why I suggest this serves 2-3.


CREAMY BROCCOLI + RED LENTIL SOUP


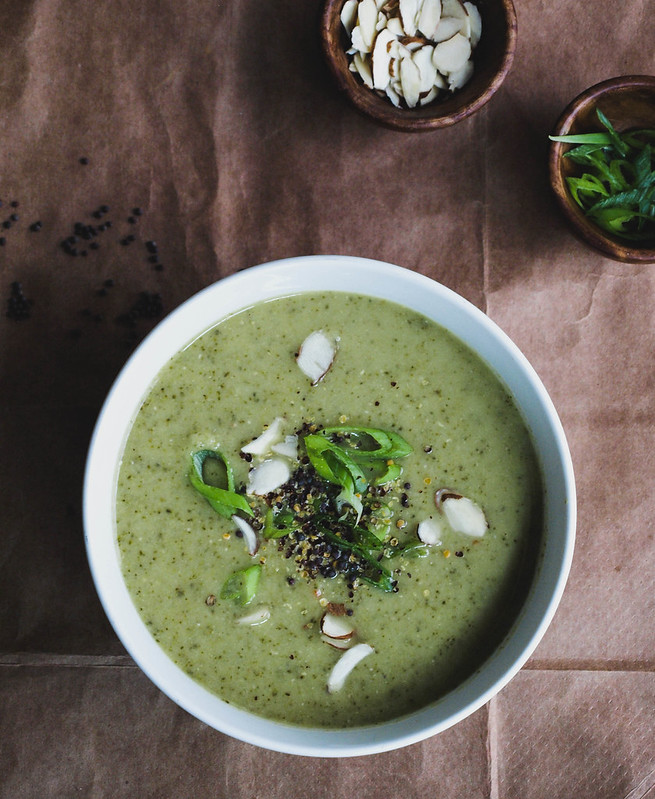
I had a bunch of broccoli that needed to be used up and thought this would be a perfect time to add a broccoli soup to the recipe collection. Seeing that my last soup, Butternut Squash + Red Lentil Soup, was so good with the addition of lentils, I decided to add them to this soup as well. Lentils add bulk, heartiness and boost the nutritional profile by adding protein and good carbohydrates. They cook fast too so you can pull this recipe together in about 40 minutes from start to finish. It's also a one-pot meal which I love (less dishes is always a plus)! I was inspired by both these recipes from 101 Cookbooks and Green Kitchen Stories. Both simple and delicious! I especially love the Savory Corn Biscuit recipe included in the GK Stories recipe, which I had a chance to make. I made half a batch and used different shapes, a flower and a circle. Because I didn't have the non-dairy yogurt on hand, I subbed unsweetened almond milk. They were still delicious without the yogurt, so easy to make and a perfect accompaniment to the soup! 

On a side note... 

Time is flying and the holidays are almost here. If you haven't finished your holiday menus, take a peek at my Vegan Thanksgiving & Christmas Recipe ideas on pinterest and follow along if you like. During mid-October through December of every year you'll find this link at the top of every page. All handpicked and include a note about the recipe or suggestions when needed. Check the board often, it will continue to grow as I find new recipes. Happy holidays and happy pinning! :)

I also updated a couple soup recipes over the last week or so. If you need some more soup inspiration take a look at these: Roasted Fennel & Potato Soup, Roasted Butternut Squash Soup, Parsnip & Split Pea Soup: Slow Cooker or Stove Top and this Curry Lentil & Greens Soup. Each one is delicious...check em out!

CREAMY BROCCOLI + RED LENTIL SOUPCREAMY BROCCOLI + RED LENTIL SOUP

We know broccoli is a nutrient dense vegetable. Rich in fiber, vitamin k & C and folate, its deep color holds many health benefits. I often eat it simply steamed with a dollop of hummus and a little sambal oelek. Once mixed, the combination is creamy, slightly spicy and delicious! Having it here in a soup is a nice change up, especially with soup season under way.

I love red lentils and their ability to blend easily in pureed soups. They add fiber, protein and cook up very light as to not alter the color of the soup as much as if using green/brown lentils. I would suggest sourcing and keeping red lentils in your pantry at all times. They are reasonable at about $2 to $3 a pound and will make dishes more nutrient dense when added. 

CREAMY BROCCOLI + RED LENTIL SOUP

CREAMY BROCCOLI + RED LENTIL SOUP

Ingredients
  • 1 tablespoon coconut, grapeseed or olive oil or 3 Tbsps water for water saute
  • 1 medium onion, diced
  • 3 garlic cloves, minced
  • 1/4 teaspoon red pepper flakes
  • 1 cup red lentils
  • 2 - 3 large heads broccoli, cut into florets (stalks chopped ok too)
  • 6 - 7 cups water or vegetable broth (or combo)
  • 1 can coconut milk, optional
  • mineral salt, to taste

to serve
  • mustard seeds, crushed (I used black)
  • 1 - 2 scallions, sliced
  • slivered almonds

In a large dutch oven or stock pot, heat oil/water over medium heat, add onion and cook until translucent, about 5 minutes. Add garlic and red pepper flakes, cook another minute or until fragrant. Add lentils, broccoli, broth/water and optional coconut milk. Turn heat to high and bring to a boil, using the back of a fork or spoon press the broccoli down as much as you can to cover with liquids. Cover pot with lid, reduce heat to low and simmer for 15 - 20 minutes. Soup is done when lentils are tender. Taste soup, add salt as needed. Using an immersion blender puree until desired consistency. Or once cooled a few minutes, use a food processor/blender to puree (this method may take two batches to complete).

Serve in individual bowls topped with mustard seeds, scallions and almonds. Pairs great with crusty bread or biscuits of choice. If you have one on hand, a squeeze of lemon will add some brightness. 

Notes: 

If using pre-cut packaged broccoli, use about 1 1/2 - 2 pounds or 8 - 10 cups.

You may feel there is not enough water, and most likely all the broccoli won't be covered by the liquids at first. As it cooks it will soften and sink down, and any that doesn't will steam and become soft. If you like you can push the broccoli down half way through cooking. If adding a while can of coconut milk, start with the lower amount of liquids adding more as needed.

If you don't use veggie broth or have run out of an onion and/or garlic. Try adding 1 teaspoon each of garlic and/or onion powder.

I recommend sticking with red lentils but you can use green/brown lentils if needed. Cook same as above but simmer for 30 - 35 minutes, or until lentils are tender. Your soup may look a bit muddy but flavor will be good.

Use full-fat or light coconut milk. If you'd prefer, use up to 1 cup or so of unsweetened almond milk. 


KIMCHI BREAKFAST TACOS

KIMCHI TOFU SCRAMBLE TACOS

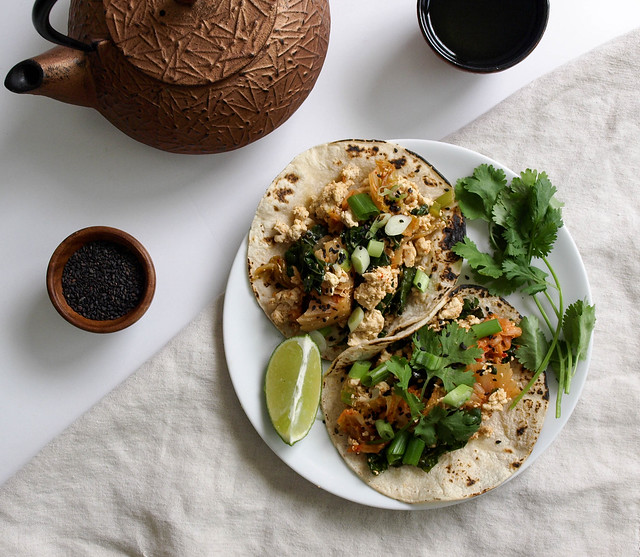
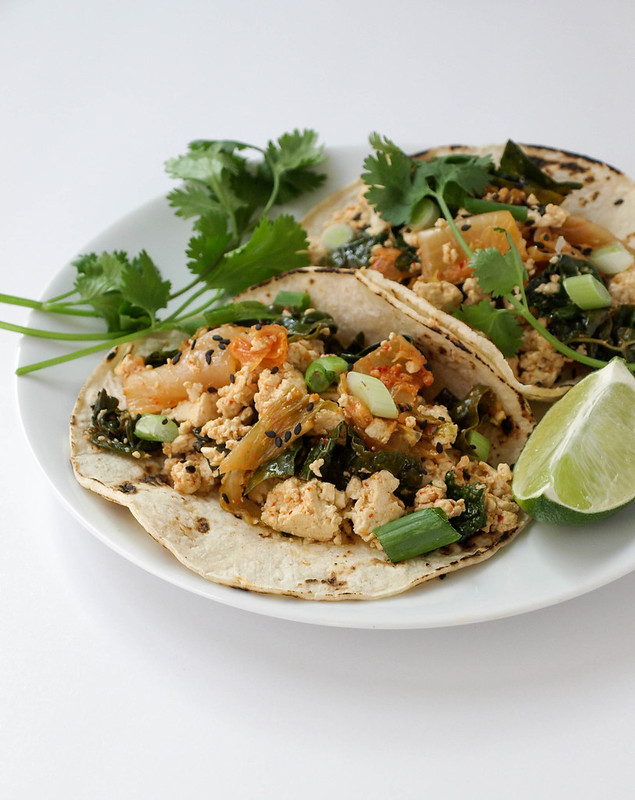
Now that kimchi has been added to the recipe collection, it's time to experiment with this spicy, tangy mixture. What better way than to add this spiciness to a tofu scramble. Tofu at times can use a little help, kimchi is a perfect addition and will whip that tofu into shape. This is my vegan version of a recipe I saw for a kimchi scramble using eggs. My tofu interpretation came out amazing and I'm very happy with the results. If you're a kimchi lover and tofu appreciator, than I think you'll agree! I first made this recipe using spinach (which tasted great, of course!) but ultimately decided to use kale here as we try to use the most nutrient dense foods possible whenever we can. I loved the kale, it cooks down beautifully adding a nice pop of green to the scramble. I've kept the seasoning super simple, it doesn't need much as the kimchi will shine through. Best to use your most fermented batch of kimchi, the ripened flavors will work best when cooking with kimchi. These tacos can be eaten any time of day. It pairs great with green tea. If having these for lunch or dinner and you're a beer drinker, I think an Asian or Mexican beer would be great too. Beers like Kirin Ichiban, Sapporo, Corona and Dos Esquis are vegan friendly. To see if your favorite beer or alcohol is vegen, check this great guide: Barnivore. Whatever your drink of choice is, you're going to love every bite of these kimchi tacos! 

KIMCHI TOFU SCRAMBLE TACOS
KIMCHI TOFU SCRAMBLE TACOSKIMCHI TOFU SCRAMBLE TACOS
KIMCHI TOFU SCRAMBLE TACOS

All cooked and ready to go. I could eat it just like you see it above...so good! But we're making tacos here, so fill your warmed tortillas (I used corn), you may like to use two if your mixture is very wet. Top with cilantro sprigs, scallions, sesame seeds and a squeeze of lime. Enjoy to the fullest!

KIMCHI TOFU SCRAMBLE TACOS

KIMCHI TOFU SCRAMBLE TACOS


Ingredients
  • 1 tablespoon sesame seed oil, optional
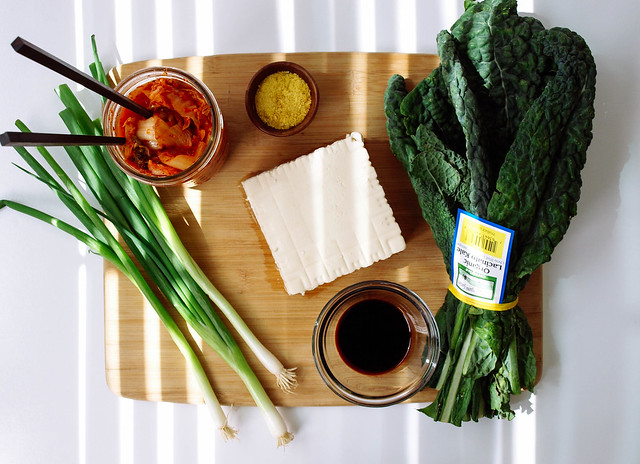
  • 1 block (14 - 16 oz) organic tofu, firm or extra-firm
  • 4-5 large leaves of kale, center stem removed and julienned
  • 3 scallions, sliced (divided)
  • 1-2 tablespoons tamari
  • 1/2 teaspoon garlic powder
  • 1-2 tablespoons nutritional yeast, optional
  • 1 cup kimchi
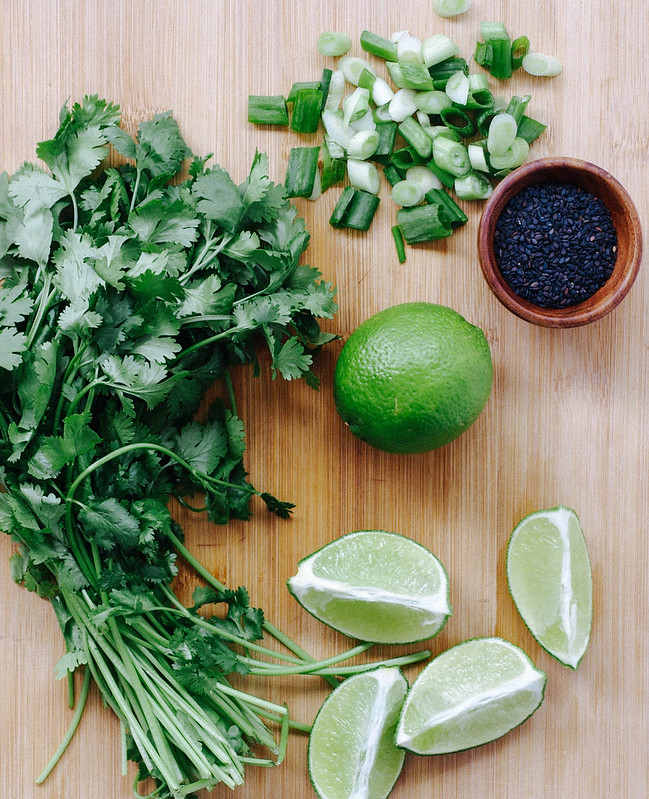
  • cilantro sprigs, for garnish
  • sesame seeds (toasted, black or white), for garnish
  • lime wedges, to serve
  • 6 corn or flour tortillas, to serve

Measure out 1 cup kimchi and let come to room temp.

Open and drain tofu. You may like to give it a quick press to remove moisture if not using a vacuum packed brand. 

In a large wok/skillet, heat oil over medium high heat. Add tofu, crumbling between your fingers, cook, stirring occasionally, for about 2 -3 minutes. Turn heat to medium, carefully add tamari and garlic powder, give a good stir. Add kale and 2/3 - 3/4 of the scallions, cook, stirring occasionally until kale becomes soft and wilts, cover partially to help with the process, about 5 - 7 minutes. Lastly, add the nutritional yeast and kimchi, mix and cook just until kimchi has warmed through, about 1 minute or so. We don't want to overcook the kimchi or it will destroy some of the health benefits of the probiotics. 

Heat your tortillas. I like to heat mine carefully over a gas burner until lightly charred in spots. Use your preferred method.

Layer your tortillas with the scramble mixture, add a few sprigs of cilantro, some of the reserved scallions, a sprinkle of sesame seeds and a squeeze of lime. 

Serves 3

Notes: 

Use spinach in place of kale.

Use ripened kimchi, the flavors will be more pronounced. You may prefer fresher kimchi, in which case use your favorite.

You may like to chop your kimchi a bit before adding it to the tofu. I kept it as it was but it's an optiona.

Try adding a drizzle of this Garlic Miso Cashew Sauce, or for extra heat try the Dynamite Sauce or Sriracha Cashew Cream. You can control the heat when adding the spice to each of these condiments. 


KIMCHI

KIMCHI...Freshly packed

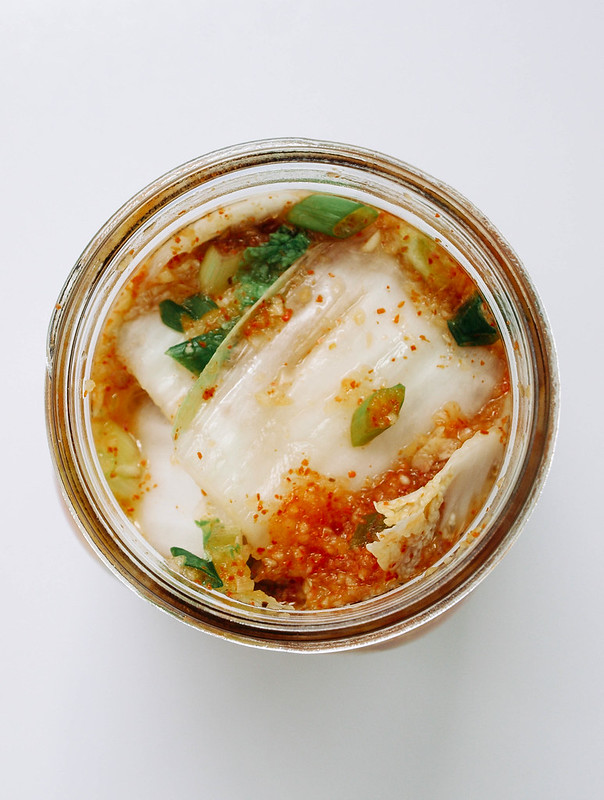
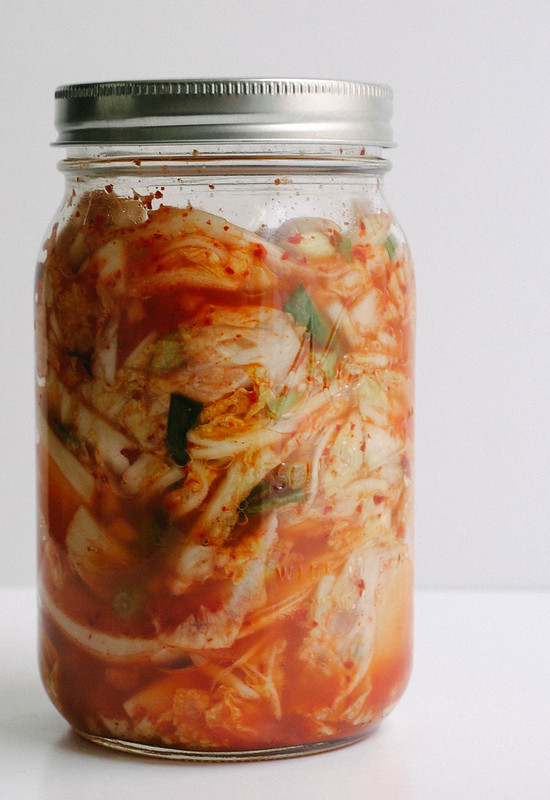
Welcome to the world of Kimchi! This tangy, spicy dish is a staple in the Korean culture and is typically eaten with every meal. In fact, kimchi is their national dish. Once you become accustomed to its unique characteristics, you may find yourself hooked! Kimchi is a mixture of vegetables and spices that go through a fermentation process, in our case we'll be using cabbage as our base. Fermenting foods have long been known for their health benefits. Foods like kimchi, kombucha, sauerkraut, pickles, miso and tempeh are probiotic powerhouses. The fermenting creates good bacteria which work directly in the gut to balance and regulate a variety of bodily functions. It can help with IBS, boost your immunity, aid in weight loss and even promote better skin. With kimchi being so simple to make, it's easy to add this beneficial mixture to your weekly meal plans. 

My first  experience with kimchi was with a jar I picked up at a local grocery store labeled Pickled Planet. I fell in love with the spicy flavor. I also have an affinity for all the ingredients listed on the jar and set out to make my own using the list as my guide. Basically it's cabbage, apple, green onion, red pepper, salt, garlic & ginger. After researching I found how kimchi recipes vary. I'll be playing around with different versions and sharing my experience here as I do. It's very easy to make and just takes patience to get through the first day or two. In the last couple weeks, I've tried 2 different spice blends, both delicious and noted below. I've also used different style cabbages, all great. I've even added shredded carrots but will save that for another recipe. Kimchi is a new addiction for me. Its spicy, pungent flavor and versatility keeps me coming back for more. If you've never tried kimchi, I hope this will inspire you to get in the kitchen and give it a try, or pick up a ready-made vegan version and enjoy asap! 

KIMCHIKIMCHIKIMCHI

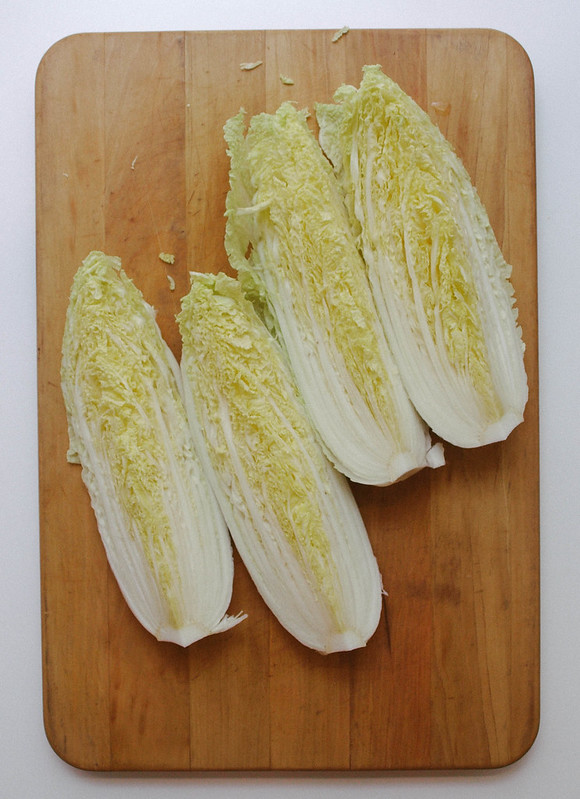
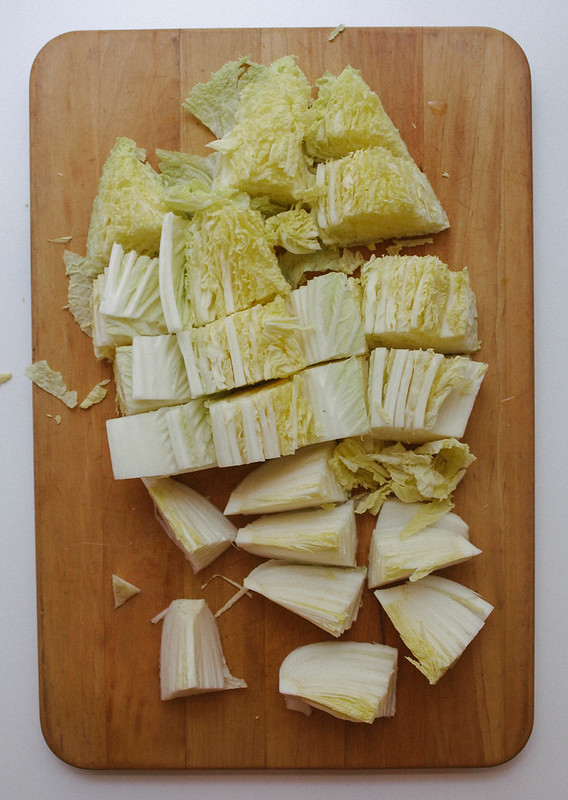
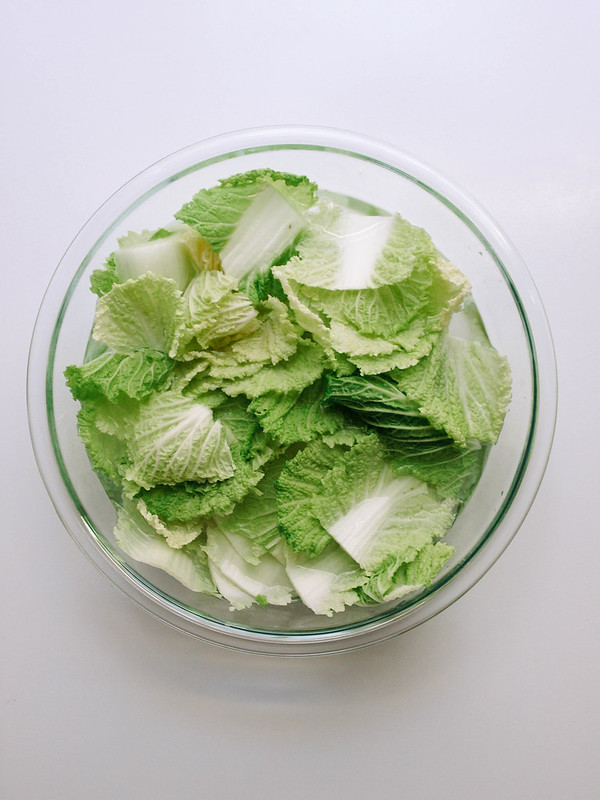
First, quarter your cabbage and slice laterally into 2" chunks. Cabbage will shrink a bit more during the fermentation process so no need to chop it too small. But you may consider slicing the pieces with thick stalks (mainly the pieces towards the bottom), slicing them in half will do fine. Here I used Napa cabbage as it is the most traditionally used cabbage but you can use green or savoy with excellent results, you may even find you like one of these better.

KIMCHIKIMCHIKIMCHIKIMCHI

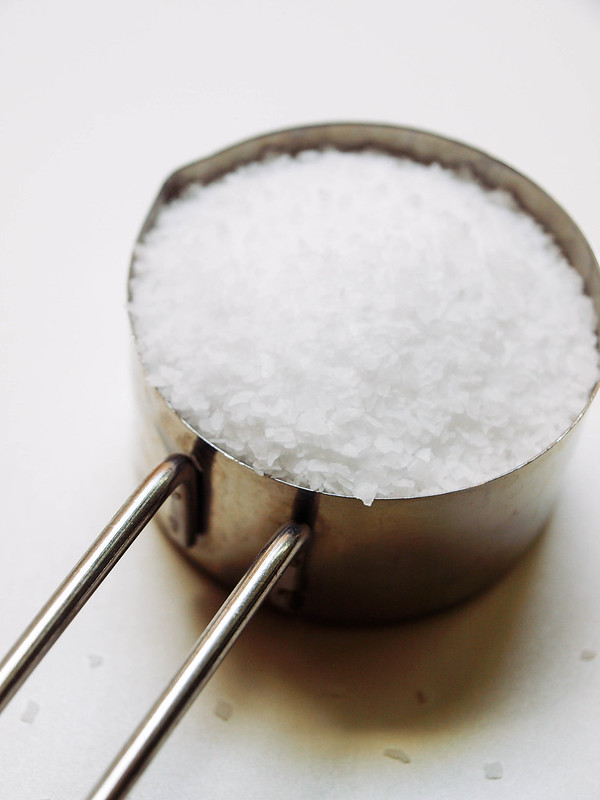
Next is the soaking of the cabbage in salt water, this will help draw moisture from the plant cells causing the leaves to wilt. Soaking the cabbage in salt water will move the preperation along a lot faster than than other methods used, it is my preferred method. For your salt, stick with using kosher, pickling or other course salts like sea or mineral salts that do not contain iodine. Iodine, with its antimicrobial properties, may interfere with proper fermentation. Place cabbage in a salted water bath, cover with dish and place weighted object on top to submerge the cabbage, let soak for at least 2 hours, up to 12 if you like but I find 2 hours is plenty.

KIMCHIKIMCHI

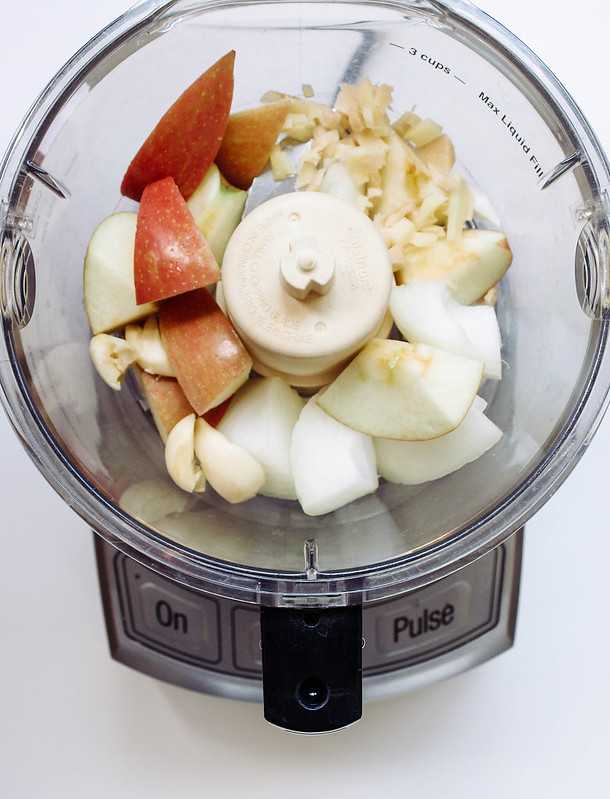
Puree the apple, onion, ginger and garlic making a sweet and zesty mixture. The sugar from the apple will help in the fermentation while adding a hint of sweetness. You can also use a pear. Some recipes call for a teaspoon or two of sugar in place of the apple (I will save that method for another kimchi recipe). I like the thought of using an apple but if you're in a pinch without an apple in sight, use 2 teaspoons of organic pure cane sugar, coconut sugar or sugar in the raw....just the puriest sugar you can find. You may like to add a bit of water to the mix as well, about 2 - 3 tablespoons. 

KIMCHI

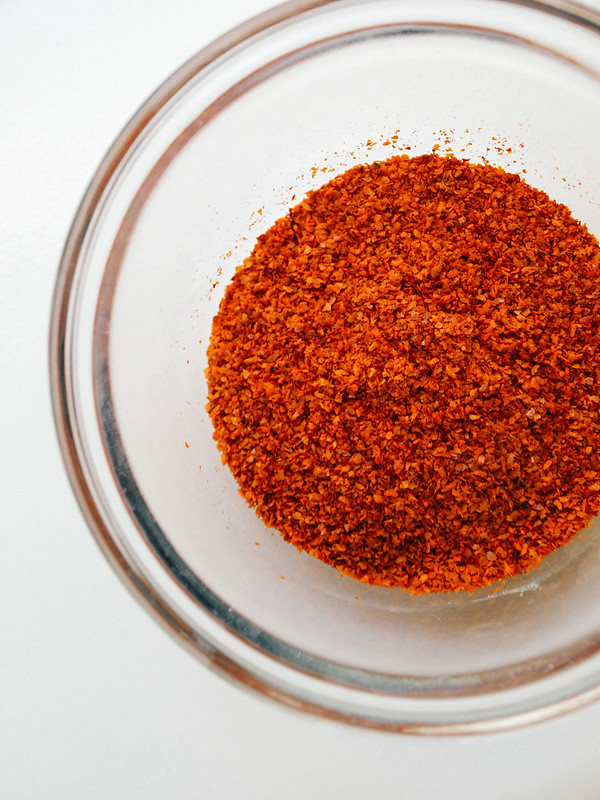
For the spice, you'll want to source out Korean red pepper powder or flakes known as gochugaru. You can find it at Asian grocery stores or online. I just tried this one from Mother In Laws Kimchi Korean red pepper flakes and thought it had an nice flavor. The peppers are not overly spicy, but I do find that the spiciness will intensify as the kimchi ages. I've also replaced the korean red pepper and used a mix of cayenne pepper and sweet Hungarian paprika, using 1 tablespoon each, and it was delicious as well.

KIMCHIKIMCHIKIMCHI

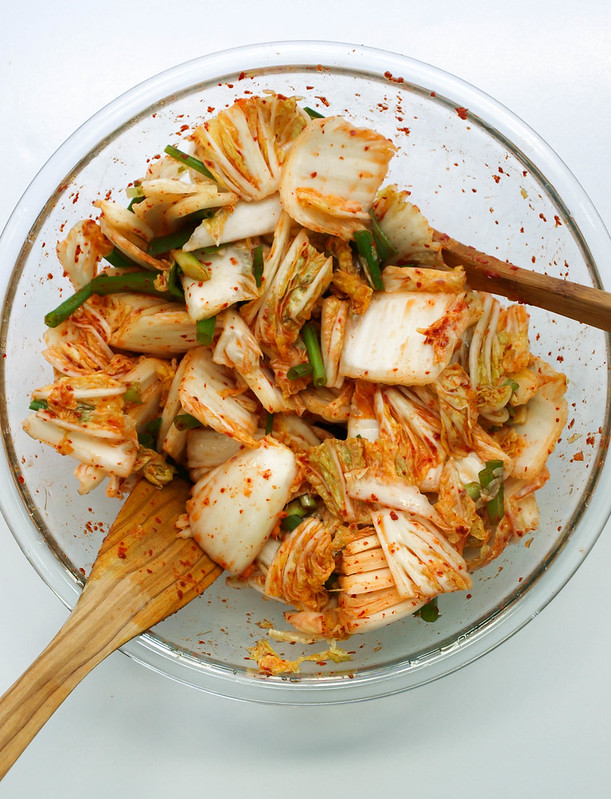
Make your spice mixtures and combine with cabbage and green onions, mix well to coat. Some use their hands (gloves recommended if you do), I used wooden spoons. Pack your mixture into glass jars or containers with a lid, leaving a little room at the top and cover. Check periodically for the next 24 - 36 hours. Move to refrigerator, kimchi will keep for at least a month, maybe 2. 

KIMCHIKimchi

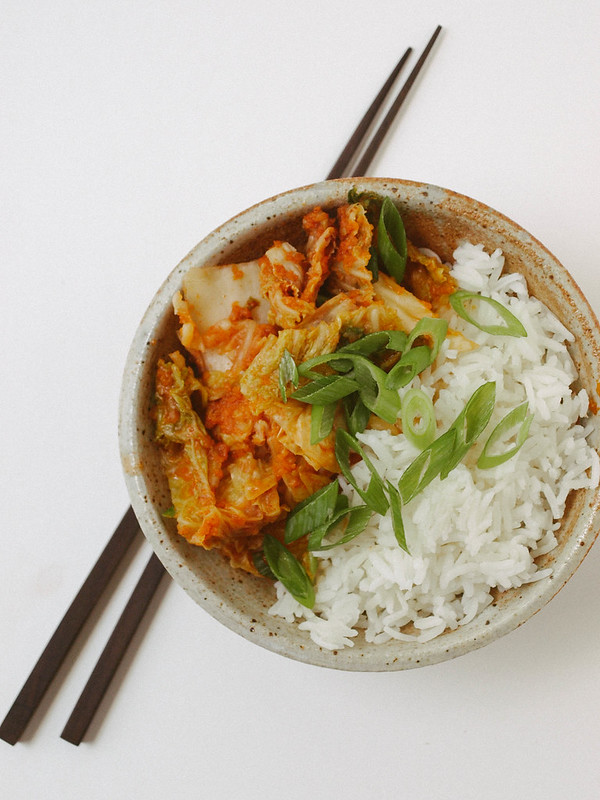
Kimchi can be served a number of ways. It's great as a simple dish with rice, a little cubed tofu would balance the meal out nicely. I have a Kimchi Tofu Scramble Taco recipe coming up next which tastes amazing! You can also be inspired by these tasty recipes: Kimchi Steamed Buns, Brussels Sprout Kimchi Tacos, Kimchi Fried Rice and Kimchi Tofu Summer Rolls. I have a few other ideas in mind as well so stay tuned...

KIMCHI

KIMCHI

Ingredients
  • 1 medium Napa cabbage, about 2 lbs (savoy, green or any combo works too)
  • 1/4 cup kosher, sea salt or other course salt 
  • 6  cups water
  • 3/4 sweet apple (I used fuji), chopped
  • 1/2 small white onion, chopped
  • 1 1/2 inch ginger, chopped
  • 1 - 2 cloves garlic
  • 3 tablespoons Korean chili powder (gochugaru) or 1 tablespoon each cayenne & Hungarian paprika
  • 3 - 4 scallions (green onions), sliced 1 inch

Preparing Cabbage: Quarter cabbage and chop laterally into about 2 inch pieces. Place cabbage in a an extra large bowl or pot. Combine salt with 2 cups of luke warm water, stir to dissolve salt. Pour salt water over the cabbage and add remaining 4 cups, stir to mix. If you can, place a plate or circular baking dish of sorts on top to submerge the cabbage (I used a pie dish), place something with a good amount of weight on top to hold down if necessary (it's not completely necessary but will help to evenly wilt the cabbage). Give cabbage a good mix every now and then. Let set for 2 hours, up to 12 if you like. I found that 2 - 4 hours was enough and didn't see much change between the two times.

Make your seasonings: While cabbage is soaking, combine apple, onion, ginger and garlic in food processor/blender and process until fairly smooth.

In a small bowl, mix the chili pepper with a small amount of water to make a wet paste. You can just as easily blend it with the apple/onion mixture adding a couple tablespoons of water as well.

Mix everything together: Once cabbage is ready, drain water, reserving 1/2 cup, and rinse well. Place cabbage back in large bowl, combine with the scallions, apple/onion mixture and chili paste. Mix well to coat all pieces. Either use your hands (with gloves on pref to protect from the chili pepper) or simply use wooden spoons to toss everything.

Packing: Place the kimchi in glass jars or containers with lid, pack down the best you can to close air pockets and leave about an inch at the top for air and gases. Top with remaining juices, add reserved brine if needed to cover vegetables.

Fermenting: Let kimchi set at room temp (or in a cool place like a pantry or closet if weather is extremely warm) for 24 - 36 hours. After 24 hours, open kimchi and pack the mixture down with a spoon (the cabbage will have likely shrunk and you'll have more liquids). You may notice it bubbling, this is perfectly normal as the kimchi is fermenting. As your kimchi ferments the flavors will develop, taste every 24 hours and place kimchi in the refrigerator once you're happy with the taste and to slow fermentation, usually after 48 - 36 hours. It should be tangy, spicy and slightly sweet. After moving to the fridge, it's best used within a month, maybe two.

Makes about 3 - 4 cups.

Notes:

Practice makes perfect with kimchi. You may find you like it more or less spicy. After a few tries you'll find the perfect mix to suit your taste. Also, how fermented you like your kimchi will take practice as well. The weather will also play a role in how fast/slow your mixture will ferment. Higher temperatures will progress fermentation while cooler will slow it down.

If you're in a pinch without an apple in sight, use 2 teaspoons of organic pure cane sugar, coconut sugar or sugar in the raw....just the puriest sugar you can find. You may like to add a bit of water to the mix as well, about 2 - 3 tablespoons. 

You can also enjoy kimchi fresh right after you mix it and store it straight in the fridge. You may like to experiment by putting half the recipe in the fridge and the other half in the pantry to ferment & sour to see which flavor is your favorite.

Optional ingredients for color and variation: carrots and/or daikon radish (grated or julienned), about a 1/2 cup of each. If using these, add to cabbage when mixing scallions and wet mixtures together.

If using savoy or green cabbage, quarter cabbage, remove core and roughly slice.

If you don't have glass jars, plastic containers with lids will work just as well. If you have too much room, more than and inch, place plastic wrap over top but sinking it close to the surface of the kimchi and cover with lid.


I'd love to see your noms...
#thesimpleveganista


SUGAR SNAP PEA & SOBA NOODLE BOWL + MISO SAUCE

SUGAR SNAP PEA & SOBA NOODLE BOWL + MISO SAUCESUGAR SNAP PEA & SOBA NOODLE BOWL + MISO SAUCESUGAR SNAP PEA & SOBA NOODLE BOWL + MISO SAUCE

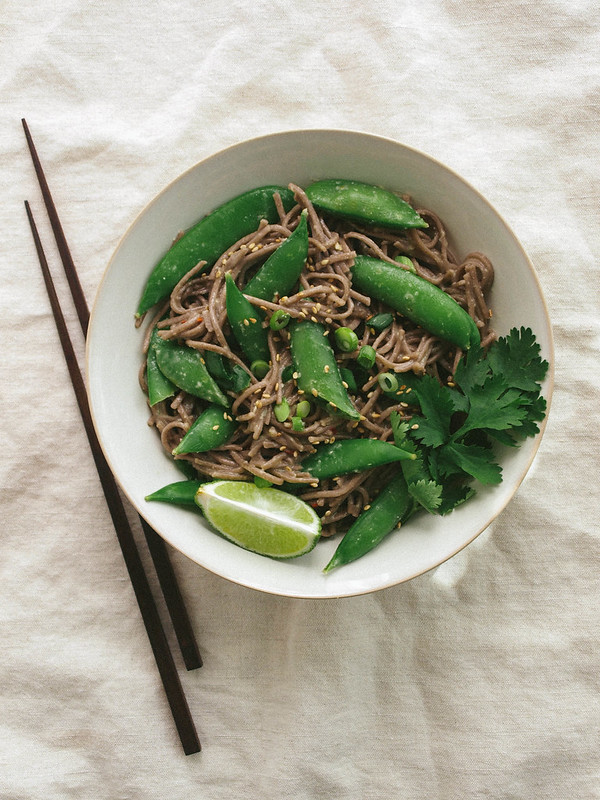
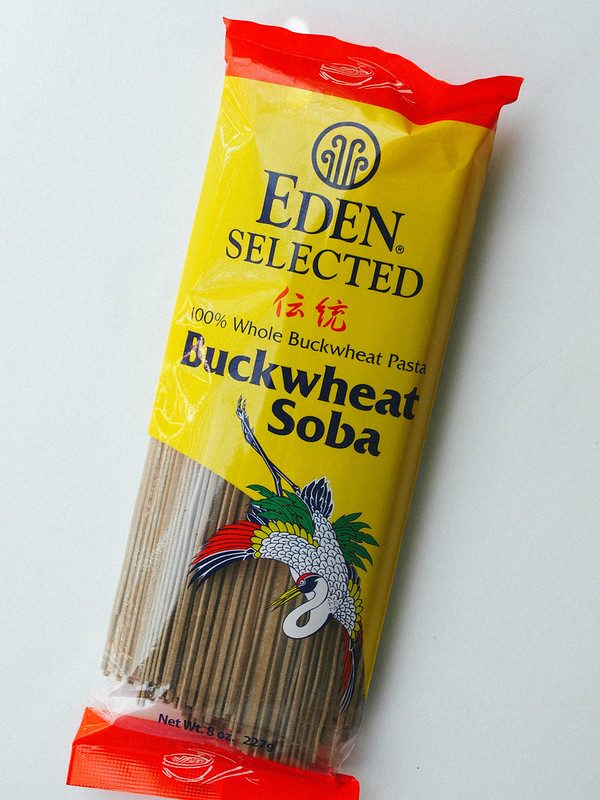
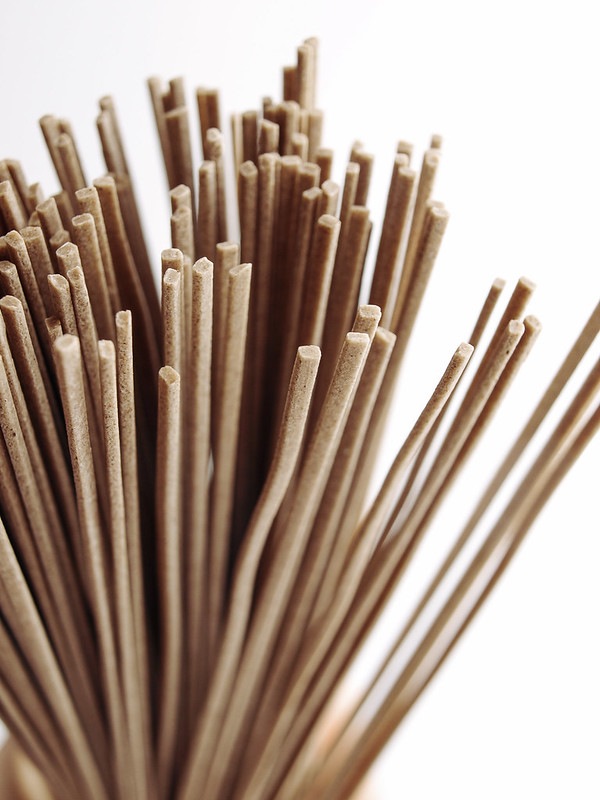
Soba noodles have become a favorite of mine. I love the 100% buckwheat noodles from Eden Foods. They have a nutty flavor with a somewhat chewy texture. Each serving contains 6 grams of protein and 3 grams of fiber. I love that they can be served warm or cold making them a versatile noodle choice. They are gluten free using only buckwheat flour, unlike other brands of soba noodles which use a combination of wheat and buckwheat flours. They tend to be a bit more expensive than the mixed flour soba noodles. I happen to see these noodles as a tradeoff for the more expensive items that I don't purchase anymore such as meat, poultry and dairy. Keeping that in mind, the extra expense doesn't bother me. I hope you may have the same perspective as I do when picking and choosing your plant based grocery items.

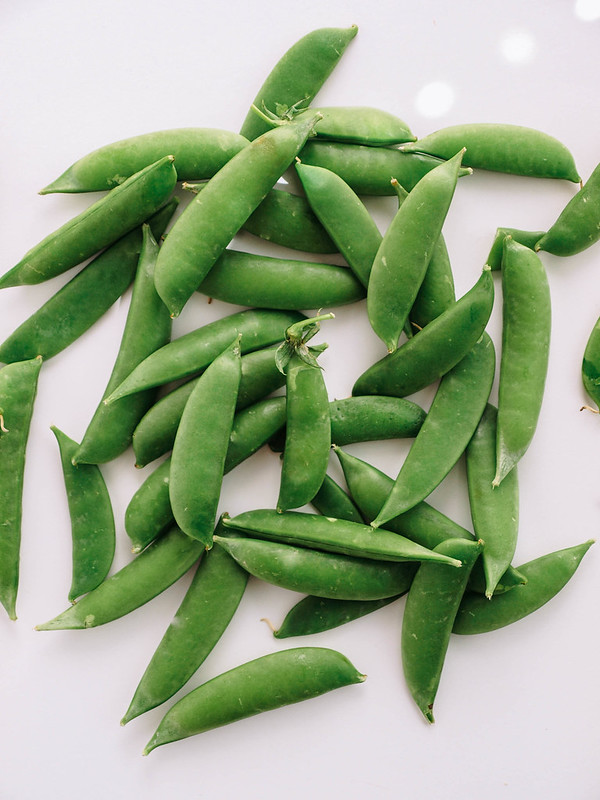
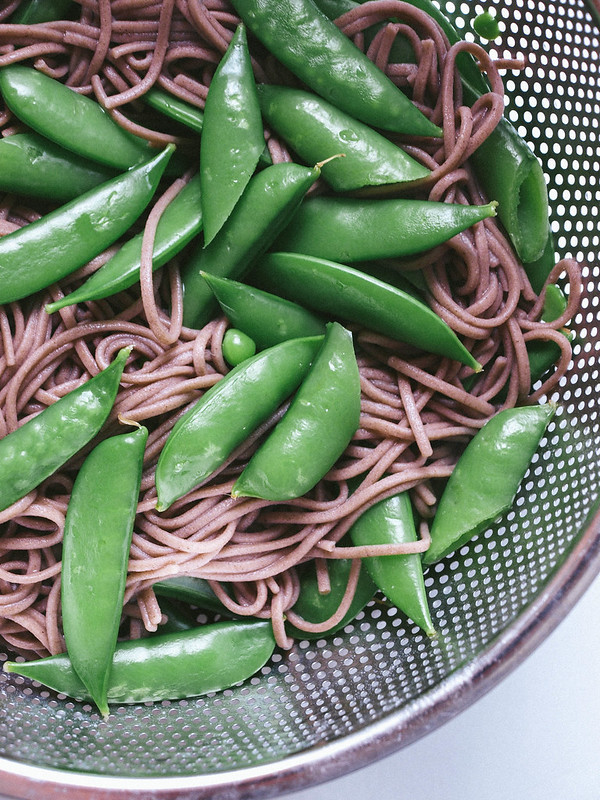
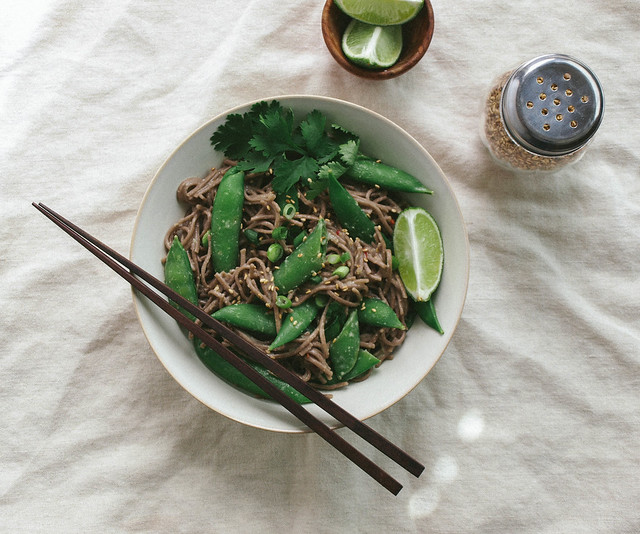
The addition of sugar snap peas add a perfect dose of sweetness and crunch to the soba noodles. I love sugar snap peas and have them often dipping them in hummus and eating as is. In this recipe we will be adding the pods to the soba noodles half way through as they cook to soften them a bit and bring out their greenest green. 

SUGAR SNAP PEA & SOBA NOODLE BOWL + MISO SAUCE
SUGAR SNAP PEA & SOBA NOODLE BOWL + MISO SAUCESUGAR SNAP PEA & SOBA NOODLE BOWL + MISO SAUCE

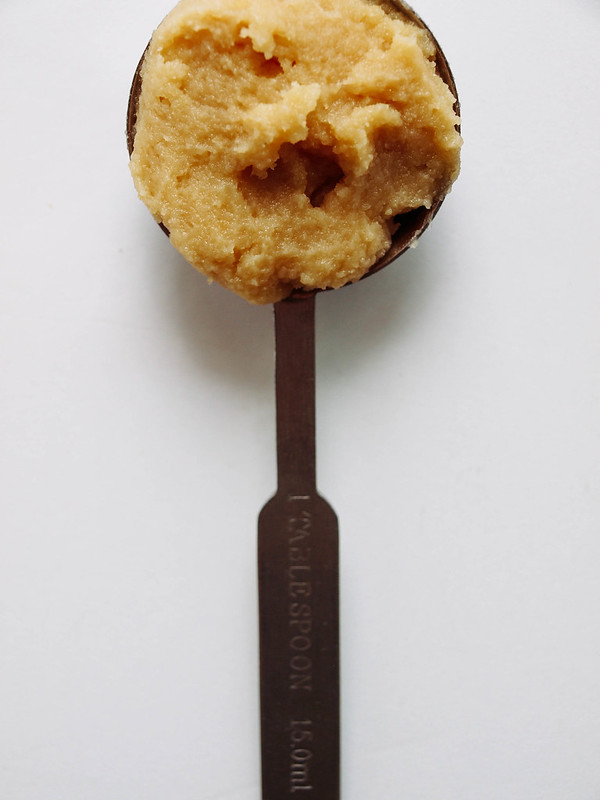
Miso is another great addition to your healthy eating habits. With a few additional ingredients it makes for an easy and flavorful dressing for the noodles and sweet peas. A tub of miso will last up to 9 months + in the refrigerator and can be used for soups, dressing/dips and adding richness to vegan cheeses and sauces. It will go a long way in your kitchen and is a great staple ingredient to have on hand.

This is a very easy meal to throw together and will be ready in about 25 minutes or less. I originally planned on having cubed tofu in this recipe but in the end forgot to add it in for this set of pictures. Feel free to add in a serving of tofu (as per the notes). With or without tofu, enjoy this simple, wholesome and delicious meal! 

SUGAR SNAP PEA & SOBA NOODLE BOWL + MISO SAUCE

SUGAR SNAP PEA & SOBA NOODLE BOWL+ MISO SAUCE

Ingredients
  • 1 package (9oz.) soba noodles
  • 8 oz. sugar snap peas
  • 2-3 scallions (green onions), sliced, to garnish
  • toasted sesame seeds, to garnish
  • handful cilantro sprigs, to serve
  • lime wedges, to serve

Miso Sauce
  • 2 - 3 tablespoons mellow miso paste (white miso)
  • 2 tablespoons rice wine vinegar 
  • 3 tablespoons water, + more as needed to thin
  • 1 inch knob of ginger, grated or minced
  • juice of 1 lime (about 1 tablespoon)
  • pinch of red pepper flakes

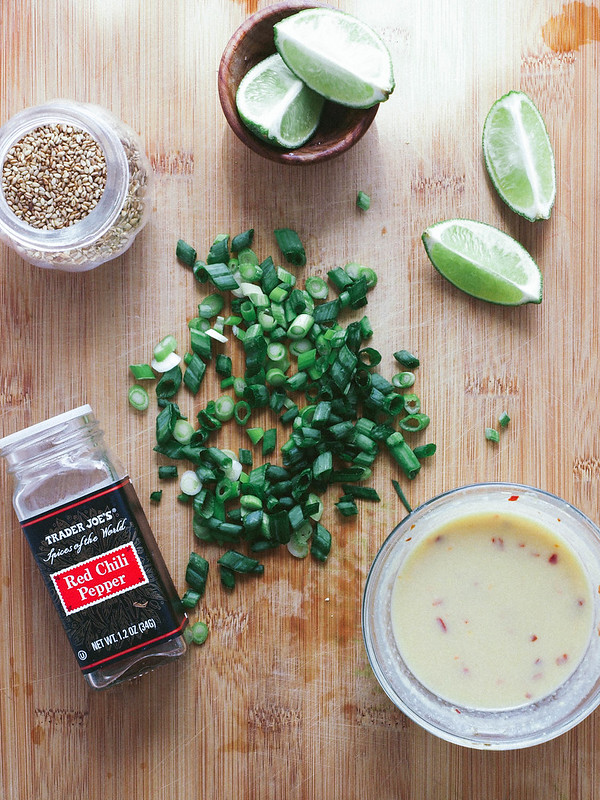
In a small bowl, mix the miso sauce ingredients together, set aside.

Fill a large pot just under 1/2 full of water, bring to a boil, add a pinch of salt and soba noodles, cook 4 minutes. If using 100% soba noodles, careful to watch the water after 2 minutes or so, it will start to become foamy and bubble over...turn the heat to medium and back up again as needed to keep the water at a boil but not boiling over.

2-3 minutes before noodles are done according to package directions, add sugar snap peas to the noodles and continue cooking until noodles are done. Drain and rinse noodles and peas under cool running water.

Add noodles/peas back to the pot they were cooked in, add sauce and gently toss to coat. Serve in individual bowls with sliced scallions, sesame seeds, cilantro and lime wedges to squeeze over top.

Serves 2

Notes:

If your sugar snap peas are on the larger side, slice them diagonally in the center to make them easier to eat.

Add in a serving or two of cubed tofu for extra protein if you like...either baked, pan cooked until golden or simply diced from the package. You may even like to add in a serving or so of edamame.

If you have soy allergies, try using other miso's which don't contain soy such as chickpea miso. 


    BOK CHOY & WILD MUSHROOM MISO SOBA NOODLE BOWL

    BOK CHOY & WILD MUSHROOM MISO SOBA BOWL

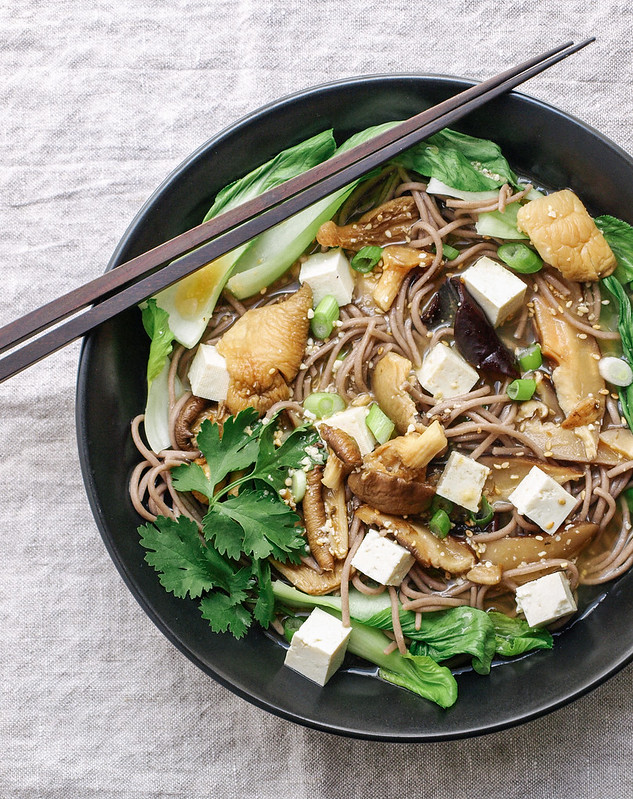
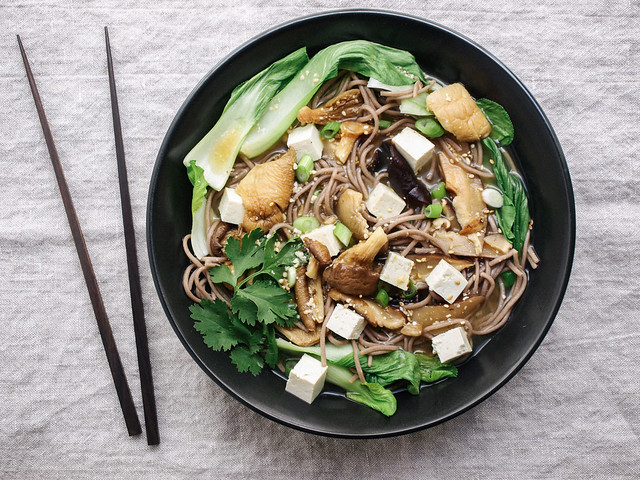
    I've had my eye on this recipe from A House In The Hills since February of this year. I love her blog and taste in foods! I finally got around to putting my own version together and it's nothing short of delicious! I love every ingredient here and the pure simplicity of it all. It does take more than one pot to cook it all in but it's well worth the few extra dishes. I'm sure you can find a way to streamline my instructions even further to suit your needs and/or make it go a bit quicker if need be. I love this kind of cooking, minimal ingredients that come together creating a satisfying nutrient dense meal. Plus, anything called a 'bowl' and I'm all in! I hope you'll enjoy my version and check out the original too, it's a bit different as it doesn't have the miso soup. Either way you like it....cheers and enjoy your soba bowl!

    Recently updated, in case you're a soup lover, is this Pasta and Bean with Kale Soup. It's super delicious and enough to serve six generously. You'll most likely have leftovers and you'll be glad you did!

    BOK CHOY & WILD MUSHROOM MISO SOBA BOWLBOK CHOY & WILD MUSHROOM MISO SOBA BOWL

    I used 100% soba noodles but you can use the mixed flour soba noodles if you like. You can even use ramen or udon noodles if you prefer, just know they are not gluten free if you're following that kind of diet. I don't have to follow a gluten free diet but I love soba noodles and do try to limit foods containing gluten. I started using them for their nutritional aspect and came to love their flavor and versatility. The noodles contain 6 grams of protein per serving. I call for 2 servings of soba noodles per person giving you 12 grams. The tofu is optional and will add extra protein, about 9 grams per serving, giving this dish almost half of the the average persons protein requirements. If you decide to not use the tofu, have a protein shake for dessert or somewhere in your day if you feel you haven't met your needs elsewhere. The bok choy is a must here and has such a mellow flavor but I'm sure you can adjust using something else if needed.

    BOK CHOY & WILD MUSHROOM MISO SOBA BOWLBOK CHOY & WILD MUSHROOM MISO SOBA BOWLBOK CHOY & WILD MUSHROOM MISO SOBA BOWL

    I used dried mushrooms here since I have somehow collected three bags of them and decided it was time to put one package to good use. Feel free to use fresh mushrooms of choice, about 8 oz should be good.

    BOK CHOY & WILD MUSHROOM MISO SOBA BOWL

    Red miso is what I had on hand for this recipe, but you can use your favorite or whatever you have available. If you don't have miso on hand, sub in some low-sodium veggie broth. But I recommend having miso handy at all times, it's makes for great broths and soup bases! FYI, it will last up to one year in the refrigerator...a great incentive to add this to your refrigerator staples.

    BOK CHOY & WILD MUSHROOM MISO SOBA BOWLBOK CHOY & WILD MUSHROOM MISO SOBA BOWL
    BOK CHOY & WILD MUSHROOM MISO SOBA BOWL

    BOK CHOY & WILD MUSHROOM MISO SOBA BOWL


    Ingredients (serves 2)
    • 1 package (9oz) soba noodles (I use Eden)
    • 1 package dried wild mushrooms or 8 oz shitake, oyster or mushrooms of choice
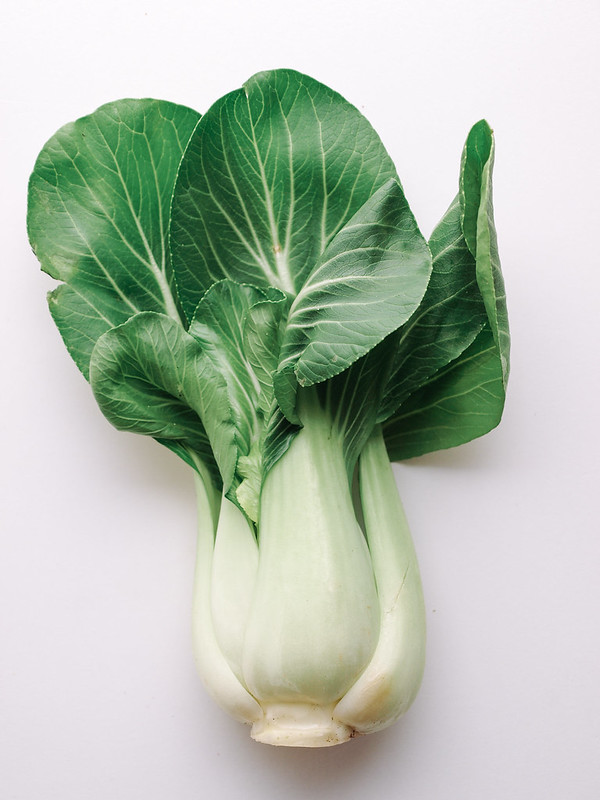
    • 3 small bok choy
    • 2 - 3 tablespoons miso (use your favorite)
    • 4 cups water
    • 2 - 4 oz. cubed tofu, optional
    Garnish
    • 2 scallions, sliced
    • fresh cilantro sprigs
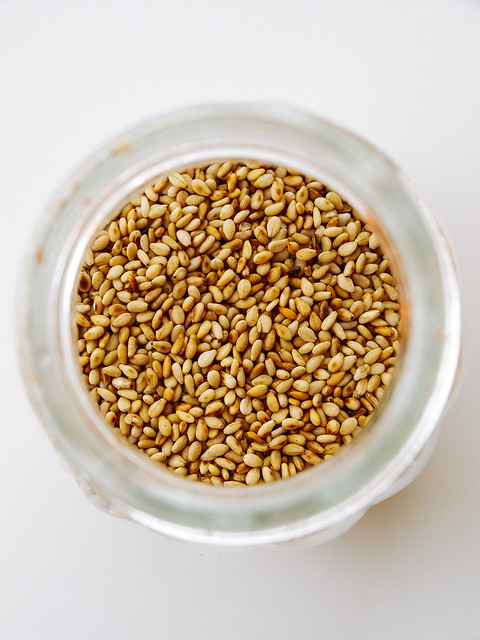
    • sesame seeds 
    • red pepper flakes (optional)

    Cook your soba noodles according to package, rinse under cool water, set aside. 

    Meanwhile, in a small saucepan, warm 4 cups of water over medium heat (do not boil), add dried mushrooms, lower heat and let simmer, uncovered for 10 - 15 minutes. Add miso, stir to remove any clumps and continue to keep the soup warm over low heat.

    If using fresh mushrooms, slice into strips, saute them in a bit of sesame oil and splash of tamari for about 5 minutes over medium high heat, add mushrooms to the broth while simmering.

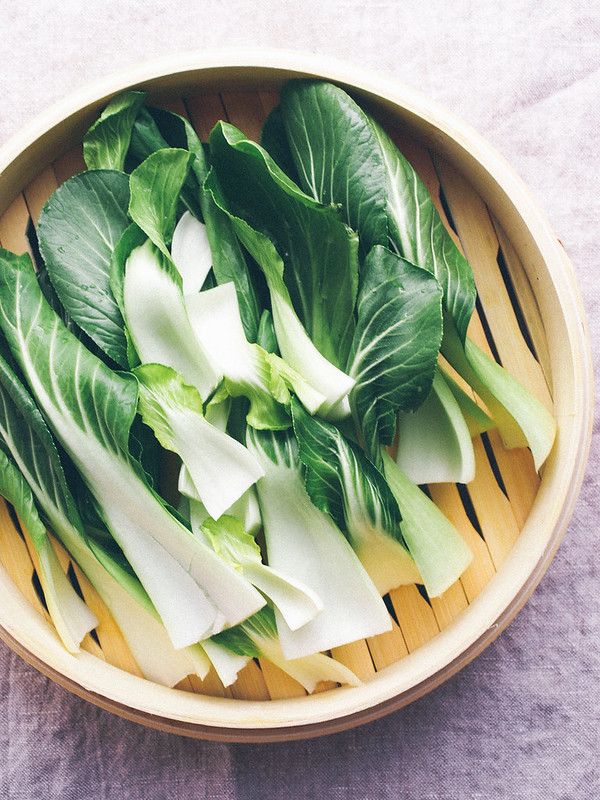
    Steam your bok choy. I used a bamboo steamer with the pot I cooked the noodles in.

    Tofu can be steamed with the bok choy or added to the soup to warm.

    Build your bowl by adding half the bok choy and soba noodles to your serving bowl, ladle 1/2 of the miso broth and mushrooms over top. Top with cubed tofu, scallions, cilantro sprigs and sesame seeds.

    Notes: 

    If you don't have miso on hand, sub in some low-sodium veggie broth. But I recommend having miso on hand, it's makes for great broths and soup bases! FYI, it will last up to one year in the refrigerator...a great incentive to add this to your refrigerator staples.

    A note on the Eden 100% Buckwheat Noodles and their price. It is a bit more expensive than most noodles but from my perspective, I eat basic, cheap foods most of the time so I consider these noodles to be my 'meat' if you will. You can always hunt the internet for cheaper prices and buy in bulk. 100% soba noodles are well worth the price considering I don't spend money on many other food items like cheese, meat, fish and poultry...all of which can cost just as much, if not more. I hope to encourage you to rethink food items and their cost when adapting to new foods...there is a trade off and I much rather spend my money on 100% soba noodles. Feel free to use other noodles as mentioned above.

    Enjoy!


    Back to top