POTATO + LEEK + WHITE BEAN SOUP

POTATO + LEEK + WHITE BEAN SOUP

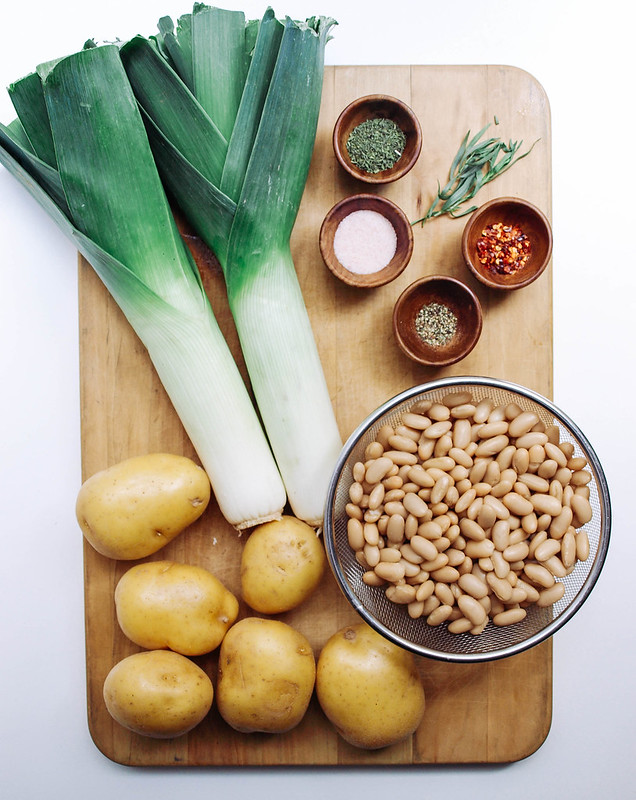
I love soups this time of year! I've been making them like crazy lately. They're just so easy to throw together. And when it's time to clean out the fridge, I can almost always pull something together with a few stocked canned goods. They've made life a little easier around here with all the hustle and bustle over the holidays. So in comes this crazy good soup loaded with leeks, potatoes & white beans. I'm in love with leeks at the moment and used two large ones here. They add a wonderful mellow onion flavor that pairs perfectly with the other ingredients. I've made this soup a few times over the past couple of weeks and found that I love tarragon as my herb, along with savory. But don't worry, if you don't have either of these two herbs on hand, thyme and/or herbs de provence will work perfectly in their place. The latter are two herbs I always have stocked! The preferred potato to use would be red or Yukon gold. For the beans, I would stick with cannellini or great northern but chickpeas (garbanzo beans) would be ok too. If you manage to have left overs, the flavors get even better. Soup will thicken a bit after a couple of hours (here) from the potatoes which is nice (soup shown here is right after cooking and broth is thin). So gather your ingredients and get ready for a simple and flavorful soup to keep you warm and feeling your best any time of year!
POTATO + LEEK + WHITE BEAN SOUPPOTATO + LEEK + WHITE BEAN SOUP

Sauté your leeks, add spices and cook a minute more. Add the remaining ingredients and cook until potatoes are fork tender. And voila...soups on! It's that easy...

POTATO + LEEK + WHITE BEAN SOUP

 POTATO + LEEK + WHITE BEAN SOUP

Ingredients
  • 3 lbs. yukon gold potatoes, cubed 1/2 inch
  • 2 medium/large leeks, sliced and dirt removed (white & pale green parts only)
  • 1 tablespoon olive oil or 1/4 cup water (water saute)
  • 1 1/2 teaspoons each dried tarragon & savory or 1 tablespoon herbes de provence or thyme
  • pinch of red pepper flakes
  • 3 cups cooked or 2 cans (15 oz.) cannellini beans (drained and rinsed)
  • 5 cups vegetable broth
  • mineral salt & fresh cracked pepper to taste

In a large pot or dutch oven, heat oil/water over medium-high. Add leeks and saute until softened, about 5 minutes. Add in herbs and spices, cook until fragrant, about 1 minute. Add in potatoes, beans, broth and salt & pepper to taste. Bring to a boil, cover, reduce heat to low and simmer for about 20 minutes, or until potatoes are fork tender. Let cool a few minutes before serving.

Serve with topped with chopped parsley if you like and a slice of crusty bread to soak up the juices.

Serves 4 - 6

Notes:

You can change up the herbs here with what you have on hand. I really love the tarragon and savory here but starter cooks may not have them on hand so the herbs de provence and thyme will be great too!

Here is a simple guide to slicing and cleaning leeks: How To Clean Leeks 


CREAMY BROCCOLI + RED LENTIL SOUP


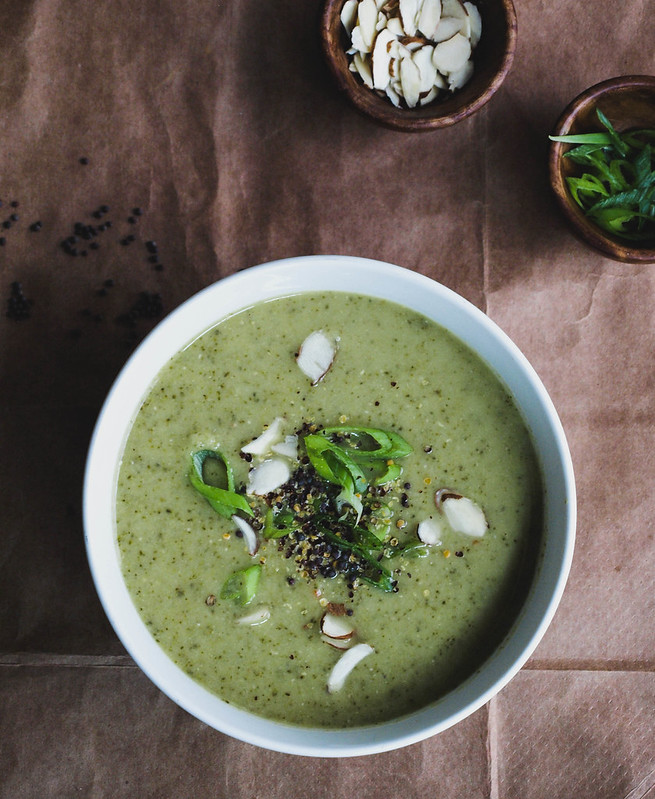
I had a bunch of broccoli that needed to be used up and thought this would be a perfect time to add a broccoli soup to the recipe collection. Seeing that my last soup, Butternut Squash + Red Lentil Soup, was so good with the addition of lentils, I decided to add them to this soup as well. Lentils add bulk, heartiness and boost the nutritional profile by adding protein and good carbohydrates. They cook fast too so you can pull this recipe together in about 40 minutes from start to finish. It's also a one-pot meal which I love (less dishes is always a plus)! I was inspired by both these recipes from 101 Cookbooks and Green Kitchen Stories. Both simple and delicious! I especially love the Savory Corn Biscuit recipe included in the GK Stories recipe, which I had a chance to make. I made half a batch and used different shapes, a flower and a circle. Because I didn't have the non-dairy yogurt on hand, I subbed unsweetened almond milk. They were still delicious without the yogurt, so easy to make and a perfect accompaniment to the soup! 

On a side note... 

Time is flying and the holidays are almost here. If you haven't finished your holiday menus, take a peek at my Vegan Thanksgiving & Christmas Recipe ideas on pinterest and follow along if you like. During mid-October through December of every year you'll find this link at the top of every page. All handpicked and include a note about the recipe or suggestions when needed. Check the board often, it will continue to grow as I find new recipes. Happy holidays and happy pinning! :)

I also updated a couple soup recipes over the last week or so. If you need some more soup inspiration take a look at these: Roasted Fennel & Potato Soup, Roasted Butternut Squash Soup, Parsnip & Split Pea Soup: Slow Cooker or Stove Top and this Curry Lentil & Greens Soup. Each one is delicious...check em out!

CREAMY BROCCOLI + RED LENTIL SOUPCREAMY BROCCOLI + RED LENTIL SOUP

We know broccoli is a nutrient dense vegetable. Rich in fiber, vitamin k & C and folate, its deep color holds many health benefits. I often eat it simply steamed with a dollop of hummus and a little sambal oelek. Once mixed, the combination is creamy, slightly spicy and delicious! Having it here in a soup is a nice change up, especially with soup season under way.

I love red lentils and their ability to blend easily in pureed soups. They add fiber, protein and cook up very light as to not alter the color of the soup as much as if using green/brown lentils. I would suggest sourcing and keeping red lentils in your pantry at all times. They are reasonable at about $2 to $3 a pound and will make dishes more nutrient dense when added. 

CREAMY BROCCOLI + RED LENTIL SOUP

CREAMY BROCCOLI + RED LENTIL SOUP

Ingredients
  • 1 tablespoon coconut, grapeseed or olive oil or 3 Tbsps water for water saute
  • 1 medium onion, diced
  • 3 garlic cloves, minced
  • 1/4 teaspoon red pepper flakes
  • 1 cup red lentils
  • 2 - 3 large heads broccoli, cut into florets (stalks chopped ok too)
  • 6 - 7 cups water or vegetable broth (or combo)
  • 1 can coconut milk, optional
  • mineral salt, to taste

to serve
  • mustard seeds, crushed (I used black)
  • 1 - 2 scallions, sliced
  • slivered almonds

In a large dutch oven or stock pot, heat oil/water over medium heat, add onion and cook until translucent, about 5 minutes. Add garlic and red pepper flakes, cook another minute or until fragrant. Add lentils, broccoli, broth/water and optional coconut milk. Turn heat to high and bring to a boil, using the back of a fork or spoon press the broccoli down as much as you can to cover with liquids. Cover pot with lid, reduce heat to low and simmer for 15 - 20 minutes. Soup is done when lentils are tender. Taste soup, add salt as needed. Using an immersion blender puree until desired consistency. Or once cooled a few minutes, use a food processor/blender to puree (this method may take two batches to complete).

Serve in individual bowls topped with mustard seeds, scallions and almonds. Pairs great with crusty bread or biscuits of choice. If you have one on hand, a squeeze of lemon will add some brightness. 

Notes: 

If using pre-cut packaged broccoli, use about 1 1/2 - 2 pounds or 8 - 10 cups.

You may feel there is not enough water, and most likely all the broccoli won't be covered by the liquids at first. As it cooks it will soften and sink down, and any that doesn't will steam and become soft. If you like you can push the broccoli down half way through cooking. If adding a while can of coconut milk, start with the lower amount of liquids adding more as needed.

If you don't use veggie broth or have run out of an onion and/or garlic. Try adding 1 teaspoon each of garlic and/or onion powder.

I recommend sticking with red lentils but you can use green/brown lentils if needed. Cook same as above but simmer for 30 - 35 minutes, or until lentils are tender. Your soup may look a bit muddy but flavor will be good.

Use full-fat or light coconut milk. If you'd prefer, use up to 1 cup or so of unsweetened almond milk. 


ROASTED NOURISH BOWL


ROASTED NOURISH BOWL

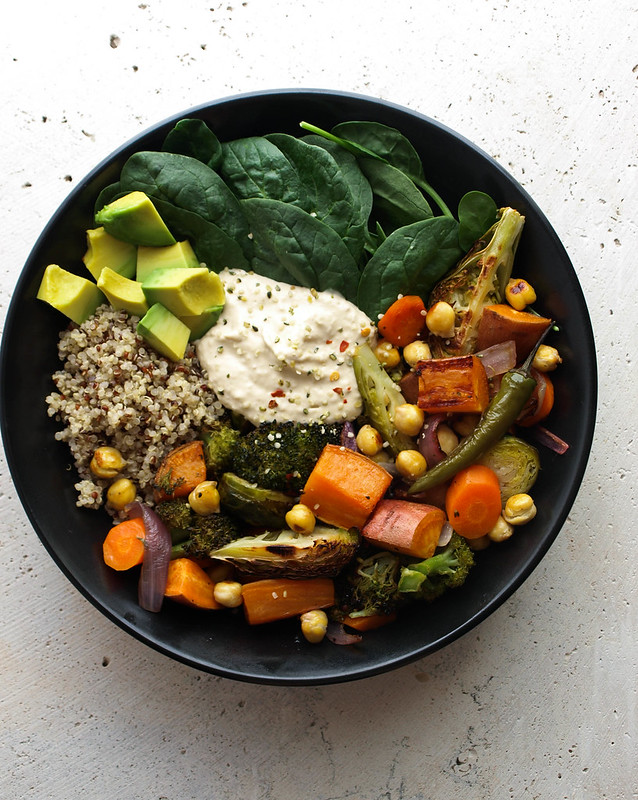
Life has been very slow lately. I think it must be this time of year and changing season that has slowed me down. I'm not complaining, in fact I quite like it. It's given me a chance to really practice my yoga, spend time with my kids and bake a lot of loafs of bread, mainly these pumpkin and banana breads. I'm obsessed with them at the moment and they've both been amazing recipes, even when making new alterations that I've also added to the notes. Winter hasn't set in yet but I'm prepared for when it does. Between easy vegetable bowls, like the one I'm sharing here which can work for lunch or dinner, and my breads, that I eat in the morning and as a snack or dessert, I'm ready for the cooler months to come. And if you're anything like me...you'll appreciate the simplicity and beauty of this roasted nourish bowl. Late last spring I shared this Everyday Nourish Bowl which is full of fresh vegetables. I thought it'd be a good idea to have a roasted version here too so you can get an idea of, and be tempted by, all the goodness it has to offer. Even in the cooler months, the freshness of the everyday nourish bowl would be great. But really the roasted version is so delicious and perfect for the cooler months. Enjoy every bite...be warm and nourished!

ROASTED NOURISH BOWL

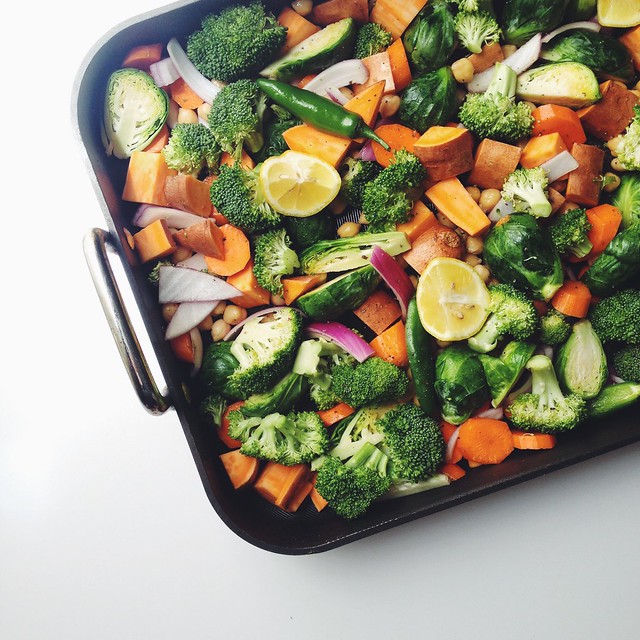
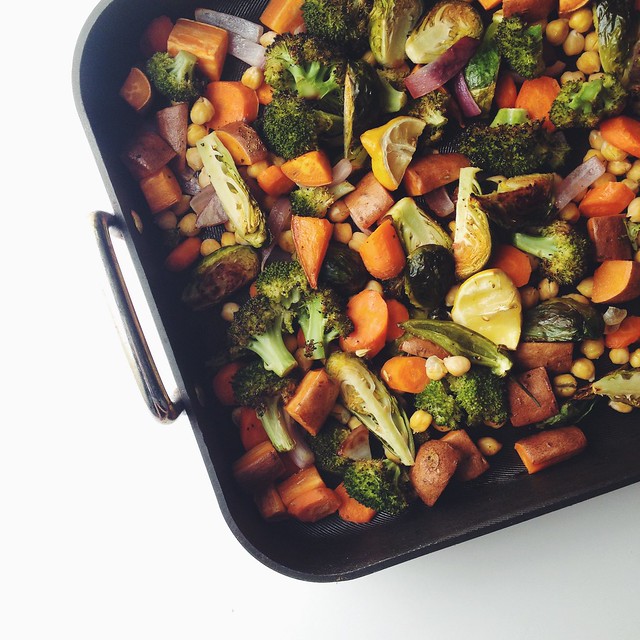
Simply chop your veggies, add them and your beans to a roasting pan, toss in a little oil (or not), add a little salt & pepper and roast. Once done your vegetables should be nice and browned on the edges and fork tender. Feel free to use more or less of the vegetables I have listed. If you can't get them all in that's ok, a various few of the veggies called for will be enough. You can also change up the beans if you like, maybe use another white bean like cannellini or great northern. Other beans have slightly more protein and fiber than chickpeas so if you're looking to get the most protein I'd suggest changing them up. 

ROASTED NOURISH BOWL

Makes a perfect complete meal once you add a grain like quinoa and some fresh spinach. A nice big dollop of hummus and you're all set for a hearty, nutrient dense meal. So much to love about bountiful nourish bowls!


ROASTED NOURISH BOWL

ROASTED NOURISH BOWL

Ingredients
  • olive, grapeseed or coconut oil, 1 - 2 tablespoons
  • 1 large sweet potato, cut into 3/4" cubes
  • 2 large carrots, sliced
  • 1 1/2 cups brussles sprouts, halved or quartered
  • 1 1/2 cups broccoli florets
  • 1/2 large red onion, sliced
  • 6 serrano chilis, sliced in half and de-seeded 
  • 1 1/2 cups cooked chickpeas or 1 can (15oz) drained and rinsed
  • 1 - 2 lemons, cut into six pieces
  • mineral salt & fresh cracked pepper, to taste

To serve
  • 1 1/2 cups cooked quinoa
  • 5 oz. spinach
  • 1 - 2 avocados
  • big dollop of hummus
  • red pepper flakes, to garnish
  • hemp hearts, to garnish


Preheat oven to 400 degrees F.

Prepare vegetables: remove any unsightly spots on the sweet potato skins before cubing, peel the carrots if needed and half or quarter the brussels sprouts depending on the size.

Place vegetables, chickpeas and lemon in a large roasting pan or rimmed baking sheet. Toss with oil and sprinkle with salt & pepper to taste. Roast for 40 - 45 minutes, stirring half way through. Vegetables should be slightly browned on the edges and fork tender. Remove from oven and let cool a few minutes. If you have a favorite herb or herb blend, you may consider adding a dash or two before roasting.

In individual bowls, serve vegetables with 1/2 cup quinoa, handful of spinach, sliced avocado and a nice dollop of hummus. Top with a sprinkle of red pepper flakes, hemp hearts a squeeze of roasted lemons.

Serves 6.

Notes: 

Vegetables can vary in quantity. Add or subtract to your liking.

Serrano peppers are optional. I personally love the heat they give and they are wonderful roasted! You can sub 3 jalapeno peppers as well.

If you don't have hummus on hand or want to vary it up, try using these dressings and sauces instead: Lemon-Tahini Dressing, Sriracha Cashew Sauce, tahini based Dynamite Sauce or Creamy Tahini Hippie Sauce, For a non-creamy dressing, try this Shallot Vinaigrette.

Cooking quinoa: I had a comment about cooking quinoa so here is my recipe for perfect quinoa.

In a medium size pot, bring 1 3/4 cup water + 1 cup quinoa to a boil, cover, reduce heat to low and simmer for 15 minutes. Once done, turn off heat, remove cover, fluff with fork and let set 10 - 15 minutes.

Perfect quinoa every time! Makes about 3 cups. Feel free to add a little seasoning to the quinoa before cooking like garlic powder, thyme, garlic salt, mineral salt, lemon pepper, everyday seasoning, etc. Or simply season once done. This will give you more than called for in the recipe...leftovers can be served chilled or warmed with your favorite vegetables or fruits.

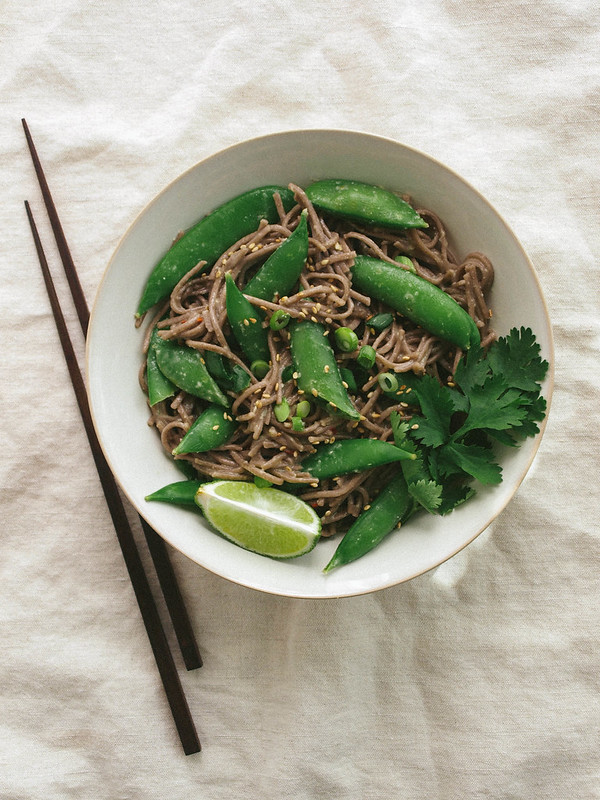
SUGAR SNAP PEA & SOBA NOODLE BOWL + MISO SAUCE

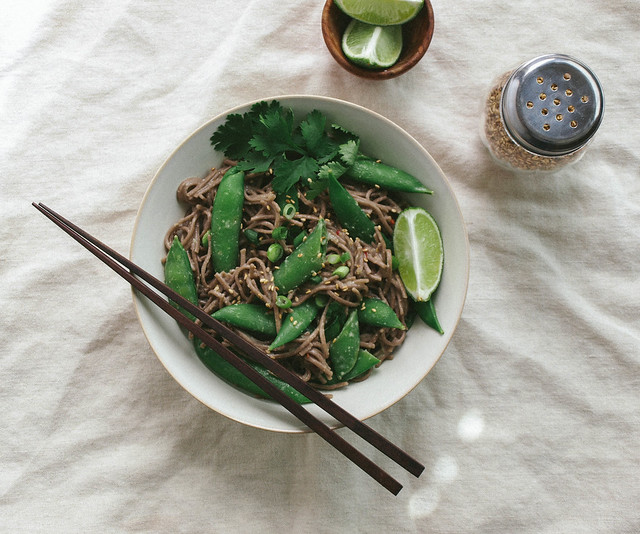
SUGAR SNAP PEA & SOBA NOODLE BOWL + MISO SAUCESUGAR SNAP PEA & SOBA NOODLE BOWL + MISO SAUCESUGAR SNAP PEA & SOBA NOODLE BOWL + MISO SAUCE

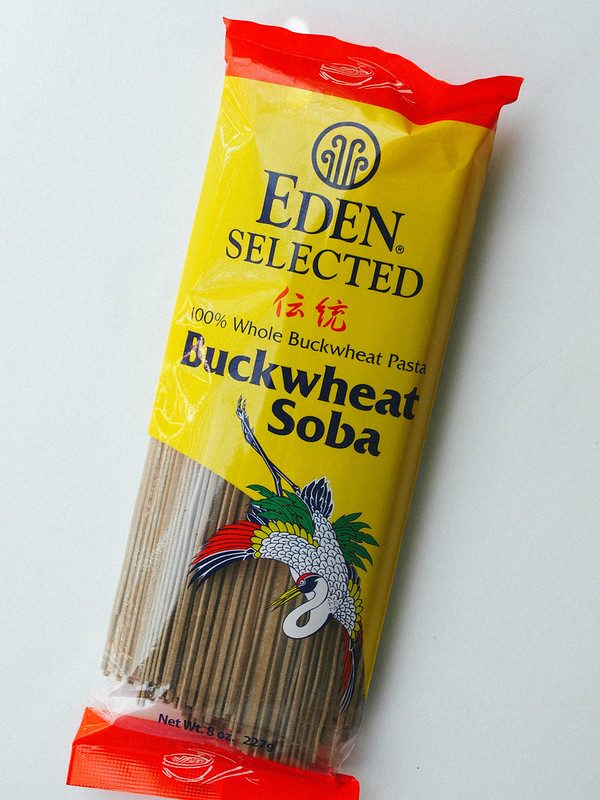
Soba noodles have become a favorite of mine. I love the 100% buckwheat noodles from Eden Foods. They have a nutty flavor with a somewhat chewy texture. Each serving contains 6 grams of protein and 3 grams of fiber. I love that they can be served warm or cold making them a versatile noodle choice. They are gluten free using only buckwheat flour, unlike other brands of soba noodles which use a combination of wheat and buckwheat flours. They tend to be a bit more expensive than the mixed flour soba noodles. I happen to see these noodles as a tradeoff for the more expensive items that I don't purchase anymore such as meat, poultry and dairy. Keeping that in mind, the extra expense doesn't bother me. I hope you may have the same perspective as I do when picking and choosing your plant based grocery items.

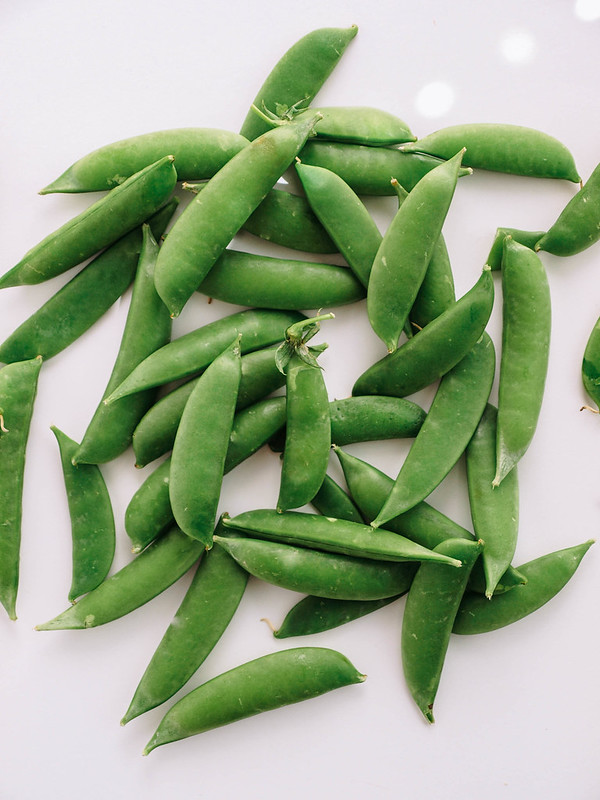
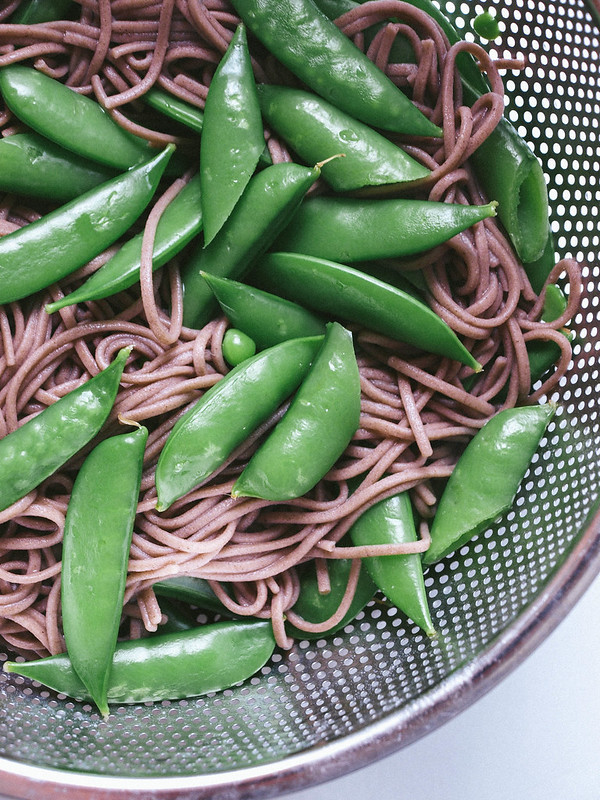
The addition of sugar snap peas add a perfect dose of sweetness and crunch to the soba noodles. I love sugar snap peas and have them often dipping them in hummus and eating as is. In this recipe we will be adding the pods to the soba noodles half way through as they cook to soften them a bit and bring out their greenest green. 

SUGAR SNAP PEA & SOBA NOODLE BOWL + MISO SAUCE
SUGAR SNAP PEA & SOBA NOODLE BOWL + MISO SAUCESUGAR SNAP PEA & SOBA NOODLE BOWL + MISO SAUCE

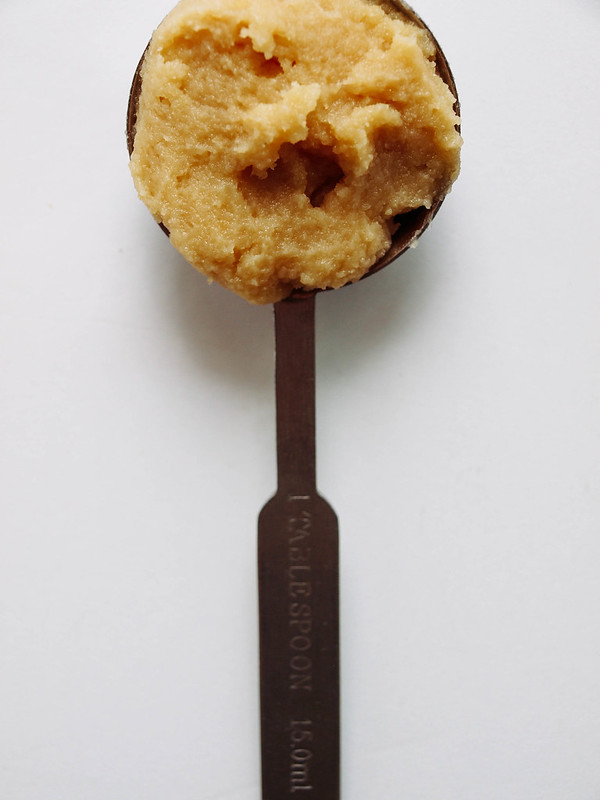
Miso is another great addition to your healthy eating habits. With a few additional ingredients it makes for an easy and flavorful dressing for the noodles and sweet peas. A tub of miso will last up to 9 months + in the refrigerator and can be used for soups, dressing/dips and adding richness to vegan cheeses and sauces. It will go a long way in your kitchen and is a great staple ingredient to have on hand.

This is a very easy meal to throw together and will be ready in about 25 minutes or less. I originally planned on having cubed tofu in this recipe but in the end forgot to add it in for this set of pictures. Feel free to add in a serving of tofu (as per the notes). With or without tofu, enjoy this simple, wholesome and delicious meal! 

SUGAR SNAP PEA & SOBA NOODLE BOWL + MISO SAUCE

SUGAR SNAP PEA & SOBA NOODLE BOWL+ MISO SAUCE

Ingredients
  • 1 package (9oz.) soba noodles
  • 8 oz. sugar snap peas
  • 2-3 scallions (green onions), sliced, to garnish
  • toasted sesame seeds, to garnish
  • handful cilantro sprigs, to serve
  • lime wedges, to serve

Miso Sauce
  • 2 - 3 tablespoons mellow miso paste (white miso)
  • 2 tablespoons rice wine vinegar 
  • 3 tablespoons water, + more as needed to thin
  • 1 inch knob of ginger, grated or minced
  • juice of 1 lime (about 1 tablespoon)
  • pinch of red pepper flakes

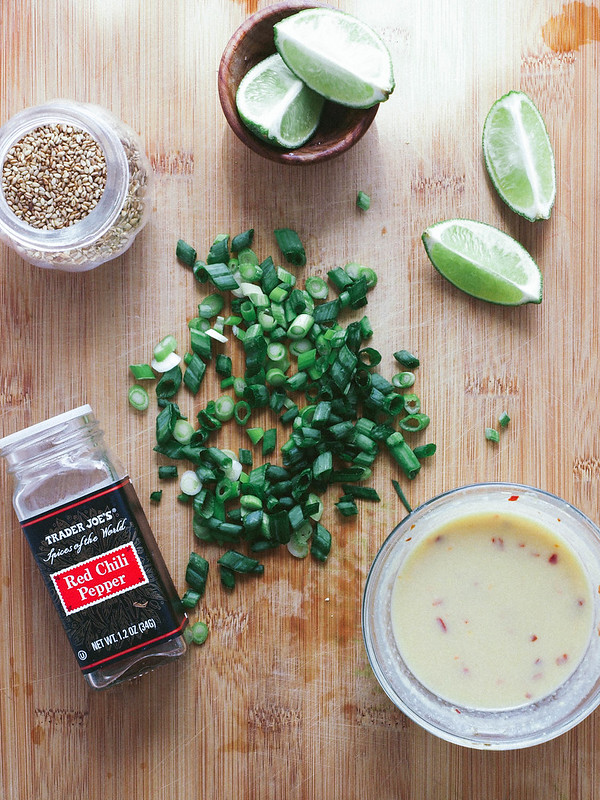
In a small bowl, mix the miso sauce ingredients together, set aside.

Fill a large pot just under 1/2 full of water, bring to a boil, add a pinch of salt and soba noodles, cook 4 minutes. If using 100% soba noodles, careful to watch the water after 2 minutes or so, it will start to become foamy and bubble over...turn the heat to medium and back up again as needed to keep the water at a boil but not boiling over.

2-3 minutes before noodles are done according to package directions, add sugar snap peas to the noodles and continue cooking until noodles are done. Drain and rinse noodles and peas under cool running water.

Add noodles/peas back to the pot they were cooked in, add sauce and gently toss to coat. Serve in individual bowls with sliced scallions, sesame seeds, cilantro and lime wedges to squeeze over top.

Serves 2

Notes:

If your sugar snap peas are on the larger side, slice them diagonally in the center to make them easier to eat.

Add in a serving or two of cubed tofu for extra protein if you like...either baked, pan cooked until golden or simply diced from the package. You may even like to add in a serving or so of edamame.

If you have soy allergies, try using other miso's which don't contain soy such as chickpea miso. 


    HUMMUS VEGGIE WRAP

    HUMMUS VEGGIE WRAP

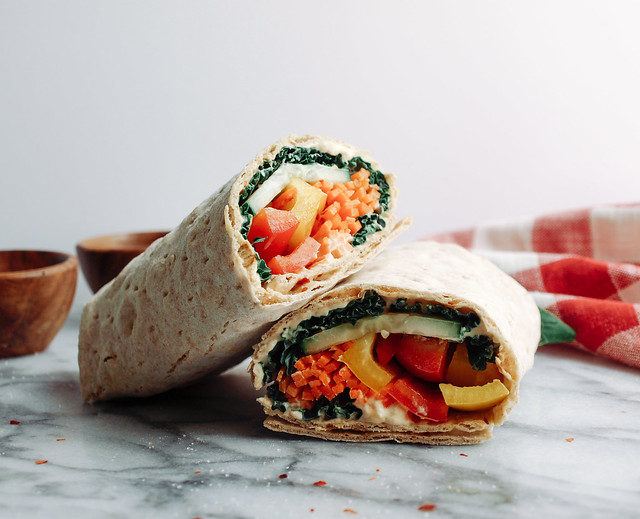
    Wraps have been my thing lately! They're easy, economical and travel well. And let's not forget how versatile they are. Change up the spread using flavored hummus of your choice. Vary up the veggies, add spices and herbs to suit your taste. Layer and roll. Done and done!

    HUMMUS VEGGIE WRAP

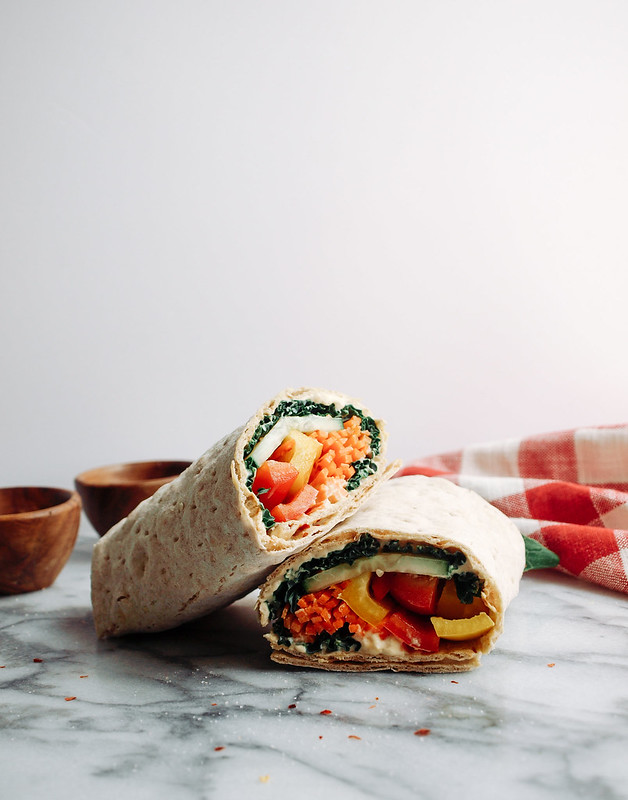
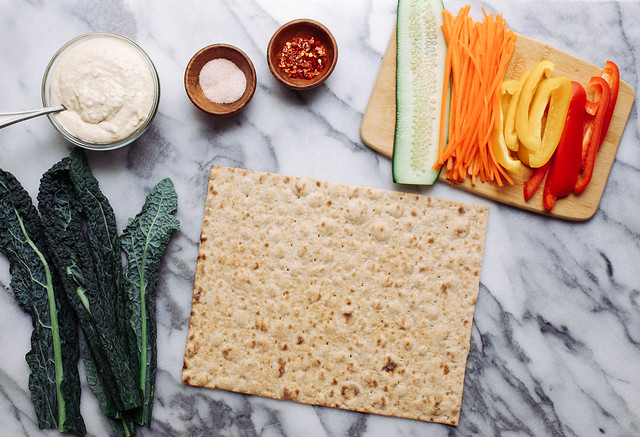
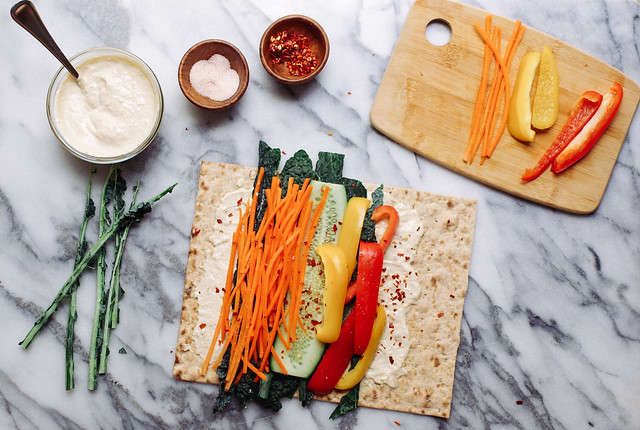
    I used kale, plain hummus, bell peppers, carrots, cucumber, mineral salt and red pepper flakes. All on top of lavash bread. You could easily use shredded cabbage (green or purple) in place of the kale, or any other leafy greens you prefer. I think these are a good combination of veggies here. You could try adding in some sliced avocado to the mix if you like. This just gives you an idea, you can take it from here and make it your own, or use this one...it was delicious!

    HUMMUS VEGGIE WRAP

    Layer and roll...

    HUMMUS VEGGIE WRAP: BROWN BAG LUNCH

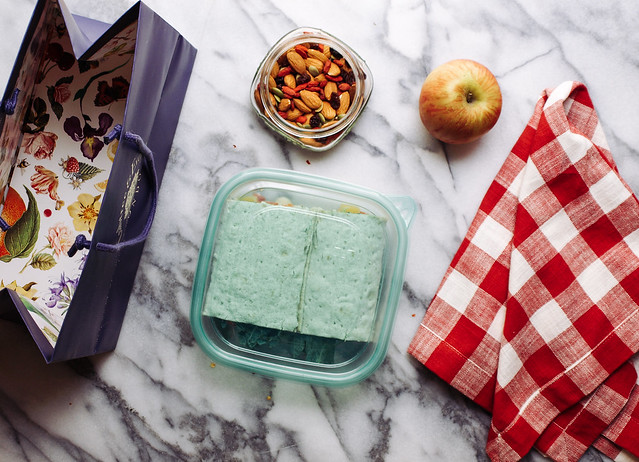
    Take it with you for a brown bag lunch! In this case, a blue bag since I like to recycle, reduce and reuse my paper shopping bags. It's kind of girly, so guys you can tote around your usual uni-sex lunch bag. It fits perfectly in this little reusable plastic container, they usually come in a set of four so you could make a few and tuck them away in the refrigerator for later. I paired my wrap with some mixed nuts & dried fruits along with a fresh apple. I eat at least one apple everyday, sometimes two or three and I always carry one with me. My favorite is the sweet, juicy Fuji apples. They are convenient, fit right in my purse along with my Nalgene water bottle. Next time I share a brown bag lunch I'll break it out for you. And if you doubt that I always carry an apple with me, I swear just look in my purse!

    HUMMUS VEGGIE WRAP

    HUMMUS VEGGIE WRAP

    Ingredients
    • lavash bread (or large flour tortilla)
    • kale or other leafy greens of choice
    • red bell pepper, sliced
    • yellow bell pepper, sliced
    • 1- 2 carrots, sliced lengthwise or julienned
    • cucumber slices
    • hummus, to spread 
    • salt, to taste
    • red pepper flakes, to taste

    Lay lavash bread (or tortilla) on a flat surface, spread hummus over 2/3 - 3/4 of the wrap leaving at least an inch on both ends, layer with veggies, wrap one end up, over, and roll. Slice in half and enjoy now or store for later. 

    Notes:

    Make 2 - 3 of these wraps at a time storing them in individual containers for the next day or two as a lunch or snack. They will hold up well and actually allow the bread to soften a bit in the refrigerator.

    I have my cucumbers in long slabs but you can cut them in long 1/4 - 1/2 inch strips instead. 


    LENTIL & SUN-DRIED TOMATO HUMMUS WRAP

    LENTIL & SUN-DRIED TOMATO HUMMUS WRAP

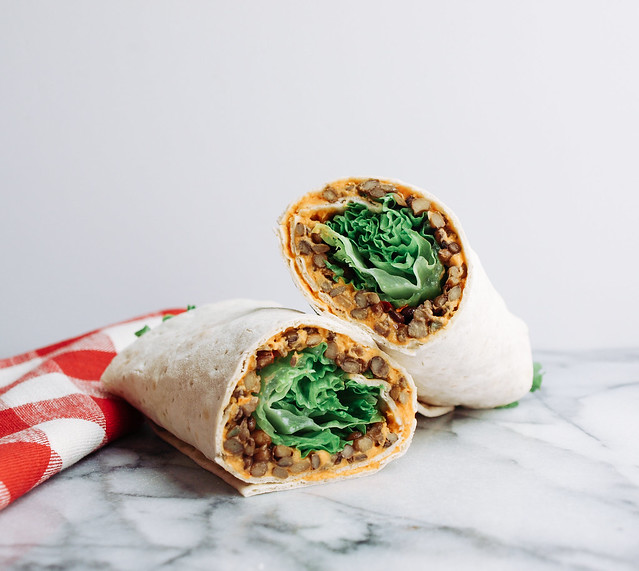
    I'm all about quick and easy when it comes to eating. Sometimes I don't mind more intensive recipes in the kitchen but for the most part, I like to keep it simple. Today's recipe is just that. About as simple as it gets while satisfying my hunger and leaving my taste buds happy. I simply used pre-cooked steamed lentils like the ones Trader Joe's carries (Melissa's also carries steamed lentils if you can find them in your grocery store). They have tons of flavor and don't need much of anything. I'll even top them on a big bed of leafy greens, drizzle on something spicy and be happy as can be. Done and done! Here the lentils worked well with this sun-dried tomato hummus. I imagine plain, garlic or red pepper hummus would be delicious! Hummus is a great spread that lends creaminess to the wrap. You won't miss that there isn't any cheese.  Adding some leafy greens to the wrap gives some freshness, and of course a little spice from the red pepper flakes completes my wrap. I'm a sucker for red pepper flakes and most things spicy. Plenty of protein and flavor in this wrap. I hope it inspires you to gather your ingredients and roll up your own. They also make for great brown bag lunches!

    If you're interested in a few quick sweet treat ideas, I just updated my Raw Hemp Bites and Raw Ginger Snaps. They are both no bake, no added sugars and amazingly delicious!

    LENTIL & SUN-DRIED TOMATO HUMMUS WRAPLENTIL & SUN-DRIED TOMATO HUMMUS WRAP

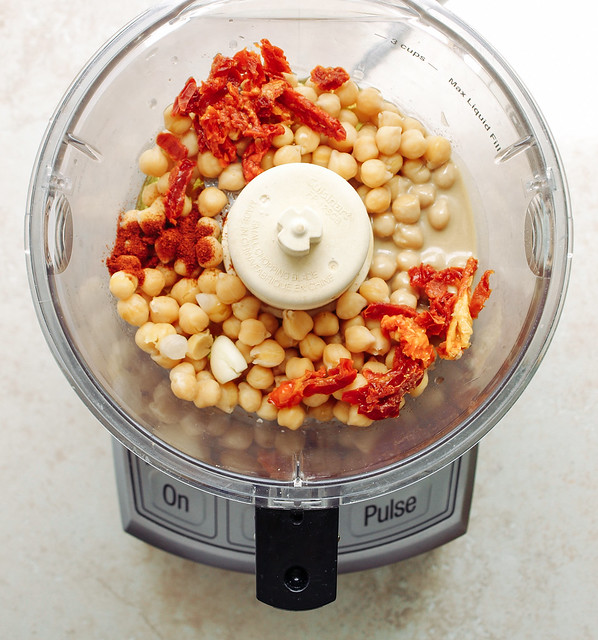
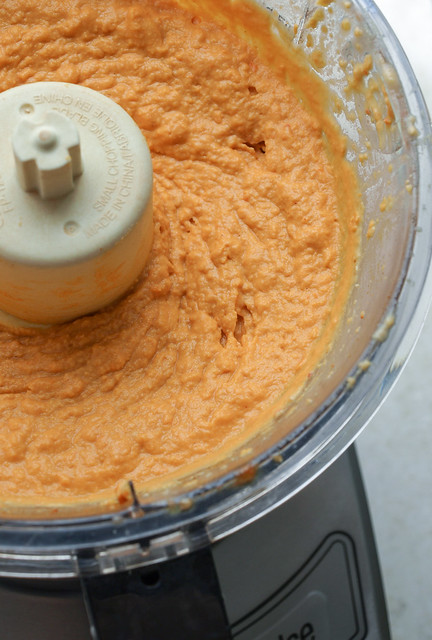
    Start by making your hummus...

    LENTIL & SUN-DRIED TOMATO HUMMUS WRAPLENTIL & SUN-DRIED TOMATO HUMMUS WRAP

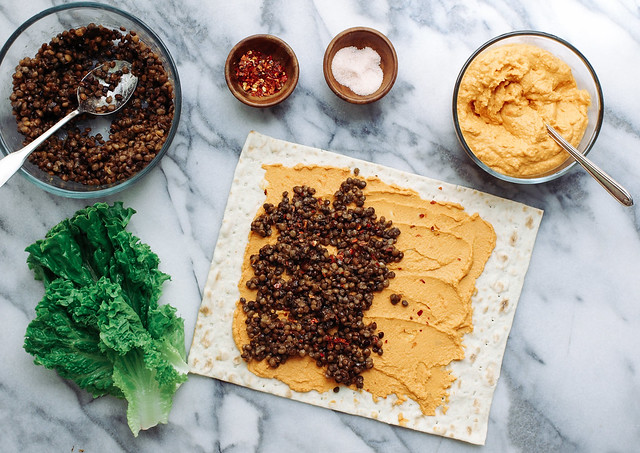
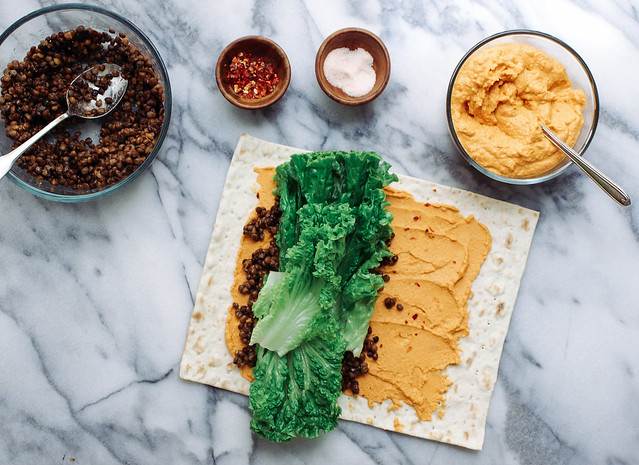
    Layer everything as you see here and roll, gently but tightly, starting from the fullest side (in this case I rolled from left to right).

    LENTIL & SUN-DRIED TOMATO HUMMUS WRAP

    LENTIL & SUN-DRIED TOMATO HUMMUS WRAP


    Ingredients
    • lavash bread (whole grain pref.) or flour tortillas
    • 1/2 cup cooked lentils, per wrap
    • leafy greens (I used romaine)
    • red pepper flakes
    • mineral salt

    Sun-Dried Tomato Hummus
    • 1 1/2 cups fresh cooked garbanzo beans (chickpeas) or 1 can (15oz) garbanzo beans
    • 2 - 3 tablespoons sun-dried tomatoes, chopped
    • 2 tablespoons tahini
    • 2 tablespoon extra virgin olive oil
    • 1 clove garlic
    • 1/2 teaspoon paprika (I used smoked)
    • 1/2  teaspoon mineral salt, or to taste
    • juice of 1 lemon or 1 - 2 tablespoons lemon juice
    • 1/4 - 1/3 cup water, as needed

    For the hummus:

    If using packaged sun-dried tomatoes, soak your tomatoes in water for about 15 minutes to soften, reserve water. Use the remaining water as needed when adding it to the hummus. If using bottled in oil sun-dried tomatoes, use as is.

    Place all ingredients into food processor/blender, except for the water. Blend until creamy, about 3 minutes or so, adding water as needed to thin. I used about 1/3 cup water as I like my hummus on the moist, thin side.

    Assemble your wrap:

    Lay your lavash bread on a flat surface. Spread a nice layer of hummus over 3/4, top with about 1/2 cup lentils over top, sprinkle with red pepper flakes and mineral salt, add leafy greens over top, roll gently but tightly as you can. Slice in half and enjoy!

    Notes: 

    Feel free to play around with the tahini and olive oil adjusting to suit your taste. You may like more tahini, or you may not have any on hand and can use olive oil in its place.

    If you're looking to make this virtually fat free, use water in place of the tahini and olive oil.

    Store hummus tightly covered in the refrigerator for up to six days. Makes about 1 1/2 cups.

    Try this hummus with warmed corn tortillas or fresh sliced cucumbers, zucchini, carrots, bell peppers, etc. Thin a little more and use as a crema for tacos, enchiladas, and burritos. You can even use it in your salads! Hummus is so versatile and my new nut based cream replacements whenever possible!


    Spicy Lentil & Quinoa Wraps with Spicy Tahini Sauce

    Spicy Lentil & Quinoa Wraps with Tahini Sauce

    You may be familiar with the Spicy Lentil Wraps from Trader Joe's. They are one of four vegan wraps available at the moment, the other's being a Veggie Wrap, Falafel Wrap and Eggplant Wrap. I love all of these wraps with the Spicy Lentil Wrap and Falafel Wrap being my favorites. Out of them all the Spicy Lentil Wrap has the highest protein amount with 14 grams and is the one I usually grab for. Lentils are an excellent addition to your diet. Not only are they a great source of protein but also fiber, vitamin B and a few essential trace minerals your body needs to function well, all of this with very low fat. If you have a local Trader Joe's near you, check out the lentil wrap and the other wraps too. Also, take a look at this list of vegan products they have to offer. Items do change from time to time but this is a great list to get you started. A few other favorite grab-n-go items I love at Trader Joe's are the Lentil Soup with Ancient Grains, Black Bean and Corn Enchilada's, Tofu Spring Rolls and a few various salads.

    Spicy Lentil & Quinoa Wrap with Tahini Sauce

    Spicy Lentil & Quinoa Wrap with Tahini Sauce

    I've wanted to do my own version of their Spicy Lentil Wrap and finally got around to it. I started with the ingredient list using lentils and bulgur wheat but really wanted to create a recipe that was gluten free. I was going to try an all lentil mix but once I shared my testing on Instagram, someone suggested that I use quinoa. Brilliant idea! Why didn't I think of that? ;) After trying a few batches with and without the quinoa, the quinoa was a keeper as it had the preferred texture. The mix is super versatile, easy to put together and can be stored in the fridge for up to a week or frozen if needed. I'm very happy to say that even my 'picky eater' daughter loved this. I actually made her a wrap using flour tortillas with no greens, only avocado, which she ate with no complaints. That is something of a miracle around here as we tend to be very different eaters!

    Spicy Lentil & Quinoa Wrap with Tahini Sauce

    As for the tahini sauce and chili paste, the sauce is pretty straight forward and is meant to be on the thin side. It can be used as a drizzle for each bite. It can also double as a salad dressing, or drizzled on steamed or roasted vegetables! The Trader Joe's chili paste uses a recipe that is made up of red pepper flakes that I just didn't get around to recreating, maybe I'll come back to it later, but rather decided to use ready made chili paste that I've been loving lately. I use the Huy Fong, Garlic Chili Paste or their plain Chili Paste. I love this stuff and have been steaming vegetables topping it with either of the chili paste as all the flavoring I need, maybe a dash of pink salt too. I definitely love my spicy food! If you haven't given it a try, I highly recommend it. It can be found in the Asian section of your grocery store or bought online. There's more to love about chili peppers than just the flavor, they are good for clearing congestion, fighting inflammation, boosting immunity, act as a topical pain reliever, help with weight loss and can stop cancer cells. If you can take the heat, get your spicy on!

    Spicy Lentil & Quinoa Wraps with Tahini Sauce

    Make yourself a wrap using lavash bread or go gluten free using warmed corn tortillas for tacos.

    Spicy Lentil & Quinoa Wraps with Spicy Tahini Sauce

     Both are super hearty and filling!

    Spicy Lentil & Quinoa Wraps with Tahini SauceSpicy Lentil & Quinoa Wraps with Tahini Sauce
    Spicy Lentil & Quinoa Wraps with Spicy Tahini Sauce

    Ingredients

    Lentil & Quinoa Mix
    • 3/4 cup red lentils, sorted and rinsed 
    • 1/2 cup quinoa, rinsed
    • 2 1/2 cups water, + more as needed
    • 1 tablespoon grapeseed oil, optional
    • 2 heaping teaspoons cumin
    • 1 teaspoon garlic powder
    • 1 teaspoon onion powder
    • 1/2 teaspoon pink salt, or to taste
    • 1 teaspoon red pepper flakes, optional
    • 2 tablespoons chopped parsley
    • 1 scallion, sliced

    Spicy Tahini Sauce
    • 1/4 cup tahini
    • 1/2 cup water, + more as needed 
    • juice of 1/2 lemon or 1 tablespoon
    • pinch of pink salt
    • pinch of red pepper flakes
    • 1 tablespoon finely chopped parsley

    to serve
    • shredded cabbage or micro greens
    • lavash bread or corn tortillas (flour tortillas work too)
    • chili paste or sriracha (may fav chili paste)
    • sliced avocado, for tacos (optional)

    In a medium sauce pan, bring water, lentils, quinoa and oil to a boil, reduce heat to low, add in cumin, garlic & onion powder, salt and optional red pepper flakes, stir to combine, cover and simmer for 20 minutes. Remove from heat, add in chopped parsley and scallions, let rest for 10 minutes. If you feel it's too dry, add a couple tablespoons of water. Mixture should be creamy, not dry. Add extra spices to taste.

    While lentil & quinoa mix is cooking, combine all the ingredients for the sauce in a small bowl. Set aside.

    For the wrap, lay your lavash bread on a flat surface. Spread a tablespoon or so of chili paste about 1 1/2 inches from the edge on the first 1/3 portion from top to bottom, leaving an inch on both ends. Layer with about 1/4 cup lentil & quinoa mix and cabbage, fold over and roll. Slice in half and serve with a drizzle of tahini sauce on each bite.

    For tacos, warm your tortillas, layer with lentil & quinoa mix, micro greens or cabbage, add chili paste and tahini dressing to taste and sliced avocado.

    Notes:

    Feel free to use all cabbage, or any greens that you like. I have used micro greens here because I had them on hand and for variation.

    Lentil & quinoa mix makes about 3 cups. Refrigerate for up to a week or freeze for longer.

    Tahini sauce makes about 3/4 cup. Store in refrigerator for up to a week. Great on salads, steamed or roasted vegetables too! If you prefer it to be thicker, use less water.

    If you don't have quinoa available you can still pull this together using all lentils. 1 cup lentils to 2 1/4 cups water. If using brown/green lentils, cook at least 40-45 minutes.

    Enjoy!

    Asian Rainbow Salad + Spicy Mango Dressing

    Asian Rainbow Salad + Spicy Mango Dressing
    Asian Rainbow Salad + Spicy Mango Dressing

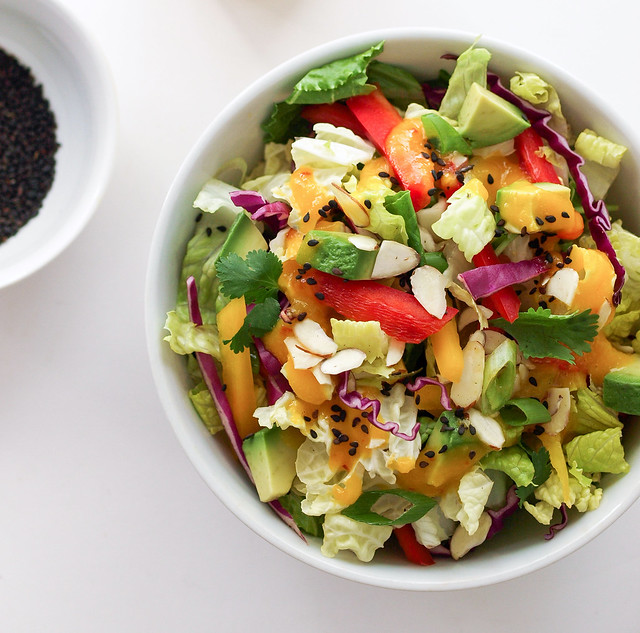
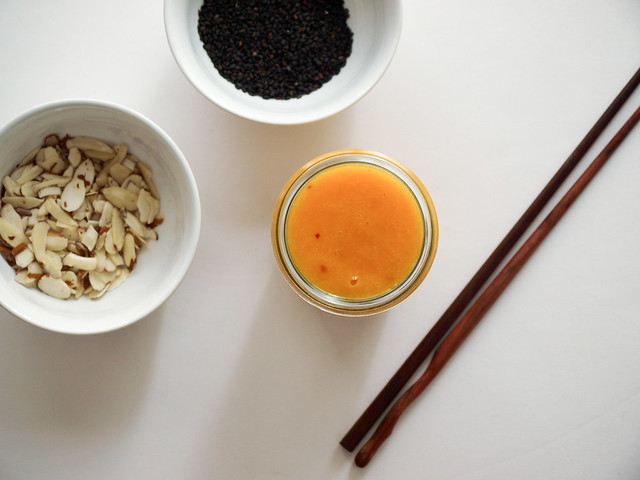
    You may remember a few posts back that I mentioned buying loads of strawberries each week, I shared with you all a Strawberry Chocolate Milkshake.  Not only have I been buying strawberries each week, and freezing most of them, I've also been buying mangoes. We have a local farmer who comes around selling them and I scoop them up as much as I can. Some have been chopped and stored in the freezer along with the strawberries for smoothies, others eaten with a sprinkle of cayenne or as is. I love mangoes with their sweet yellow/orange flesh  and have been wanting to put them to different uses. I've always wanted to try a mango dressing but just never felt like using the food processor, one more thing to have to wash...I'm all about keeping things easy. But sometimes you just have to give and the little extra cleaning was all worth it. This spicy mango dressing with it's beautiful color is the perfect accompaniment to this colorful salad. And, it's a nice mix up to all the peanut dressings that I usually tend to use. Light, bright and refreshing, this colorful salad is another welcome addition to the recipe collection!

    Asian Rainbow Salad + Spicy Mango DressingAsian Rainbow Salad + Spicy Mango Dressing

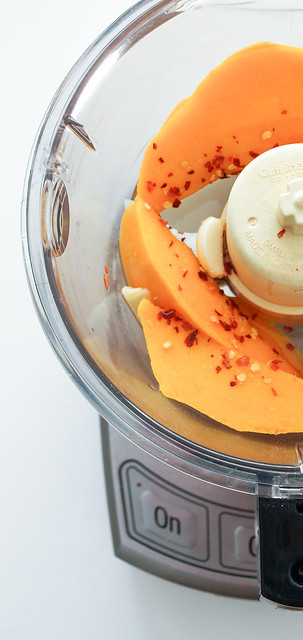
    Start with your spicy mango dressing. Add ingredients to food processor/blender, process until smooth. Set aside so flavors can develop.

    Asian Rainbow Salad + Spicy Mango Dressing

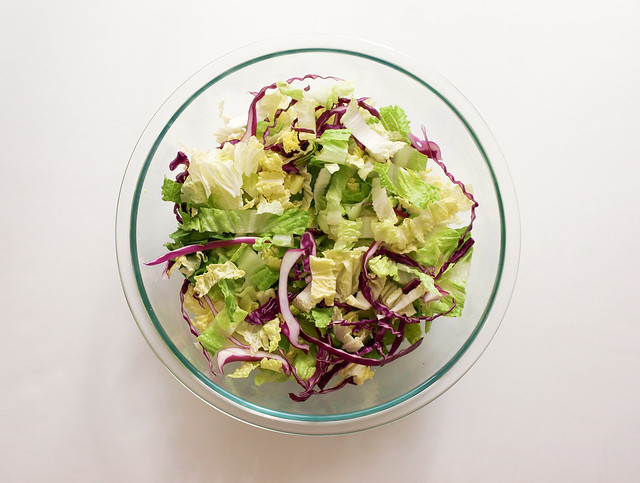
    Chop and shred your lettuce and cabbages, add to large bowl.

    Asian Rainbow Salad + Spicy Mango Dressing

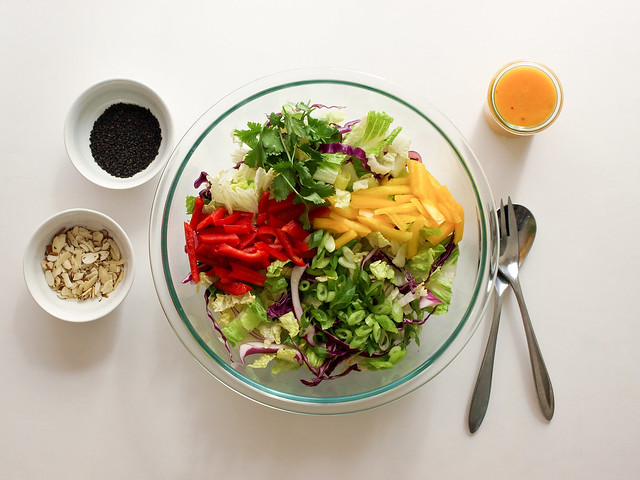
    Add bell peppers, scallions and cilantro, toss and serve! 

    Asian Rainbow Salad + Spicy Mango Dressing

    Asian Rainbow Salad + Spicy Mango Dressing

    Ingredients
    • 1 head romaine, sliced
    • 1 small head cabbage, or 1/2 head large, sliced
    • 1/4 head red cabbage, sliced
    • 1/2 red bell pepper, sliced
    • 1/2 yellow bell pepper, sliced
    • 2 scallions, sliced
    • 1/2 cup cilantro, roughly chopped
    • 1 avocado, sliced, to serve
    • black sesame seeds, to serve
    • slivered almonds, to serve

    Spicy Mango Dressing
    • 1 ripe mango, peeled and seed removed
    • 3 tablespoons apple cider vinegar
    • 3 tablespoons water, or more vinegar if you like
    • 1 clove garlic
    • 1/2 teaspoon red pepper flakes
    • pinch of pink salt

    Start with the mango dressing by adding all ingredients to food processor/blender and blend until smooth. Set aside to let the flavors develop.

    Add salad ingredients to a large bowl and toss. Serve in individual dishes, top with diced avocado and spicy mango dressing. Add a sprinkle of black sesame seeds & slivered almonds over top. If eating this as a monster salad, simply enjoy straight from the large bowl! 

    Makes one very large salad or four smaller salads.

    Notes:

    Feel free to add cucumbers, carrots, broccoli....whatever you like.

    Add some cubed plain, baked or crispy fried tofu for added protein if you like. 

    Enjoy! 


    Hot Pepper Tofu

    Hot Pepper Tofu

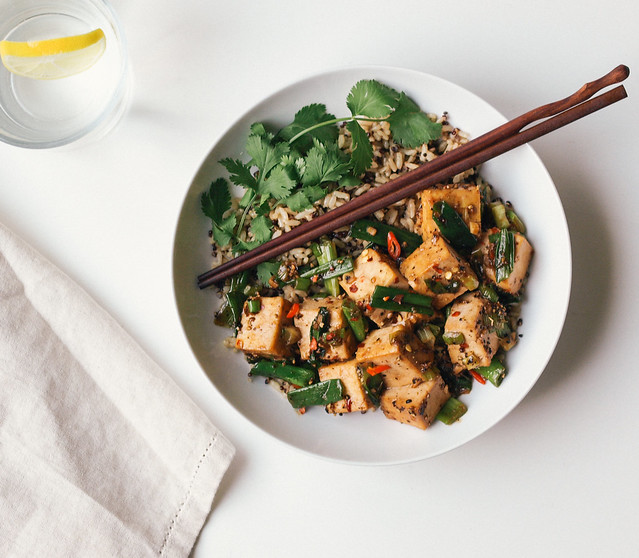
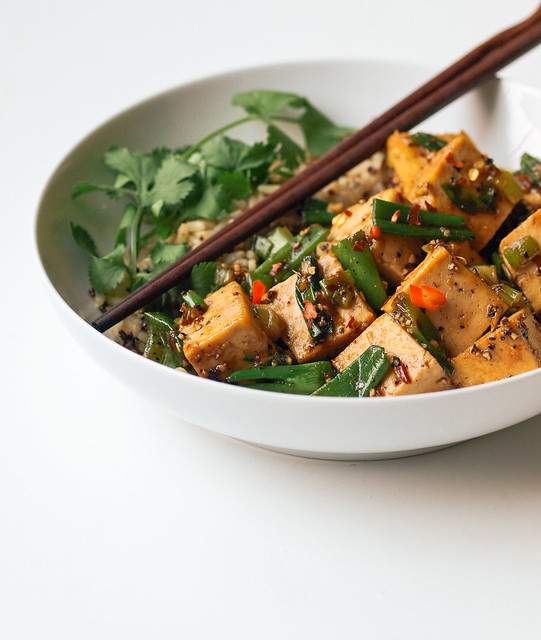
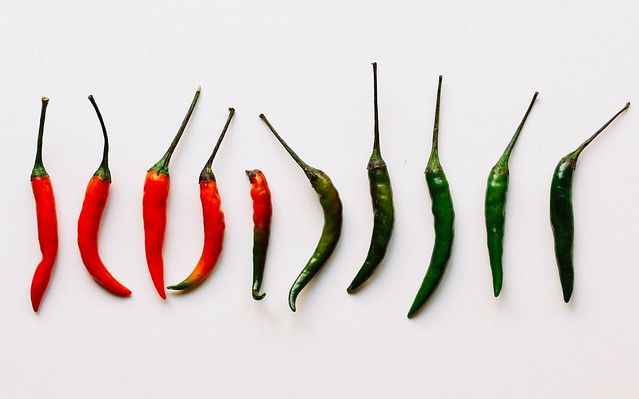
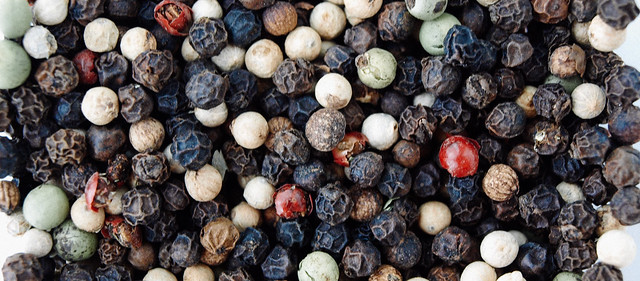
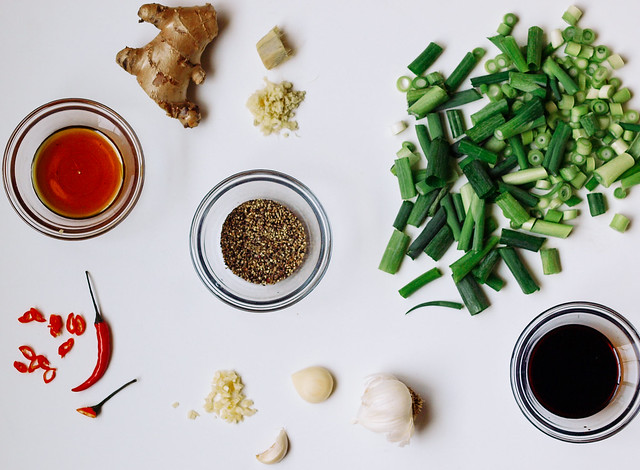
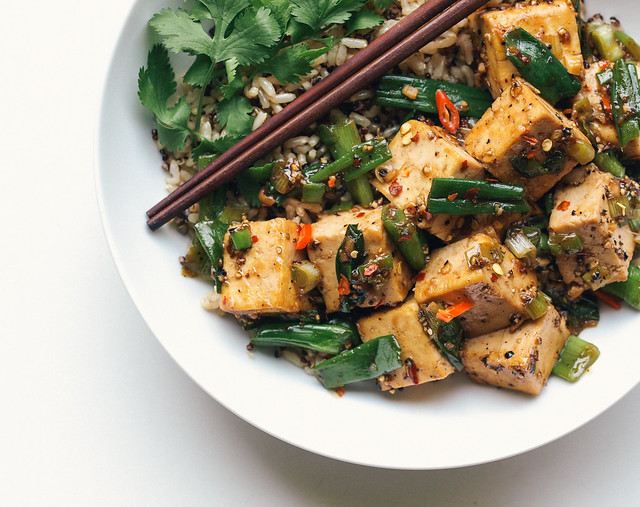
    For those of you who follow this blog, you know how much I love spicy food. And if you’re a lover of spiciness, this hot pepper tofu will work well for you too. I've simplified the traditional black pepper tofu which calls for 1 stick of butter and 3 types of soy sauce, these items are just not in my kitchen essentials. I can't even imagine eating/using a whole stick of butter these days, vegan or not! It's simply not an option for me anymore and I would be so sick to my stomach if I did. Lol But not to worry my pepper lovers, this simple and healthy version is so flavorful that you won't miss a thing. Feel free to change up any of the ingredients using some of the suggestions in the notes or making it your own using whatever ingredients you have on hand (like I did). I've really tried taking into account all the different levels of eating habits creating a version for almost everyone. You'll find various things on most of the ingredient lines reflecting this, and in the notes too. The thing I love about this recipe is that it's pretty much fool proof. The only thing you may end up doing is adding too much pepper/heat for your taste, those of you who are more sensitive should stick to using the lesser amounts called for and go up from there. 

    Hot Pepper Tofu
    Hot Pepper Tofu
    Hot Pepper Tofu
    Hot Pepper Tofu
    Hot Pepper Tofu

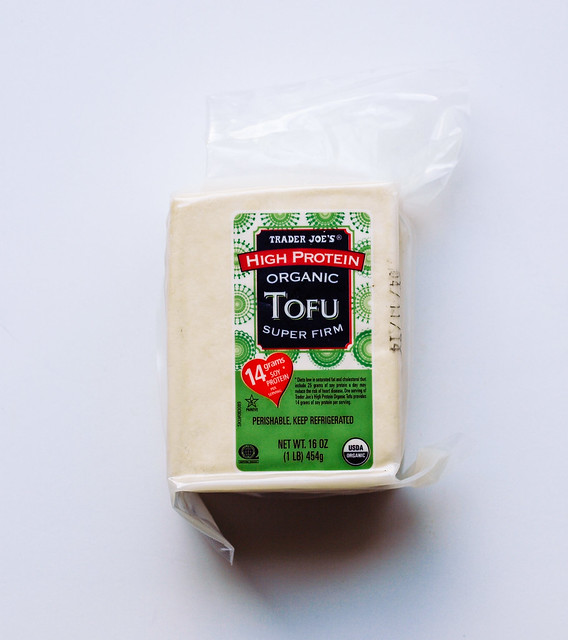
    I love using this high protein tofu. It holds up really well. Another benefit from using this is that it doesn't need to be pressed. It's so dense that not much water is absorbed making it one less step in preparing your tofu recipes. I've used this one from Trader Joe's pictured above and a few various ones from Wildwood that also do not need to be pressed. Both tofu brands, firm and extra firm, are very versatile and can go from being used in salads to skewered for grilling. And remember, TOFU is one of those foods that should be eaten in moderation, it has many health benefits but is not for everyone. Just a note about the soy beans that whole foods recommends are whole soybeans or fermented ones like tempeh, soy sauce, tamari, miso & tofu. Soy milk (in most cases), soybean oil and soy protein isolates are highly processed and should be avoided. Read more here.

    Hot Pepper Tofu
    Hot Pepper Tofu

    Hot Pepper Tofu

    Ingredients
    • 1 block (14-16oz.) organic tofu (firm or extra firm), cubed
    • 1 tablespoon toasted sesame, sesame or grapeseed oil
    • 1/4 cup tamari, soy sauce or coconut amino's
    • 1/4 cup water or veggie broth
    • 3 tablespoons maple syrup or liquid sweetener of choice
    • 2 teaspoons arrowroot or tapioca flour (cornstarch is fine too)
    • 1 - 2 tablespoons fresh cracked pepper
    • 3 - 4 cloves garlic, minced or 1 teaspoon garlic powder
    • 1 1/2 inch knob ginger, minced
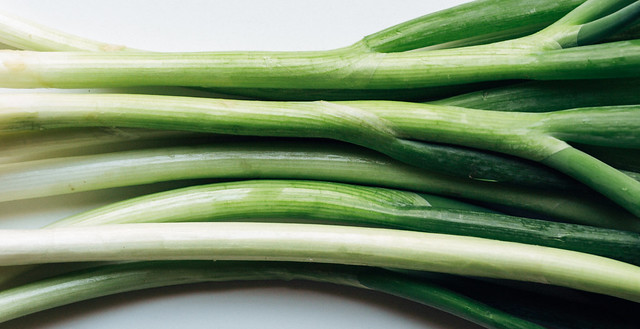
    • 1 bunch scallions, chopped
    • 1 - 2 chili's peppers, sliced and seeds removed or 1 teaspoon red pepper flakes
    • 1 bunch cilantro, roughly chopped, to serve

    If not using one of the tofu's mentioned above, you'll want to drain and press your tofu to remove excess water. Simply cut tofu into slabs and place between paper towels or a clean dish cloth. With wrapped tofu laying on a flat surface, place a heavy book/object on top for about 15 minutes or so. Here's a great tutorial from Olives for Dinner: How to press tofu perfectly in six steps

    In a small/medium bowl, combine the tamari, water, sweetener and flour. This will be your slurry, ensuring your tofu will be coated nicely.

    Heat oil in a large wok or skillet over medium high. Add tofu and cook, stirring occasionally for about 5 minutes. Your tofu will slightly brown (we're not going to worry about it getting super brown and crispy here but if you want it browner and crispier, cook another 5 minutes or so stirring occasionally).

    Add in your slurry mixture, ground pepper, garlic and ginger. It will sizzle at first when adding the liquids. Stir fry another 3 minutes or so, add in hot peppers and scallions. Liquids should start to thicken a bit, cook another 5 minutes or until the scallions are just softened.

    Serve with brown rice, brown rice/quinoa mix, basmati or jasmine rice. Soba noodles would be great too. Add a large handful of chopped cilantro on the side, it will add to the flavors while giving a nice dose of freshness to the pepperiness. If you love cilantro, you will truly appreciate it here!

    Serves three.

    Notes:

    Add more or less of any ingredient to suit your taste. You can also sub in mild chili peppers or sliced jalapeno peppers with the seeds removed.

    For the scallions, you'll notice that I cut the darker green parts into 1 inch sections while slicing the white and light green parts into 1/4 inch pieces. Just a thought if you'd like to do the same.

    Feel free to use 2 tablespoons pure cane sugar, raw sugar or coconut sugar in place of the liquid sweetener.

    Enjoy!


    Back to top