ROASTED VEGETABLE MISO SOUP + SOBA NOODLES

ROASTED VEGETABLE MISO SOUP + SOBA NOODLES

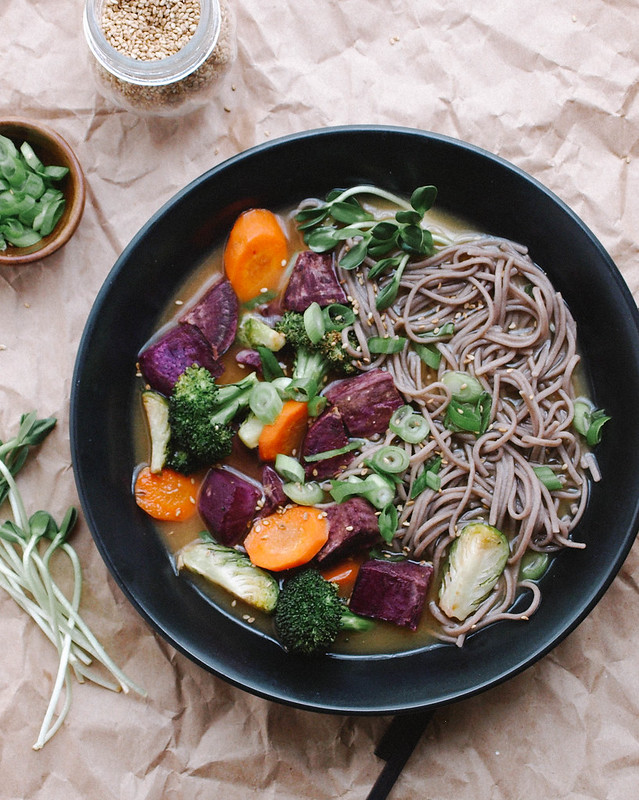
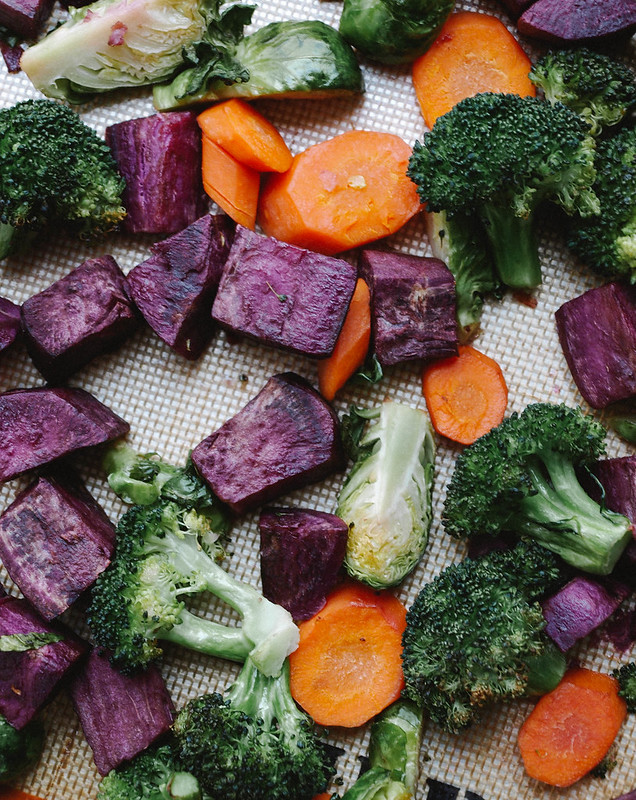
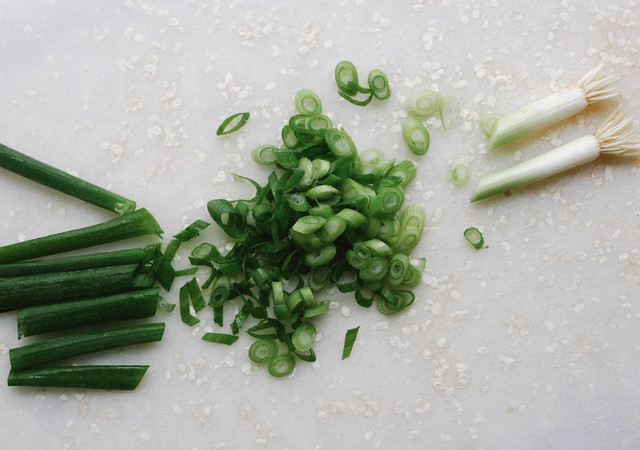
Soups really have been a big part of my winter meals, although I've been really loving a few new vegetables bowls that I'll be sharing soon! They're so easy to throw together and will last me a good day or two. This soup happened to come about as a combination of ingredients I've never had together. It was something I threw together on a whim. I shared my first attempt here (this one looks better) and thought it was ultimately good enough to make it to the recipe collection. So here it is! It fits my criteria for being simple to pull together, has versatility and is fairly well-balanced. Now, I know that roasting vegetables and serving them in soup is not really typical but I'll be darned if it didn't taste great and make my life simple. I gently roasted them just until softened, about 20 - 25 minutes. It helps to cook your vegetables faster if they're chopped on the smaller side. You don't have to use all the vegetables I have here either, maybe just 3 of the 4 opting between the broccoli or brussels sprouts. I wasn't sure what direction I was going to go in, using the broccoli or brussels sprouts and decided to just add them both using 4 vegetables. Suits me perfectly! The miso broth is super simple. I'm in love with red miso at the moment (it's robust & flavorful) but you can use your favorite. You may even like to add a tablespoon or so of tahini to the broth for something different. Making the miso broth as suggested with keep the integrity (health benefits) of the miso paste at it's highest. The soba noodles are easy too and cook pretty much the same as any other noodle. Add some freshness to the soup with sliced scallions, a few greens and cilantro if you have it on hand. A dash (or two) of sriracha isn't a bad idea either! And if you feel the need for some added protien, add a serving of cubed organic tofu (firm or extra firm). If you have a few veggies left over, save and serve them with a grain like rice or quinoa and a protein like lentil or beans (or make more soup!). Enjoy this soup....it's filling, flavorful and easy. Win, win, win!
ROASTED VEGETABLE MISO SOUP + SOBA NOODLESROASTED VEGETABLE MISO SOUP + SOBA NOODLESROASTED VEGETABLE MISO SOUP + SOBA NOODLESROASTED VEGETABLE MISO SOUP + SOBA NOODLESROASTED VEGETABLE MISO SOUP + SOBA NOODLESROASTED VEGETABLE MISO SOUP + SOBA NOODLES

ROASTED VEGETABLE MISO SOUP + SOBA NOODLES

Ingredients
  • 1 purple sweet potato (or any color), peeled and cubed 
  • 2 carrots, sliced
  • handful brussels sprouts, quartered
  • handful broccoli florets
  • drizzle of sesame, olive or grapeseed oil
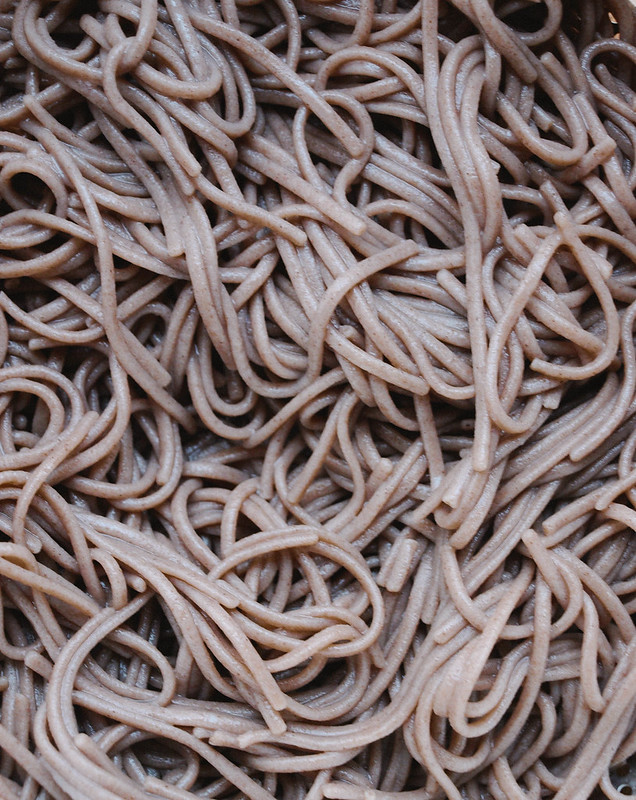
  • 1 package 100% soba noodles
  • 5-6 tablespoons miso (I used red, use your favorite)
  • 4 cups water
garnish
  • 2 scallions, sliced
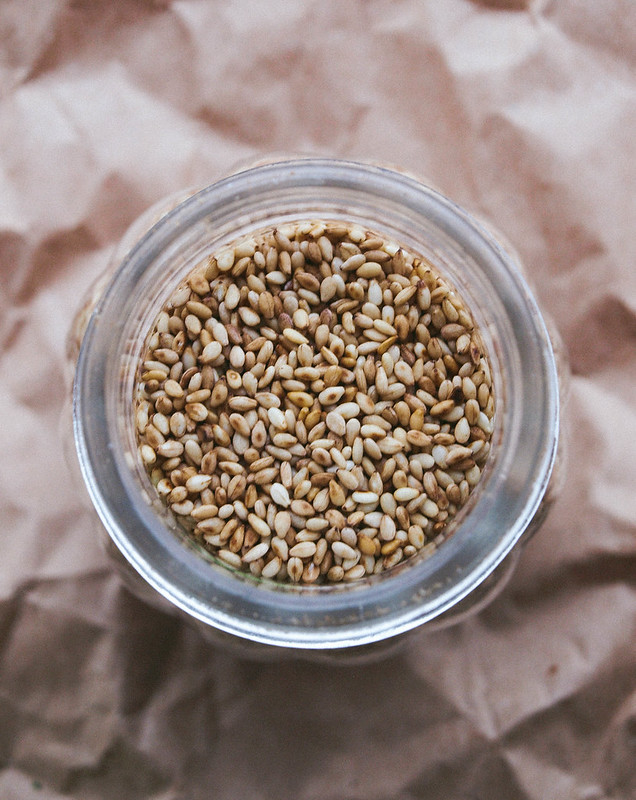
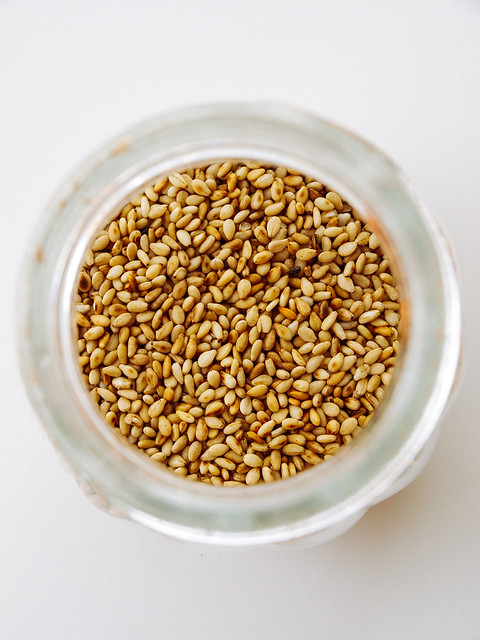
  • toasted sesame seeds (raw black and/or white are great too)
  • handful of shoots, sprouts or greens and/or cilantro

Preheat oven to 400 degrees F.

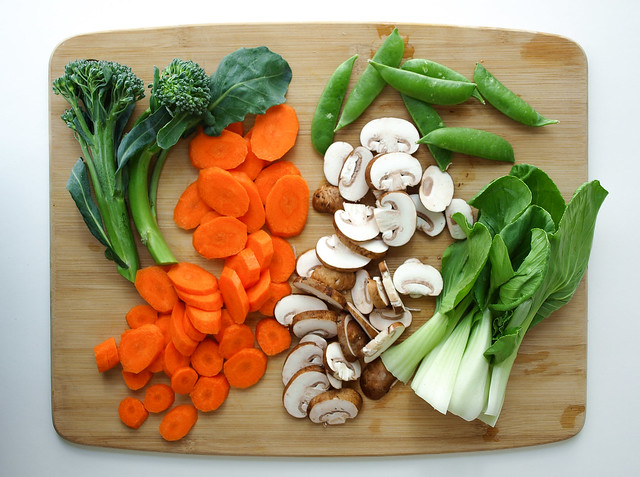
Prepare vegetables and place on a large rimmed baking sheet that's lightly greased or lined with a silpat or parchment paper. Add a drizzle of oil and toss well. Add a sprinkle of salt over top. Place sheet on the middle rack and cook for 20-30 minutes stirring every 10 minutes, vegetables are done when just fork tender.

Cook your soba noodles according to the package directions. Be sure to use a large pot filled just under half way when cooking soba noodles. Once the noodles have come to a boil, the water tends to foam up quickly and overflow (ugg, I've learned from experience). Pay attention and reduce the heat as needed to prevent the water from boiling over while keeping the water at a gentle rolling boil.

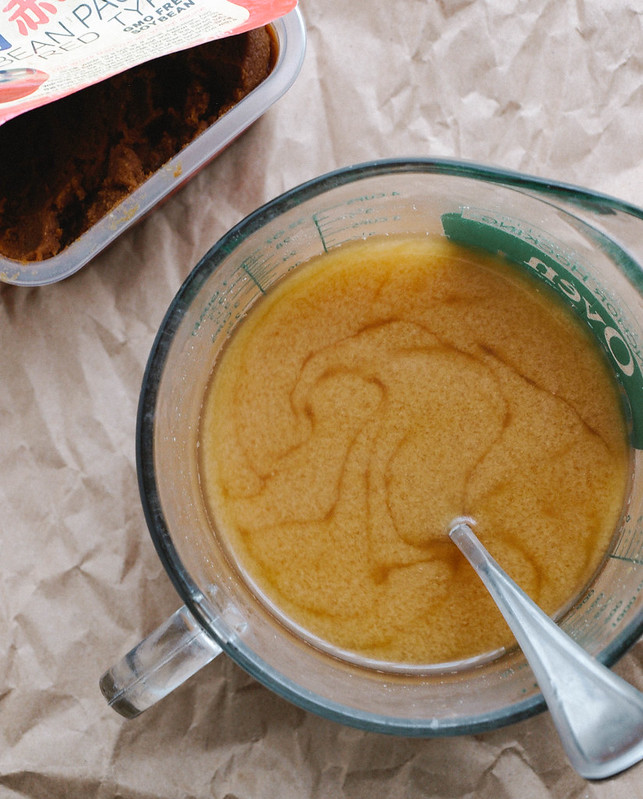
For the miso broth, heat your water until nicely warmed, but not boiling, in a small pan or use the pot the noodles were cooked in. Remove from heat, add miso and mix until miso is dissolved. For me, I fill my 4 cup measuring cup using my hot water dispenser, add the miso and mix (works great for me!). 

Add noodles and vegetables to your serving bowl, top with broth and add a few of the garnishes. Some other optional garnishes would be a dash or two of sriracha or red pepper flakes.

Serves 2-3.

Notes:

Try adding a tablespoon or so of tahini to the broth for something different.

No need to use all these vegetables, three is enough. You may opt to use either the brussels sprouts or broccoli. My Vegetarian Flavor Bible didn't suggest that broccoli was a match for miso, but I liked it and it's available all year long. You can also try using butternut or kabocha squash in place or along with the sweet potato. I used butternut squash in my first attempt and it was delicous!

The smaller you cube your vegetables the quicker they cook. 

Add a serving of cubed organic tofu (firm or exta firm) for added protein.

For the noodles, it's 4 servings per package but I can easily eat half a package myself which is why I suggest this serves 2-3.
SUGAR SNAP PEA & SOBA NOODLE BOWL + MISO SAUCE

SUGAR SNAP PEA & SOBA NOODLE BOWL + MISO SAUCESUGAR SNAP PEA & SOBA NOODLE BOWL + MISO SAUCESUGAR SNAP PEA & SOBA NOODLE BOWL + MISO SAUCE

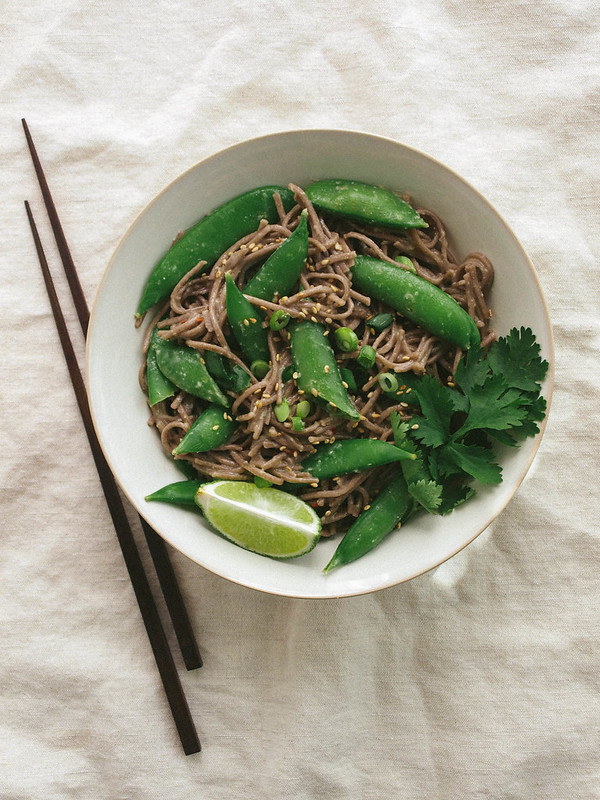
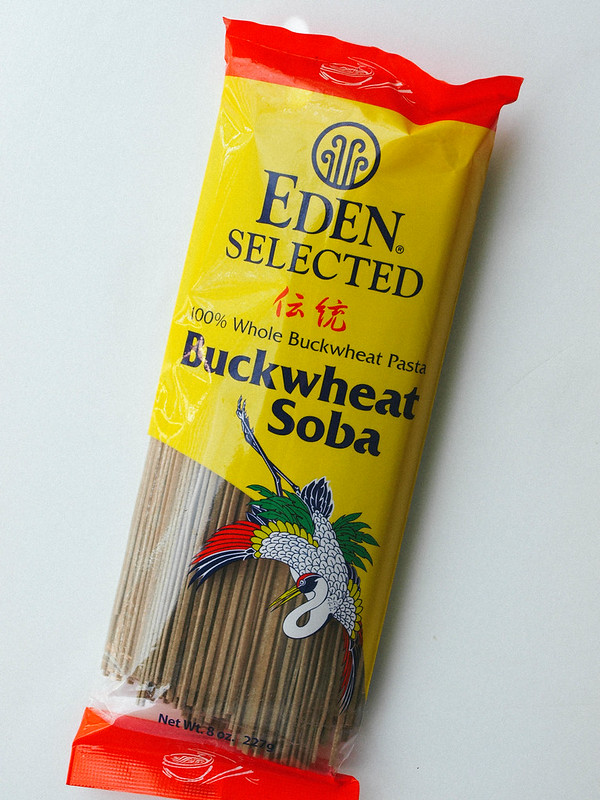
Soba noodles have become a favorite of mine. I love the 100% buckwheat noodles from Eden Foods. They have a nutty flavor with a somewhat chewy texture. Each serving contains 6 grams of protein and 3 grams of fiber. I love that they can be served warm or cold making them a versatile noodle choice. They are gluten free using only buckwheat flour, unlike other brands of soba noodles which use a combination of wheat and buckwheat flours. They tend to be a bit more expensive than the mixed flour soba noodles. I happen to see these noodles as a tradeoff for the more expensive items that I don't purchase anymore such as meat, poultry and dairy. Keeping that in mind, the extra expense doesn't bother me. I hope you may have the same perspective as I do when picking and choosing your plant based grocery items.

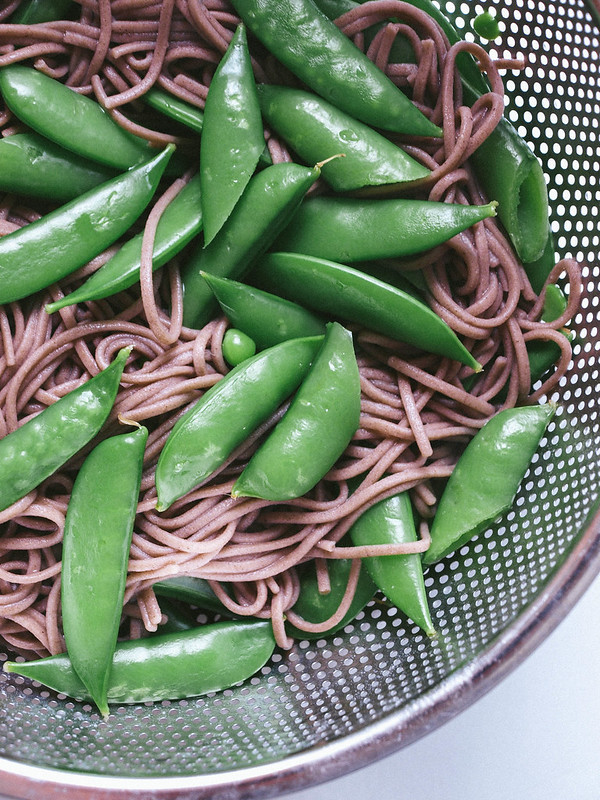
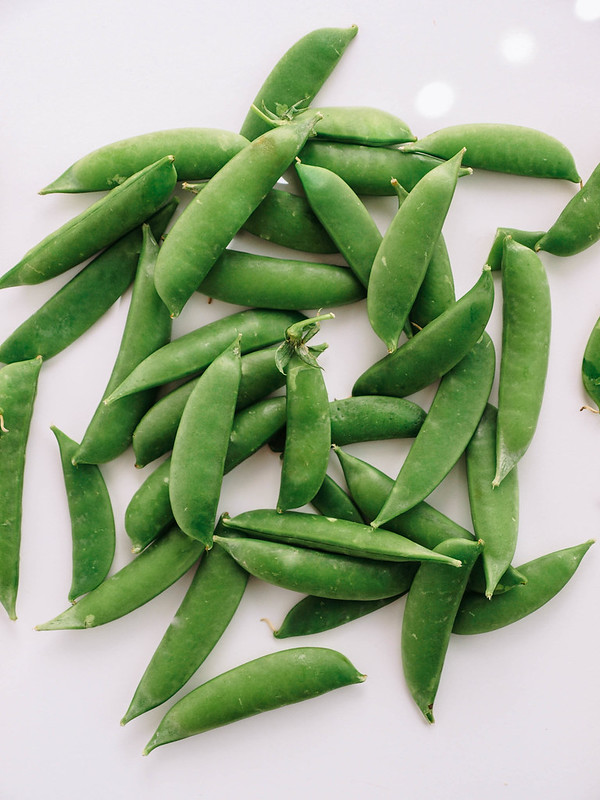
The addition of sugar snap peas add a perfect dose of sweetness and crunch to the soba noodles. I love sugar snap peas and have them often dipping them in hummus and eating as is. In this recipe we will be adding the pods to the soba noodles half way through as they cook to soften them a bit and bring out their greenest green. 

SUGAR SNAP PEA & SOBA NOODLE BOWL + MISO SAUCE
SUGAR SNAP PEA & SOBA NOODLE BOWL + MISO SAUCESUGAR SNAP PEA & SOBA NOODLE BOWL + MISO SAUCE

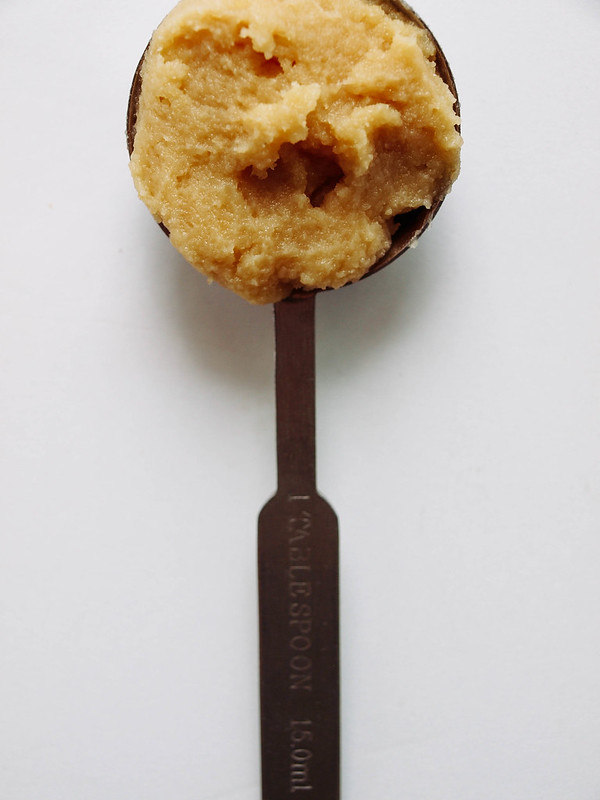
Miso is another great addition to your healthy eating habits. With a few additional ingredients it makes for an easy and flavorful dressing for the noodles and sweet peas. A tub of miso will last up to 9 months + in the refrigerator and can be used for soups, dressing/dips and adding richness to vegan cheeses and sauces. It will go a long way in your kitchen and is a great staple ingredient to have on hand.

This is a very easy meal to throw together and will be ready in about 25 minutes or less. I originally planned on having cubed tofu in this recipe but in the end forgot to add it in for this set of pictures. Feel free to add in a serving of tofu (as per the notes). With or without tofu, enjoy this simple, wholesome and delicious meal! 

SUGAR SNAP PEA & SOBA NOODLE BOWL + MISO SAUCE

SUGAR SNAP PEA & SOBA NOODLE BOWL+ MISO SAUCE

Ingredients
  • 1 package (9oz.) soba noodles
  • 8 oz. sugar snap peas
  • 2-3 scallions (green onions), sliced, to garnish
  • toasted sesame seeds, to garnish
  • handful cilantro sprigs, to serve
  • lime wedges, to serve

Miso Sauce
  • 2 - 3 tablespoons mellow miso paste (white miso)
  • 2 tablespoons rice wine vinegar 
  • 3 tablespoons water, + more as needed to thin
  • 1 inch knob of ginger, grated or minced
  • juice of 1 lime (about 1 tablespoon)
  • pinch of red pepper flakes

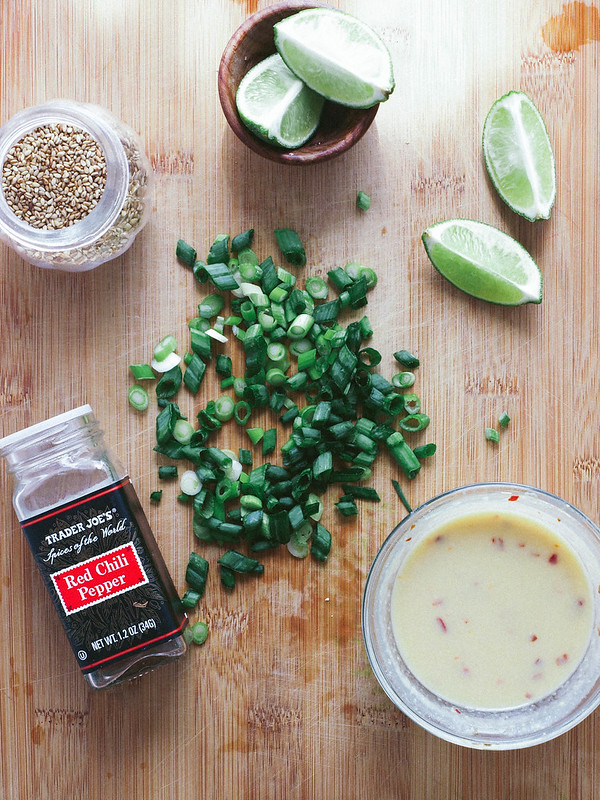
In a small bowl, mix the miso sauce ingredients together, set aside.

Fill a large pot just under 1/2 full of water, bring to a boil, add a pinch of salt and soba noodles, cook 4 minutes. If using 100% soba noodles, careful to watch the water after 2 minutes or so, it will start to become foamy and bubble over...turn the heat to medium and back up again as needed to keep the water at a boil but not boiling over.

2-3 minutes before noodles are done according to package directions, add sugar snap peas to the noodles and continue cooking until noodles are done. Drain and rinse noodles and peas under cool running water.

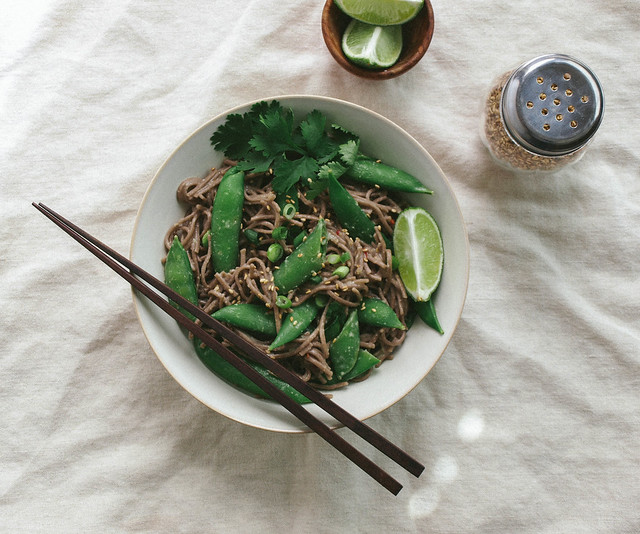
Add noodles/peas back to the pot they were cooked in, add sauce and gently toss to coat. Serve in individual bowls with sliced scallions, sesame seeds, cilantro and lime wedges to squeeze over top.

Serves 2

Notes:

If your sugar snap peas are on the larger side, slice them diagonally in the center to make them easier to eat.

Add in a serving or two of cubed tofu for extra protein if you like...either baked, pan cooked until golden or simply diced from the package. You may even like to add in a serving or so of edamame.

If you have soy allergies, try using other miso's which don't contain soy such as chickpea miso. 


    BOK CHOY & WILD MUSHROOM MISO SOBA NOODLE BOWL

    BOK CHOY & WILD MUSHROOM MISO SOBA BOWL

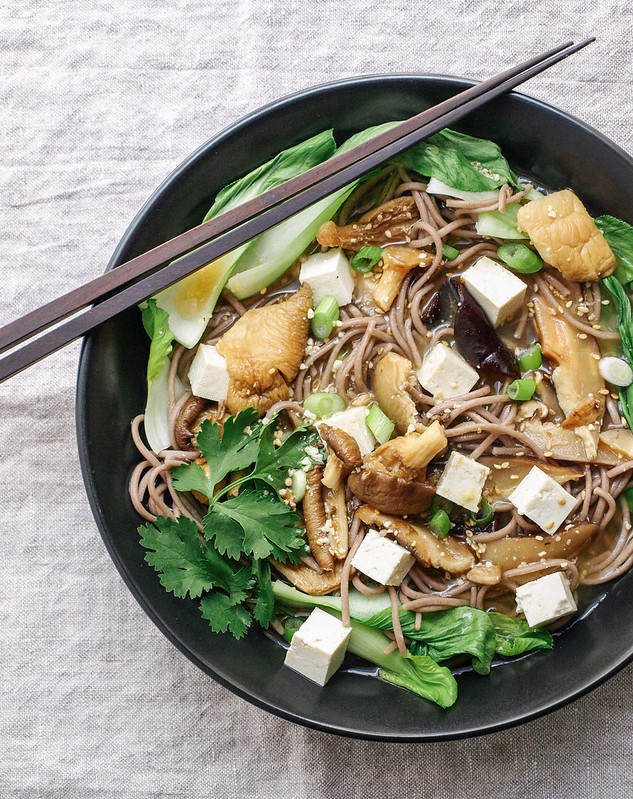
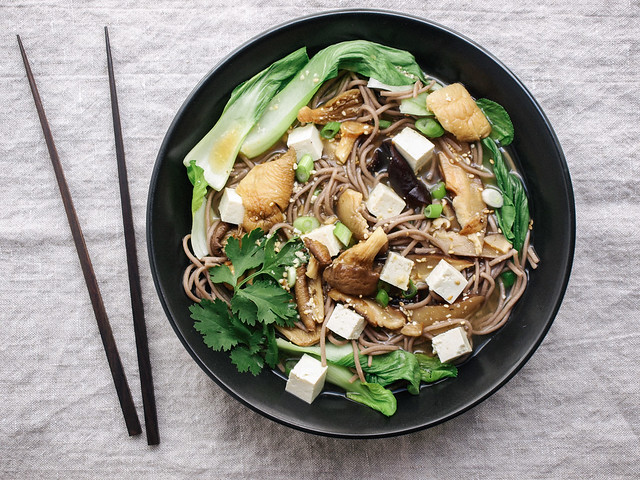
    I've had my eye on this recipe from A House In The Hills since February of this year. I love her blog and taste in foods! I finally got around to putting my own version together and it's nothing short of delicious! I love every ingredient here and the pure simplicity of it all. It does take more than one pot to cook it all in but it's well worth the few extra dishes. I'm sure you can find a way to streamline my instructions even further to suit your needs and/or make it go a bit quicker if need be. I love this kind of cooking, minimal ingredients that come together creating a satisfying nutrient dense meal. Plus, anything called a 'bowl' and I'm all in! I hope you'll enjoy my version and check out the original too, it's a bit different as it doesn't have the miso soup. Either way you like it....cheers and enjoy your soba bowl!

    Recently updated, in case you're a soup lover, is this Pasta and Bean with Kale Soup. It's super delicious and enough to serve six generously. You'll most likely have leftovers and you'll be glad you did!

    BOK CHOY & WILD MUSHROOM MISO SOBA BOWLBOK CHOY & WILD MUSHROOM MISO SOBA BOWL

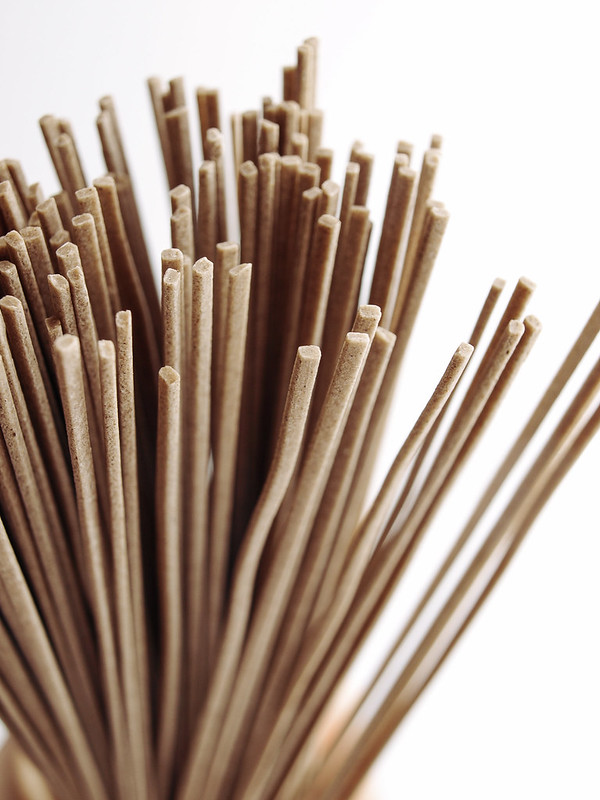
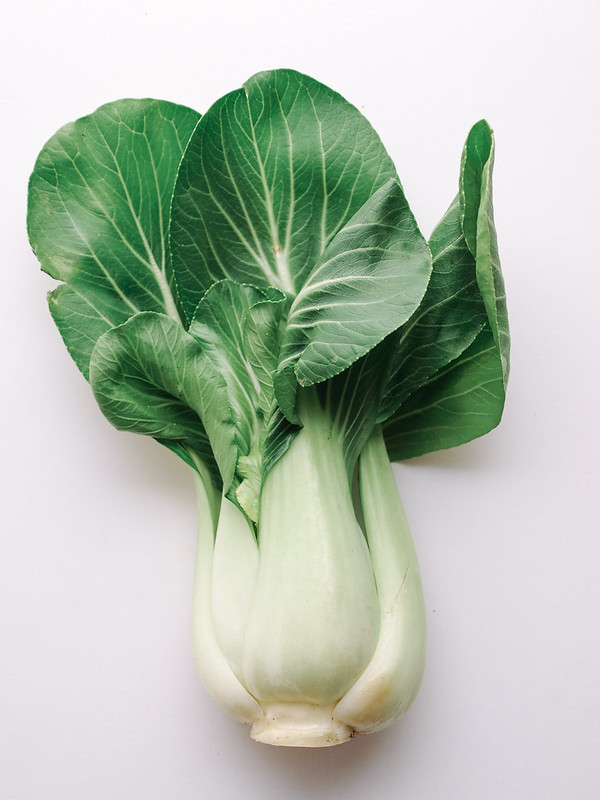
    I used 100% soba noodles but you can use the mixed flour soba noodles if you like. You can even use ramen or udon noodles if you prefer, just know they are not gluten free if you're following that kind of diet. I don't have to follow a gluten free diet but I love soba noodles and do try to limit foods containing gluten. I started using them for their nutritional aspect and came to love their flavor and versatility. The noodles contain 6 grams of protein per serving. I call for 2 servings of soba noodles per person giving you 12 grams. The tofu is optional and will add extra protein, about 9 grams per serving, giving this dish almost half of the the average persons protein requirements. If you decide to not use the tofu, have a protein shake for dessert or somewhere in your day if you feel you haven't met your needs elsewhere. The bok choy is a must here and has such a mellow flavor but I'm sure you can adjust using something else if needed.

    BOK CHOY & WILD MUSHROOM MISO SOBA BOWLBOK CHOY & WILD MUSHROOM MISO SOBA BOWLBOK CHOY & WILD MUSHROOM MISO SOBA BOWL

    I used dried mushrooms here since I have somehow collected three bags of them and decided it was time to put one package to good use. Feel free to use fresh mushrooms of choice, about 8 oz should be good.

    BOK CHOY & WILD MUSHROOM MISO SOBA BOWL

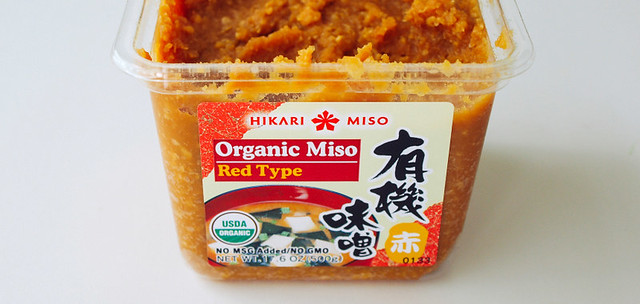
    Red miso is what I had on hand for this recipe, but you can use your favorite or whatever you have available. If you don't have miso on hand, sub in some low-sodium veggie broth. But I recommend having miso handy at all times, it's makes for great broths and soup bases! FYI, it will last up to one year in the refrigerator...a great incentive to add this to your refrigerator staples.

    BOK CHOY & WILD MUSHROOM MISO SOBA BOWLBOK CHOY & WILD MUSHROOM MISO SOBA BOWL
    BOK CHOY & WILD MUSHROOM MISO SOBA BOWL

    BOK CHOY & WILD MUSHROOM MISO SOBA BOWL


    Ingredients (serves 2)
    • 1 package (9oz) soba noodles (I use Eden)
    • 1 package dried wild mushrooms or 8 oz shitake, oyster or mushrooms of choice
    • 3 small bok choy
    • 2 - 3 tablespoons miso (use your favorite)
    • 4 cups water
    • 2 - 4 oz. cubed tofu, optional
    Garnish
    • 2 scallions, sliced
    • fresh cilantro sprigs
    • sesame seeds 
    • red pepper flakes (optional)

    Cook your soba noodles according to package, rinse under cool water, set aside. 

    Meanwhile, in a small saucepan, warm 4 cups of water over medium heat (do not boil), add dried mushrooms, lower heat and let simmer, uncovered for 10 - 15 minutes. Add miso, stir to remove any clumps and continue to keep the soup warm over low heat.

    If using fresh mushrooms, slice into strips, saute them in a bit of sesame oil and splash of tamari for about 5 minutes over medium high heat, add mushrooms to the broth while simmering.

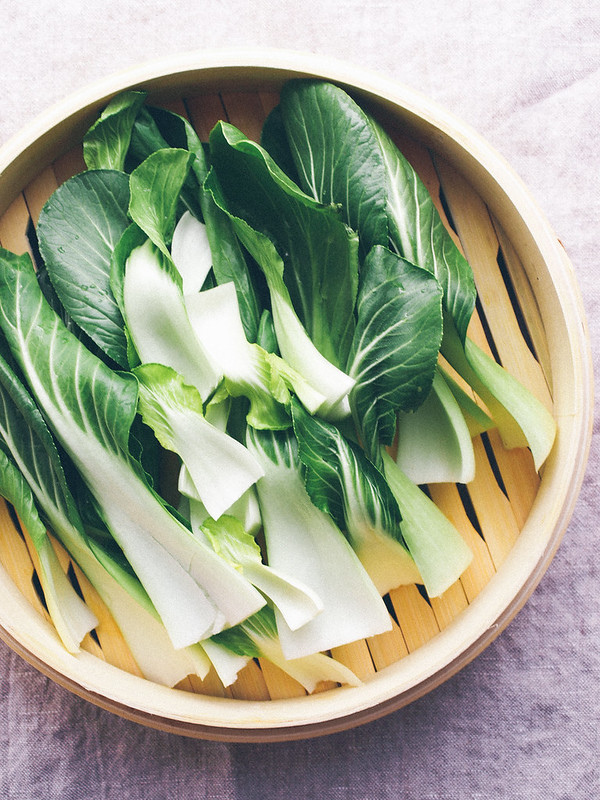
    Steam your bok choy. I used a bamboo steamer with the pot I cooked the noodles in.

    Tofu can be steamed with the bok choy or added to the soup to warm.

    Build your bowl by adding half the bok choy and soba noodles to your serving bowl, ladle 1/2 of the miso broth and mushrooms over top. Top with cubed tofu, scallions, cilantro sprigs and sesame seeds.

    Notes: 

    If you don't have miso on hand, sub in some low-sodium veggie broth. But I recommend having miso on hand, it's makes for great broths and soup bases! FYI, it will last up to one year in the refrigerator...a great incentive to add this to your refrigerator staples.

    A note on the Eden 100% Buckwheat Noodles and their price. It is a bit more expensive than most noodles but from my perspective, I eat basic, cheap foods most of the time so I consider these noodles to be my 'meat' if you will. You can always hunt the internet for cheaper prices and buy in bulk. 100% soba noodles are well worth the price considering I don't spend money on many other food items like cheese, meat, fish and poultry...all of which can cost just as much, if not more. I hope to encourage you to rethink food items and their cost when adapting to new foods...there is a trade off and I much rather spend my money on 100% soba noodles. Feel free to use other noodles as mentioned above.

    Enjoy!


    RED HOT MISO NOODLE BOWL

    Red Hot Miso Noodle Bowl

    Lately, I've been completely loving steamed vegetables with chili paste as my sole seasoning. Usually I'll add some sort of noodle and tofu to really make it hearty. I wanted to do something a little different and decided to add a spicy miso broth to the mix. Well, the result was super! I love a good miso broth and a spicy one is even better for me, but of course the spice can be an option for you. I know not everyone is as fond of spicy as I am but if you love some added heat you'll find this miso noodle bowl to be right up your alley. It's fairly quick to pull together and should be ready for your dinner table, couch or wherever you eat within 30 minutes. It's a versatile recipe allowing you to use items you may have on hand or can find fairly easily. The miso and chili paste may be the only ingredient that some, in certain parts, may have trouble with. Alas, there is the internet to fill that gap. You'll be able to use these items in more recipes than just here, so I encourage you to source them and start enjoying their flavors and benefits.

    Red Hot Miso Noodle Bowl

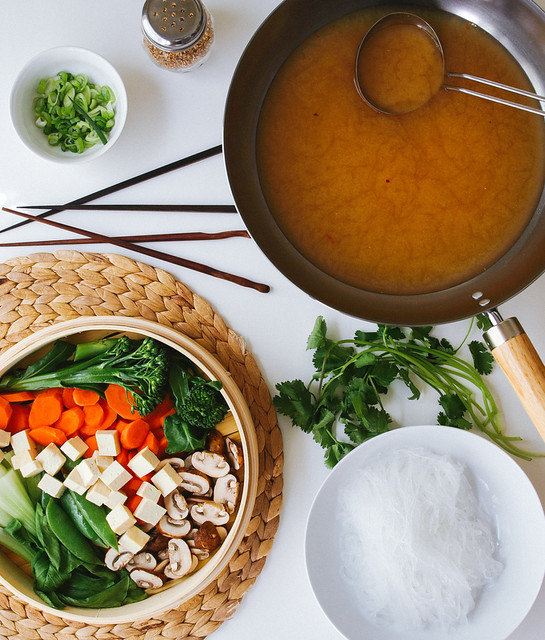
    I used mung bean threads here, aka glass or cellophane noodles. They come in these cute little nest bundles. This is my first time experimenting with mung bean noodles. I love the thinness and light texture they have once softened. They're easy to prepare, needing only to be soaked in warm water for about 15 - 20 minutes. I started these after prepping my vegetables and they were ready when everything was done.  Feel free to use any noodle you prefer or is available to you. Soba, rice, ramen and udon noodles would all be great here. If you're gluten intolerant, stick with the bean thread, 100% soba and rice noodles. You can find out about more gluten free noodles in this article from The Kitchn: 11 Gluten Free Asian Noodles. Most of these noodles can be found in the Asian section of your grocery store, and all can be found in your local Asian grocery store or purchased online. 

    Red Hot Miso Noodle Bowl
    Red Hot Miso Noodle Bowl

    I used a red miso, but you can use your favorite miso. Even a combination of two different miso's would be great...ie, red and white miso. The red miso is a bit more robust in flavor and slightly saltier than the mellow white miso I generally use. I enjoyed the stronger flavor here, especially with the addition of the chili paste which is pronounced as well. The miso soup is fantanstic on it's own, maybe adding some cubed tofu, sliced scallions and wakame for simplicity. I usually use Miso Master but found this brand at the Asian store while buying the bean threads and thought I'd give it a try. I was pleased all around. Find out more about the different types of Miso in this article from Bon Appetit: Know your Miso

    Red Hot Miso Noodle Bowl

    For the heat in this recipe I've used this chili paste from Huy Fong. It's on my favorites list right now. You can also sub in sriracha if you prefer. If you're not a fan of too much spice, start with a smaller amount than listed and work your way up at serving time. You can also use 1 - 2 teaspoons red pepper flakes in place of the chili paste.

    Red Hot Miso Noodle Bowl

    Your vegetable choices can be anything you like. I happen to have all of this on hand and threw in a little of everything. My favorite was the sugar snap peas. They gave a perfect sweet contrast to the spicy! I would highly recommend adding those in if you have them available. Play around with different vegetables using asparagus, baby corn, wild mushrooms, bell peppers, bamboo shoots, etc...any combination that suits your taste.

    Red Hot Miso Noodle Bowl

    RED HOT MISO NOODLE BOWL

    Ingredients (serves 2)
    • bean thread noodles, 2 nests or 4 oz. (or noodles of choice)
    • 1 - 2 bok choy
    • 2 carrots, peeled and sliced thin
    • 6 mushrooms, sliced
    • 1/2 cup broccoli
    • handful sugar snap peas
    • 4 oz. cubed organic firm tofu
    • 4 cups water, vegan dashi or vegetable broth
    • 3 - 4  tablespoons miso
    • 1 tablespoon chili paste or sriracha
    • 1 teaspoon grated ginger, optional
    • 1 - 2 scallions, sliced thin, to garnish
    • small bunch cilantro, to garnish
    • toasted sesame seeds, to garnish

    Prepare your vegetables, set aside.

    If using bean threads. In small saucepan, heat enough water to cover bean threads, remove from heat, let sit 15 - 20 minutes, or until nicely softened. In hind site: You could heat water, place one nest of bean threads in your serving bowl, pour enough water to almost cover the bean threads and let set for 15 - 20 minutes. Gently tilt to drain dish of the water before adding vegetables and broth. If using other noodles, cook according to package directions, drain and set aside.

    Next, steam your vegetables and tofu. I used a bamboo steamer here along with the wok but you can use any pot you like. Fill wok/pot 1/3 of the way with water. Heat water over high heat, place bamboo steamer over top, add steamer lid and steam until al dente, about 4 - 5 minutes. Remove steamer, keep lid on and set aside. Empty wok/pot of water.

    In same wok/pot, place 4 cups water and heat over high heat until nicely warmed (do not boil). Turn heat to low, add miso, chili paste and ginger, mix well dissolving any clumps of miso. Remove from heat.

    In each serving dish, place one nest of noodles, half of the vegetables & tofu and fill with spicy miso broth. Top with cilantro sprigs, scallions and toasted sesame seeds. Add more chili paste or sriracha to taste.

    Notes:

    Use a vegan dashi or light vegetable broth in place of water for more flavor. Or use part water and part dashi/vegetable broth.

    Use your favorite miso paste.

    Change up the vegetables. Try using asparagus, baby corn, spinach, bell peppers, bamboo shoots, wild mushrooms, etc...mixing and matching to suit your taste.

    Change up the noodles using ramen, soba, rice or udon. For gluten free, use 100% soba, rice or bean thread noodles.

    Use 1 - 2 teaspoons or red pepper flakes in place of chili paste if needed.


    Enjoy!

    Carrot Miso Soup

    Carrot Miso Soup
    Carrot Miso Soup

    This wonderful soup comes from the Smitten Kitchen. It's the simplest of ingredients with such great flavor. Yes, there are a lot of carrots involved but carrots are really on the cheap. I can pick up a 5 lb bag of organic carrots for under $5 making this a very inexpensive soup to prepare (double the recipe and store in the freezer for later if you like). The miso costs a bit more at around $8-9 a tub but will last up to a year + in the fridge. If you follow my recipes you will be sure to use it more than once. The miso compliments this soup beautifully making it a classic favorite. I love miso for its flavor and health benefits, it is quite unusual and irreplaceable. The only changes I made to Deb's recipe was adding a little tofu to round this soup out with some protein. I have chosen to use a silken tofu, sliced and topped with a bit of cayenne for a little kick of spice. The tofu is soft and silky blending in almost seamlessly with each bite and the cayenne adds a bit of warmth. So delicious! Feel free to omit the tofu if you're not a fan. And if you are a fan, feel free to add more for extra protein. 

    Carrot Miso Soup

    Carrot Miso Soup 

    Ingredients
    • 2 tablespoons sesame oil
    • 2 - 2 1/2 pounds carrots, peeled and chopped
    • 1 large onion, diced
    • 4 garlic cloves, minced
    • 1 1/2 tablespoons fresh ginger, finely grated 
    • 4 cups water or vegetable broth (I used water)
    • 1/4 cup (4 tablespoons) white miso paste
    • 8 oz. organic silken tofu, sliced thin and at room temperature
    • cayenne pepper as garnish, to taste 
    • chives, chopped OR scallions, thinly sliced

    In a large dutch oven or pot, heat oil over medium heat, add onion, carrots and garlic, saute until onion is translucent, about 7 minutes. Add liquids and ginger. Cover and simmer, stirring occasionally for 30 minutes, or until carrots are tender.

    Let soup cool a bit. Add miso to soup and puree using 1 of 3 methods: An immersion blender right in the por, a food processor or a regular blender. You may have to puree the latter two methods in batches.

    Add a bit more water as needed. Taste for seasoning adding salt, especially if you didn't use veggie stock you may like to add salt. Add pepper, more miso or grated ginger to taste.

    Slice your tofu, ladle your soup into serving bowls, top with tofu, a sprinkle of cayenne for some heat and a nice bunch of chives or scallions.

    Enjoy!


    Tahini Miso Dressing-Dip

    Tahini Miso Dressing-Dip

    Today I have this most delicious and slightly addicting dressing-dip to share with you. I used this dressing in a recent post with steamed broccoli, Broccoli + Tahini Miso Dressing, and have been loving it ever since. It pairs great as a dip for sliced raw veggies too, or use it as a dressing in a slaw salad or any of your usual leafy lettuce salads. You could also use it as a spread for sandwiches. It's a nice mix up from the Simple White Bean Hummus and Favorite Hummus that I usually make. All in all, this is a great versatile dressing for use with raw, steamed or roasted vegetables. Make this thick or thin to suit your needs.

    Tahini, which is made of sesame seeds, is a great source of calcium...1/4 cup contains 351 mg of calcium, slightly more than 1 cup of milk provides. It also contains vital nutrients like copper, manganese, zinc, iron, phosphorus, vitamin B1 (thiamine), vitamin E, protein and fiber.

    Miso is also a beneficial addition to this dressing. Its health benefits include being a complete protein containing all essential amino acids. It's a quality source of the essential vitamin B-12. Miso stimulates the secretion of digestive fluids in the stomach and restores beneficial probiotics to the intestines. And it is high in antioxidants to fight free radicals while also strengthening the immune system.

    This dressing-dip is another way to get these beneficial ingredients into your meal rotation.

    Tahini Miso Dressing-Dip
    Tahini Miso Dressing-Dip

    Ingredients
    • 1/4 cup tahini
    • 1 tablespoon white miso
    • juice of one lemon
    • 1 tablespoon tamari
    • pinch or two red pepper flakes, optional
    • 1 tablespoon - 1/4 cup water or more depending on how thin you like it

    In small to medium size bowl, combine all ingredients adding the water in small increments until desired thickness/thinness. Taste for flavor and serve as desired.

    Use less water for dips and sauces and more water for salad dressings. Typically this will serve four to six depending on how much extra is added. 

    Enjoy!


    Broccoli + Tahini-Miso Dressing

    Broccoli + Tahini-Miso Dressing

    Simple, flavorful and creamy. Tahini and miso pair so well together and are both full of nutrition. No empty calories in this recipe, each ingredient holds benefits to unlock your bodies full potential. This easy to make dish can be served as a side dish, paired with rice or quinoa, or simply eaten as is. I found this to be a great lunch or dinner as is with a nice glass of lemon water. Filling and light, yet very satisfying. I look forward to coming back to this again and again. Feel free to serve the broccoli either raw, steamed or roasted. I have mine lightly steamed here. If keeping broccoli raw, you may like to keep the florets on the smaller side.

    Broccoli + Tahini-Miso Dressing

    Broccoli + Tahini-Miso Dressing

    Ingredients
    • 2 cups broccoli
    • 1 green onion, thinly sliced

    Tahini-Miso Dressing
    • 1/4 cup tahini
    • 2 teaspoons mellow white miso
    • pinch or two red pepper flakes, optional
    • juice of 1 lemon
    • 1 tablespoon tamari
    • 1 tablespoon or so water for thinning

    Prepare your broccoli as desired, either raw, steamed or roasted and slice your green onion.

    Combine the dressing ingredients in a small bowl, mix well adding any additional water 1 teaspoon at a time as needed to thin. This is meant to be on the creamy side but you may prefer it a little thinner, and it will stretch farther by adding water.

    Combine everything together and serve as desired.

    Serves four, or if you like me and eat it for lunch or dinner...one.

    Enjoy!


    Asian Slaw Salad + Miso Ginger Dressing

    Asian Slaw Salad + Miso Ginger Dressing

    Simple, flavorful and delicious. This colorful Asian style slaw can be served alone or as a side dish. I had this for lunch today and it was fantastic as a stand alone salad. It would also pair nicely served at room temperature on top crispy pan fried tofu. The dressing packs tons of flavor and uses very little oil, which may be omitted if desired. Easy to put together and can also be made ahead of time and kept separately in the refrigerator or mixed together to mingle. Great way to add beneficial miso & ginger into your meal plans along with fresh vegetables. Try squeezing a little lemon on top for added zest. Recipe is adapted from Food 52.

    Asian Slaw Salad + Miso Ginger Dressing

    Asian Slaw Salad + Miso Ginger Dressing

    Ingredients
    • 2 cups green cabbage, finely shredded
    • 2 cups red cabbage, finely shredded
    • 2 radishes, julienned
    • 1 carrot, peeled & julienned
    • 1 tablespoon black sesame seeds

    Miso-Ginger Dressing
    • 1 inch ginger, finely grated
    • 1 clove garlic, finely grated
    • 2 tablespoons mellow miso
    • 2 tablespoons rice wine vinegar (I used a seasoned rice vinegar)
    • 1 tablespoon tamari
    • 2 teaspoons toasted sesame oil, optional
    • 3 tablespoon water

    In a small bowl, whisk together the ingredients for the dressing. Alternately you can use a small blender to combine until smooth. Set aside.

    In a large bowl, toss the cabbage, carrots, radishes and sesame seeds together with the dressing. You can also omit the sesame seeds and serve them as a garnish as the pictures above. Serve immediately if you like it very crunchy or let it sit covered in the refrigerator for a few hours for a more slaw-like texture and to let the flavors mingle a bit. Both ways are great. Depending on how you are serving the dish it can be served at room temperature or cold. Serves two generously or four as small sides.

    Notes:

    Thinly sliced green onions would also be a great addition to this salad.

    Enjoy!

    Portobello & Kale Calzone with Garlic Miso Cream

    portobello & kale calzone with garlic miso cream

    I can't remember the last time I had a calzone. They are delicious! This recipe was inspired from Leafy Greens and Me...I could barely wait to get this one underway. I've had a few of these the last few days trying to get good pictures...what a tough job right! :) What I really loved about this is the roasted garlic cream sauce....roasted garlic is amazing and actually mellows out after roasting leaving wonderful mild flavors, a little nutty, sweet, almost caramel like. I added some miso to the garlic sauce, giving it that little extra something. Miso is a staple in my refrigerator and lasts up to a year, you can find more uses for miso by searching my site in the box on the right or by scrolling down to the ingredients list. I have a couple recipes that you might enjoy. Be sure to pick up some miso and get this calzone into your life, and if you don't have miso this will still be a great roasted garlic cream sauce!

    There is quite a bit of high heat oven time going on so this is definitely a great meal during the cooler months....perfect for this time of year. You don't want the oven on like this in the summer, especially in the hotter regions....400 & 500 degrees for an hour or two and someone is bound to get slapped upside the head. ;) This is also not an energy saving recipe for those ultra conservatives, but we do a bit here and a bit there so I think we'll be alright to enjoy this scrumptious calzone every now and then. As a matter of fact while were on the subject of the environment, did you know the global warming we are experiencing is a natural part of the earth's cycle. Yes indeed, it would happen no matter what...with us or without us...just ask and I will forward you some interesting information! Of course, it definitely doesn't help creating new canister hairsprays, or having herds of cars, or herds of factory farmed animals contributing to the already warming trend, but what are we going to do...little by little, step by step everything will come to light...in the meantime let's relax & eat...

    Portobello & Kale Calzone with Garlic Miso Cream

    Ingredients (makes 4)
    • 1 1b. whole wheat/grain pizza dough (I used Trader Joe's), divided into 4 sections
    • 1/2 onion, diced
    • 2 -3 garlic cloves, minced
    • 1 tablespoon thyme
    • 2 portobello mushrooms, sliced
    • 1 1/2 cups broccoli florets, cut somewhat small
    • four large leaves of kale, stems removed and roughly chopped or left somewhat whole (I used curly kale) or a bundle of spinach
    • large handful cherry or grape tomatoes, sliced in half
    • olive oil, to brush on top of calzone
    • himalayan salt and cracked pepper to taste
    • cornmeal for dusting the pizza wheel

    Garlic Cream Sauce
    • 1 cup cashews, soaked for at least two hours or over night
    • 1/2 cup to 1 cup water, if you soaked the cashew for two hours use 1 cup, if soaked overnight use 1/2 cup water
    • 1 head garlic
    • 1 tablespoon olive oil
    • 2 teaspoons white miso
    • juice of 1 lemon
    • himalayan salt & pepper to taste

    Preheat oven to 400 degrees.

    First, roast the garlic for the garlic cream sauce. Remove most of the outer layer of skin on the garlic leaving enough to hold them in place, lay sideways and cut the tops off. Place garlic cut side up on a piece of tinfoil, drizzle with olive oil and top with sea salt & cracked pepper. Fold ends of foil up and squeeze together and crimp the edge. Place on cookie sheet and cook for 40-45 minutes. Let cool. Check here for a great visual tutorial from Oh She Glows: How To Roast Garlic

    Once garlic is done, turn the oven up to 475-500 degrees. Place pizza stone inside the oven for about 45 minutes before cooking.

    While garlic is roasting, let pizza dough come to room temp in its package away from oven heat for 30 minutes. Remove from package, place on a lightly floured surface, flatten out a bit with your hands, cut dough into four equal portions, roll each portion into a ball, cover with light towel and let set for another 30 minutes away from oven heat to let the gluten relax....if the gluten isn't relaxed you may have a hard time rolling out your dough properly.

    Next onto the garlic cream sauce. Drain cashews and place all ingredients into food processor/blender and process until creamy, about 3 to 4 minutes. If cream is too thick and extra water 1 tablespoon at a time until desired consistency being careful not to thin it out too much making it runny, if in doubt leave it on the thick side. Taste for seasoning, set aside.

    Slice your grape/cherry tomatoes in half, place in small bowl and set aside. You may even want to dip a tomato half into the garlic cream sauce, just to make sure it tastes good! 

    In large skillet, heat olive oil over medium high heat. Add onion, garlic and cook until onions become soft. Add in mushrooms, broccoli, kale/spinach, thyme and salt & pepper to taste, cook for another 5 minutes or so. Turn off heat and cover ajar to help steam and soften the veggies a little more while working on the next step. 

    On a lightly floured surface, roll each portion out into an eight inch oval, rectangle, circle, ...whatever works easiest for you. Lay on some of the veggie mixture, add a few heaping tablespoons of the garlic miso cream and top with some of the kale and tomatoes (or layer however you like, this is just a suggestion, my emphasize is to keep the cream in the middle of the calzone as much as possible). Fold the other half over and seal the edges by rolling them up and sealing or by pressing with a fork, or both. Top with a light coat of olive oil and a sprinkle of salt, pepper and thyme.

    Portobello & Kale Calzone with Garlic Miso Cream

    Dust the heated pizza stone with cornmeal, place calzone on the pizza stone and bake for 7 - 10 minutes, until crust is puffy and golden brown. Let cool a few minutes and serve. Serve with some garlic miso sauce on the side.
    Note: Pizza stones are a really nice item to have...they work great for pizza of course, and this calzone, as well as baking artisan bread. Some of my favorite loaves of artisan bread were baked using a pizza stone. 

    Enjoy!

    I would love to see your masterpieces! #thesimpleveganista


    Winner! Mac & Cheese Bake

    Vegan Mac & Cheese Bake

    Winner, Winner....Mac & Cheese Dinner!

    Vegan Mac & Cheese Bake

    First off, let me say that this was a supreme hit with my 12 year old daughter who usually turns her nose up at almost everything I make! As a matter of fact, I hear her in the kitchen right now nibbling on the left overs...this is a good day. We have a winner here...this mac & cheese bake will hit the spot for the kids, just don't say a word about what's in it. ;) Now had I added veggies in the bake, it would not have passed which is why this is just a simple recipe. Feel free to add in veggies like broccoli, kale, etc...whatever you may usually add into a mac & cheese bake! 

    Vegan Mac & Cheese Bake

    As for myself, I seriously could have sat there and ate this whole thing myself. I haven't had a mac & cheese bake in I don't know how long. The cheese is just great! I especially love the bread crumbs and the light dusting of smoked paprika I added on top of my portion. I paired mine with some sauteed Tuscan kale which was terrific! 

    Vegan Mac & Cheese Bake

    Vegan Mac & Cheese Bake

    Ingredients
    • 16 oz. package pasta of choice (I used rice penne pasta) (works with an 8oz package too)
    • paprika, garnish

    For the bread crumb topping
    • two pieces of bread or 1 cup bread crumbs 
    • tablespoon olive oil
    • twist or two of the salt grinder

    Cheese Sauce
    • 1 1/2 cup raw cashews, preferably soaked for a 2 -3 hours (aides in digestion)
    • 1 3/4 cups water or unsweetened almond milk, or combo like I did
    • 1/3 cup nutritional yeast
    • juice of one large lemon or 1 tablespoon vinegar
    • 1 clove garlic
    • 2 tablespoons of extra virgin olive oil
    • 1 tablespoon white miso
    • 1 teaspoon onion powder
    • 1 teaspoon sea salt, or to taste
    • 1/4 to 1/2 teaspoon chili powder, to taste*
    • 1/8 teaspoon turmeric
    • dash of cayenne powder 

      Preheat oven to 350 degrees.

      Bring a large pot of water to a boil, cook your noodles al dente and set aside.

      While waiting for the water to boil, start with your bread topping first. I toasted two pieces of bread we had on hand really well and processed them in the food processor until crumbly, a high speed blender will work too. Place the crumbs in a small bowl, drizzle with olive oil and a twist or two of the salt grinder, mix well and set aside. Quickly rinse the processor/blender bowl and move on to the cheese sauce.

      For the cheese sauce: In food processor/blender, combine all of the cheese sauce ingredients except for about 1/2 of the water/milk and blend until creamy. Add remaining water/milk and blend again. Taste for flavor adding anything extra to suit your taste.

      Once pasta is cooked and drained. Add pasta back to the pot it was cooked in, add the cheese sauce and combine well. It may seem like too much liquid but the pasta will take care of most of it.

      In baking dish, pour mac & cheese and top with bread crumbs. Bake for 25 - 30 minutes, check after 15 minutes if crumbs are darkening too much for your liking, cover with foil.

      When done, let cool about 10 minutes and serve. The sauce will thicken upon standing.

      * The chili pepper adds a really nice flavor without being too powerful. If your worried about the spiciness, especially for the little ones, I would suggest using the smaller amount, taste and add more if desired.

      Notes: If you use a smaller baking dish or use ramekins, lessen the cooking time to 10 - 20 minutes depending on the size of dish you use.


      Enjoy!

      Why I ♥ this cheese so much is not only does it taste fantastic and its easy to make, but also because not one cow was harmed, or had their baby taken away, or just simply had to live a life of misery in order to satisfy a taste we have come accustomed to without even realizing how these animals are handled, especially through factory farming. That in itself makes all dairy products undesirable to me. I began my vegan journey for health reasons and soon found out just how unpleasant the meat and dairy industry really is. It is not a question of whether it's wrong or right to consume animals and their products...that depends on your circumstances. But I do believe that in this day and age we live in we simply do not need them to survive, and we definitely do not need to factory farm them the way it is being done.

      Veganism for me is liberation for ALL sentient beings! And it most certainly starts with my fork. :)

      To find out more about the life of factory farmed animals and animal rights you can visit PETA.org for more information.

      Roasted Garlic, Miso & Greens Soup

      roasted garlic, miso & greens soup

      This will be the new 'Chicken Soup' in terms of healing and building the immune system when you are feeling under the weather. The real trick is to keep from getting sick in the first place...adding this to your diet may be good preventative medicine. Garlic, miso and greens are all super foods to help maintain and restore your body's immune system. Lemon and red pepper flakes also aid in healing in their own way. This is a very simple soup with wonderful flavors coming from the few ingredients this recipe calls for. It doesn't need much making this an even better go to soup when feeling under the weather or just because you simply love roasted garlic. You could also add some cubed organic tofu for added protein. I really enjoyed this soup and hope you find it as good as I did.

      Roasted Garlic, Miso & Greens Soup

      Do not be turned off by the amount of garlic listed. Roasting garlic in the oven dramatically mellows out the intense garlicky flavor leaving behind a very pleasant mellow flavor. It will become mild, sweet, nutty, almost caramel like. It will squeeze out of the skins like butter. No peeling necessary. You can use less garlic if you are uncomfortable with this amount. Also, to lessen energy use I would suggest roasting garlic along with other vegetables to be used in another dish or alongside this one. Here's a great visual tutorial from Oh She Glows on how to roast garlic.

      Roasted Garlic, Miso & Greens Soup

      Ingredients
      • 2 heads of garlic
      • 2 tablespoons olive oil
      • 6 cups water or vegetable broth (I used water)
      • 3 to 4 tablespoons white miso, to taste
      • 4 cups greens of choice, chopped (I used tuscan kale)
      • pinch of red pepper flakes, garnish
      • squeeze of lemon, optional
      • himalayan salt to taste

      Preheat oven to 400 degrees. 

      Remove most outer layer of skin from bulbs of garlic, leaving the most inner layer so they will stay together. Cut off the tops of the garlic bulbs. Place bulbs cut side up on a piece of tin foil large enough to fold over and close tight at the top when done. Drizzle one tablespoon olive oil over each bulb. Close the tin foil by folding up the edges and squeezing them together at the top and fold over, or bring up the sides and fold over while pinching and folding the ends. Bake for 45-50 minutes. Let cool for 10 minutes. 

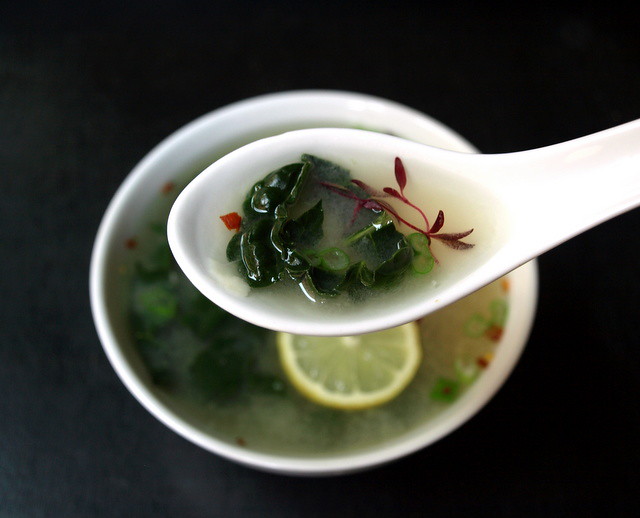
      In large pot, squeeze garlic bulbs into the pan and mush it a bit with the back of a wooden spoon. Add liquids, turn heat to medium. Add your miso and stir to incorporate the paste. Once broth has warmed for about 20 minutes, add in greens and let wilt. Serve with a slice of lemon and a pinch of red pepper flakes. I topped mine with a few colorful purple micro greens. Serves six.


      Notes: 

      ~ If using tofu, add in after adding the miso paste. Use soft or firm tofu that has been pressed to remove excess moisture. To press you can either use your palms by using paper towels in between to soak up the moisture. Or place the tofu under a somewhat heavy book with paper towels on each side of the tofu for 10 minutes or so.

      ~If staying away from soy, try using brown rice or chickpea miso.

      ~ Adding wakame (sea weed) as your green would also add great nutrition. Seaweed is full of essential minerals and vitamins that the body needs. You can find wakame dehydrated so it will last in the pantry a long time. Simply crumble some in your soup, wait a few minutes and it will add lots of valuable trace minerals. Here is a site that offers a bit of information and many recipes using wakame: Wakame: Health & Healing from the Sea

      Great for the mind, body and soul...Enjoy!


      Back to top