Collard Greens & Cannellini Beans

Collard Greens & Cannellini Beans

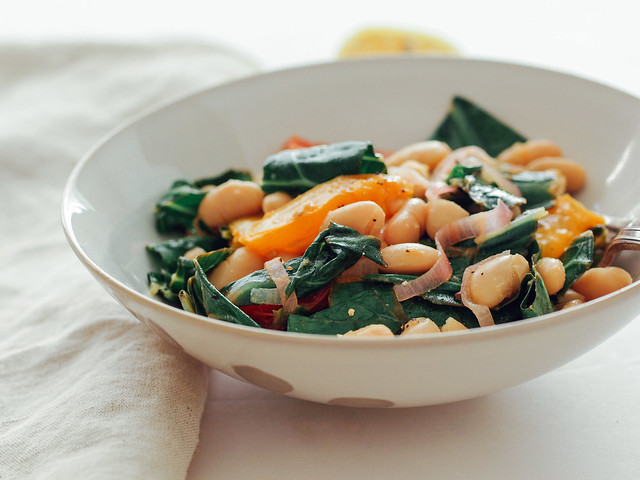
This is my first time ever having collard greens. I know I'm not alone in this and if you haven't yet tried these leafy greens, I think it's high time you do. This dish may not look super exciting but let me tell you it is a very welcome addition to the recipe collection! I surely have been missing out and am happy to share with you this very easy collard dish that will win your heart! I most definitely prefer my collards lightly cooked versus raw. They are far too bitter for me raw but once lightly sautéed they lend a beautiful smoky flavor that I find myself craving. The lemon is essential in this recipe so please be sure to have a couple lemons on hand, or bottled lemon juice if need be. This is a super simple, full of flavor dish that can easily act as a meal. Pair it with some warmed corn tortillas, naan or a slice of artisan bread and you're good to go. I've chosen to use cannellini beans here as they are mild, creamy and pair well with the other ingredients. Feel free to use another white bean of choice. Adding a tomato or two lends a bit more juices and color rounding out the dish perfectly.
Collard Greens & Cannellini Beans

Collard greens in a recent study outshined steamed kale, broccoli, brussels sprouts & mustard greens in its ability to aid the digestive tract helping to reduce the body's cholesterol levels. There is not a lot of scientific literature on collards themselves, they are usually lumped together with other cruciferous vegetables, but they hold many benefits to your health as the world is finding out. Three of the major benefits include: detox support, antioxidant powers and anti-inflammatory benefits. They are an excellent source of vitamin K, A, C, manganese, fiber and calcium. If you haven't given these leafy greens a try, this recipe is a great way to add them into your diet.

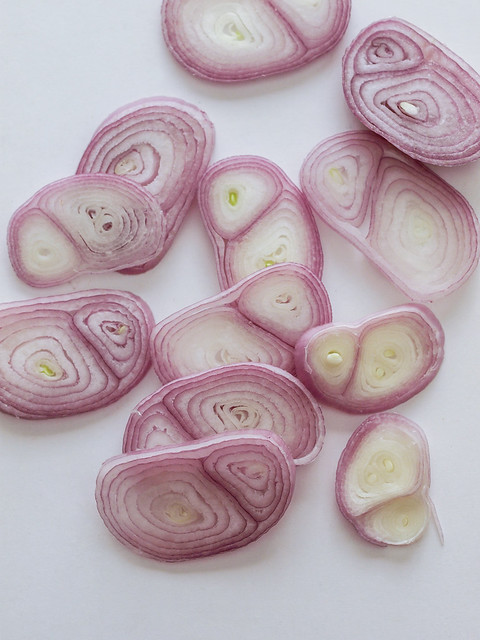
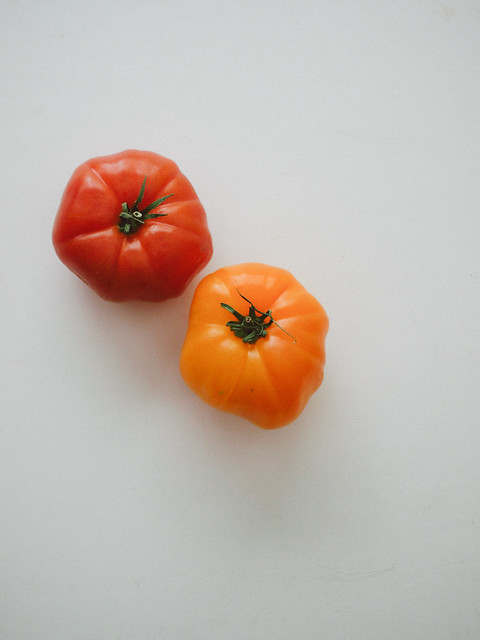
ShallotSliced shallotCollardsHeirloom tomatoes

Ultra simple and super delicious...
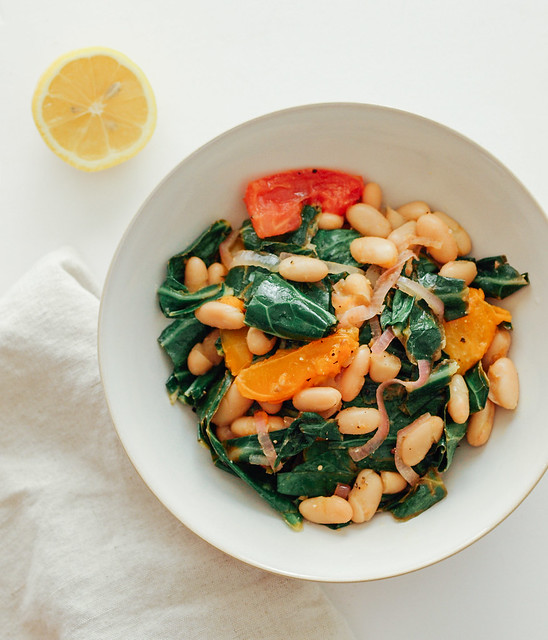
Collard Greens & Cannellini Beans

I promise! ♥

Collard Greens & Cannellini Beans

Collard Greens & Cannellini Beans

Ingredients
  • 1 bunch collard greens, stems removed and chopped
  • 1 1/2 cups cooked or 1 can (15 oz.) cannellini beans, drained and rinsed
  • 2 small heirloom tomatoes, sliced or diced
  • 1 shallot, sliced or 1/2 onion, sliced
  • 1 tablespoon grapeseed or olive oil
  • 2 - 3 tablespoons lemon juice (1 large or 2 small lemons)
  • 1/4 teaspoon garlic powder
  • salt & pepper to taste

Heat oil in a large wok over medium heat, add shallots and sauté 4 minutes or so, just until softened. Add collards, lemon juice, garlic powder, salt & pepper, cook another 4 minutes. Add tomatoes and beans, cook, stirring occasionally, until collards are lightly wilted or until beans and tomatoes are heated through. I like my collards al dente if you will and cooked for about 5 extra minutes. Ending cooking time will vary depending on how soft you like your collards. 

Serve in individual bowls. Top with a squeeze of lemon and lemon-pepper seasoning if on hand. IF not using lemon pepper, try adding a light dusting of almond parmesan on top. Pair with warmed corn tortillas, naan or crusty bread and a tall glass of lemon water. 

Serves 2.

Notes:

If your bunch of collard greens is on the larger side, you may consider adding another can of beans.

Feel free to use sliced grape tomatoes, or sliced tomatoes on the vine. Whatever tomatoes you prefer or have on hand.

Add more garlic powder if you like, I didn't measure and am guessing this is about how much I used.

Enjoy this simple and flavorful dish!
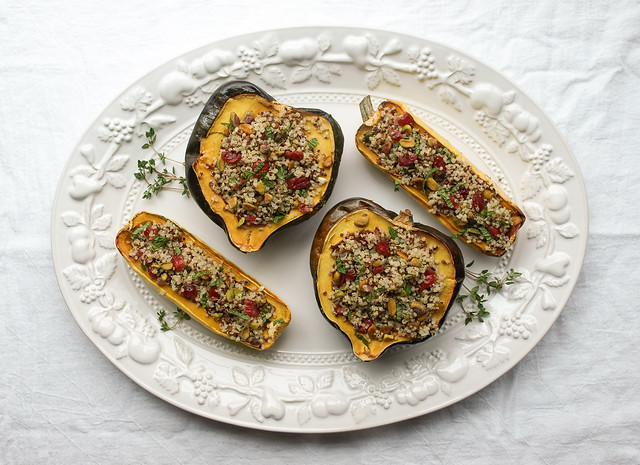

Stuffed Winter Squash + Quinoa, Cranberry & Pistachio

Stuffed Winter Squash + Quinoa, Cranberry & Pistachio

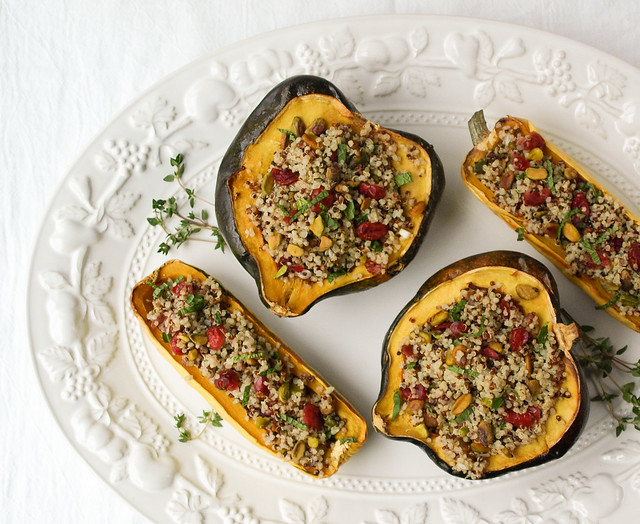
This is the time for winter squashes and all their wonderful flavors. These stuffed squashes would make for a pretty presentation on any holiday table, or simply enjoy anytime during the season for a flavorful and filling meal. This recipe can be dressed up fancy or kept simple, depending on your mood or occasion. Keep it to a few ingredients while adding more to add complexity to the dish. I've made this with just six ingredients (squash, quinoa, cranberries, pistachios, oil and salt) and it was great, adding a few other components give it more depth and flavor. This recipe is more of a template for you to create a quinoa stuffing to your liking. I encourage you to play around with the ingredients adjusting to your personal tastes. 

Stuffed Winter Squash + Quinoa, Cranberry & Pistachio

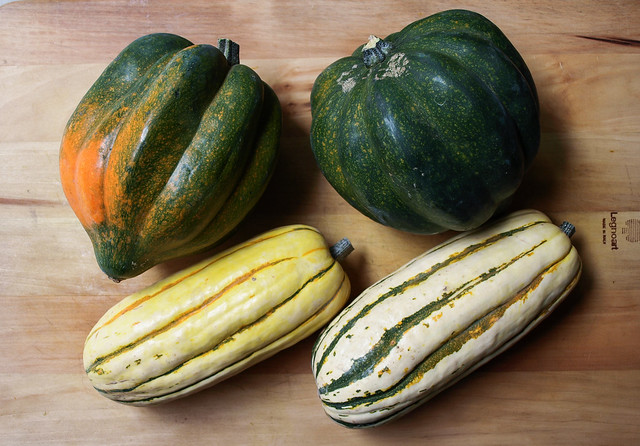
I decided to do both the acorn and delicata squash with this because they both work so well here. You can use one or the other, or both for variation at the table. I love the delicata squash because the skin is edible. The acorn squash on the other hand may have a tougher, and possibly bitter, skin making it less likely that you'll be able to eat it but it does make for a great bowl. So either way, they both are great and can cook together if doing both. 

Stuffed Winter Squash + Quinoa, Cranberry & Pistachio

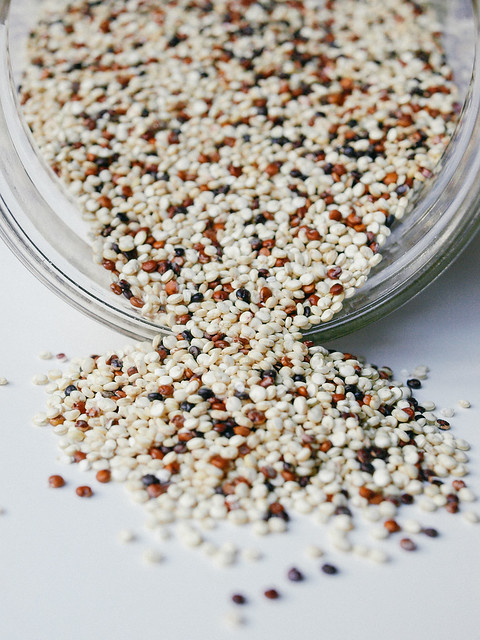
Quinoa is my favorite grain, well technically it's a seed but can be prepared like a grain. It's a complete protein, full of fiber and a good source of calcium, magnesium and iron making it a great alternative to grains. And it's gluten free. It's perfect for those on a plant based diet and those seeking nutritionally dense foods. Served warm or cool, quinoa tastes great and is such a versatile grain. Here I used a blend of pearl and tri-colored quinoa. I like blending the two so there is just a few specks of the darker quinoa.

Stuffed Winter Squash + Quinoa, Cranberry & PistachioStuffed Winter Squash + Quinoa, Cranberry & Pistachio

Add in some festive colors from the pistachios and cranberries and this dish is as appealing looking as it is good, and good for you!

Stuffed Winter Squash + Quinoa, Cranberry & Pistachio

Stuffed Winter Squash + Quinoa, Cranberry & Pistachio

Ingredients
  • 2 large or 3 small acorn or delicata squash
  • maple syrup
  • olive oil
  • 1 cup quinoa, rinsed well 
  • 1 3/4  cup water
  • 1/2 cup dried cranberries
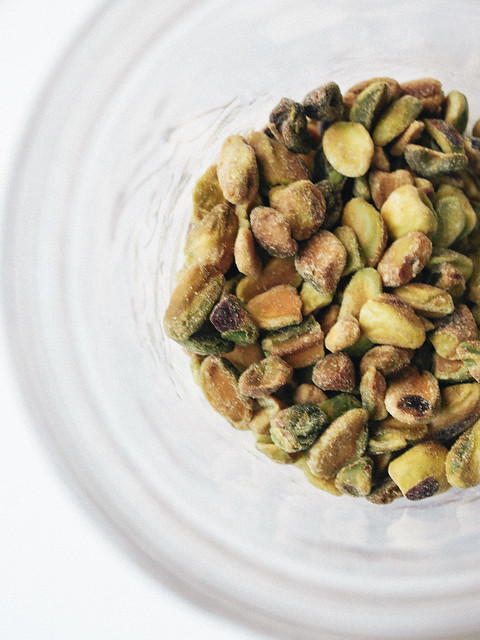
  • 1/2 cup pistachios
  • 2 tablespoons finely minced shallot, optional
  • mineral salt & freshly ground pepper to taste
  • juice of 1 lemon

add complexity to the quinoa by adding one or more of the following to suit your taste:
  • pinch red pepper flakes
  • 1/2 cup chopped parsley (if your a mint fan, try 1/4 cup fresh mint)
  • 1 - 2 teaspoons fresh thyme 
  • drizzle of olive oil

Preheat oven to 375 degrees F.

Wash and dry squash. Slice each squash in half lengthwise, remove seeds. The seeds should come out easily by scraping the inside of the squash with a spoon. Lightly brush the inside of each squash with a little oil and/or maple syrup. sprinkle with a bit of mineral salt. Place on baking sheet cut side up. Bake in oven for 35 - 40 minutes, or until squash is tender and pierces easily with a fork.

While squash is cooking add 1 3/4 cup water and 1 cup quinoa to a medium size pot. Bring to a boil, cover, reduce heat to low and simmer for 15 minutes. Remove lid and let set 15 minutes. Add pistachios, cranberries, shallots, salt, juice of lemon, and any other optional ingredients. Toss to combine.

Scoop quinoa into squash halves, place back in the oven for 10 minutes to warm if needed, and serve.

Notes: 

For the quinoa I used a blend of 1/2 cup white and 1/2 cup tri-color quinoa. Feel free to use all of one type or mix and match to your preference.

Seek out organic cranberries if possible. Unsweetened is best but can be hard to find. The ones I have here are from Trader Joe's which are organic but sweetened.

Enjoy!

    Quinoa & White Bean Veggie Burger

    Quinoa & White Bean Veggie Burger

    It's burger time...

    Quinoa & White Bean Veggie Burger

    Quinoa & White Bean Veggie BurgerQuinoa & White Bean Veggie Burger
    I haven't done a veggie burger in almost a year. It was time to add a new one to the list and this one is as delicious as it gets. These patties are loaded with protein and fiber as well as other beneficial nutrients, and they are very filling. As far as veggie burgers go this is fairly easy. I have to admit that I'm a pretty lazy cook and don't like a lot of steps. I prefer to spend as little time as possible preparing a meal as well as cleaning it up. Fyi, you can make this recipe even simpler by using a pre-made flour instead of processing oats like I did. The patties came out fantastic and held up great without falling apart, and they were not dry at all, nor were they mushy. The texture, taste and visual appeal all hit the mark. Once layered with all the extra goodies this burger was supreme and the best veggie burger I've ever had...am I biased...maybe, but these were divine! And, if you don't feel like having it on a bun, by all means top your veggie burger on a bed of fresh leafy greens with a squeeze of lemon, some avocado, salt and pepper...so good just like that! 

    Quinoa & White Bean Veggie Burger

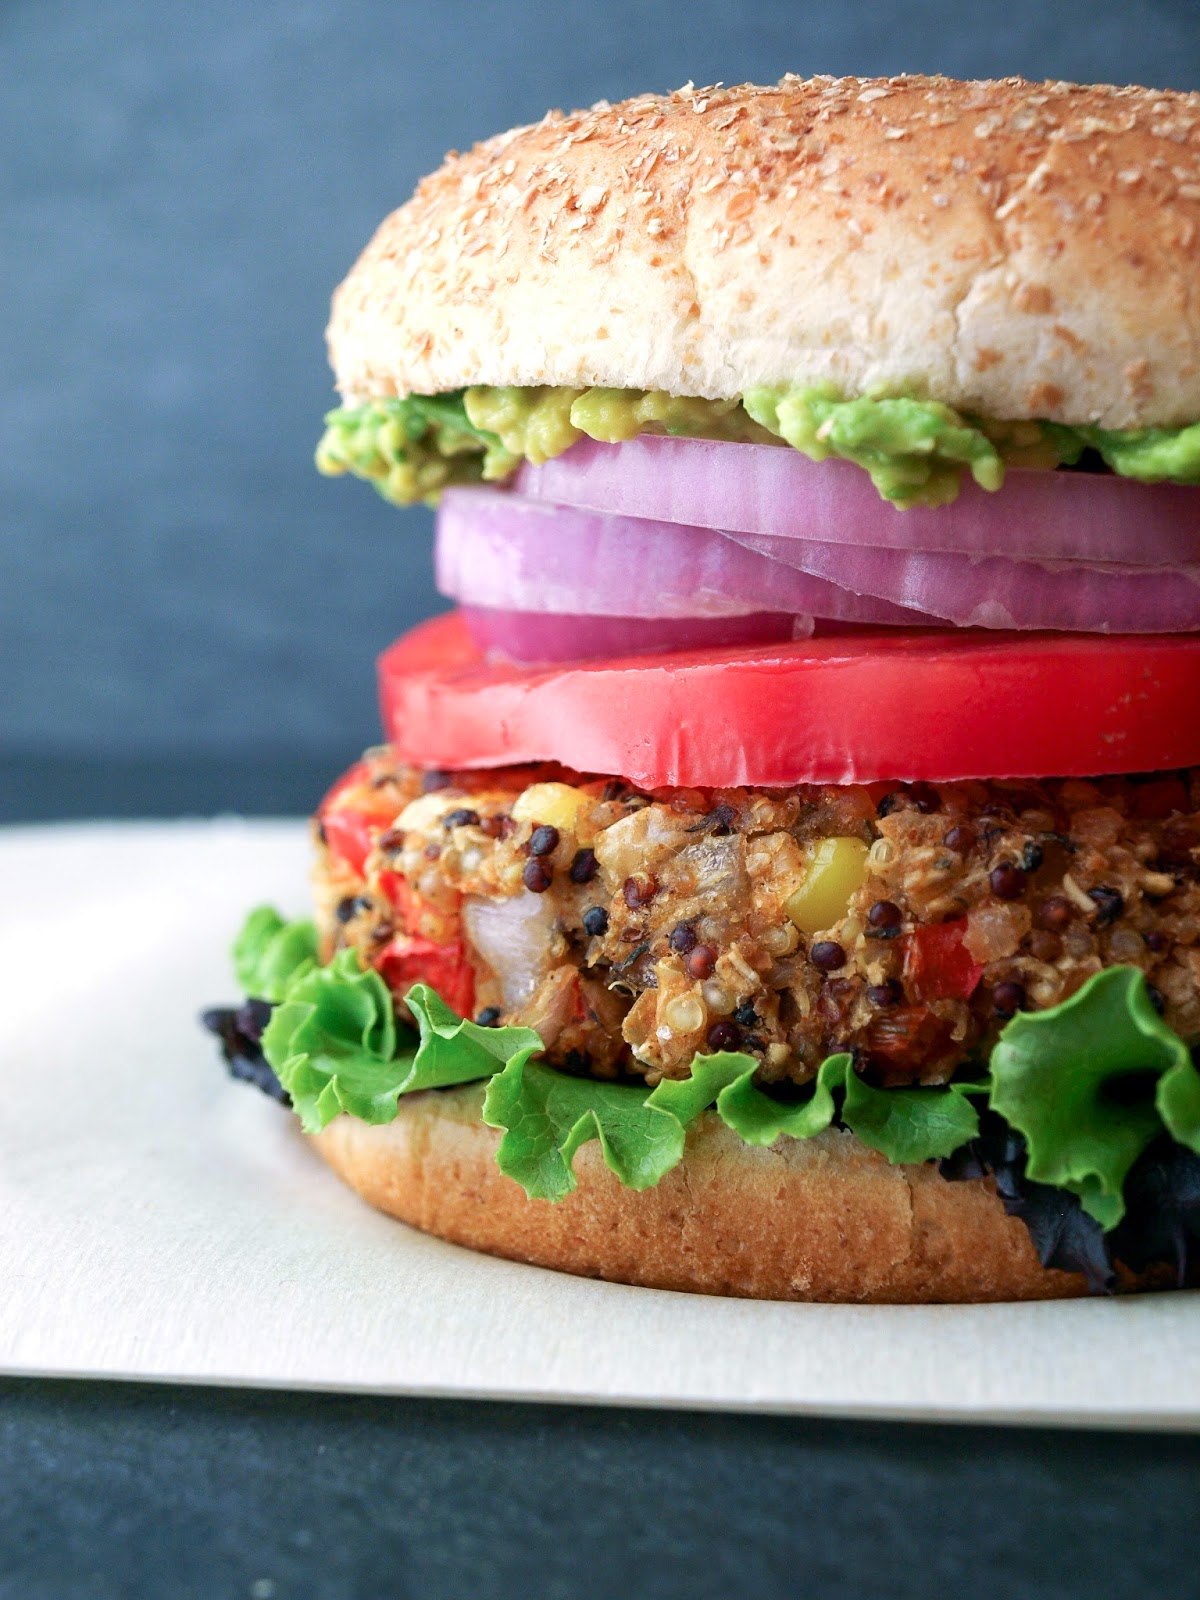
    I loaded this beauty up with leafy greens, slice of heirloom tomato, sliced red onion, whole grain mustard, mashed avocado and a nice drizzle of sriracha. Lot's of flavors going on and I loved it. As the saying goes, "Eat like you mean it!" 

    Quinoa & White Bean Veggie BurgerQuinoa & White Bean Veggie Burger

    Quinoa & White Bean Veggie BurgerQuinoa & White Bean Veggie Burger

    Quinoa & White Bean Veggie BurgerQuinoa & White Bean Veggie Burger
    Quinoa & White Bean Veggie BurgerQuinoa & White Bean Veggie Burger

    And now for the money shot! Having fun with my iphone and the VSCO Cam app (it's free), managed to create this final mouthwatering picture...veggie love at first sight!

    Choose your cooking style...stove top

    Quinoa & White Bean Veggie Burger

    Ingredients (makes four patties)
    • 1/2 cup quinoa (I used tri-color)
    • 1 cup water
    • 1 teaspoon garlic powder
    • 3 teaspoons thyme, divided (oregano would be good too)
    • 1/2 - 1 teaspoon smoked paprika 
    • 1/2 teaspoon ground chipotle pepper, optional
    • 1 can (15 oz.) white beans (I used cannellini), drained and rinsed
    • 1/2 cup corn, fresh or frozen (about 1/2 fresh corn off the cob)
    • 1/2 cup red bell pepper, finely diced (about 1/2 bell pepper)
    • 1/2 cup shallot, finely diced (about 1 medium) or red onion
    • juice of one lemon
    • 1/3 cup oat flour, or flour of choice 
    • 1 Ener-G egg replacer or 1 flax egg (1 Tbs flaxseed meal + 3 Tbs water), optional*
    • mineral salt & cracked pepper, to taste
    • coconut or olive oil, to grease

    To Serve:
    • tomato, sliced
    • leafy greens
    • avocado, sliced or mashed
    • red onion, sliced
    • whole grain or dijon mustard (hummus or vegan mayo is great too)
    • sriracha or Sriracha Cashew Cream (use the sriracha cream in place of mustard)
    • burger buns of choice

    Start by making your flax egg or ener-g egg replacer and set aside. If baking in the oven, turn oven to 375 degrees F. (It's helpful to read instructions first before making the patties)  

    In a medium pot, bring water, quinoa, garlic powder and 1 teaspoon thyme to a boil. Cover, reduce heat and simmer for 15 minutes. Once done, remove cover and let set for 10 minutes.

    While quinoa is cooking, prepare your corn, shallot and red pepper. Be sure to dice your onion and red pepper fairly fine, they should be about the same size as the corn kernels.

    Next, mash your beans. I mashed about 3/4 of the beans leaving a quarter of the batch whole or somewhat whole.

    Once quinoa is ready, add the quinoa to the beans along with the shallots, red pepper, corn, remaining 2 teaspoons thyme, smoked paprika and optional chipotle powder and lemon juice. Mix well. Add in the flour and egg replacer, mix well again. Season to taste with salt, pepper and more of the other spices. We all vary on how strong we like our spices...you can't take out but you can always put in.

    Now to divide and make your patties. I like to pat my mixture into the bowl a little and divide it with a knife into 4 sections, making a plus sign if you will. Take each section and pack it tightly into a ball in the palm of your hands. It should be about the size of your hand. Flatten with your palms and place on hard surface. Cup the edges with your palms and tighten them in a bit and flatten the top to the desired size. Mine were about 1/2 inch thick by 3 1/2 - 4 inches.

    Cook one of two ways:

    In the oven at 375 degrees on a greased or parchment lined cookie sheet for 30 minutes, turning once after 15 minutes. I also added a sprinkle of himalayan salt to the top before baking.

    OR

    In a large skillet, heat 1 tablespoon coconut oil or olive oil over medium to medium high heat. Cook patties about 4 - 5 minutes on each side.

    I cooked both ways and had no preference. They both held up well and cooked great. (pic shows skillet cooked)

    Serve on bun or bed of leafy greens with choice of toppings!

    Notes:

    The patties can be made ahead of time and stored covered in the refrigerator for a couple days prior to cooking.

    *I have a sneaky feeling that this can be made without the use of any egg replacer if you don't have it available. I have it here for good measure until I try without (in the comments you will see that it has been done). If you decide not to use an egg replacer, when adding the flour, just try adding two - three tablespoons of water instead if needed...the amount may depend on the flour you're using.

    For mashed avocado, cut open avocado, remove seed and using a fork, mash the flesh right in the skin...it's like a bowl. Spread on bun for a great creamy condiment!

    I hope this makes you want to get in the kitchen and cook.
    I encourage you to make these soon and often...

    Enjoy!

    Green Salad + Chickpeas + Lemon-Tahini Dressing

    Green Salad + Chickpeas + Lemon-Tahini Dressing

    Summer is still here and salads are my go to meals this time of year. For the last few weeks I've been trading between all my salad posts from the last month and have come back to this one here that I shared on Instagram not too long ago. It's such a simple salad and needed to be added to the recipe collection. This is just one of those salads that I threw together in a pinch while cleaning the fridge and it tasted delicious. So, here it is for you to play with as is or make it your own by adding anything that sounds good to you! It's really a great little salad...easy breezy vegan!

    Green Salad + Chickpeas + Lemon-Tahini Dressing

    Green Salad + Chickpeas + Lemon-Tahini Dressing

    Salad
    • 1 can (15oz) garbanzo beans (chickpeas), drained and rinsed
    • spring salad mix, or any salad mix you prefer
    • handful grape or cherry tomatoes, halved 
    • 1 shallot, thinly sliced
    • micro greens, optional
    • mineral salt & fresh cracked pepper, to taste

     Lemon-Tahini Dressing
    • 4 tablespoons tahini
    • juice of one large lemon
    • dash of mineral salt
    • dash of garlic salt
    • dash of cayenne pepper
    • 2-3 tablespoons water or lemon juice, as needed to thin

    Start with your dressing by combing all the ingredients except for the water. Taste for flavor adding any extra you might like. Add the water or lemon juice one tablespoon at a time as needed to thin to desired consistency. 

    Prepare your salad, layer as you like adding half the chickpeas and top with dressing. Serves two.

    As with most salad recipes, use however much you like of each salad ingredient!

    Enjoy!

    Savory Chickpea Pancake/Flatbread (Gluten Free)

    Savory Chickpea Pancake

    The chickpea pancake is a great way to enjoy a savory and filling pancake any time of day. Filled with vegetables and spices of your choice, this pancake will leave you satisfied and able to concentrate on your day. Except you may be thinking about how wonderful it was and when you're going to make it next. It is that good and so easy to make. I know you will add this to your meal rotation somewhere!

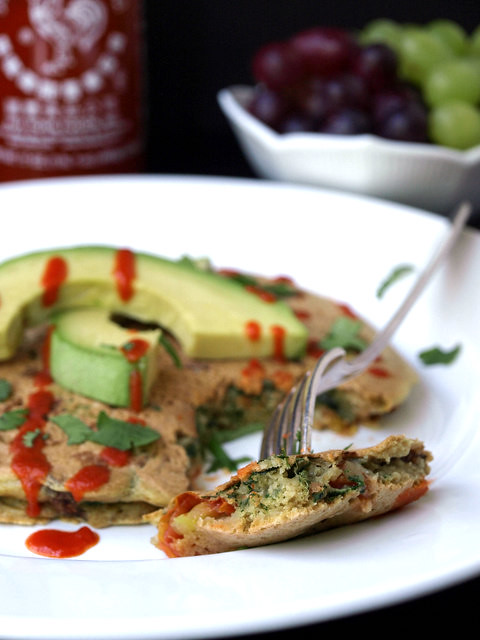
    You can eat this like a pancake or pull it apart like flat bread. I especially love eating this with hummus, either spread on top or pulling it apart for dipping. For the photos I decided to serve it like a pancake topped with cilantro, avocado and sriracha. And you can bet this way was delicious too!

    The Chickpea Pancake

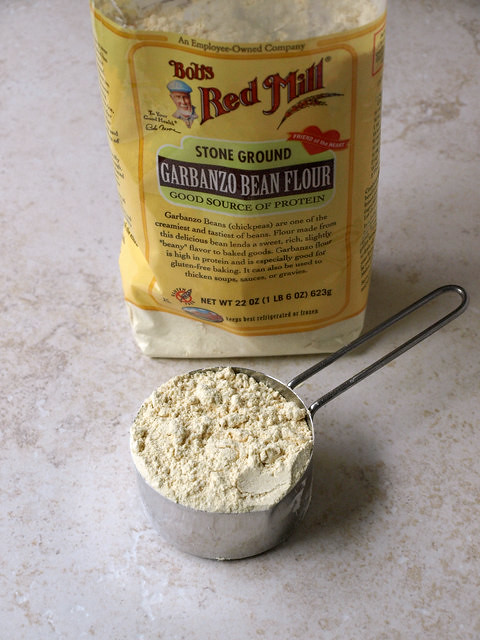
    The base of the pancake, garbanzo bean flour (aka, besan, gram flour, chana flour, chickpea or cici flour ), is a great source of protein and fiber. It contains 110 calories per 1/4 cup of flour and boosts 6 grams of protein while offering 5 grams of fiber. One of these pancakes uses 1/3 cup flour so you're getting 9 grams of protein and about 7 grams of fiber per serving. Not bad at all! This is one of those vegan dishes that will stay with you for awhile making it great to start your day, or eat whenever you need to be fueled for a few extra hours. Fill your pancake with whatever you have handy or plan on picking up some special ingredients to make this extra special for yourself, friends and family. Some of the ingredients you may like to use are roasted garlic & bell peppers along with some dandelion greens. I used these ingredients the first time I made this and it was delicious. I'll break it down in a list...that'll be much easier...try mixing and matching any of the following.

    Greens...kale, spinach, arugula, chard, dandelions, parsley or cilantro.

    Other veggies...(slice, dice or grate any of the following)...scallions, onion, shallots, garlic, tomatoes or sun-dried tomatoes, mushrooms, zucchini, bell peppers, carrots, jalapenos, asparagus, broccoli, peas, green chilies, etc...

    Spices...garam masala, cayenne, garlic powder, cumin, red pepper flakes, thyme, nutritional yeast, cracked pepper, curry, coriander, ground chipotle, summer savory, etc...

    Toppings...hummus, salsa, avocado, harrisa, sweet chili sauce or hot sauce all come to mind.

    I'm sure you will come up with some great versions of this pancake!

    The Chickpea PancakeThe Chickpea Pancake

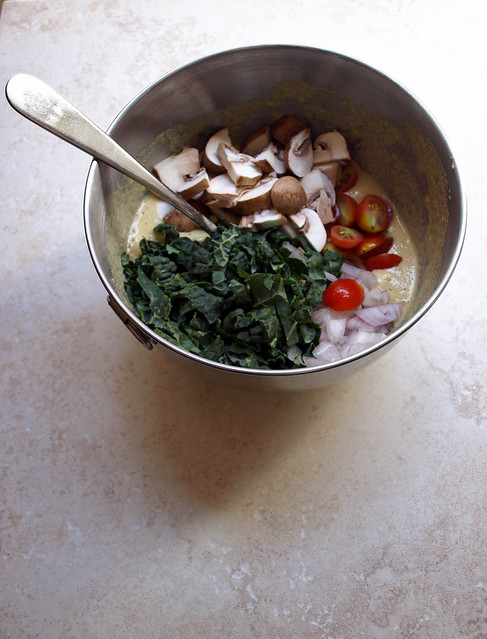
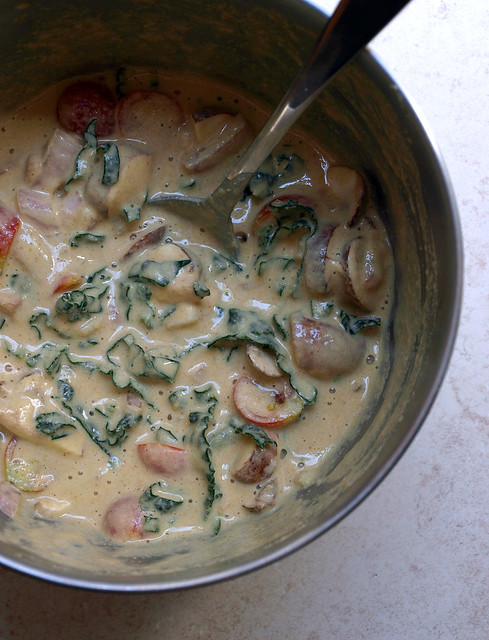
    Add spices and vegetables of choice, mix to combine. I used kale, mushrooms, shallots and grape tomatoes.

    The Chickpea Pancake

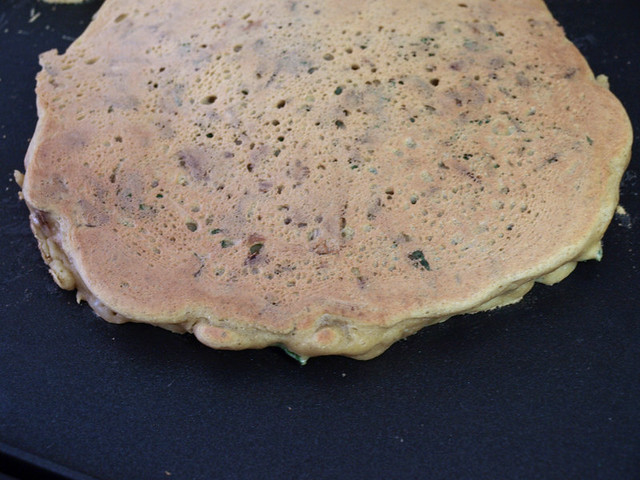
    Pour 1/2 of the mixture onto preheated griddle or skillet. Use your spatula to spread the veggies around and flatten as needed. Also, you can help make your pancake round by gently pushing in the edges where needed. There may be times when it appears that you have more veggies than batter, don't panic....in a few minutes the batter will puff up from the baking soda and fill in making it look fluffy and full. Cook for 5 minutes.

    The Chickpea Pancake

    Flip and cook another 5 - 7 minutes making sure the center gets nice and cooked. I've had a few times of not letting it cook thoroughly enough and have had a center that was too mushy. Leave it on the heat a couple extra minutes if in doubt. Serve with your choice of condiments and topping. As shown  below, I used avocado, cilantro and sriracha to garnish. You can also add a nice dollop of your favorite hummus like the first photo in which I used an avocado hummus. Both ways are delicious!

    The Chickpea Pancake

    Savory Chickpea Pancake/Flatbread

    Ingredients (makes two/serves two)
    • 2/3 cup garbanzo bean flour
    • 2/3 cup water
    • 1/2 heaping teaspoon baking soda
    • pinch of turmeric (will give it a yellow color), optional
    • 1/2 teaspoon cumin, or to taste
    • 1/4 teaspoon garlic powder
    • mineral salt, to taste
    • juice of 1/2 small lemon or 1 teaspoon apple cider vinegar
    • 2/3 cup lacinato kale (aka: Tuscan/dinosaur) or spinach, julienned and loosely packed
    • small handful sliced mushrooms
    • 1/2 shallot, diced
    • 7 grape tomatoes, halved or quartered depending on the size

    Preheat griddle on medium.

    In a medium size bowl, combine flour, water, baking soda, optional turmeric, cumin, garlic powder and salt to taste. Mix well ensuring all the flour lumps are gone. Add in lemon, stir and you will notice the batter rise and foam a bit. Add in veggies and combine thoroughly. (Note: I don't really measure the vegetables, so this is an approximation)

    Pour 1/2 of the mixture onto preheated griddle or skillet. You can use your spatula to move the veggies around and flatten as needed if they are piled up in areas. Also you can help make your pancake round by gently pushing in the edges where needed. There may be times when it appears that you have more veggies than batter, don't panic....in a few minutes the batter will puff up from the baking soda and fill in making it look fluffy and full. Let cook for 5 minutes. Flip and cook another 5 - 7 minutes, making sure the batter cooks throughout nicely. 

    Serve with your choice of condiments. A thinned hummus would also be great! Pairs well with fresh fruit on the side.

    Enjoy!

    Inspired and adapted from Cake Maker To The Stars. She has various versions on her blog, check it out for more inspiration!


    Baked Falafel Salad + Two Creamy Dressings

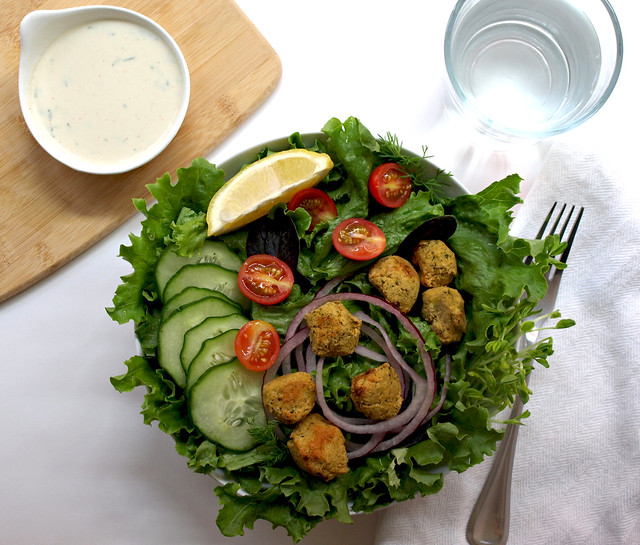
    Baked Falafel + Two Creamy Dressings

    Chickpeas are an amazing bean and I'm finding out just how versatile they are. I've used chickpea's in a lentil stew, roasted them with spices for snacking on and used them on top of salads. They are the main ingredient in hummus, which is just as versatile as the chickpea itself. They are great freshly cooked and I have no problem snacking on them just like that. They also make good things like socca bread and chickpea omelets (recipes coming soon). Its flour can be used and combined with other gluten free flours to make gluten free baked items too. And now, I come across the falafel, another great way to use chickpeas. High in protein and full of fiber, anything made with chickpeas is a great addition to a healthy lifestyle.

    This last week I've been falafel making and am here to share with you my experiences. Falafels are a Mediterranean food and can be used in various ways like in salads, or made into sandwiches using pita bread and the ingredients of the salad base within this recipe along with a nice drizzle of dressing. You can also enjoy them by simply pairing your falafels with hummus, a flat bread and fruit (fresh grapes come to mind) for a great snack or simple meal. Along with the falafel recipe are two creamy style dressings. One is a more traditional dressing using tahini as the base while the other is not so traditional using avocado and cucumber. The avocado and cucumber dressing is inspired by my Avocado & Cucumber Soup and works great as a dressing too. I loved them both and decided to add them together for varying tastes. Hope you enjoy them!

    Baked Falafel Salad + Two Creamy Dressings

    Let me share with you a bit about my trials of falafel making. I have used canned beans and dried beans that have been soaked. It's important to soak them for at least 12 hours so they soften all the way through, but it's ideal to soak for 18 + hours and rinse well (this will help with gassiness and allow your body to absorb more of their nutrients). For me, both the canned and soaked beans worked out great without any issues. Use whatever style bean you prefer, or is convenient. You may like to try both for yourself to see which one you like best, I had no preference. I also made them with added flour and/or oil like some recipes call for. I personally found the flour and oil to not be necessary. I've baked my falafels in a skillet and on cookie sheets, both work great. I've also added a few extra ingredients like coriander which is nice but have omitted it here just to keep it simple as possible (although I do have the garlic & onion powder...I like them for good measure). But by all means, if you have coriander on hand go ahead and throw in a teaspoon if you like. As for the greens, feel free to use only parsley or cilantro if you like. That's a little about my experiences. I'm sure there is more to learn and each of us will have varying outcomes due to our kitchen appliances, tools and taste. All in all, these were great falafels and I see them being made fairly regularly around here!

    Baked Falafel + Two Creamy Dressings

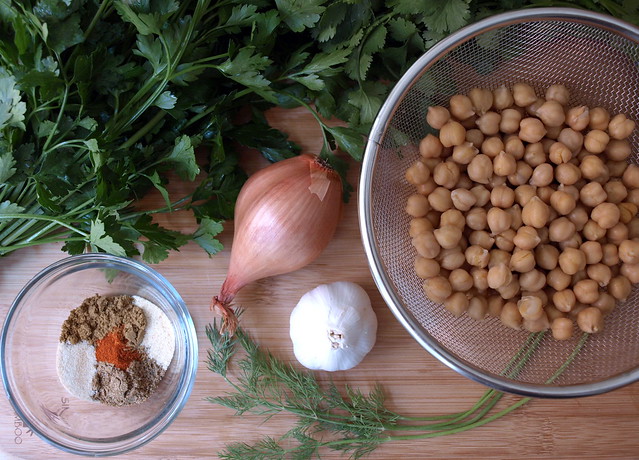
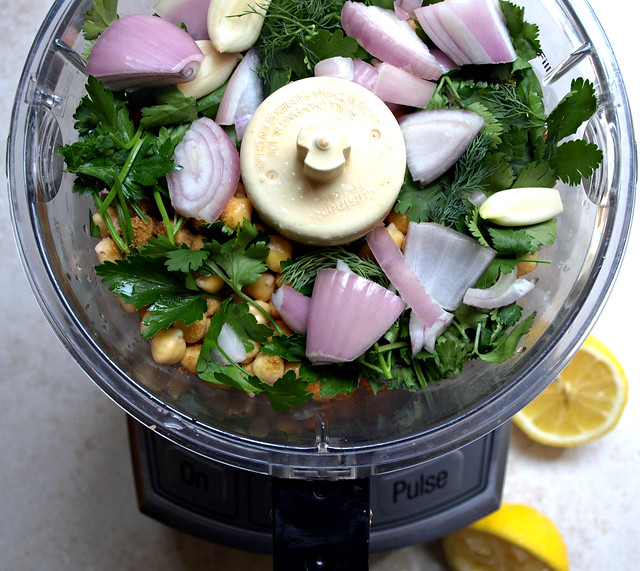
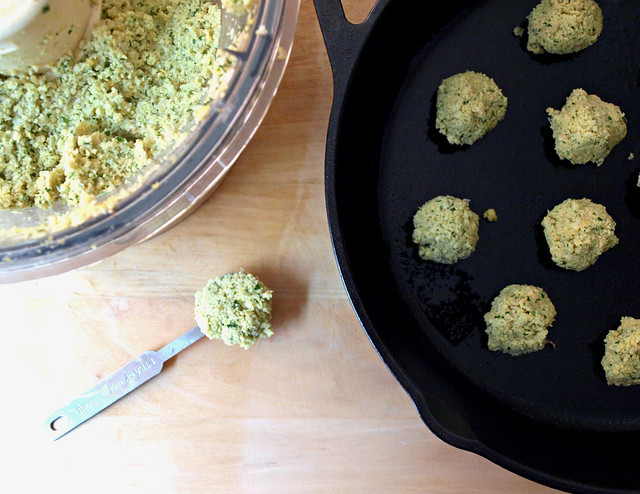
    Start by adding the ingredients to your food processor/blender...

    Baked Falafel + Two Creamy Dressings

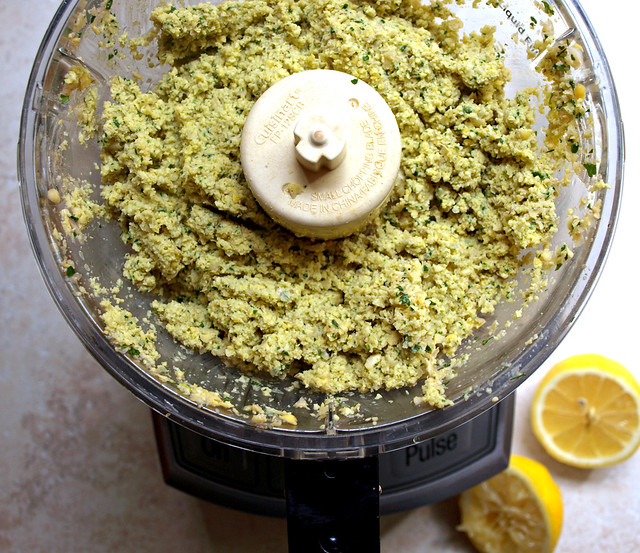
    Blend until fairly smooth, stopping every now and then to scrap down the sides. And then your on to shaping your falafels into whatever size you like.

    Baked Falafel + Two Creamy Dressings

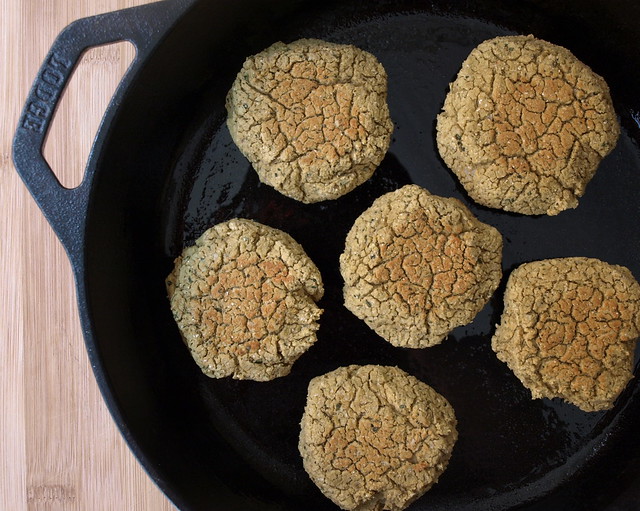
    These were some bite size falafels I made using a heaping teaspoon to scoop up the mixture, this yielded about 24 or so mini falafels. The ones below are the larger patties which I used approx 3 tablespoons per patty and yielded about 6. You can vary your size according to your needs and uses. All the ways I baked them they came out nicely firm on the outside and perfectly cooked on the inside, soft and tender. I know the ones below looked like a parched desert but trust me they weren't dry on the inside.

    Baked Falafel + Two Creamy Dressings

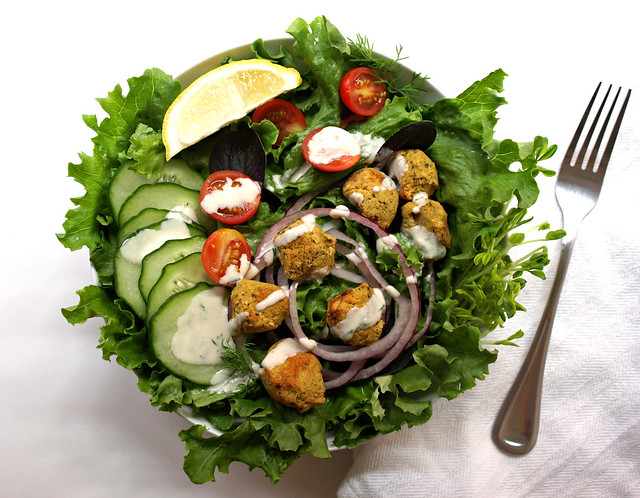
    Once your falafels are baked...make your salad or enjoy them however you like!

    Baked Falafel + Two Creamy Dressings

    Baked Falafal Salad + Two Creamy Dressings

    Salad Base
    • spring mix or choice of leafy greens
    • red onion, thinly sliced
    • tomatoes, sliced 
    • cucumber, thinly sliced

    Falafals
    • 1 can (15oz) garbanzo beans, drained and rinsed OR 3/4 heaping cup garbanzo beans soaked for at least 18 hours and drained (they will double in size)
    • 1/4 cup loosely packed cilantro, chopped
    • 1/4 cup loosely packed parsley, chopped
    • 3 tablespoons fresh dill, chopped (optional)
    • 1 small shallot or 1/2 small onion, roughly chopped
    • 3 garlic cloves
    • 1 teaspoon cumin
    • 1/2 teaspoon garlic powder
    • 1/2 teaspoon onion powder
    • pinch or two cayenne pepper, chili powder or smoked paprika (depending on your mood)
    • himalayan salt & freshly cracked pepper to taste

    Preheat oven to 400. Coat your cast iron skillet or cookie sheet with coconut oil, or oil of choice.

    In food processor/blender, combine all the ingredients for the falafels. Blend until fairly smooth. Form patties into whatever size you like....

    For larger patties: Scoop 3 tablespoons per patty...will yield approx. 6.

    For small patties: Scoop 1 heaping tablespoon per patty...will yield approx. 12.

    For mini patties: Scoop 1 heaping teaspoon...will yield approx. 24.

    Place patties on greased skillet/cookie sheet and bake for 10 minutes. Flip and bake for 15 minutes.  Total cooking time 25 minutes. If you find that your falafels are not as browned as you like, place them under the broiler for a minute or two, just be sure to keep an eye on them so they don't burn.

    Store leftover falafels in an air tight container. They will soften overnight. To warm them up and return crispness again to the outside, place under broiler or in a toaster oven at a high temp for a minute or two while keeping an eye on them so they don't burn. 


    Lemon-Tahini Dressing 
    • 4 tablespoons tahini
    • 1 garlic clove, pressed OR a dash or two garlic powder
    • juice of 1 large lemon
    • few dill fronds, cilantro or parsley, minced 
    • himalayan salt to taste
    • 1/3 cup water, + more to thin
    • pinch of cayenne

    In a small bowl, combine all ingredients and mix until well combined. Taste for seasoning and add more water as needed 1 tablespoon at a time or add more lemon juice. Store leftovers in an air tight container in the refrigerator for up to five days.


    OR, for something different and refreshing...


    Baked Falafel + Two Creamy Dressings

    Avocado-Cucumber Dressing 
    • 1 avocado
    • 1 cucumber, peeled
    • a few springs cilantro and dill fronds
    • 1 clove garlic
    • juice of 1/2 lemon
    • dash of onion powder
    • salt to taste
    • water as needed to thin

    In food processor/blender, combine all the ingredients except for the water. Blend until smooth. Taste for seasoning. Add water a tablespoon or two at a time until desired consistency. Best chilled in the refrigerator before serving. Leftovers will hold up a day or two in a sealed container in the refrigerator. It may last a little longer but it's gone by day two around my house.


    Once patties are ready, make your salad, top with falafels and dressing.

    Enjoy!

    How do you like your falafels? I like to experiment and would love to hear any suggestions and ideas!

    Kale & Mushroom Gratin

    Kale & Mushroom Gratin

    This was truly a comfort food at its finest. Perfect for these cooler winter days and nights. The creaminess and flavors of this dish will have you oooing and ahhing in delight. This was from a recipe that I just recently came across from Food 52 entitled, Spinach, Mushrooms and Cream for Dinner. It's adapted from Nigel Slater's, Tender. I decided to veganize it and I'm so glad I did, it's one of those dishes that I will definitely come back to. It's simple, easy to prepare and just about fool proof. And oh so delicious! I wish everyone a chance to give this a try as you will not miss any of the standard animal products typically used in dishes like this. And that I promise you!

    Let me explain a little about why I love using cashews and nuts instead of vegan butters, cheeses, margarine's and heavy creamers. They all have fats and are high in calories, except nut based creams are less processed using healthy nuts that have been soaked to enhance their nutrition even more. They also contain some proteins and fiber, as well as vitamins and trace elements. We are creating new habits using foods of a less processed nature while still tasting fantastic, if not better. :)

    I served my gratin over a bed of farro but you can use whatever you like or fits into your dietary guidelines. If you're not gluten intolerant, farro is a wonderful ancient grain to add to your meal plans. It's a lot like barley in taste and texture. Per serving, about 1/4 cup, farro has 290 calories with only 1.5 grams fat, 7 grams of protein and 5 grams of fiber. It will stick with you leaving you feeling satisfied for a good while. I picked up bag of 10 minute farro from Trader Joe's and it was ready right along with the gratin. 


    Kale & Mushroom Gratin

    Ingredients
    • 1-2 cloves garlic, minced
    • 1 shallot, diced
    • 1 tablespoon olive oil
    • 1 lb. (16 oz.) mushrooms, sliced or quartered, cremini or baby bella's
    • 1 large bunch kale, stems removed (I used curly kale)
    • handful spinach, optional (I added some in just because I had it on hand)
    • 1/4 cup white wine 
    • 1 cup heavy cashew cream (recipe below)
    • 1/2 cup unsweetened almond milk, more as needed
    • himalayan salt & cracked pepper to taste
    • almond parmesan (a pantry staple)
    • farro, barley, brown rice pasta, jasmine or basmati rice

    Heavy Cashew Cream
    • 3/4 cup cashews (soaked at least 3 hours or overnight)
    • 1/2 cup water, slightly more as needed
    • juice of 1/2 lemon

    Preheat oven to 350 degrees.

    Start with your cream. Cashews should be soaked in water, covering them with 2 -3 times the amount of water as they will swell up. Rinse cashews well. Place cashews, water and lemon juice into blender/food processor and blend until smooth and creamy scrapping down the sides as needed. (The magic bullet is a perfect size blender for this job.) Add water two teaspoons at a time as needed to create desired thickness/thinness. Set aside.

    Heat oil over medium high heat, add onion, garlic and mushrooms and saute, stirring occasionally until some of mushroom liquid cooks away and they start to brown, I found this to be about 12 minutes or so. Add the white wine and boil for a couple minutes. Then add cream and milk, let simmer for several more minutes. Turn off heat. (If you have time, leave this mixture to steep; the cream and milk will get wonderfully mushroomy.)

    Wash and shred your kale. I liked mine to be in smaller pieces. To steam, place in a large pot or wok with cover, cook on low, stirring occasionally until it wilts, about 5 to 10 min. No need to add water as the washing done right before will give enough moisture.

    Add kale and a couple tablespoons of almond parmesan to the mushroom-cream mixture. Season with salt and pepper to taste and transfer to a shallow baking dish. Lightly sprinkle a few more tablespoons almond parmesan on top. Cook for about 25-30 minutes, or until golden.

    Serve over a bed of farro, barley, brown rice pasta or pasta of choice, jasmine or basmati rice. Top with a tad more almond parmesan and salt & pepper to taste. Enjoy it with the rest of the wine or a nice glass of lemon water.


    Seriously good eats...Enjoy!


    If you like this you may also enjoy this: Mushroom Bourguignon

    Raw Pasta Primavera & Meatballs

    Raw Pasta Primavera & Meatballs

    Let's uncook something wonderful...

    Need I say much about this dish except that is amazing and fresh! This is a nice escape from the salads of the day. I love salads but these raw pasta dishes take it to another level of raw foods that I can really get into. Using fresh herbs will also add to the freshness and flavor. The oregano in the meatballs was just delicious. And sprinkle some of the herbs on top too. Not only are they pretty but the flavors will all mingle and come together for a tasty sensation. You may find yourself craving this raw dish again and again. 
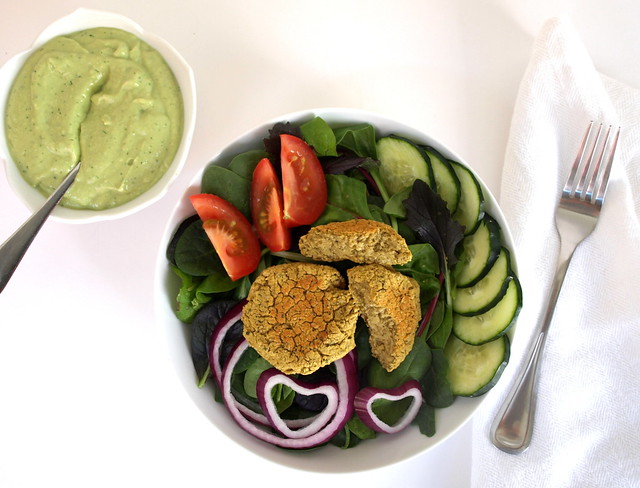

    Raw Pasta Primavera & Meatballs

    Raw Pasta Primavera + Meatballs

    Ingredients (serves 4)
    • 1 orange bell pepper, diced
    • 1 yellow bell pepper, diced
    • tomatoes of choice, diced
    • 1/2 large zucchini, diced
    • 1 -2 green onions, thinly sliced

    Pasta
    • 3 zucchini, spiralize or julienne
    • 3 yellow squash, spiralize or julienne

    Primavera Sauce
    • 4 roma tomatoes, 8 campari or 2 large tomatoes of choice
    • 1/2 cup sun dried tomatoes, soaked apprx 30 minutes to 1 hour
    • 1 small shallot or 1/2 large
    • 2 tablespoon extra virgin olive oil, optional
    • 1 tablespoon lemon juice
    • 1 tablespoon garlic powder or 1-2 fresh garlic cloves
    • 1/2 cup fresh basil
    • pinch or two red pepper flakes
    • himalayan salt to taste

    Meatballs
    • 2 cups mushrooms, sliced (baby bella's or cremini)
    • 2 rounded tablespoons tahini
    • 3/4 cup walnuts, soaked for 4 hours and left to dry 1 hour*
    • 3 tablespoons quick oats or oat flour
    • 1 clove garlic
    • 1/2 small shallot
    • 2 teaspoons tamari or nama shoyu
    • 2 tablespoons fresh oregano, packed
    • himalayan salt & cracked pepper to taste

    Start by preparing your veggies while the sun-dried tomatoes are soaking. Spiralize or julienne (either by hand or with a julienne tool) your zucchini & squash for the pasta. Prepare your diced veggies. Set aside.

    Next, place ingredients for the meatballs into your food processor/high speed blender, blend until well combined but still a bit chunky(not too chunky but just a very minimal amount). Taste for seasoning. Scoop out using heaping tablespoons and form into balls. I gently flipped them back and forth between my palms, and once rounded I used my fingers to mold making a nice circle shape. Makes 8. Set aside.

    Rinse equipment that the meatballs were made in and start the marinara sauce by placing all ingredients in food processor/high speed blender and combine until smooth or desired consistency. Taste for seasoning. Makes two cups.

    Layer pasta in individual serving dishes, top with marinara, a handful of veggies and a couple meatballs. Finish it off by topping with a light dusting of almond parmesan and some fresh cracked pepper.

    * There are benefits to soaking your nuts and seeds whenever possible. In this recipe they need to dry out after soaking or the mixture is too wet. For that reason this is an option here, especially if it's not convenient with your time frame. The reason why soaking is a good idea is that it enables your body to digest the nuts & seeds more easily. It also increases the nutrients and allows your body to absorb them more readily. But don't worry if you can't soak, your still getting health benefits. Here is quick article with the essential information and a nice chart of all the nuts/seeds soaking & sprouting times: Benefits of Soaking Nuts

    Clean and vibrant...Enjoy!


      ROASTED BUTTERNUT SQUASH SOUP

      Roasted Butternut Squash Soup

      I'm a little embarrassed to say, but this is my first time ever having butternut squash soup. I've been missing out on something wonderful all these years. This soup is truly amazing with its simple flavors. The sweetness of the roasted squash is the center piece with a light hint of garlic and shallot. I found this soup to be very light on its own, so pairing it with a sandwich or crackers will make this a filling, healthy and tasty meal. You may also try this over pasta as a butternut squash pasta sauce. Double this recipe and you'll be sure to have some leftovers to use in various ways. It's a welcome addition to the recipe collection and I look forward to making this recipe many more times in the future. Its bright and cheery colors will be welcome on those dark, grey days of the winter ahead. Bring on the warm, colorful soup and beanies!

      Roasted Butternut Squash SoupRoasted Butternut Squash Soup

      This is so easy to make, simply roast your squash, shallots and garlic. Once done, puree the vegetables with vegetable broth and serve with garnish of choice.

      Roasted Butternut Squash Soup

      Here I paired it with half an avocado, tomato & hummus sandwich using my Simple White Bean Hummus, you could also use my Favorite Hummus. Nothing fancy, just good simple foods that taste amazing. This was a perfect combo and hit the spot completely! 

      Roasted Butternut Squash Soup

       ROASTED BUTTERNUT SQUASH SOUP

      Ingredients
      • 1 butternut squash, peeled, seeded and cubed into 3/4' inch pieces (approx. 4 cups)
      • 3 garlic cloves, peeled
      • 2 small shallots or 1/2 sweet onion, peeled and halved
      • 1 tablespoon olive or coconut oil
      • 1/2 teaspoon sea salt
      • 2 1/2 cups water or vegetable broth

      Preheat oven to 400 degrees.

      Prepare vegetables, toss with olive oil right on the roasting pan or rimmed cookie sheet (line with parchment paper or use a silpat if you rather but tossing with oil on the cookie sheet with also grease your pan). Roast for 40 minutes, stirring once or twice, cooking until squash is fork tender. Remove any onion or garlic that seem to be over roasting and set aside. Once done, remove and let cool for 10 to 15 min.

      Make your soup one of two ways:

      One: Place roasted vegetables, liquids and salt in large pot, use submersion blender to blend until smooth. Depending on how much squash you actually used, add more liquid as needed for desired consistency. Cook on medium low until heated through. Taste for seasoning.

      or...

      Two: Place squash and shallots in blender/food processor and blend until creamy. In large pot place blended mix and add water and salt. Cook on medium low until heated through adding more liquid as needed and taste for seasoning.

      Serve as you like topped with seeds, herbs and spices or leave it simple as is. I topped mine with pepitas (pumpkin seeds), a few rosemary leaves and a dash of cayenne pepper for some heat. Fresh chopped sage or thyme, even a sprinkle of caraway seeds would be great too if you have it on hand. A little Coconut Bacon on top may be a nice variation too.

      Serves 2 - 3.

      Enjoy!

      Back to top