KIMCHI BREAKFAST TACOS

KIMCHI TOFU SCRAMBLE TACOS

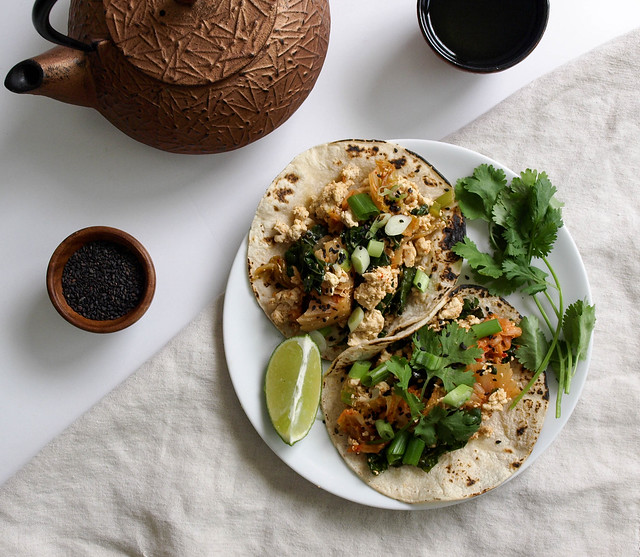
Now that kimchi has been added to the recipe collection, it's time to experiment with this spicy, tangy mixture. What better way than to add this spiciness to a tofu scramble. Tofu at times can use a little help, kimchi is a perfect addition and will whip that tofu into shape. This is my vegan version of a recipe I saw for a kimchi scramble using eggs. My tofu interpretation came out amazing and I'm very happy with the results. If you're a kimchi lover and tofu appreciator, than I think you'll agree! I first made this recipe using spinach (which tasted great, of course!) but ultimately decided to use kale here as we try to use the most nutrient dense foods possible whenever we can. I loved the kale, it cooks down beautifully adding a nice pop of green to the scramble. I've kept the seasoning super simple, it doesn't need much as the kimchi will shine through. Best to use your most fermented batch of kimchi, the ripened flavors will work best when cooking with kimchi. These tacos can be eaten any time of day. It pairs great with green tea. If having these for lunch or dinner and you're a beer drinker, I think an Asian or Mexican beer would be great too. Beers like Kirin Ichiban, Sapporo, Corona and Dos Esquis are vegan friendly. To see if your favorite beer or alcohol is vegen, check this great guide: Barnivore. Whatever your drink of choice is, you're going to love every bite of these kimchi tacos! 
KIMCHI TOFU SCRAMBLE TACOS
KIMCHI TOFU SCRAMBLE TACOSKIMCHI TOFU SCRAMBLE TACOS
KIMCHI TOFU SCRAMBLE TACOS

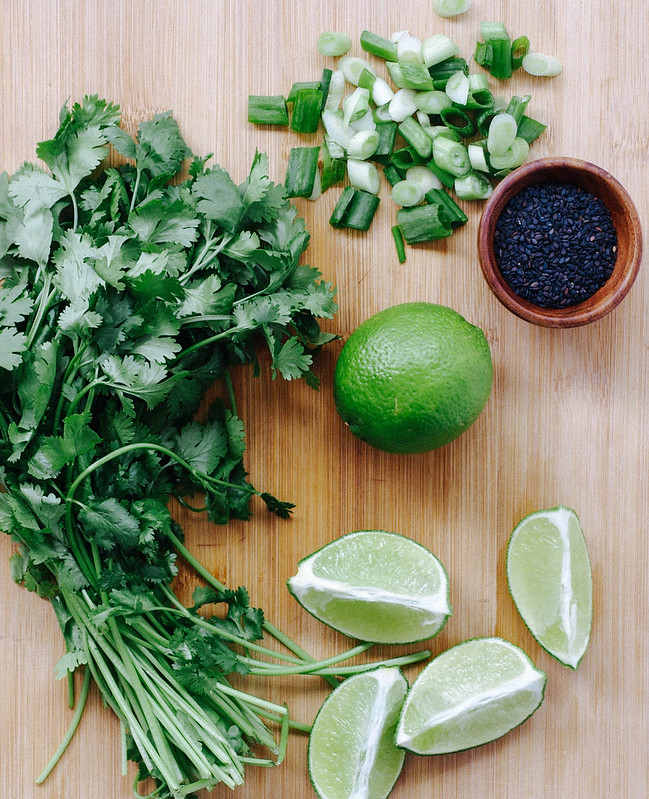
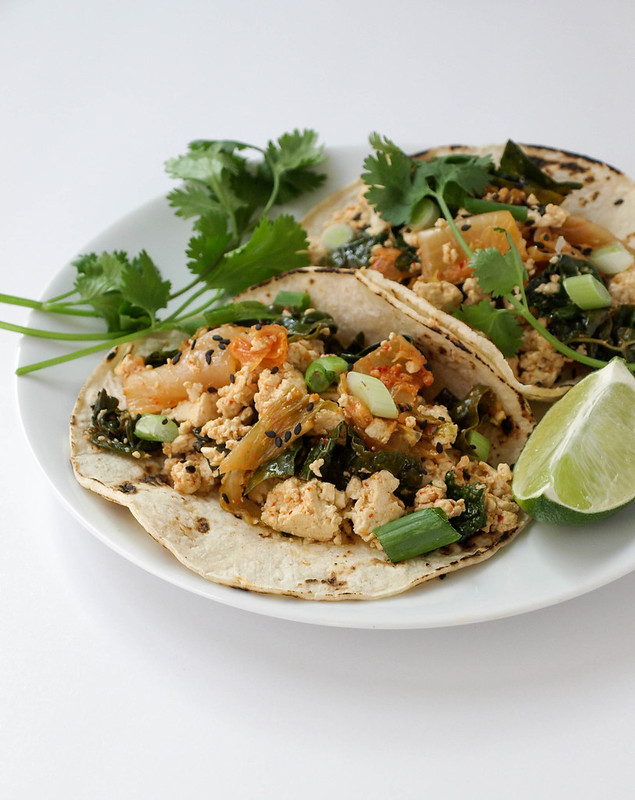
All cooked and ready to go. I could eat it just like you see it above...so good! But we're making tacos here, so fill your warmed tortillas (I used corn), you may like to use two if your mixture is very wet. Top with cilantro sprigs, scallions, sesame seeds and a squeeze of lime. Enjoy to the fullest!
KIMCHI TOFU SCRAMBLE TACOS

KIMCHI TOFU SCRAMBLE TACOS


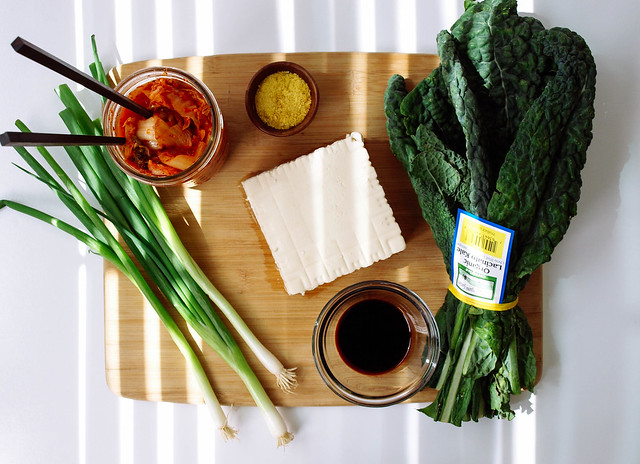
Ingredients
  • 1 tablespoon sesame seed oil, optional
  • 1 block (14 - 16 oz) organic tofu, firm or extra-firm
  • 4-5 large leaves of kale, center stem removed and julienned
  • 3 scallions, sliced (divided)
  • 1-2 tablespoons tamari
  • 1/2 teaspoon garlic powder
  • 1-2 tablespoons nutritional yeast, optional
  • 1 cup kimchi
  • cilantro sprigs, for garnish
  • sesame seeds (toasted, black or white), for garnish
  • lime wedges, to serve
  • 6 corn or flour tortillas, to serve

Measure out 1 cup kimchi and let come to room temp.

Open and drain tofu. You may like to give it a quick press to remove moisture if not using a vacuum packed brand. 

In a large wok/skillet, heat oil over medium high heat. Add tofu, crumbling between your fingers, cook, stirring occasionally, for about 2 -3 minutes. Turn heat to medium, carefully add tamari and garlic powder, give a good stir. Add kale and 2/3 - 3/4 of the scallions, cook, stirring occasionally until kale becomes soft and wilts, cover partially to help with the process, about 5 - 7 minutes. Lastly, add the nutritional yeast and kimchi, mix and cook just until kimchi has warmed through, about 1 minute or so. We don't want to overcook the kimchi or it will destroy some of the health benefits of the probiotics. 

Heat your tortillas. I like to heat mine carefully over a gas burner until lightly charred in spots. Use your preferred method.

Layer your tortillas with the scramble mixture, add a few sprigs of cilantro, some of the reserved scallions, a sprinkle of sesame seeds and a squeeze of lime. 

Serves 3

Notes: 

Use spinach in place of kale.

Use ripened kimchi, the flavors will be more pronounced. You may prefer fresher kimchi, in which case use your favorite.

You may like to chop your kimchi a bit before adding it to the tofu. I kept it as it was but it's an optiona.

Try adding a drizzle of this Garlic Miso Cashew Sauce, or for extra heat try the Dynamite Sauce or Sriracha Cashew Cream. You can control the heat when adding the spice to each of these condiments. 


Roasted Vegetables + Chickpeas with Lemon-Cannellini Sauce

Roasted Vegetables + Chickpeas with Lemon-Cannellini Sauce

This recipe is adapted from one of the very first vegan meals I used to make on a regular basis when starting my new lifestyle. This was before I started blogging and then was off trying everything else I could. Nice to come back to this recipe once again. I have only slightly changed it from the original by adding chickpeas for boost of protein and texture, as well as mixing up the veggies a bit. The original recipe can be found here on One Green Planet by its author Robin Robertson. I love this recipe because of the versatility and ease. The vegetables can be pretty much anything you like. Use red or Yukon gold potatoes in place the sweet potato, just be sure to use about 2 cups worth. You can add, or sub in, butternut squash, pumpkin or any other winter squash you might like. You may like to add earthiness by using cubed beets. Try cauliflower florets in place of broccoli. Really anything goes here. As for the sauce, I find it's not something to write home about on its own but that changes once added like gravy to the top of your vegetables and grain, all the flavors come together and you'll be in comfort food heaven! This recipe is easy to pull together and makes for a great hearty meal in these cooler months. It's full of protein and fiber, is low in fat and has plenty of essential nutrients needed to maintain a healthy plant based diet! 

Roasted Vegetables + Chickpeas with Lemon-Cannellini Sauce

Clean, vibrant, healthy and satisfying!

By all means load your plate with two to three times the vegetables you see here. Enjoy freely!

Roasted Vegetables + Chickpeas with Lemon-Cannellini Sauce

Roasted Vegetables + Chickpeas with Lemon-Cannellini Sauce

Ingredients (serves 4-6)
  • 1 large sweet potato, cut into 1 inch cubes
  • 2 cups broccoli florets
  • 2 large carrots, sliced
  • 2 cups brussels sprouts, halved lengthwise
  • 1 onion, sliced (use your favorite onion or what you have on hand)
  • 1 can (15 oz.) garbanzo beans (chickpeas), drained  and rinsed
  • 1 tablespoon olive oil
  • mineral salt & fresh cracked pepper or lemon-pepper, to taste
  • 2 -3 cups cooked quinoa or grain of choice (about 1/2 cup per person)
Sauce
  • 2 cans (15 oz.) cannellini beans, drained and rinsed
  • 1/4 cup nutritional yeast
  • 1 teaspoon garlic powder
  • 3/4 - 1 cup vegetable broth (start low and add as needed)
  • juice of 1 good size lemon
  • generous pinch of red pepper flakes
  • mineral salt, to taste
  • 1 tablespoon fresh chopped basil, thyme, parsley, chives, sage, tarragon 

Preheat oven to 425 degrees F.

Line roasting pan/baking dish with silpat, parchment paper or grease lightly with neutral oil. Add vegetables to roasting pan and toss to coat with olive oil. Arrange vegetables in a single layer (as much as possible), sprinkle with salt and pepper to taste. Roast vegetables until tender and lightly browned, about 45 minutes, mixing once halfway through.

Start your grain of choice while vegetables are cooking. Quinoa will take about 30 minutes.

Prepare your sauce by placing all the ingredients into your food processor/blender, except for the herbs, and process until smooth. Add extra broth as needed to thin. Add in herbs and pulse once or twice. Place sauce in a small saucepan and heat over low heat, uncovered, until warm, stirring occasionally.

Serve vegetables over grain of choice with a nice helping of sauce over top. Serve warm.

Serves 4 generously.

Store leftovers in refrigerator for up to a week. Leftovers are just as delicious!

Enjoy!


Easy Spicy Mac n' Cheese


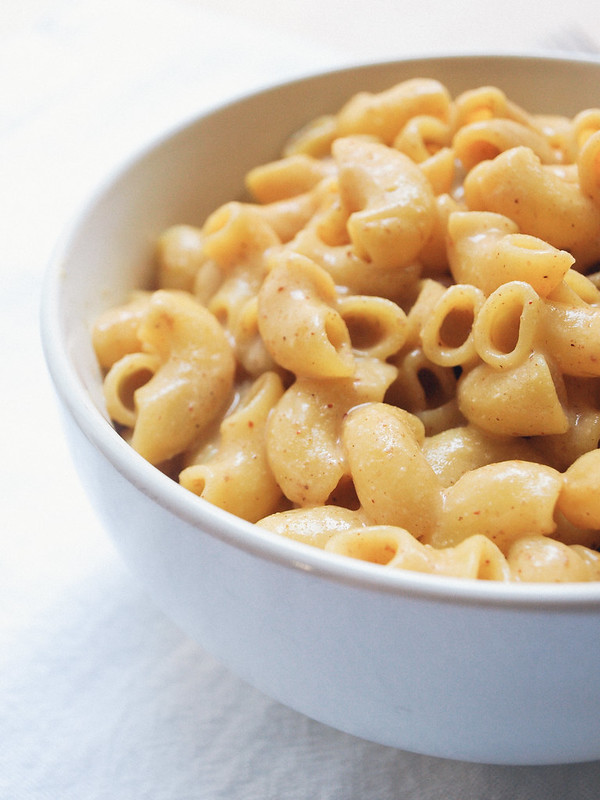
No frills here, just a simple mac n' cheese with a kick!

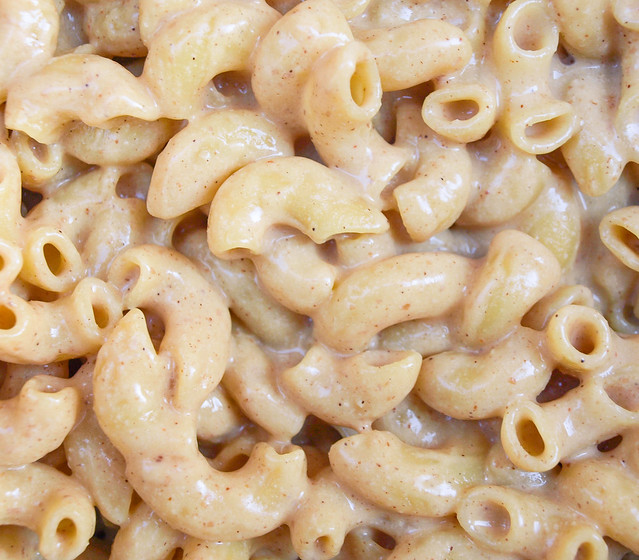
This is my second mac & cheese recipe to date. My other one, Winner! Mac and Cheese Bake, is supreme to any other's I have tried and is an easy nut based recipe. After much research, I found that vegan mac n' cheese recipes that win contests will undoubtedly contain cashews. Why you may ask. It's because cashews blend into a wonderful creamy texture making for a creamy sauce that can rival dairy based ones...and I agree! But I don't always want to use the high fat nut based recipes. In comes this one which is simply made from non-dairy milk, a little oil, flour, nutritional yeast and a few spices. That's it, and it came out great! I used almond milk for mine but you can opt for your favorite nut free non-dairy milk instead to make this nut free. This is a wonderful easy version that I can see being made again and again in my kitchen, adding steamed or roasted vegetables for variation. It may not win any contests (yet!), but for what it is it's another winner in my book. It hits the spot completely and I think you'll agree!

Easy Spicy Mac n' Cheese

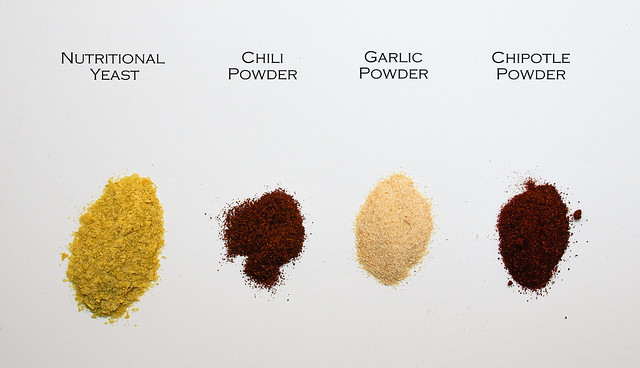
Using these key ingredients will give this mac n' cheese lot's of flavor! 

Nutritional yeast, aka 'nooch' or 'savoury yeast flakes', has a savory/umami characteristic. With its wonderful nutty, cheesy flavor it's perfect for cheesy flavored dishes. It's a great addition to your plant based diet in that it's a complete protein, low in fat and sodium. It also contains B vitamins, some are fortified with B-12 so be sure to seek out those brands. It's also If this is new to you, it's a flavor that you may have to adjust too. I've heard many do not like like it at first, but it will grow on you and you will find it to be a useful and tasty addition to your healthy diet. If your wondering what else you can do with nutritional yeast, you can find a few more ways to use it here: Winter Potato, White Bean & Kale Soup...Spicy Kale Pesto...Tofu Scrambles...Almond Parmesan...Vegetable Frittata...Cashew Ricotta Cheese. Lot's of ways to put nutritional yeast to use in your kitchen. You may even try sprinkling some on your popcorn!

Easy Spicy Mac n' Cheese

This is an easy, versatile mac n' cheese that will win hearts!

Easy Spicy Mac n' Cheese

Easy Spicy Mac n' Cheese

Ingredients
  • 8 oz. favorite pasta (I used quinoa pasta)
  • 1 1/4 cup unsweetened almond milk or your favorite unsweetened non-dairy milk
  • 2 tablespoons olive oil
  • 2 heaping tablespoons flour (spelt, rice, tapioca or all-purpose)
  • 1/2 cup nutritional yeast flakes
  • 1/2 teaspoon garlic powder
  • 1/4 teaspoon chili powder
  • 1/4 teaspoon chipotle powder
  • mineral salt, to taste

Cook your pasta according to package. Drain and place back in pot, set aside.

In a small/medium sauce pan, heat oil over medium heat, add flour and whisk to incorporate. Continue whisking and cook for 2 minutes. Add milk slowly, whisking constantly. Turn heat to low and cook until sauce thickens, about 8 minutes, stirring frequently. Remove from heat. Stir in nutritional yeast, salt, garlic powder, chili powder and chipotle powder. Stir until everything is incorporated and smooth again. Taste for flavor. 

Add sauce to the pasta, toss well, add more milk as needed and serve right away.

Notes: 

This recipe is just a template. Add as much of the salt and spices to suit your taste. You may even like to omit the chili and chipotle opting for a mild mac n' cheese. Or use either the chili or chipotle powder alone.

For the nutritional yeast, if using powder form reduce amount to about 1/4 cup. You can try playing around with the amount. I have used less, 1/4 - 1/3 cup, and still had a nice cheesy flavor. You may opt to start with less and add more to taste. 

Toss in steamed or roasted vegetables of choice with the pasta...broccoli, brussel sprouts, sun-dried tomatoes, tomatoes, spinach, kale and corn are a few that come to mind that will work with the flavors. I'm sure I missed a few and would love to hear your suggestions in the comments below.

To reheat, add a small amount of milk and heat over low until warmed.

You may also like to top with some almond parmesan! 

Enjoy!

Recipe inspired by the Free People Blog

TOFU SCRAMBLE STUFFED POBLANO PEPPERS

Tofu Scramble Stuffed Poblano Peppers

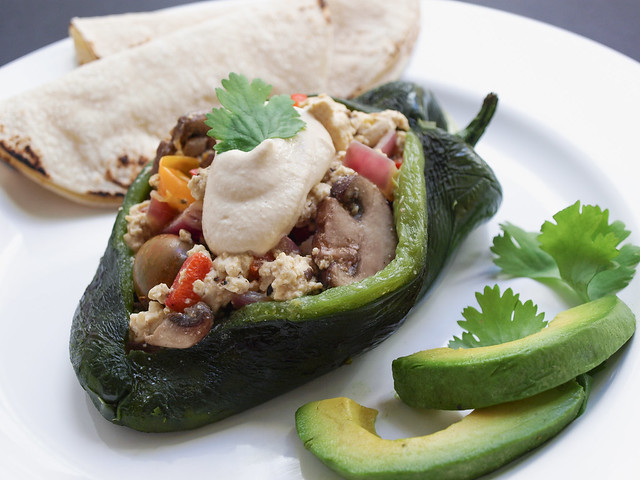
What to do with those poblano peppers? I bought a couple of them a few days ago, not quite knowing what I was going to do with them, and decided to try stuffing them with a breakfast tofu scramble. It worked great! Let's not keep these just for breakfast and brunch though, these can be eaten any time of day. They happen to be my lunch and dinner the day I cooked these up. This was fairly simple to prepare and absolutely delicious! The peppers were soft and tender, not too hot and the combination of everything filled me up perfectly. Feel free to sub in whatever veggies you prefer or have available in the fridge. I love tofu scrambles because they are so versatile, you can add pretty much whatever you like as the tofu will take on the flavors of all the other ingredients and pairs well with most vegetables. I kept the seasoning very minimal, using only nutritional yeast, garlic powder, salt and pepper. It really didn't need much and I was happy with the simplicity, letting the poblano come through, just be sure to season it well with the ingredients listed. Topping this with a bit of sriracha cashew cream or other cashew based cheese sauce lends another level of wonderfulness. Or simply top with salsa or any hot sauce you like. I also paired mine with some warmed corn tortillas and sliced avocado. Keep it simple or go all out!

Tofu Scramble Stuffed Poblano Peppers

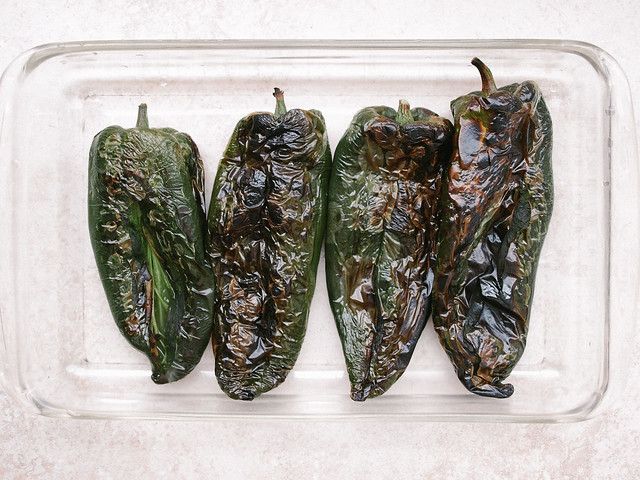
A look at after roasting the peppers, before peeling the skin off. I roasted my peppers under the broiler. These happen to be really nice sized peppers. The glass dish on the right is a 9x13, giving you the idea of just how big they were. If you only have smaller ones, use 6 to 8 depending on the size. The scramble filled up all four of these with a few bites left over.

Tofu Scramble Stuffed Poblano Peppers

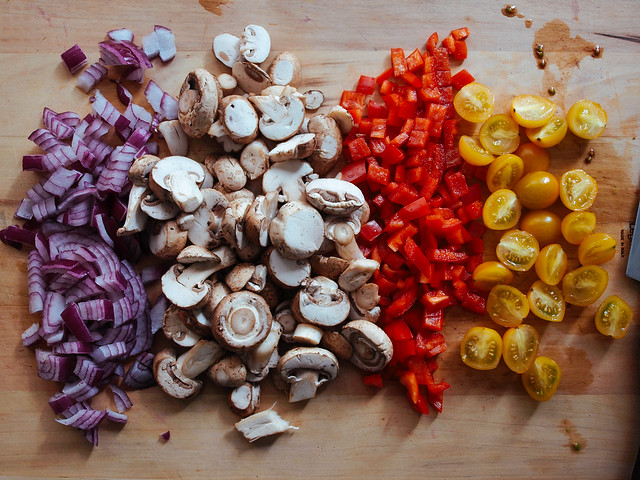
Change up the vegetables to suit your personal taste. Sub in zucchini, yellow squash, spinach, green onions, softened sun-dried tomatoes to name a few. You can never have enough vegetables in my opinion. Use as much as you like of everything!

Tofu Scramble Stuffed Poblano Peppers

 TOFU SCRAMBLE STUFFED POBLANO PEPPERS

Ingredients
  • 4 large poblano peppers or 6 small
  • 1 block (15 oz) firm or extra firm organic tofu, drained and pressed
  • 1 tablespoon olive oil
  • 1 small onion, diced (use any color you prefer or have on hand)
  • 8 oz mushrooms, sliced (I used baby bella)
  • 1 small bell pepper, diced (any color)
  • handful grape tomatoes, sliced in half
  • 1 teaspoon garlic powder
  • 1/4 cup nutritional yeast
  • mineral salt & cracked pepper, to taste
  • sriracha cashew cream, to serve
  • avocado slices, to serve

Roast your poblano peppers one of two ways.
  1. Roast in pre-heated oven at 450 degrees for 20 minutes or so on a cookie sheet, turning half way in between to flip peppers over.
  2. Roast your peppers in the broiler on low for 7 - 10 minutes on each side. Or until the skin of the peppers are lightly charred and bubbly. Ovens may very so keep watch and adjust times to suit your needs. (This was my preferred method of roasting as shown in the photo above.)

Once done, remove from oven. Let cool a few minutes in a baking dish covered with saran wrap. Remove any loose skin off the peppers. Gently slice each poblano pepper, making a slit down the center of one side, without cutting into the other side. Remove seeds, leave a few for heat if you like. Careful not to touch the seeds with your hands, use rubber gloves if you can. (The capsaicin will linger on your fingers and may burn, do not touch your eyes. Rub fingers in olive oil for one minute and rinse to help remove the capsaicin). Let peppers sit covered tightly until ready to stuff.

While peppers are roasting, drain and press your tofu. To press tofu, place block of tofu in a clean kitchen towel that is folded at least doubled, place on hard surface and top with a heavy pot/book for about 15 minutes.

In a large skillet/wok, heat oil over medium heat. Add onions, cook for 4-5 minutes, add in mushrooms, bell pepper, tomatoes and garlic powder, cook for another 4 minutes or so. Add tofu while crumbling with your fingers. Add in the nutritional yeast, salt and pepper. Be sure to taste and add plenty more garlic powder, nutritional yeast, salt and pepper to taste. Gently toss and cook another 3 - 4 minutes until tofu is heated through.

Scoop tofu mixture into peppers. If the peppers need to be heated, using the same baking dish you cooled the peppers in, place under broiler on low for a minute or two, watching closely so nothing burns.

Serve with a drizzle or dollop of cashew cream and avocado slices. Salsa would also be great. I also loved having some warmed corn tortillas on the side as well. Might I also suggest pairing it with some Perfect Hash Browns from Olives For Dinner. Lot's of ways to make it great...

Enjoy! 

Risi E Bisi (Rice and Peas)

Risi E Bisi (Rice and Peas)

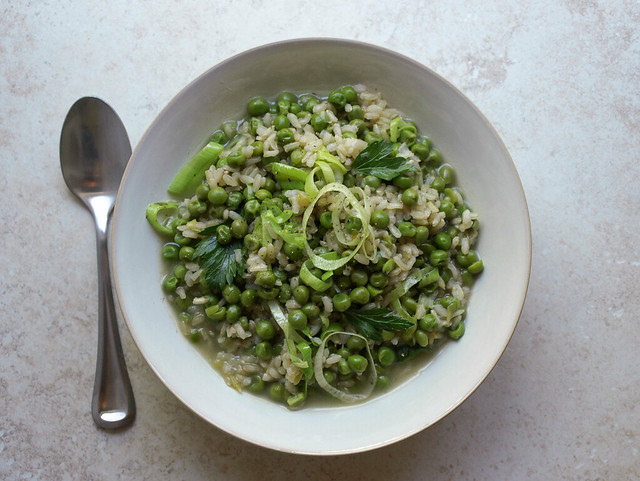
Risi e bisi (pronounced REE-see ay BEE-see) is a classic Venetian dish. It's somewhat like a risotto but a little soupier to where you will be using a spoon. I really enjoyed the simplicity and beauty of this dish in every way. The peas are sweet and pair so nicely with the leeks and other flavors from the broth and light seasonings. This recipe makes a large batch so feel free to cut the recipe in half.

This lovely recipe is inspired and adapted from NPR Kitchen Window, A Fresh Pod Cast: Savoring Springs Green Peas.

Risi E Bisi (Rice and Peas)


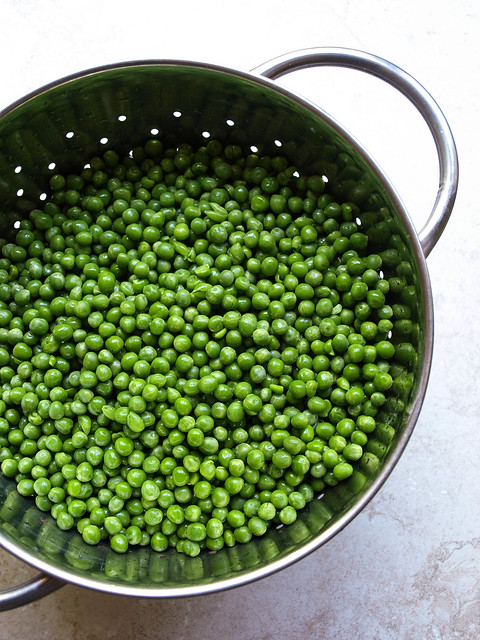
I decided to use frozen petite peas for this as I honestly didn't feel like shelling 4 lbs. of peas. Please don't judge me. :) I think this is how most of you will be cooking this as frozen peas are convenient. But of course, fresh peas are best and will yield a lovely flavor. Try not to eat them all before they go into the recipe either. I know I can eat these peas by the handfuls. They are so sweet and tender that I can't get enough of them.

Risi E Bisi (Rice and Peas)Risi E Bisi (Rice and Peas)

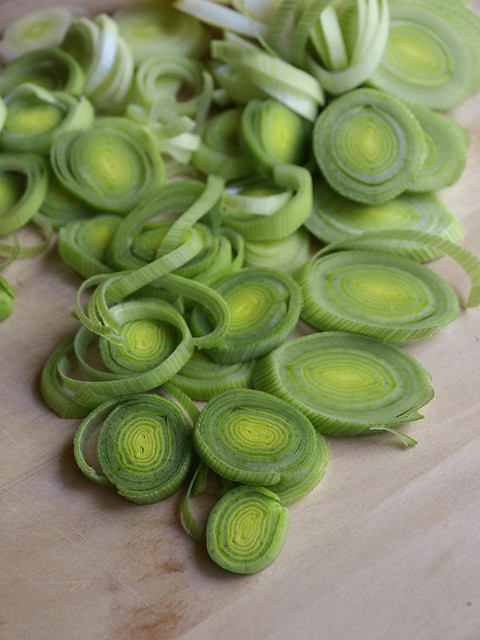
Then we bring in the mild flavors of leeks and bay leaves. I used two medium sized leeks, light green and white parts only, slicing them thinly. I also chopped about 1/3 of the thinly sliced batch so there would be some smaller onion like pieces too (this is optional).

Risi E Bisi (Rice and Peas)

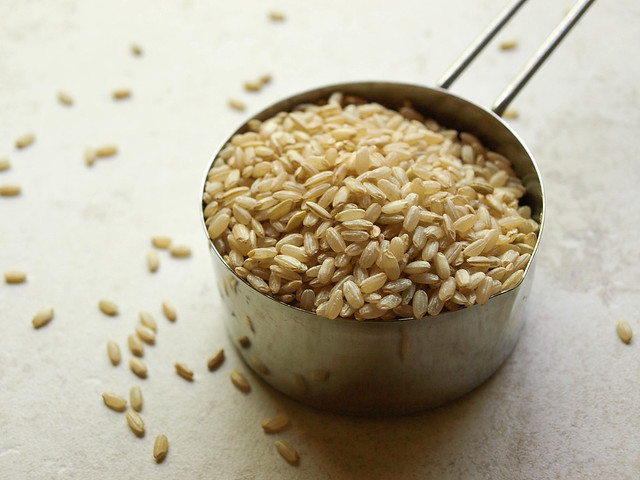
I used this sprouted brown grain rice from Planet Rice that I picked up from my local grocery store. It was about $4 for a 20 oz bag. Using this rice I found that I needed to add a little extra cooking time to achieve the texture I was looking for. They do have a lightly milled spouted brown rice that will cook a bit faster, then you won't need the extra cooking time at the end like I needed. Traditionally the rice used in this dish is a risotto rice like Arborio rice, Carnaroli or Vialone Nano which are grown in Italy.

Risi E Bisi (Rice and Peas)

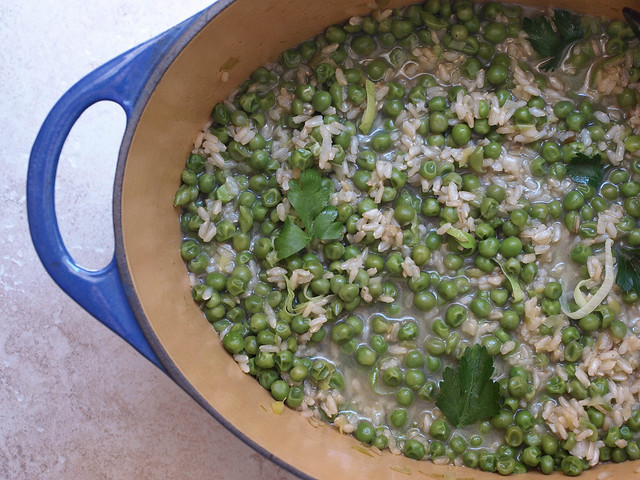
As mentioned in this Food & Wine recipe, it is said by the cooks in Venetia that "for each grain of rice there should be a pea"...I agree!

Risi E Bisi (Rice and Peas)

 Risi E Bisi (Rice and Peas)

Ingredients (serves 6 - 8)
  • 6 - 8 cups vegetable broth OR water with 3 Repunzel Vegetable Bouillons
  • 2 bay leaves
  • 3 tablespoons nutritional yeast, optional
  • 2 tablespoons olive oil
  • 2 medium leeks, thinly sliced OR one onion, diced
  • 1 garlic clove, minced
  • 2 cups sprouted brown rice, arborio or any medium grain rice of choice
  • 4 cups fresh peas or thawed frozen peas 
  • 1/4 cup flat leaf parsley, chopped and loosely packed
  • mineral salt and pepper, to taste
  • almond parmesan, for topping (not shown)

In a medium saucepan, place the stock and bring to a gentle simmer. Add in the bay leaves, nutritional yeast and keep broth warm. 

In a large stock pot or dutch oven, heat oil over medium heat. Add leeks and cook until just softened, about five minutes (remove and set aside a few tablespoons of the leeks for topping if desired). Add garlic and rice, toss until rice is nicely coated, about 3 minutes. 

Add in warm broth, one cup at a time, the stock should be bubbly. Stir often allowing the broth to be just absorbed. Add in another cup of broth, repeat. Add in peas, more stock and continue the process for another 15 minutes or so, or until the rice is al dente, tender but chewy. The whole process should be about 25 minutes or so. Note: Using the sprouted brown rice, at the end I covered my rice and peas and let simmer for about 10-15 minutes until rice was ready to my liking.

Add in more broth and stir. Your rice and peas should be a little soupy. Remove from heat, taste for seasoning and stir in parsley. Remove any bay leaves that made it into the rice and peas. Serve topped with a nice dusting of almond parmesan and freshly cracked pepper. 

Quick method: After sauteing the leeks and rice as above. Add at least 7 cups broth, peas, bay leaves and nutritional yeast, bring to a boil, cover and cook for 20 - 30 minutes until rice is tender. Remove from heat add in parsley. Let set a few minutes and serve as desired.


Quinoa and Peas

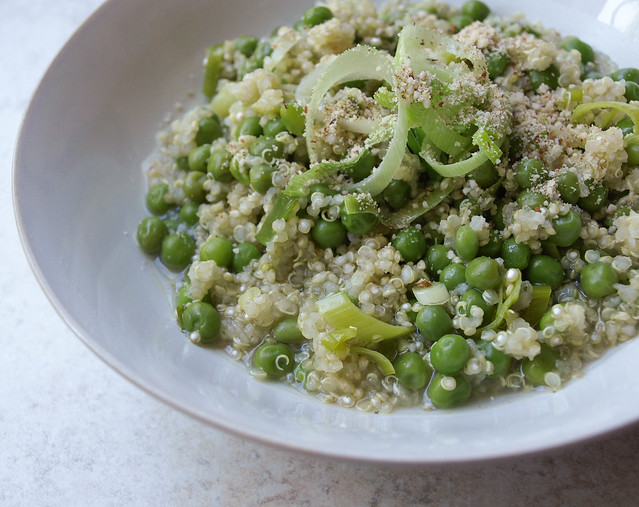
And if you were thinking about subbing quinoa for the rice, go ahead, it's delicious too as pictured below (this is actually my preferred grain, I love everything about it...but then this dish isn't called Risi E Bisi). Top with Almond Parmesan like shown and your good to go. Truly wonderful!

quinoa and peas with almond parmesan

How to make using quinoa...

In large pot, heat oil and saute leeks, about five minutes. Add 2 cups rinsed quinoa and cook for another 3 minutes, stirring frequently. 

Add 7 cups broth, bay leaves, nutritional yeast, bring to a boil. Add in peas, do not stir, cover and simmer for about 20 - 25 minutes. Test quinoa for tenderness by tasting. Turn off heat, uncover and let set for about 10 - 15 minutes until broth is mostly absorbed. It will thicken upon standing, add more warm broth as needed for desired soupiness. Remove bay leaves. Toss in parsley, taste for seasoning and serve. 

This method with the quinoa will leave you with wonderful leftovers. Quinoa holds up well and reheats beautifully the next day. 

Enjoy!


Roasted Buddha Bowl + Creamy Lemon Hippie Sauce

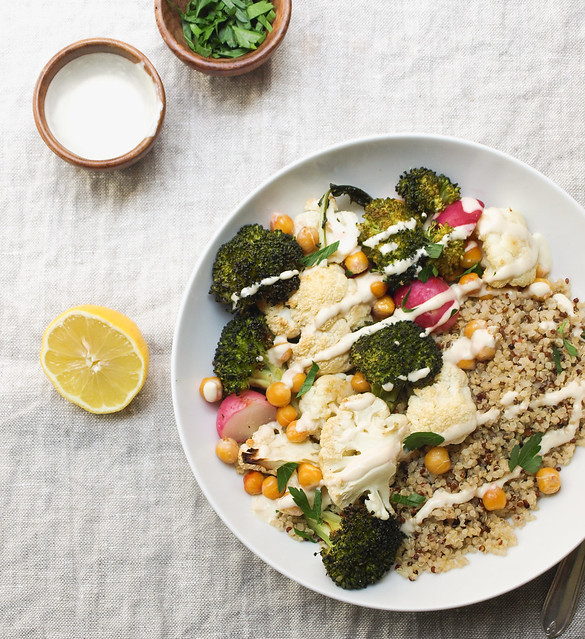
Roasted Buddha Bowl

What I have to share with you today is my take on the Roasted Buddha Bowl from Oh She Glow's. It is my kind of meal...simple, flavorful and easy! I added some radishes to my mix. Once roasted, they become sweet and tender. If you've never grilled or roasted radishes, I highly recommend adding that to your list of must tries. I also made my own sauce for this recipe. I've been having lots of cashew based sauces lately and decided to mix it up with a lemon white bean sauce. It came out wonderful and pairs really well with the quinoa and vegetables. I would consider it more of a hummus that has been thinned out a bit. I think you'll love it. So we have another nutrient dense meal that tastes great, is filling and easy to make. Be sure to pick up some radishes and give this bowl a try...you may find that you will make it again and again. I have. :)

Roasted Buddha Bowl

Before we begin, let's go over a little bit about what a Buddha bowl is. Personally, this is my first experience with it, although I have made it many times before, I just didn't know it. Buddha bowls can be whatever you want them to be...they typically include a grain, protein, sauce and vegetables. But you can add anything your kitchen holds and/or your heart desires. Usually you will find the vegetables to be sautéed or steamed. I really love roasted vegetables so this Buddha bowl is perfect for me. I think sweet potatoes would be great in this too. You can keep your Buddha bowl simple or go all out adding all kinds of colorful ingredients. Chances are you've already had many Buddha bowls too! 

Now let's be full of gratitude for all that is and dine in peace...

P5075367-2Roasted Buddha BowlRoasted Buddha Bowl

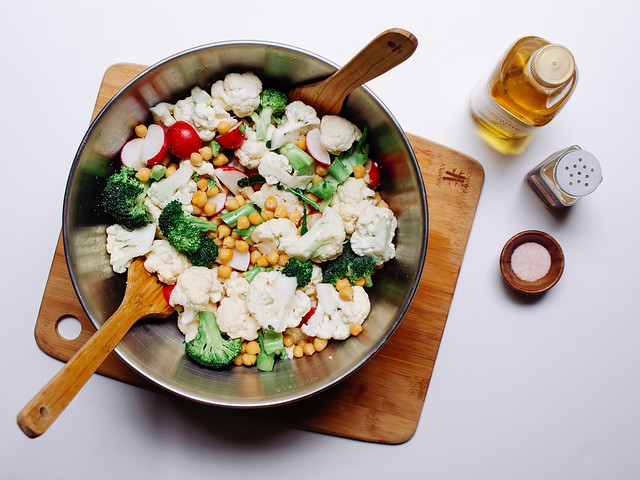
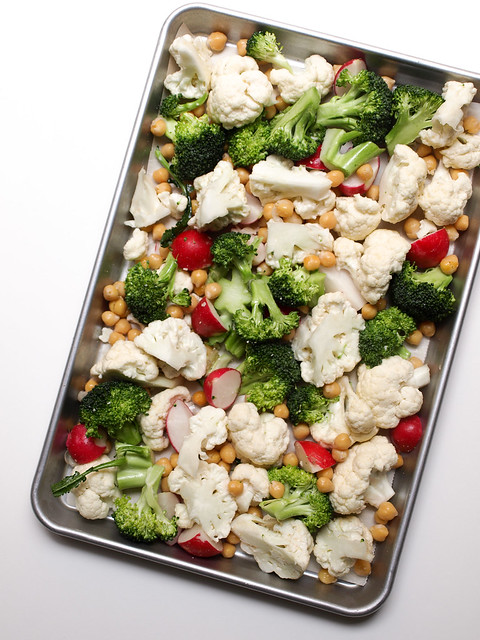
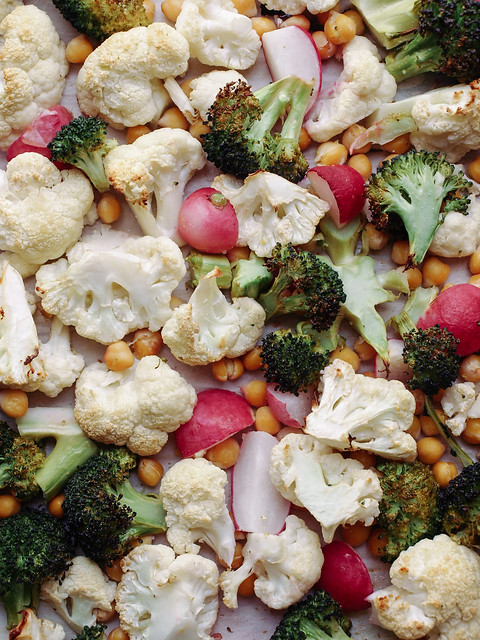
Prepare your vegetables and roast.

Roasted Buddha BowlRoasted Buddha Bowl

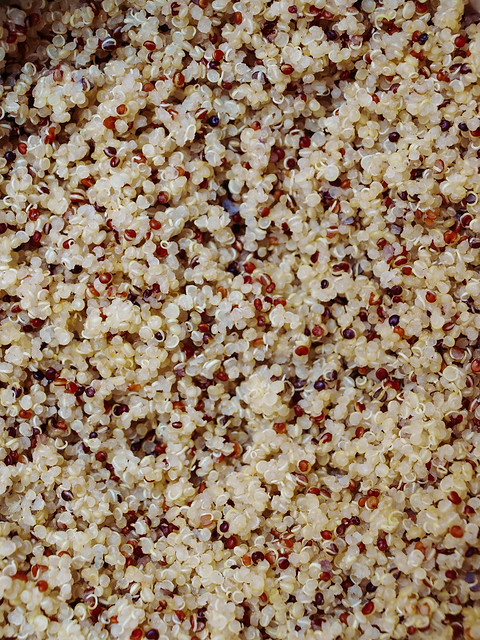
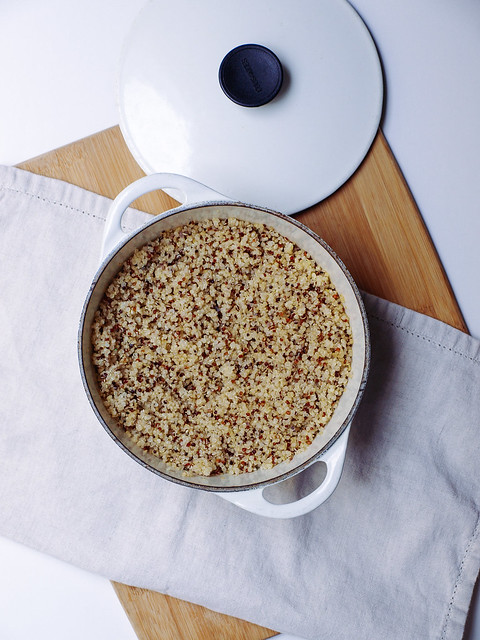
Quinoa, my favorite grain of all time...to date that is! It's full of protein, fiber and is just an amazing grain with its versatility. My favorite is mixing white and tri-color quinoa together. It breaks up the solidness of the white quinoa and the too clutseriness of the tri-color, and it always photographs the best for me adding just the right texture. It's perfect for this Buddha bowl and can cook while the vegetables are roasting.

Roasted Buddha Bowl

Roasted Buddha Bowl

Ingredients (serves 3 generously)
  • 1 broccoli head, cut into florets
  • 1 cauliflower head, cut into florets
  • large handful radishes, halved (or quartered depending on the size)
  • 1 1/2 cups cooked chickpeas (garbanzo beans) or 1 can (15 oz.), drained and rinsed
  • 1 - 2 tablespoons olive oil or sesame oil
  • generous sprinkle of garlic powder
  • pinch or two of salt
  • 1 cup quinoa, (rinse if you pref) 
  • 1 1/2 cups water
  • chopped parsley, to garnish

Creamy Lemon Hippie Sauce
  • 1 can (15 oz) cannellini beans or chickpeas (garbanzo beans), drained and rinsed or 1 1/2 cups fresh cooked
  • 2 tablespoons tahini
  • 2 tablespoons extra virgin olive oil
  • 2 tablespoons nutritional yeast, optional
  • 1 large garlic clove
  • juice of 1 large lemon
  • mineral salt, to taste
  • 2 - 4 tablespoons water for thinning 

Preheat oven to 400 degrees.

In a large bowl, combine broccoli, cauliflower and radishes, drizzle with oil, garlic powder and salt, mix well to coat. Place mixture on rimmed cookie sheet or roasting pan. Cook for 35 -45 minutes, stirring once in between.

While vegetables are roasting, in a medium pot add quinoa and 1 1/2 cup water. Sprinkle in a dash or two of garlic powder and mineral salt. Bring to a boil, cover, reduce heat and simmer for 15 minutes. Remove from heat, uncover and let rest for 10 minutes. Fluff with fork.

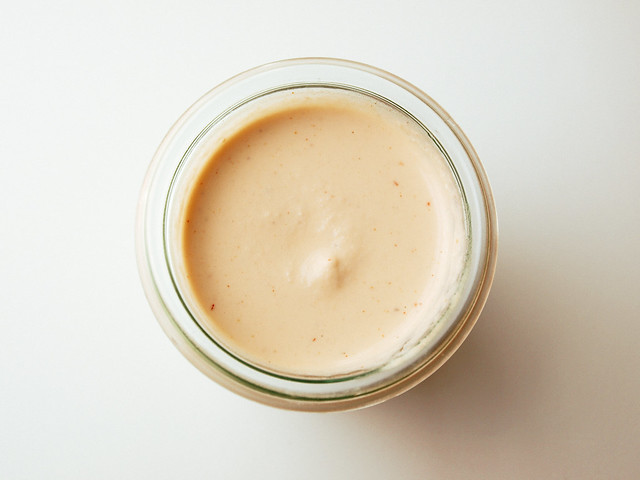
Next, prepare your sauce by placing all the ingredients in food processor/blender, except the water, and blend until creamy smooth. Add water 1 tablespoon at a time until desired consistency. You may also like to add more lemon in place of water for a really zesty lemon sauce. Taste for flavor adding extra garlic or salt if needed.

Serve vegetables on top of quinoa, add a generous amount of sauce on top...don't be shy with the sauce, it's so good and healthy. Add some freshly chopped parsley and cracked pepper or lemon pepper if you like. A Buddha bowl fit for a king or queen!

Store left overs in an air tight container in the refrigerator for up to a week

Notes:

If you have sauce left over, you can use it a dip for veggies or pita chips, or as a spread for sandwiches.

You may also like to try this Sriracha Cashew Cream Sauce in place of the sauce suggested above for a spicy twist or this Tahini-Miso Dressing for another mellow sauce!


Enjoy!

Image of the sitting man with his Buddha bowl comes from the first published book by Anna Thomas called, The Vegetarian Epicure. You can find all four of her books here including her new book, Love Soup. I stumbled onto this graphic from this blog post at Gluten Free For Good: Buddha Bowls and Hippie Chicks.

A final note, food for thought from a genius...

'If someone thinks that peace and love are just a cliche that must have been left behind in the 60's, that's a problem. Peace and love are eternal.'

~ John Lennon


Sriracha Cashew Cream Sauce

Sriracha Cashew Cream Sauce

Sriracha is spicy with a touch of sweetness making it irresistible to those who try it and this cashew cream sauce is another way for us sriracha fans to get our fix. This recipe is so simple, versatile and can be used in many different ways. Use it as a pasta cream sauce or as a sauce to drizzle on roasted vegetables and baked sweet potatoes (recipes coming soon). You can use it as a dip or as a salad dressing. This is also fantastic as a spread on burgers, sandwiches or any place you may use mayo type products. Even tacos, burritos and quesadillas would benefit from a drizzle of this sriracha cashew cream sauce. And don't forget to add it to vegan sushi rolls, this makes for a great dragon sauce. Make it as spicy as you like or keep it on the mellow side with the amount of ingredients I have listed below. I found that one teaspoon of sriracha was just the right starting point to taste the flavors while adding a nice subtle punch to your meals, on a scale from 1 -10 the 1 teaspoon of chili sauce ranks in at about a 2, mild. I made it a second time using 2 teaspoons of sriracha and it kicked it up to 3-4. This is one of my favorite cashew sauces so far as it is so versatile and so good !

Sriracha Cashew Cream Sauce

Sriracha Cashew Cream Sauce

Ingredients (makes about 2/3 cups or 3 servings)
  • 1/2 cup raw cashews, preferably soaked for 2-3 hours
  • 1/4 cup water, + 1-2 tablespoons as needed for thinning
  • 1 garlic clove
  • 2 teaspoons nutritional yeast
  • 1 teaspoon sriracha chili sauce, + more to taste

Place all ingredients into a small blender (I used a magic bullet for this job). Blend until creamy, taste for flavor adding extra chili sauce if needed. Thin with water to desired consistency using one tablespoon at a time. If you find it's too watery add a few cashews and blend again until smooth. Store leftovers in an air tight container in the refrigerator for up to six days.

Notes:  Add as much sririacha as you like to suit your taste. The one tsp I have listed here is a good starting point for a mellow flavor. I also didn't add in any salt but feel free to add salt to taste. Lastly, I usually use 1 tablespoon of lemon juice in my cashew creams but didn't add any in this recipe, I didn't feel it needed either. You may try adding 1 tablespoon if you have it on hand for another layer of flavor.

Serve however you like! I hope you find many uses for this sauce. I have many in mind and will be sharing within the recipes as they come up.

Here are a few options for using this flavorful cream...

Baked Stuffed Sweet Potato + Sriracha Cashew Cheese Sauce

Avocado and Black Bean Torta (in recipe as spread)

Portabello & Kale Calzone (replace the garlic-miso cream)

Street Tacos (drizzle on top)

Mac & Cheese Bake (would be great as the base)

Vegan Sushi Rolls (add some to the center or drizzle on top)

Tofu Scramble Stuffed Poblano Peppers

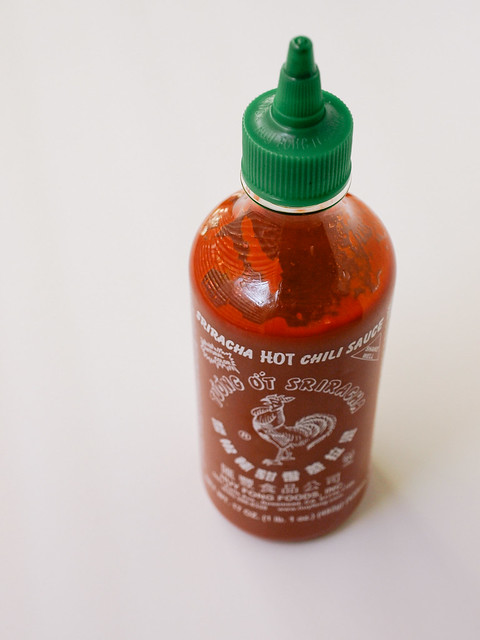
sriracha

Sriracha can be found in the Asian section of most stores. 

Enjoy!

Spicy Kale Pesto with Zucchini Noodles

Spicy Kale Pesto with Zucchini Noodles

I have been indulging in this dish the last couple days! It's so fresh and good. After making my raw zucchini wraps with kale pesto a few weeks ago, kale pesto has become a regular habit. I did this pesto a little differently than my last, minus the basil and tahini while opting to add in some red pepper flakes and a bit of nutritional yeast. The pesto pairs great with the zucchini noodles, especially with a nice dusting of almond parmesan. It was time to add this simple dish to my raw recipes in hopes to inspire others to join in on this nutritional powerhouse green, in a way that tastes amazing. Kale is king of the leafy greens and the more we can incorporate it into our meal plans the better. I use the lacinato kale, which is my favorite, and there is no bitter taste as far as I can tell. If you find your kale is a bit bitter, try adding a squeeze of lemon to the pesto. And for the zucchini, I can easily eat two in this dish so I have used that as a serving guide (I suppose it would depend on your zucchini size but go ahead and eat as much or as little as you like). I've also added diced avocado to this and it was fantastic. This is a simple meal and comes together fairly quickly. Also makes for great to-go lunches!

Spicy Kale Pesto with Zucchini Noodles

Ingredients
  • 2 zucchini per person, give or take, spiralized or julienned
  • grape tomatoes, sliced in half
  • almond parmesan, for topping
  • salt & cracked pepper
Pesto
  • 1 bunch kale, about 3-4 cups, stems removed and roughly chopped
  • 1/2 cup walnuts, optional
  • 3-4 tablespoon extra virgin olive oil, more as needed
  • 1 or 2 cloves garlic
  • 1 - 2 tablespoons nutritional yeast
  • 1/2 teaspoon himalayan salt, or to taste
  • pinch or two of red pepper flakes
  • juice of 1 small lemon, optional

Start with the pesto, place ingredients in food processor and blend until desired consistency. Add more olive oil if desired and taste for seasoning, set aside. (Serves two)

I use a spiralizer to get my curly noodle effect. You can also use a julienne tool or julienne them by hand creating a straight noodle. 

Combine the kale, tomatoes and noodles together in a medium size bowl and transfer to individual serving dishes. Top with a dusting of almond parmesan and enjoy!


Notes: To create a creamy pesto, you may also like to add 1/2 cup walnuts or pine nuts. Or try 2-3 tablespoons tahini instead.


WINTER POTATO, WHITE BEAN & KALE SOUP

Winter Potato, White Bean & Kale Soup

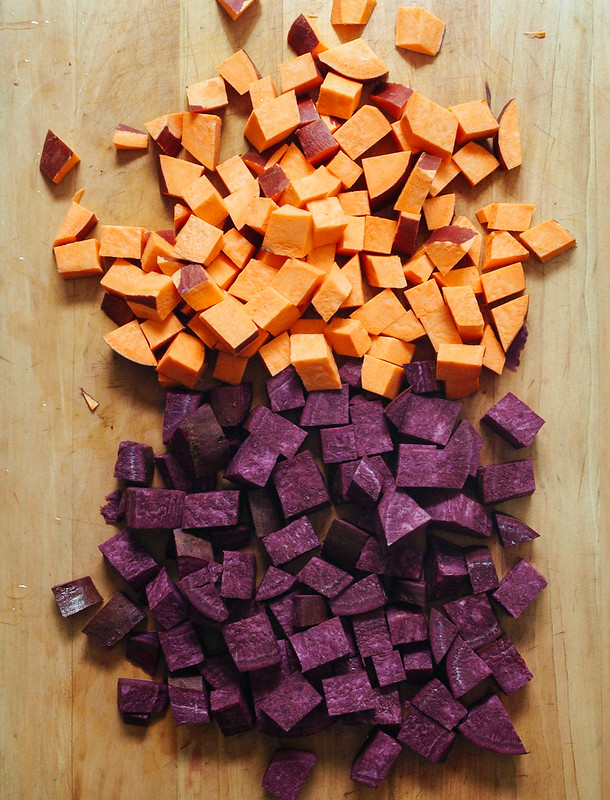
Another soup is born! I love soups...plus it's raining here today and I wanted something easy and warm. I've been on the computer most of the day too setting up my Instagram account and playing with my phone, linking everything together with social media. All that stuff takes time and I'm glad to be done with that. It's time well spent as it's a new experience for me...and your more than welcome to join me if you like to see what else is going on in my kitchen, as well as out and about in the big wide world. This was a perfect soup to accompany the weather and my geek day. It's also great for it's healing, relaxing, warming and flavorful qualities. All the vegetables and spices came together so well. The purplish hue of the broth comes from the purple sweet potato I used. With all this color, you know it's full of nutrients. The sweet potato and sun-dried tomatoes add a nice sweetness to the soup. If you can't find purple potatoes, you can sub with any color you can find. If you don't care for sweet potatoes, use Yukon gold, red or purple or blue potatoes. This is a perfect hearty and nutrient dense soup for those cool afternoon days and chilly nights. It was so good and filling! 

Winter Potato, White Bean & Kale Soup
Winter Potato, White Bean & Kale SoupWinter Potato, White Bean & Kale SoupWinter Potato, White Bean & Kale Soup

WINTER POTATO, WHITE BEAN & KALE SOUP

Ingredients
  • 2 large sweet potatoes, diced (orange, purple, white or combo)
  • 1 tablespoon grapeseed or olive oil OR 1/4 cup water
  • 1 onion, diced
  • 2 garlic cloves, minced
  • 2 cans (15 oz) cannellini beans, drained and rinsed or 3 cups cooked
  • small handful sun-dried tomatoes, chopped 
  • 4 - 5 cups vegetable broth
  • 2 teaspoons herbes de provence or thyme
  • 3 or 4 handfuls kale, chopped (I used tuscan)
  • 2 tablespoons nutritional yeast
  • sea salt & fresh cracked pepper to taste

In large pot or dutch oven, heat oil/water over medium heat, add onion and saute for 5 minutes, until onion becomes translucent. Add garlic, sun-dried tomatoes and herbes de provence, saute 1 minute.

Add broth, potatoes, beans and kale, bring to a boil, cover, turn down heat to low and simmer for 15 to 20 minutes...just until potatoes are tender. Remove from heat add nutritional and give a good stir. 

Serve with crusty bread and a light dusting of  almond parmesan. 

Makes about 4 - 6 servings.

Notes: 

Use any potatoes you like, just use about 5 cups worth. Leave the skin on or remove it according to your preference. 

*Herbes de provence is a great herb blend for the pantry. I use them quite often in my soups, like this Parsnip & Split Soup and Chickpea Ratatouille. It won't go to waste if you love soups and cook often enough. And if you can't find it, the thyme is a great herb all by itself!


Recipe adapted from Elizabeth Antionette


ALMOND PARMESAN... A sprinkling we go!

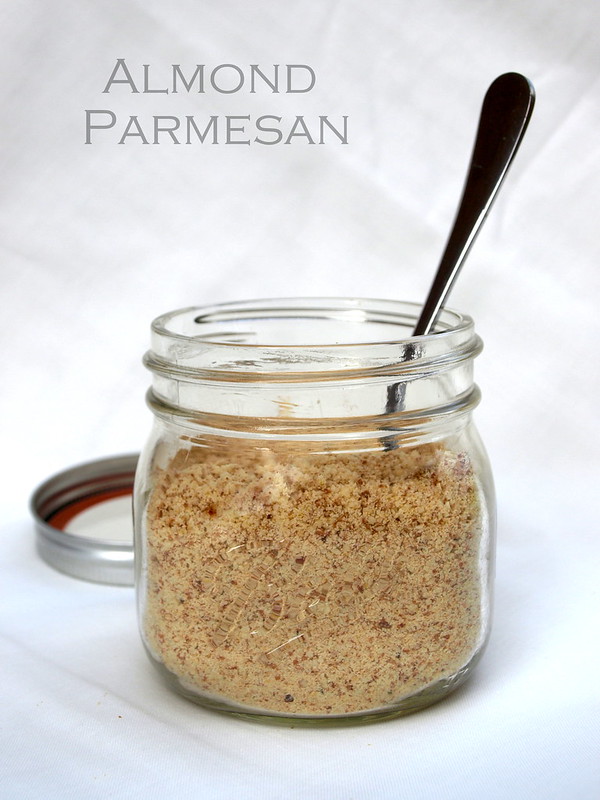
Almond Parmesan

Almond parmesan has been a great find for me and I think you'll find it the same for you too. Did you know that almonds are the most alkalizing nut. An alkaline (vs. acidic) system will help keep your system functioning at its peak. Almonds are also balancing, very nourishing, and contain high levels of potassium and vitamin E. In fact, nine almonds contain all the vitamin E you need for the day. Add in some nutritional yeast, garlic powder, a little sea salt and you have yourself a nice healthy topping. It's so easy to make and will add tons of flavor to your salads, soups, pastas and so much more! Sprinkle away...

Almond Parmesan

Almond Parmesan

Ingredients
  • 1 cup raw almonds (either with skins or without)
  • 2 tablespoons nutritional yeast
  • 1 teaspoon garlic powder
  • 1/2 teaspoon or so mineral salt

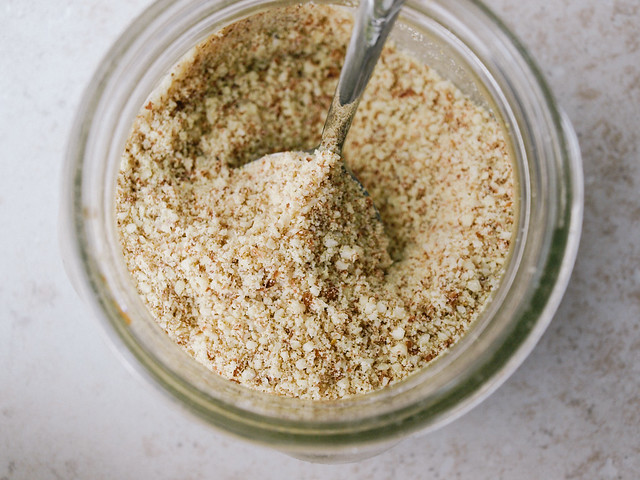
Place all ingredients in food processor/blender and process until your desired consistency. Add more nutritional yeast, garlic powder and salt to taste.

That's it...it's ready to sprinkle on soups, pastas, salads, pizza, even sandwiches may benefit from a sprinkle or two!

Store in an air tight container in the fridge or pantry, will last up to a couple months if you have it around that long. Will last longer in the fridge.

Notes:

Using almonds without the skin will give a lighter color. I use with the skins here but feel free to try without. Also, you can try using almond meal instead of grinding your own almonds. Just add all  the ingredients in a medium size bowl and mix well, or pulse in a food processor until combined.

Wherever you sprinkle...Enjoy!


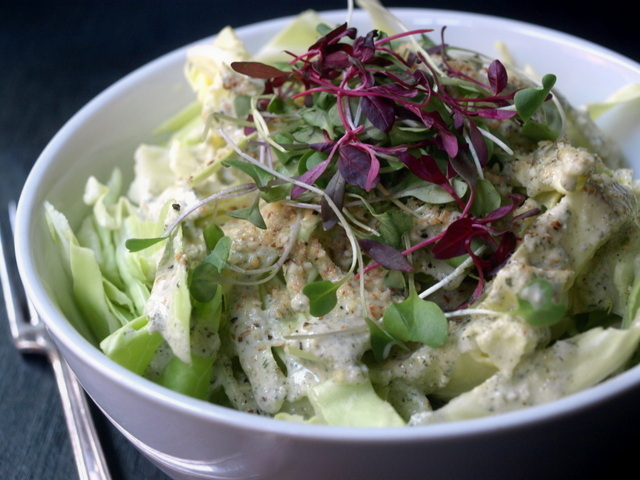
Cabbage Salad w/Creamy Dressing & Almond Parmesan

Cabbage Salad w/Creamy Dressing & Almond Parmesan

This was just one of those salads that I threw together trying to use up the last of my creamy lemon herb dressing and it turned out to be ridiculously good! And it's so pretty too, those colorful micro greens add such a nice pop, almost like adding flowers. I picked these micro greens up at my local Trader Joe's. If you can't find these little guys, try adding some sprouts or purple cabbage instead. There really isn't anything to this salad and honestly it didn't need much. This is a case of simplicity at its best. Using the creamy lemon herb dressing and almond parmesan together reminded me of and herby blue cheese in a way, or maybe it's more of those creamy chunky slaws that I used to love so much. Whatever the memory was, I look forward to this again! And the parmesan is so easy to make, it will add a nice touch to your salads, pizza's, soups, pasta dishes and may even be good in a sandwich! This dish is raw, gluten free and soy free.

Cabbage Salad w/Creamy Dressing & Almond Parmesan

Cabbage Salad w/Creamy Dressing & Almond Parmesan

Ingredients
  • 1 small head of cabbage
  • micro greens, sprouts, or purple cabbage, optional
  • 1/2 of the Creamy Lemon Herb Dressing dressing recipe
  • himalayan salt & cracked pepper to taste

Almond Parmesan
  • 1 cup almonds
  • 2 tablespoons nutritional yeast
  • 1 teaspoon garlic powder
  • 1/2 teaspoon himalayan salt

Start with the parmesan by adding all four ingredients into your food processor/blender and pulse until you have a somewhat chunky to fine meal. Depending on how you like it...it can be chunky or of a finer consistency. Store parmesan in and air tight container in the pantry or refrigerator. Will last up to a couple months, longer in the fridge.

Slice your cabbage thinly, about 1/4 inch or so. Place in serving bowl, top with creamy lemon herb dressing, a nice sprinkle of parmesan, freshly ground pepper and micro greens/sprouts. Serves two generously. 

Enjoy!


Raw Spicy Tomato & Red Pepper Soup

Raw Spicy Tomato & Red Pepper Soup

Raw Spicy Tomato & Red Pepper Soup

Happy New Years! Starting the New Year off with a raw dish to help cleanse and detox the days gone by. This soup is alkalizing and refreshing. Not only is it an anti-inflammatory soup but it's also full of beneficial ingredients that your body will thank you for. Let the power of red work wonders for your health. Each ingredient has its own special nutritional benefit, all of which contain plenty of vitamins, minerals, fiber and some proteins. For extra protein and nutrition try adding a sprinkle of black sesame, hemp or chia seeds on top. Would be great with spiralized zucchini noodles too! Eating fresh and clean for half of your daily intake is highly helpful in keeping the mind, body and spirit aligned and in good health. Cheers to good health in the new year!

Raw Spicy Tomato & Red Pepper Soup

Raw Spicy Tomato & Red Pepper Soup

Ingredients
  • 2 large tomatoes
  • 5 or 6 grape tomatoes
  • 1 red bell pepper
  • juice of 1/2 lemon
  • 1 tablespoon nutritional yeast
  • a few cilantro, parsley or basil leaves
  • a few chives
  • pinch of red pepper flakes
  • himalayan salt to taste

Quarter your tomatoes. Core and de-seed your bell pepper, cut into slices. Place all ingredients in food processor/blender and blend until a soup consistency. Taste for flavor adding extra ingredients to suit your taste. Serve with a squeeze of lemon juice over top and some chopped chives, parsley or basil. Serves one or two small as an appetizer. Feel free to warm gently.

Notes: 

Would be great with julienned or spiralized zucchini noodles.

So easy and fresh....Enjoy!

Back to top