ROASTED NOURISH BOWL


ROASTED NOURISH BOWL

Life has been very slow lately. I think it must be this time of year and changing season that has slowed me down. I'm not complaining, in fact I quite like it. It's given me a chance to really practice my yoga, spend time with my kids and bake a lot of loafs of bread, mainly these pumpkin and banana breads. I'm obsessed with them at the moment and they've both been amazing recipes, even when making new alterations that I've also added to the notes. Winter hasn't set in yet but I'm prepared for when it does. Between easy vegetable bowls, like the one I'm sharing here which can work for lunch or dinner, and my breads, that I eat in the morning and as a snack or dessert, I'm ready for the cooler months to come. And if you're anything like me...you'll appreciate the simplicity and beauty of this roasted nourish bowl. Late last spring I shared this Everyday Nourish Bowl which is full of fresh vegetables. I thought it'd be a good idea to have a roasted version here too so you can get an idea of, and be tempted by, all the goodness it has to offer. Even in the cooler months, the freshness of the everyday nourish bowl would be great. But really the roasted version is so delicious and perfect for the cooler months. Enjoy every bite...be warm and nourished!
ROASTED NOURISH BOWL

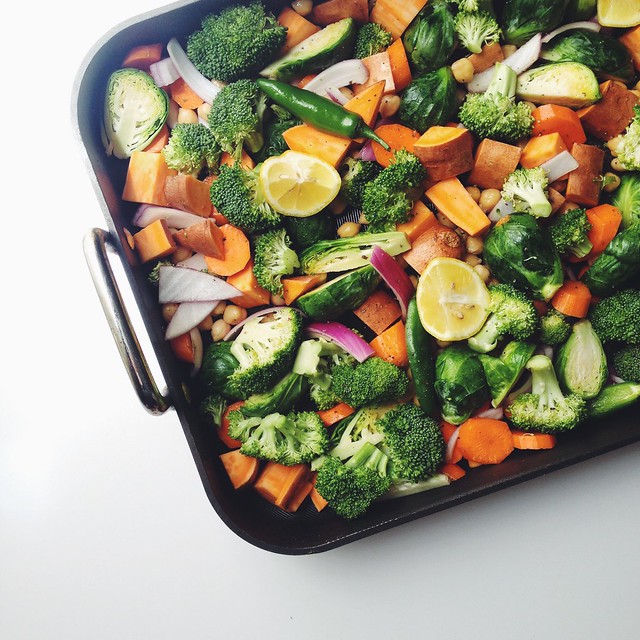
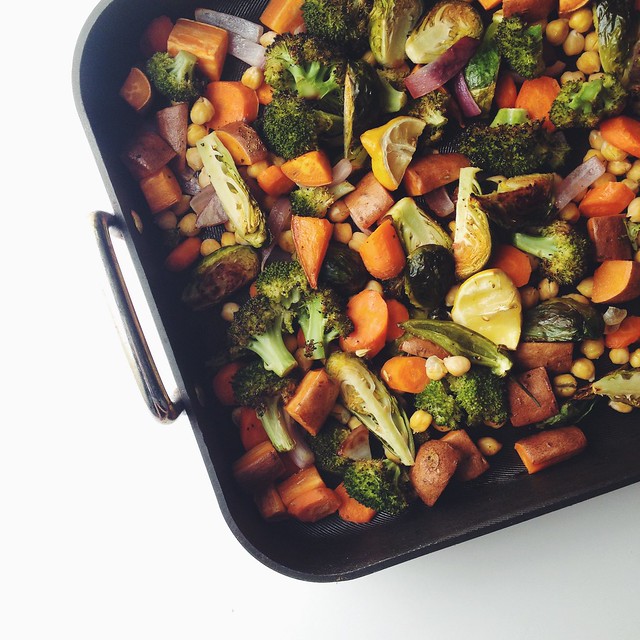
Simply chop your veggies, add them and your beans to a roasting pan, toss in a little oil (or not), add a little salt & pepper and roast. Once done your vegetables should be nice and browned on the edges and fork tender. Feel free to use more or less of the vegetables I have listed. If you can't get them all in that's ok, a various few of the veggies called for will be enough. You can also change up the beans if you like, maybe use another white bean like cannellini or great northern. Other beans have slightly more protein and fiber than chickpeas so if you're looking to get the most protein I'd suggest changing them up. 
ROASTED NOURISH BOWL

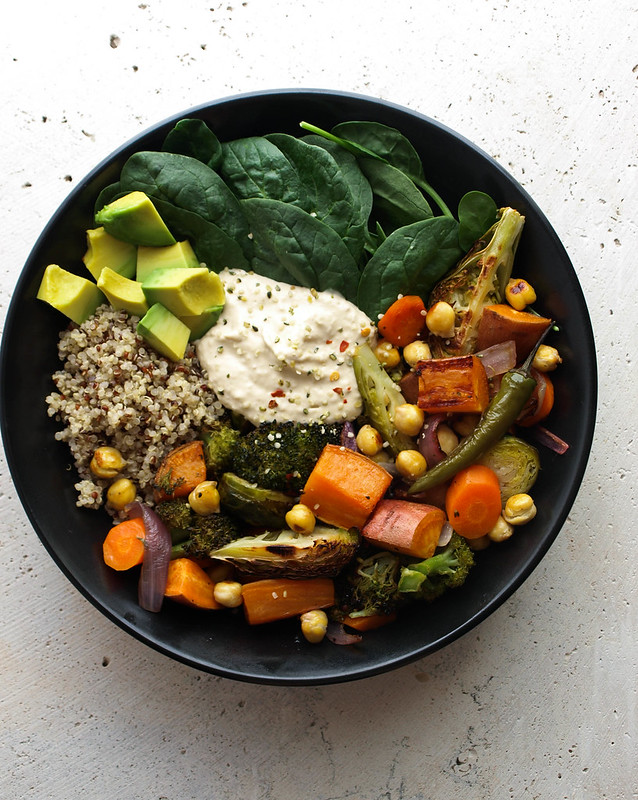
Makes a perfect complete meal once you add a grain like quinoa and some fresh spinach. A nice big dollop of hummus and you're all set for a hearty, nutrient dense meal. So much to love about bountiful nourish bowls!

ROASTED NOURISH BOWL

ROASTED NOURISH BOWL

Ingredients
  • olive, grapeseed or coconut oil, 1 - 2 tablespoons
  • 1 large sweet potato, cut into 3/4" cubes
  • 2 large carrots, sliced
  • 1 1/2 cups brussles sprouts, halved or quartered
  • 1 1/2 cups broccoli florets
  • 1/2 large red onion, sliced
  • 6 serrano chilis, sliced in half and de-seeded 
  • 1 1/2 cups cooked chickpeas or 1 can (15oz) drained and rinsed
  • 1 - 2 lemons, cut into six pieces
  • mineral salt & fresh cracked pepper, to taste

To serve
  • 1 1/2 cups cooked quinoa
  • 5 oz. spinach
  • 1 - 2 avocados
  • big dollop of hummus
  • red pepper flakes, to garnish
  • hemp hearts, to garnish


Preheat oven to 400 degrees F.

Prepare vegetables: remove any unsightly spots on the sweet potato skins before cubing, peel the carrots if needed and half or quarter the brussels sprouts depending on the size.

Place vegetables, chickpeas and lemon in a large roasting pan or rimmed baking sheet. Toss with oil and sprinkle with salt & pepper to taste. Roast for 40 - 45 minutes, stirring half way through. Vegetables should be slightly browned on the edges and fork tender. Remove from oven and let cool a few minutes. If you have a favorite herb or herb blend, you may consider adding a dash or two before roasting.

In individual bowls, serve vegetables with 1/2 cup quinoa, handful of spinach, sliced avocado and a nice dollop of hummus. Top with a sprinkle of red pepper flakes, hemp hearts a squeeze of roasted lemons.

Serves 6.

Notes: 

Vegetables can vary in quantity. Add or subtract to your liking.

Serrano peppers are optional. I personally love the heat they give and they are wonderful roasted! You can sub 3 jalapeno peppers as well.

If you don't have hummus on hand or want to vary it up, try using these dressings and sauces instead: Lemon-Tahini Dressing, Sriracha Cashew Sauce, tahini based Dynamite Sauce or Creamy Tahini Hippie Sauce, For a non-creamy dressing, try this Shallot Vinaigrette.

Cooking quinoa: I had a comment about cooking quinoa so here is my recipe for perfect quinoa.

In a medium size pot, bring 1 3/4 cup water + 1 cup quinoa to a boil, cover, reduce heat to low and simmer for 15 minutes. Once done, turn off heat, remove cover, fluff with fork and let set 10 - 15 minutes.

Perfect quinoa every time! Makes about 3 cups. Feel free to add a little seasoning to the quinoa before cooking like garlic powder, thyme, garlic salt, mineral salt, lemon pepper, everyday seasoning, etc. Or simply season once done. This will give you more than called for in the recipe...leftovers can be served chilled or warmed with your favorite vegetables or fruits.
CRUNCHY KALE SALAD + CITRUS DRESSING

CRUNCHY KALE SALAD + CITRUS DRESSING

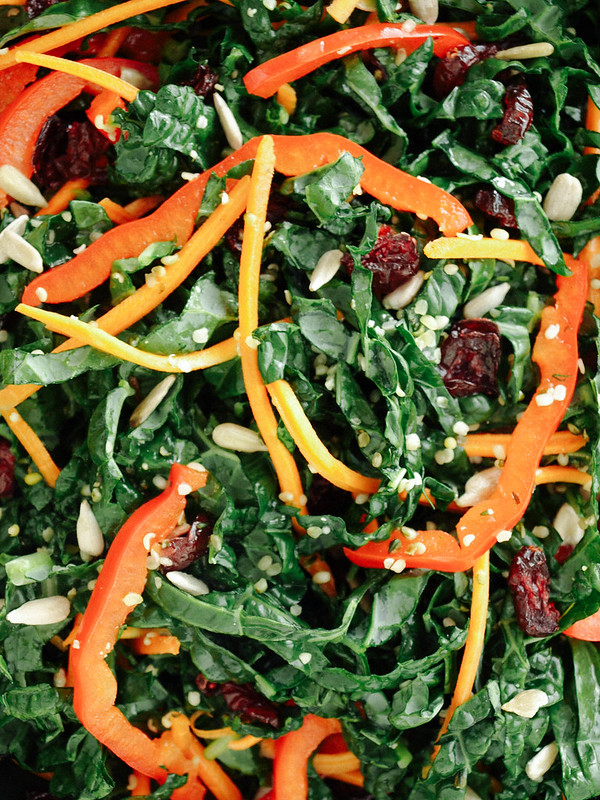
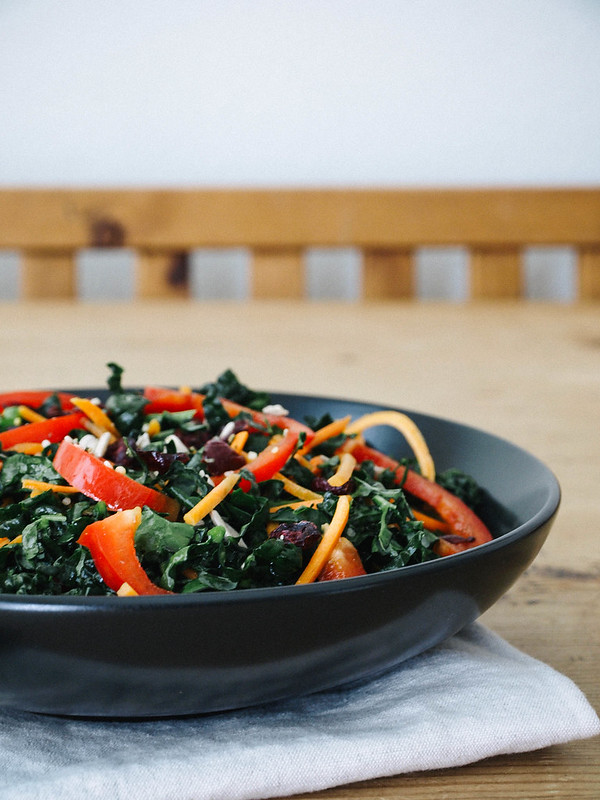
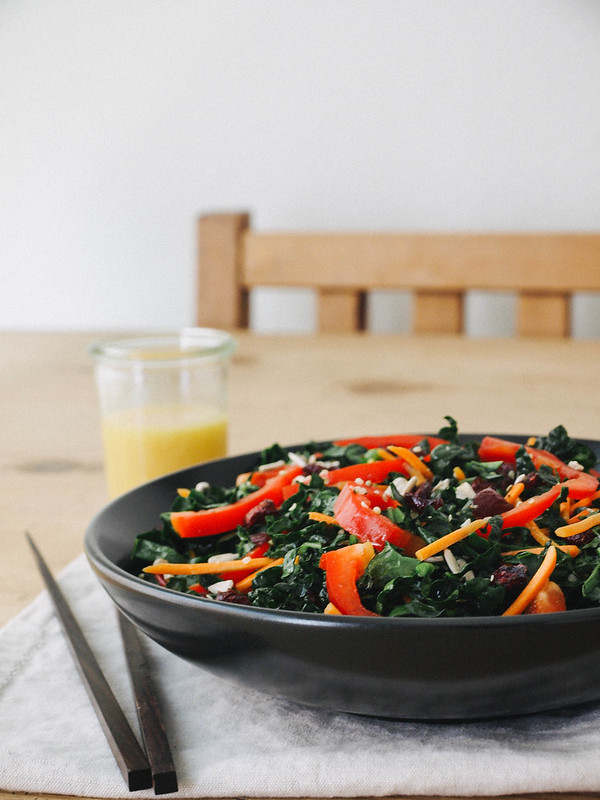
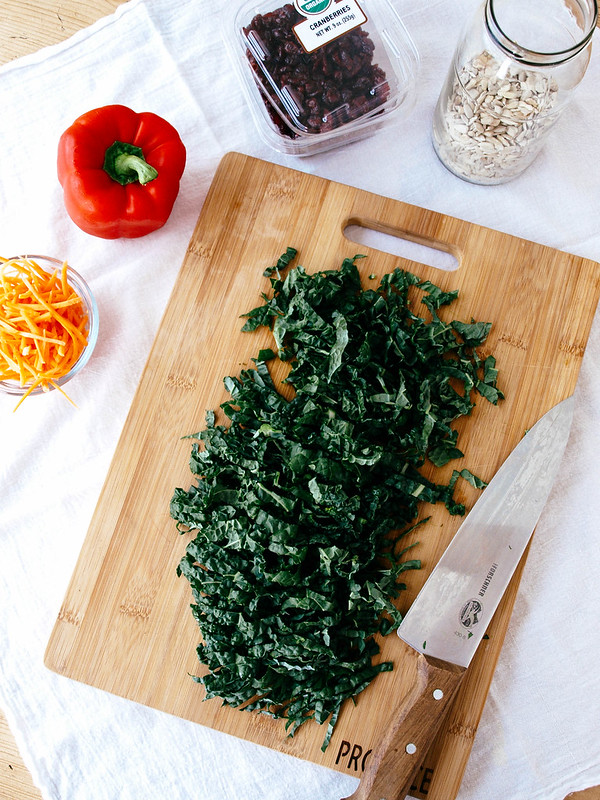
This salad featuring the king of leafy greens has been a perfect match for my lighter fare cravings. It's sweet with the cranberries and bell pepper, a bit citrusy from the dressing and crunchy from the carrots, kale and sunflower seeds. Everything adds up to nice flavor and texture. My favorite way to enjoy a kale salad is to let the kale marinate with the dressing for about an hour. This will help relax the kale and take some of the bitterness away. Making your salad this way makes for a great pack-n-go lunch option. Your salad will be softened and ready by the time lunch comes. When your looking to add some freshness into your diet, I think you'll find this to be a great inspiration!

If you don't already know, KALE is a power house of nutrients. It's loaded with anti-oxidants and anti-inflammatory support as well as being rich in calcium, iron and vitamin K, A & C. It aids in the body's detoxifying process and offers cardiovascular support. But even with all this goodness, you may have heard that too much kale is not so good. That is true for some. Kale is a green that may be best consumed moderately, especially for those with kidney and gallbladder issues because of the high amounts of oxalates. If you're in good health, kale can be consumed on a fairly regular basis without much concern. Look for organic kale whenever possible. The 'dirty dozen' list has been revised to be the 'dirty dozen plus' with kale/collards greens coming in at #16 of produce with highest amounts of pesticide residue.
CRUNCHY KALE SALAD + CITRUS DRESSINGCRUNCHY KALE SALAD + CITRUS DRESSINGCRUNCHY KALE SALAD + CITRUS DRESSING

CRUNCHY KALE SALAD + CITRUS DRESSING

Ingredients
  • 1 bunch kale, julienned
  • 1/2 cup shredded carrots
  • 1 red bell pepper, julienned
  • 1/2 cup dried cranberries
  • 1/4 cup sunflower seeds (toasted or raw)
  • 1/4 cup hemp hearts
Dressing
  • 3 tablespoons orange juice
  • 1 tablespoon lemon juice
  • 2 tablespoons apple cider vinegar
  • 1 -2 teaspoons pure maple syrup
  • 1 teaspoon dijon mustard, optional

Prepare your vegetables and gather your cranberries and seeds. 

Mix kale, carrots, bell peppers and dressing together. Let set for about an hour at room temp or in the refrigerator (this will soften the kale nicely and reduce the bitterness). Serve in individual bowls topped with cranberries and seeds. If you don't have time to let the kale marinate with the dressing, the salad will still be great! 

Serves 2

Notes:

Use orange, lemon, lime and/or grapefruit as your citrus juice. Mix and match your citrus flavors using whatever you have on hand or is available.

Make this a creamy dressing by adding 1 - 2 tablespoon tahini when mixing the dressing.

The dijon is optional, I found that I preferred it with a small amount. Try it both ways and see what you think.


EVERYDAY NOURISH BOWL

EVERYDAY NOURISH BOWL

I've always been a self-taught learner, a do-it yourself kind of girl. From household fixings to health fixings, and now to minor website fixings, I've done my fair share of learning how to take care of things myself. You may have noticed the mini-facelift on the site. I've been tweaking it around here & there after much reading and fumbling around on the computer. lol I'm finally done, for now anyway! After the few minor setbacks (I had a slight learning curve), I'm so happy to be finished bringing new things and life to my little blogspot with only spending my time (for what's it's worth, if I had to start this blog over again I would use WordPress, just saying). For starters, there is a new page up top containing MY PANTRY & KITCHEN ESSENTIALS. I hope to elaborate on this page in the future. I've also added an INSPIRATION & RESOURCE page which is still in progress. Here and there you'll find a few other new bells and whistles that were done completing my mini makeover. I hope it's easy to navigate and more pleasing to the eye. This is my personal space on the web and I like to have it as fresh and clean as possible. Now enough about that and without further ado, I hope to inspire you with this everyday nourish bowl!

EVERYDAY NOURISH BOWL 

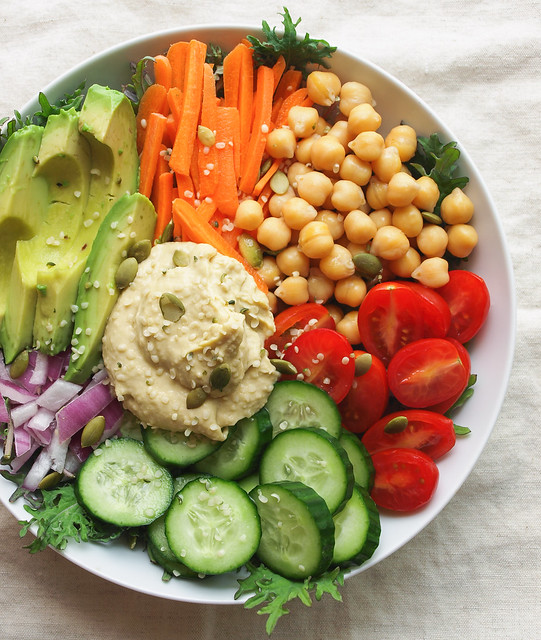
An easy everyday nourish bowl, everyone should have one! I put this bowl together with simple, accessible ingredients in mind. All ingredients are fresh, except for the hummus and chickpeas, making it a cinch to pull together. Feel free to add in roasted vegetables if you like, especially in the cooler months. If you don't have the pumpkin or hemp seeds, sub in some sunflower or sesame seeds. For the leafy greens, I picked up some baby kale on sale so that's what I used but you can use whatever greens you like. Simply add a big fat dollop of your favorite hummus in the middle (that's the best place for it!), sprinkle your seeds, add a squeeze of lemon over top and enjoy to your hearts content! A complete meal that will nourish and revitalize you in the simplest way, everyday!

EVERYDAY NOURISH BOWL

EVERYDAY NOURISH BOWL

Ingredients
  • leafy greens of choice (I used baby kale)
  • cooked chickpeas (garbanzo beans)
  • carrots, grated or sliced
  • grape or cherry tomatoes, sliced in half
  • red onion, diced or green onion, sliced
  • cucumbers, sliced
  • 1/2 avocado, sliced
  • big fat dollop of hummus
  • pepitas (pumpkin seeds), to garnish
  • hemp hearts, to garnish
  • 1 lemon, squeezed at serving

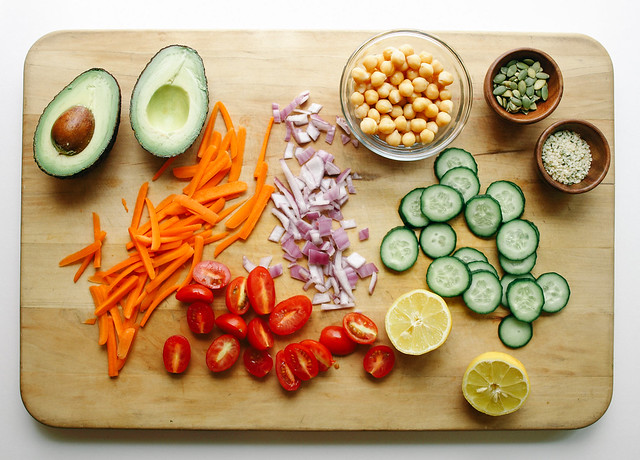
I'll let you measure your ingredients. I used about a handful of each chickpeas, carrots, tomatoes, onion and cucumber...for the onion I used a small handful. Use however much you like depending on how big your salad is going to be.

Place your ingredients in your serving bowl, add a big dollop of hummus to the middle, sprinkle with seeds and a big squeeze of lemon. Say out loud, or to yourself, "I am grateful for all that is", while keeping good thoughts in your mind. Then dig in and nourish yourself everyday!

Notes:

Add in any vegetables you prefer....broccoli florets, sliced zucchini, radishes, bell peppers, artichokes hearts, olives, etc. In the cooler months try adding in roasted vegetables like sweet potato, butternut squash, broccoli, carrots, etc. You can also add in some fresh herbs like parsley or cilantro if you have them on hand.

Sub in sunflower seeds and/or sesame seeds for the pumpkin seeds and hemp hearts.

For the best chickpea flavor, try making them fresh at home. It's really easy and nothing beats the freshness of homemade chickpeas! Take a look at the following link about garbanzo beans (chickpeas) and how to cook them from WHFoods: Garbanzo beans


Enjoy and be grateful!


I'd love to see your masterpieces!
#thesimpleveganista


Overnight Buckwheat & Steel Cut Oats Breakfast Jars

Buckwheat & Steel Oats Breakfast Jars

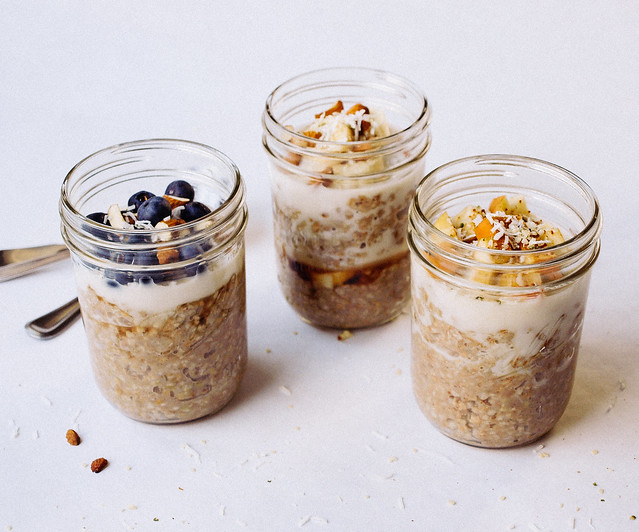
Lately, I've been eating a lot of oatmeal. Especially when I'm on the go, I'll stop by Starbuck's and grab their blueberry oatmeal which is delicious and always hits the spot. I figured it was time to look into coming up with something that I can take on the go. In comes overnight oats, and not just one serving but five for the week. I love the idea of having a couple jars in the refrigerator to grab on the go or simply take out and eat whenever I'm home and in the mood. After a little searching, I can across this recipe from The Kitchn for overnight steel cut oats in jars. Since I had both steel cut oats and buckwheat groats in the pantry, I decided to use the combination. Feel free to use one or the other if you prefer or only have one available (see notes). I've done a Raw Bircher Muesli using buckwheat groats and oats which I love, but cooking the groats and oats and letting them sit overnight leaves them a bit softer, chewier and creamier than my raw version. I really enjoyed this version and would like to try some other variations with grains in the future.

Buckwheat & Steel Oats Breakfast Jars

Buckwheat groats and steel cut oats are both top notch grains and make for a perfect porridge. Full of protein and fiber, this will leave you feeling satisfied and ready to go for a few hours or more. Add in some of the optional toppings making sure that at least one of them is fresh and you have yourself one heart healthy breakfast, lunch or dinner for that matter! 

Buckwheat & Steel Oats Breakfast JarsBuckwheat & Steel Oats Breakfast Jars

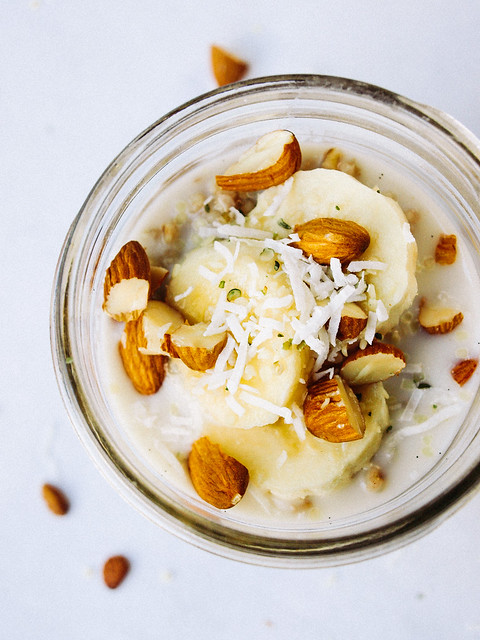
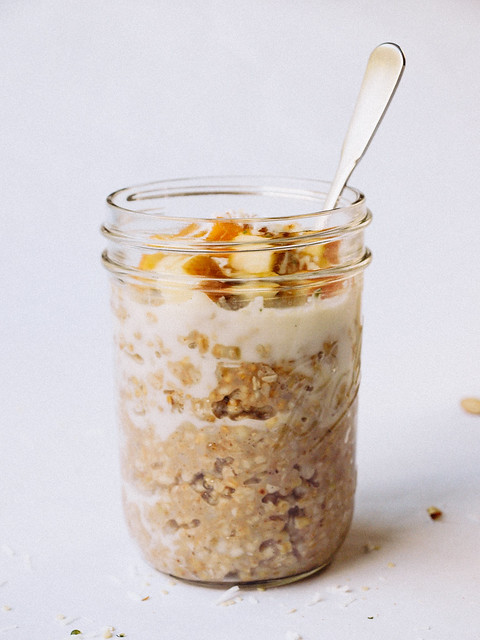
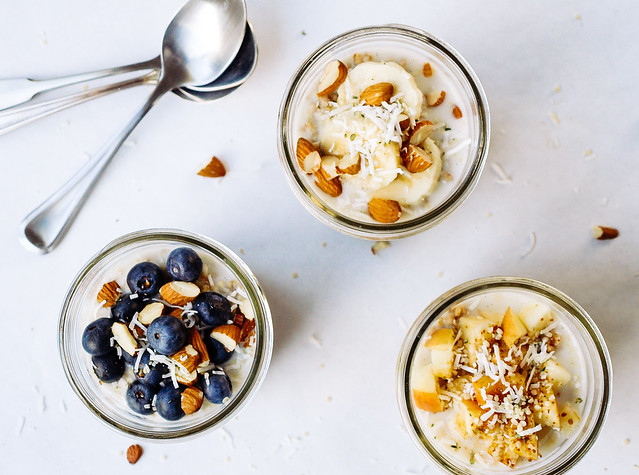
You may like to try sliced bananas, chopped almonds, hemp hearts, coconut flakes along with a splash of almond milk and pure maple syrup. Here I added sliced bananas half way through and topped with cinnamon before adding more porridge and topping it off. Nice to have some goodies in the center after you've run out...it's like an overnight oatmeal parfait!

Buckwheat & Steel Oats Breakfast JarsBuckwheat & Steel Oats Breakfast Jars
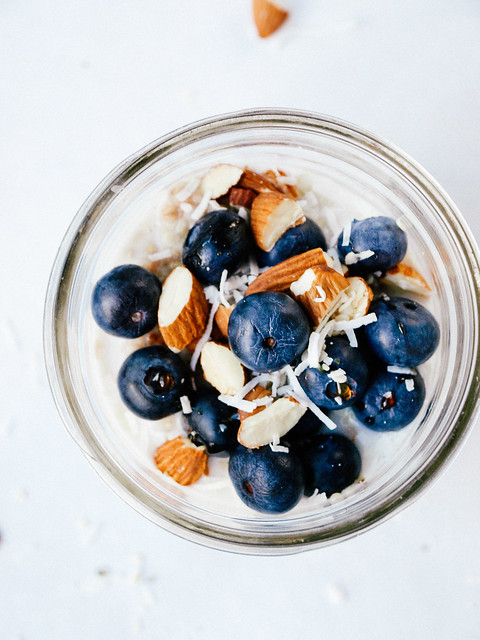
Or maybe some blueberries, chopped almonds, coconut flakes, almond milk and pure maple syrup.

Buckwheat & Steel Oats Breakfast JarsBuckwheat & Steel Oats Breakfast Jars

Lastly, how about diced apples, coconut flakes, hemp hearts, coconut sugar with almond milk poured over top with an extra sprinkle of cinnamon.

You get the idea...use whatever you have on hand or suits your taste.

Simple, versatile and ready to go!

Buckwheat & Steel Oats Breakfast Jars

Overnight Buckwheat & Steel Cut Oats Breakfast Jars

Ingredients
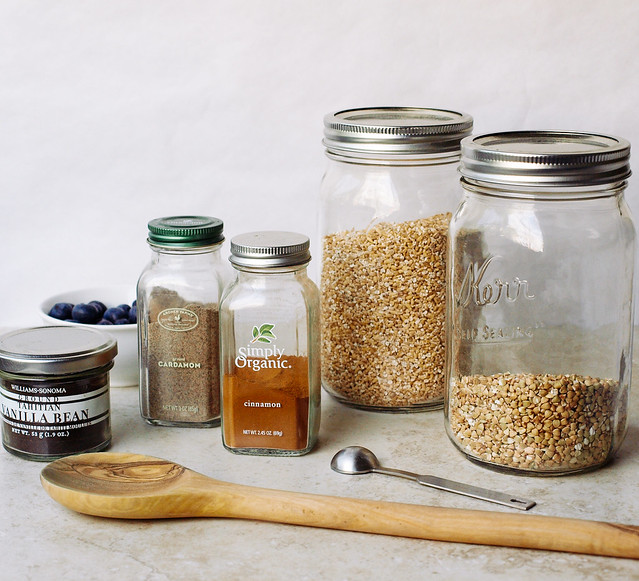
  • 1 cup raw buckwheat groats (not toasted aka kasha)
  • 1 cup steel cut oats
  • 5 cups water
  • 1 teaspoon cinnamon
  • 1/2 teaspoon cardamom
  • 1 teaspoon ground vanilla or vanilla extract
  • pinch of himilayan salt

Optional ideas for topping:
  • chopped dates, raisins, apricots or other dried fruit
  • unsweetened coconut flakes
  • fresh berries of all kind
  • coconut, almond, hazelnut or any non-dairy milk
  • pure maple syrup, coconut sugar or other sweetener of choice
  • nuts and seeds of all kinds
  • cocoa nibs
  • 100% fruit jam
  • nut butter

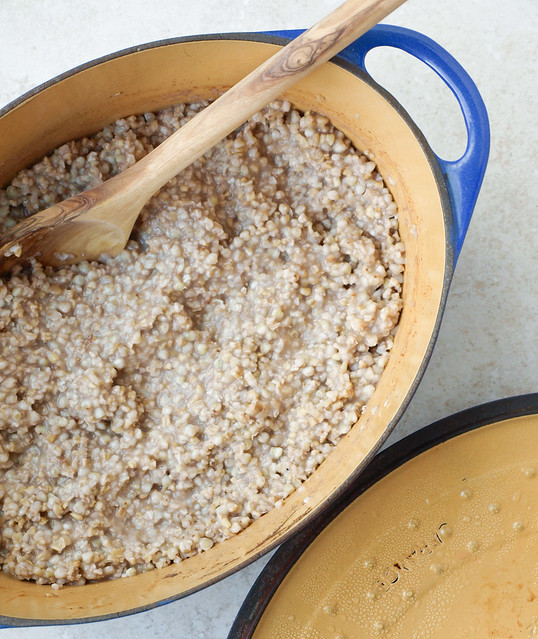
In dutch oven or large pot, bring water and remaining ingredients to a boil, cover, reduce heat to low and simmer for 5 minutes. Remove from heat, give a good stir, add more water as needed, replace lid and let sit overnight. Or you can carefully fill your mason jars (or other containers), cover and let sit overnight. Porridge will be fine on the counter, but if you wish you can place it in the refrigerator and it will still be fine.The next day fill your jars with a mix of toppings for grab & go time or simply top each jar when ready to eat.

I prefer to eat my porridge at room temp but you can heat yours either in the microwave for a minute or two, or use a heated pot of water setting the mason jar in the center until warmed.

This will fill 5, maybe 6, pint sized mason jars. Wide mouth jars are preferred, much easier to spoon out of for eating.

Serves 5 - 6. Will last up to 5 days in the refrigerator.

Notes:

Feel free to use 2 cups buckwheat or steel cut oats instead of combining the two. If using only buckwheat reduce the water amount to 4 cups.

I like my porridge on the thicker side, adjust water adding more for a thinner consistency. I prefer to add the non-dairy milk at serving to thin it out a bit.

Adjust the amount of cinnamon and cardamom to suit your taste. I'm in love with cardamom at the moment and find myself using a bit more than suggested here.

Bob's Red Mill carries both raw buckwheat groats and steel cut oats. I ordered buckwheat groats from Arrowhead Mills thinking they were raw but they were toasted, it wasn't stated on the front of the package so just be wary. Let these at least be an example of what to look for as they both have different variations.

Enjoy!


Carrot + Zucchini Ribbons + Cilantro Pepita Pesto

Carrot + Zucchini Ribbons + Cilantro Pepita Pesto

It's about time I added a new raw dish to the collection. I have received many emails over the course of starting this blog. I was just recently inspired by a most wonderful email I received from one of my readers letting me know how much she appreciates this blog and really enjoys cooking from it. It has helped her return to eating vegan full-time again (hooray!), as she has fallen of the wagon a few times and needed this inspiration to get back on. In particular, the raw recipes were a source of inspiration at one point. She had eaten raw dishes here and there, but never for a solid period of time. She went away over the summer for two months and did a raw eating cleanse using the raw recipes as a source of inspiration. After her cleanse was over, she felt amazing and knew this is how the body is supposed to feel. Free from the toxins of the typical everyday eating, you feel alive and full of energy. It's completely healthy to eat this way for short periods like this and really puts you in tune with yourself. It gives your body a boost of natural healing energy if done right, it's an almost godliness feeling in a way. I know she is shining bright and feeling her best. I thank her so much for sharing her story with me. I love hearing from you all, as much as I may be a source of inspiration for you, you are a source for me too! Whether it's about a life changing event, a certain ingredient you used or just to say hi...all of it is wonderful to me and I thank you! I can't tell you enough how much I love all of you and want only the best for each and every one of you! So I share with you another wonderful raw dish to be eaten generously and frequently.

Carrot + Zucchini Ribbons + Cilantro Pepita PestoCarrot + Zucchini Ribbons + Cilantro Pepita Pesto

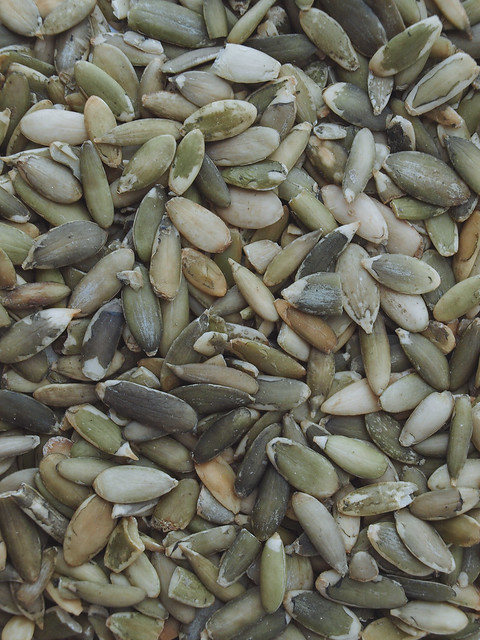
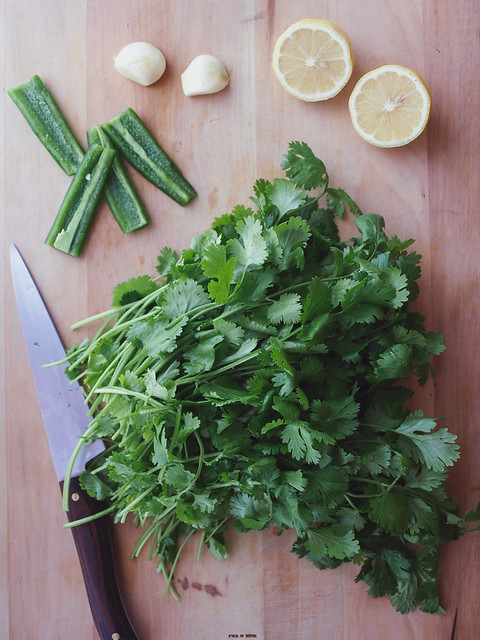
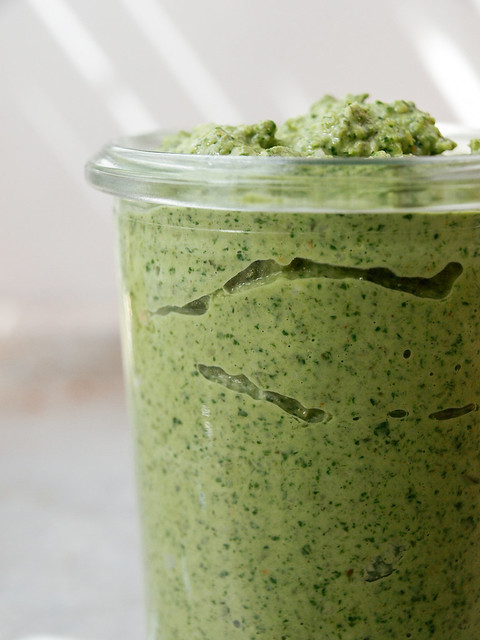
I have a ton of pepitas (shelled pumpkin seeds) that I need to use up and thought this was a great way to use them. I also had some cilantro on hand and decided to use that. What I really love about cilantro, besides the lovely flavor, is that it's available in bunches and so easy to find. In general, it's hard to find basil in large amounts enough to make pesto, making cilantro a great alternative to the traditional basil pesto. I also added a small amount of garam masala to this pesto but feel free to omit it if you don't have it on hand or don't care for it. I have yet to use my garam masala and thought why not try it here for something unusual. So I tested it out and found that I rather liked it as it adds an interesting layer of flavor and pairs well with the fresh vegetable ribbons. I even used my left over pesto as a dip for carrot sticks...so good! But keep in mind that I'm quite strange and can eat the weirdest combinations. So If you feel like experimenting, go for it...if in doubt, leave it out. I also added in some hemp hearts as well, two tablespoons or so, if you have some on hand this is a great place to use them!

Carrot + Zucchini Ribbons + Cilantro Pepita Pesto

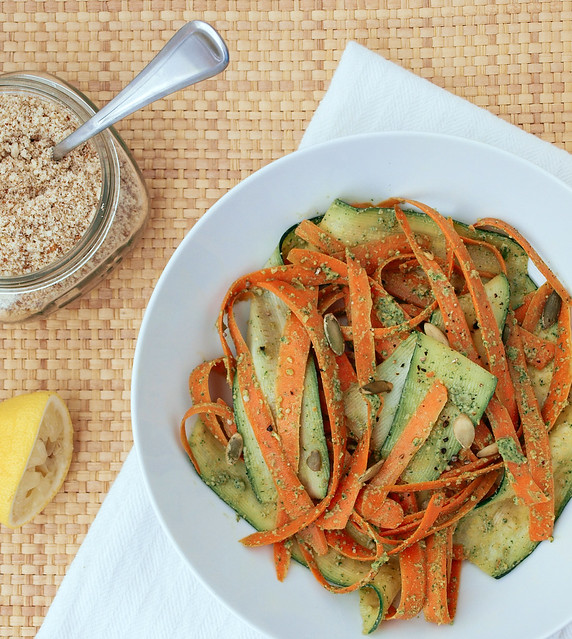
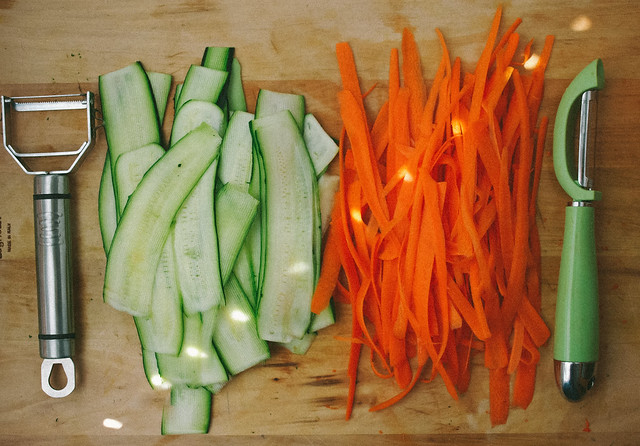
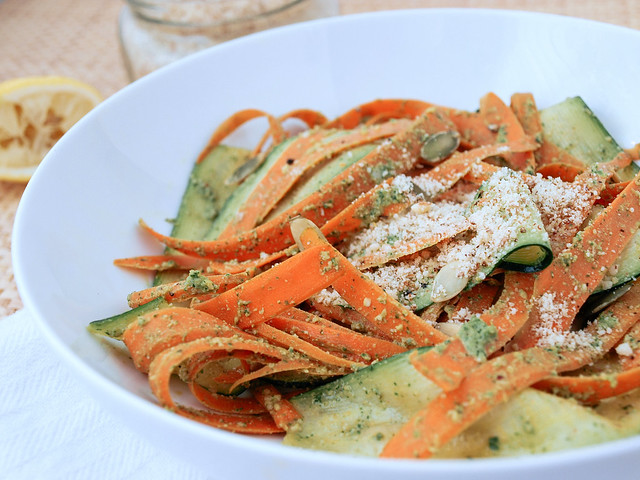
The ribbons are easy to create. I used a mandolin to ribbon the zucchini and a peeler to do the carrots. It's best to use smaller sized zucchini so the mandolin will be wider. This will help keep the zucchini edges cleaner looking instead of scoured. But do it however you're comfortable and use whatever tools you have. If you only have a peeler you can just as easily use that to ribbon the zucchini too. You can also simply use a julienne tool for thinner ribbons or julienne everything by hand if need be.

Carrot + Zucchini Ribbons + Cilantro Pepita PestoCarrot + Zucchini Ribbons + Cilantro Pepita Pesto
Carrot + Zucchini Ribbons + Cilantro Pepita Pesto

Carrot + Zucchini Ribbons + Cilantro Pepita Pesto

Ingredients
  • 3 large carrots
  • 3 small zucchini
  • pepitas, for serving
  • mineral salt & cracked pepper to taste
  • almond parmesan, for serving

Cilantro Pepita Pesto
  • 1 large bunch cilantro (3 cups loosely packed), ends removed, leaves and small stems ok
  • 1/3 cup pepitas (shelled pumpkin seeds), toasted or raw
  • 2 tablespoons hemp hearts, optional
  • 2 cloves garlic
  • 1 small jalapeno, seed removed (leave a few seeds for heat if you like)
  • 3 tablespoons extra virgin olive oil
  • juice of 1 large lemon
  • 1/2 teaspoon himilayan salt
  • 1/2 teaspoon garam masala, optional

Start with your pesto, place pepitas in your food processor and pulse a few times until seeds are broken down fairly well. Add remaining ingredients and blend until well combined and fairly smooth, stopping to scrap down the sides as needed. Add water, 1 tablespoon at a time, to thin if needed (no need to add more oil unless you want). Taste for flavor and season to taste. Set aside.

Peel the outer layer of your carrots and discard. Using the peeler, ribbon the carrots. Wash your zucchini, cut the ends off and using a mandolin, or tool of choice, ribbon the zucchini. You can just as well julienne your carrots and zucchini with a julienne tool or by hand if you would rather have thinner strands.

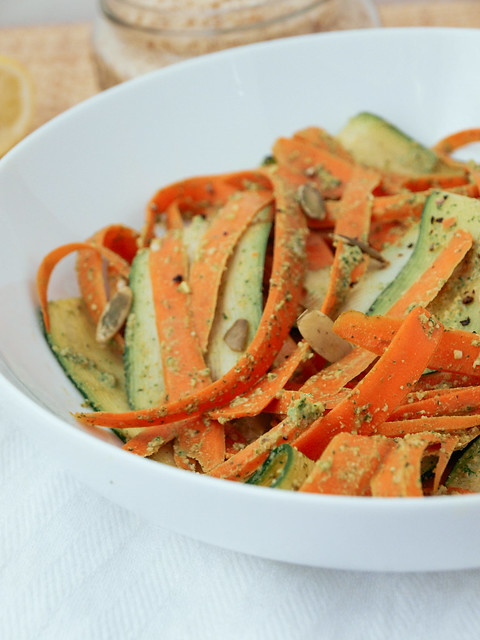
In a medium size bowl, place carrots and zucchini, add a few spoonfuls of pesto and mix to combine. You will have pesto leftover unless you really love the stuff and use it all!

Plate your ribbons, top with a sprinkle of pepitas and a nice dusting of almond parmesan. For a little extra color you could add some red pepper flakes to the top.

Serves two.

Store leftover pesto in an air tight container in the fridge for up to a week. Use the pesto for pasta, as a dip for vegetables, as a spread for sandwiches, thin it out with water or lemon juice and make a dressing for salads, etc. Lots of ways to use pesto.

Notes: Use almonds in place of pepitas if needed. I used raw pepitas instead of toasting them.

For the garam marsla, if pairing this with regular pasta I would leave it out. It pairs well with the freshness of the carrot & zucchini ribbons. Also, I found that it tasted fine with almond parmesan. But like I said earlier, I can eat some really unusual combinations. If you feel like experimenting, try it out...if in doubt, skip it.

Enjoy!


Quinoa + Hemp Heart Tabbouleh

Quinoa + Hemp Heart Tabbouleh

Tabbouleh is a popular traditional Middle Eastern dish. The ingredients remain the same but vary in ratio depending on the region. It traditionally uses bulgur wheat as the grain of choice but here we are using gluten free quinoa. I also added some hemp hearts as they are a perfect accompaniment and add extra nutrients, like all the very important omegas. What I really love about the quinoa and hemp hearts is that they are both complete proteins making this a well-balanced dish. If your new to hemp seeds and oil, following is a great article on just how wonderful and beneficial these seeds and oil is for your health: Hemp Seed - The Most Nutritionally Complete Food Source in the World

Quinoa + Hemp Heart Tabbouleh

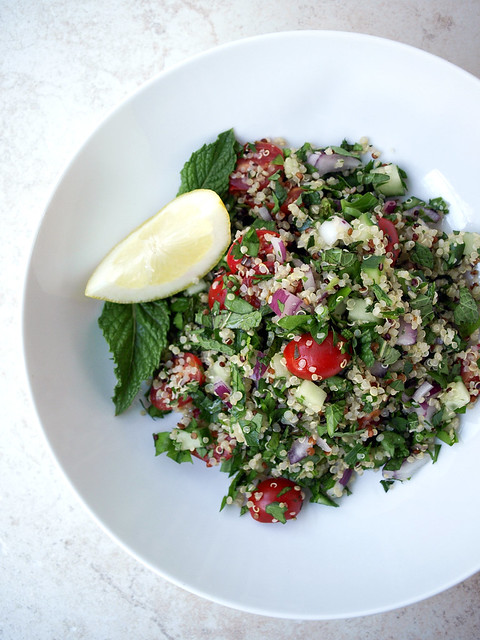
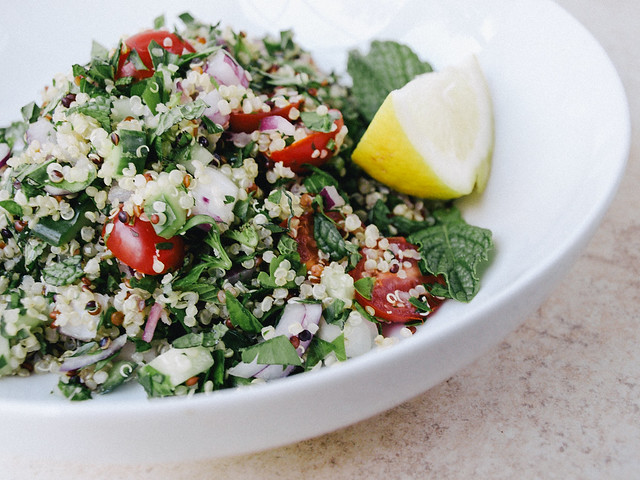
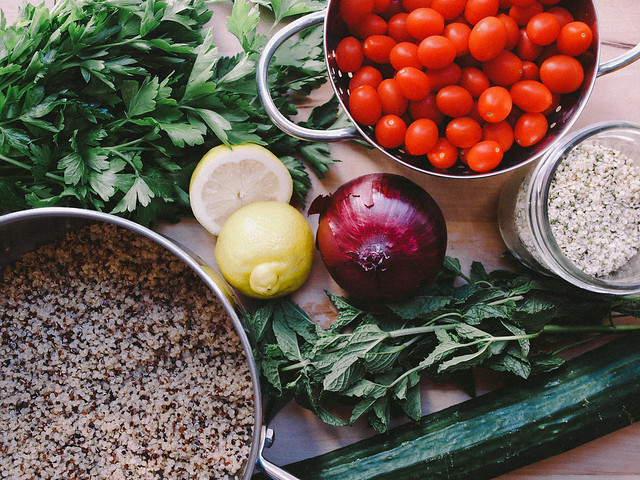
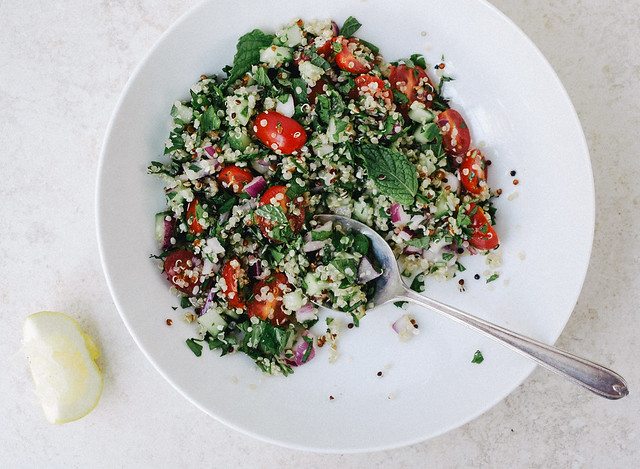
I have been wanting to make this for some time now and am so glad I finally did. It was light, fresh and delicious! The ingredient list is simple and comes together creating pleasure for all your senses...visually, texturally and flavor wise. Not to mention the smell is delicious too. The mint and parsley together are a winning combination leaving a fresh, clean taste bite after bite. The cucumber is refreshing, the tomatoes add juiciness and the lemon adds a nice light zestiness. After making this I have to admit that I sat and ate the whole thing...of course I only made half of the recipe you see here which is why I doubled this recipe so you can have some for later, or share if you like. This is clean eating and nutrient dense. For those of you who count calories, when you learn to eat clean like this you don't need to count calories...eat as much as you like and count your blessing instead! 

Quinoa + Hemp Heart Tabbouleh

It's just pure and simple...

Quinoa + Hemp Heart TabboulehQuinoa + Hemp Heart Tabbouleh

Quinoa + Hemp Heart Tabbouleh 

Ingredients
  • 1 cup quinoa (I used tri-color)
  • 1 3/4 cups water
  • 1 teaspoon garlic powder
  • 1 bunch parsley (about 2 cups lightly packed), stems removed
  • 1 small bunch mint (about 1 cup lightly packed), stems removed
  • 1 English cucumber (skin on), diced
  • 1 small red onion, diced or 3 green onions, thinly sliced
  • 1 1/2 cup cherry/grape tomatoes, halved or quartered depending on size
  • 1/4 cup hemp hearts (shelled hemp seeds)
  • drizzle of good extra virgin olive oil 
  • juice of 2 large lemons
  • mineral salt & cracked pepper to taste

Rinse your quinoa in a fine mesh stainer to remove any dust (sometimes I do this, sometimes I don't). In a medium size pot, bring water, quinoa and garlic powder to a boil, cover, reduce heat and simmer for 15 minutes. Remove from heat, remove cover and let set for 10 - 15 minutes, fluff with fork.

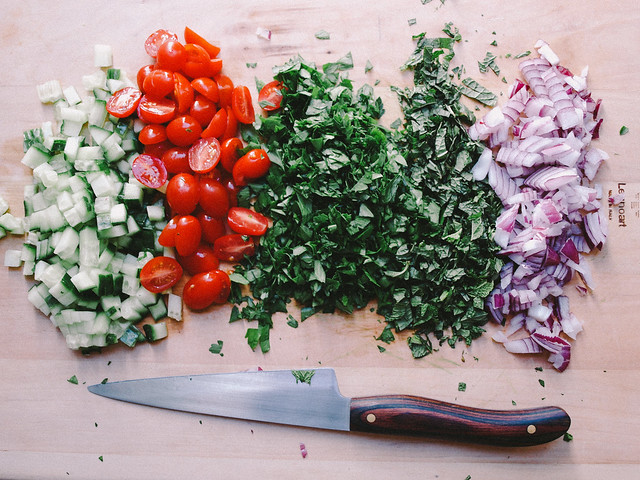
In the meantime, finely chop your parsley and mint. Dice your cucumber, tomato and onion.

Once quinoa is ready, add in the parsley, mint, cucumber, onion, tomatoes, hemp hearts, drizzle of olive oil and the juice of your lemons, salt & pepper to taste, gently mix together.

Serve with a few whole mint and/or parsley leaves and lemon wedges.

Serves three generously.

So clean & healthy...any day is a good day for tabbouleh!

Enjoy!


Detox Salad + Ginger Lime Cardamom Dressing

Detox Salad 1
Detox Salad Mix
Detox Salad

It's detox time! After a weekend of trials with the last recipe Pizza Pie + Balsamic Tomato Sauce + Roasted Vegetables, it was time for some fresh, detoxifying foods. This lovely salad is inspired by the energizing detox salad from Mildreds. I was able to put this together rather simply using most of the ingredients listed while adding my own flair with a few ingredients like cardamom. I've had cardamom on hand and have wanted to use it for a while now. It can be an optional ingredient in the dressing if you don't have it but it is a wonderful addition that I think you'll love if you have it on hand. This salad came out truly wonderful and I'm so pleased to share it with you. I can literally make a large batch of this salad and eat it all day long, for a few days on end to boot. It's what's for dinner, and lunch tomorrow! The flavors pair and mingle well for my taste, and I think those of you who love detox salads will definitely find this combination pleasing on many levels. It has a bit of sweetness from the raisins, carrots and apple, a little earthiness from the beets, a slight sour from the lime juice, and some zest from the ginger and cardamom. Add to that how colorful it is, healthy, nutritious, easy to make and so fresh...it's a detox keeper!

Detox Salad BeetsDetox Salad Beet Leaves

I love being able to incorporate beets into my diet. They are one of those foods that I don't eat often enough but this salad is a perfect place to use up this highly beneficial vegetable. Here we can use the beets and the greens...a win all around! If you can't find the beets with their greens, use chopped spinach, dandelion greens, even lacinato kale (aka: dinosaur or Tuscan kale) would be great. As for the beets, feel free to use golden beets instead. Red beets can be a bit messy. For this reason I decided to chop my beets instead of grating them, which tends to really leave a red wet mess. But of course, feel free to grate your beets if you rather. It will give extra moisture to your salad if you do. Even grating the apple will release a lot of moisture adding extra juices as well (at least for Fuji apples). Do what feels best to you!

Detox Salad EatDetox Salad Tofu

After I started eating, I remembered that the inspired recipe had an option for tofu and thought I'd give it a try. Let me say that it did not disappoint! Believe it or not the tofu was a great addition. I used an extra firm organic tofu and the texture blended right in and added a good dose of protein. Those who are familiar with tofu know that tofu it is a blank slate in terms of flavor and will take on whatever flavors it comes into contact with. Once mixed in it was great. Am I strange to love this? Oh well...I do! :) Tofu is optional but for those who are looking to make a complete meal I recommend adding a serving.

Detox Salad 2

Detox Salad + Ginger Lime Cardamom Dressing

Ingredients
  • 1 large beet with greens, beet julienned or grated and greens julienned
  • 1 large apple, cored and diced
  • 2 medium carrots, grated
  • 1/2 cup cilantro, roughly chopped
  • 1/2 cup organic raisins or golden raisins
  • a few tablespoons hemp hearts or sesame seeds, to serve 
  • organic tofu, cubed (optional)

Ginger Lime Dressing
  • 3 - 4 tablespoons lime juice (lemon is fine too)
  • 1 inch knob of ginger, finely grated (i used a microplane)
  • 1/8 teaspoon ground cardamom, or to taste
  • 1/2 - 1 teaspoon pure maple syrup or coconut nectar, optional

In a small bowl, mix together the dressing ingredients. Set aside to let the flavors mellow and come together. Check dressing for flavor before serving. 

Prepare your salad ingredients and use 3 to 4 large beet leaves (about 1 cup lightly packed) and place all ingredients in a large bowl. Pour dressing over the salad ingredients, toss to coat. (You can also make this ahead of time and keep refrigerated until ready to serve.)

Serve topped with a good sprinkle of hemp hearts or sesame seeds, and some extra raisins if you like as they add a nice sweetness.  

Serves 2 large portions or 4 -6 small portions. 

Notes:

If you don't find beets with the greens, use spinach, dandelion greens or lacinato kale instead. Use golden beets in place of red beets to keep the color mess to a minimum. 

The cardamom can be optional. If you don't use it often, there is no need to buy this just for the salad dressing although it is delicious and you may find other uses for it either here soon, or elsewhere. If you don't have it, you will still have a great dressing.

This salad tastes better the longer your able to let it set and let the flavors mingle. This is a great salad to make in advance and store in the fridge until ready to serve.

Detox away! 

Enjoy...


Ginger-Orange Granola

Ginger-Orange Granola

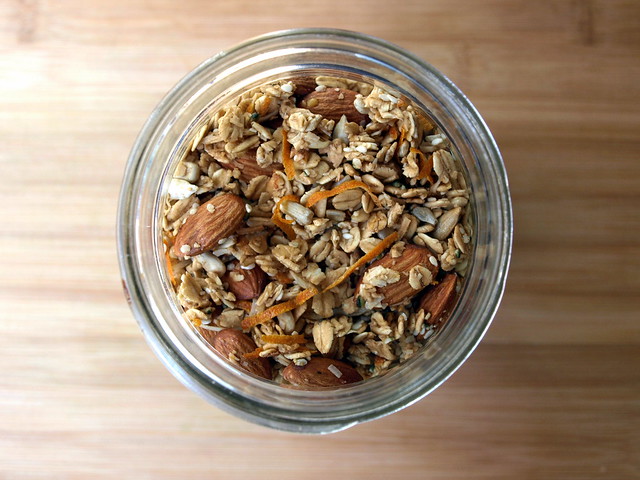
Next time you make granola...this is a must try! Especially if you love ginger and orange zest. I thought my last granola, Seeds & Goji Berry Granola, was delicious but this may just surpass that by a margin. I've been trying a few granola's lately and these two have come out on top. My house smelled like orange cinnamon rolls...mouthwatering! This granola has such nice flavoring, especially with the orange zest. I love zest of any kind, so the addition of the orange zest is welcome. It toasts up just perfectly along with the other ingredients. And when you get a bite of the toasted sesame seeds, they add another layer of deliciousness. We have another great granola to add to the recipe list. I just love a good granola and I think you'll love this one too!

Ginger-Orange Granola

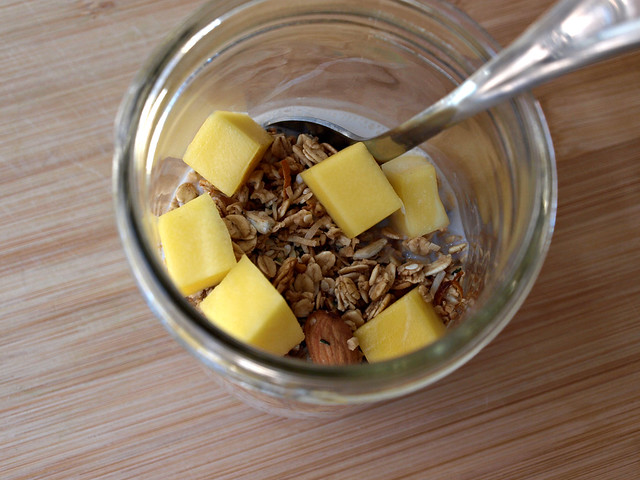
This was terrific as a cereal with diced mango and unsweetened almond milk. I can see this being a great muesli mix too for overnight oats. Might even be good with some fresh squeezed orange juice as your liquid. So simple and delicious...


Ginger-Orange Granola

Ingredients
  • 2 1/2 cups rolled oats (I used GF)
  • 1/2 cup sunflower seeds
  • 2/3 cup almonds
  • 1/3 cup shredded unsweetened coconut
  • couple tablespoons sesame seeds
  • couple tablespoons hemp hearts, ground flax seeds or chia seeds
  • 1 heaping teaspoon ground ginger
  • 1/2 teaspoon cinnamon
  • pinch of salt
  • zest of 1 - 2 oranges, chopped fine or left as is 
  • 2/3 - 3/4 cups pure maple syrup
  • coconut oil, to grease

Preheat oven to 250 degrees.

Mix all of your dry ingredients together in a large mixing bowl. Add in your maple syrup and mix well to coat. On a greased rimmed cookie sheet, lay granola in a single layer. You may need to use 2 rimmed sheets. Place sheets in oven and cook for 30 - 40 minutes, stirring every 10 minutes or so to ensure even toasting.

Once done, remove from oven, let cool completely, store in an air tight container for up to a month.

Let this be a template, add/subtract anything you like. If you're missing an ingredient you may add extra of something else you do have on hand. I like lots of zest and added the zest of 2 oranges.

Enjoy the aroma and the taste!


Seeds & Goji Berry Granola

Seeds & Goji Berry Granola

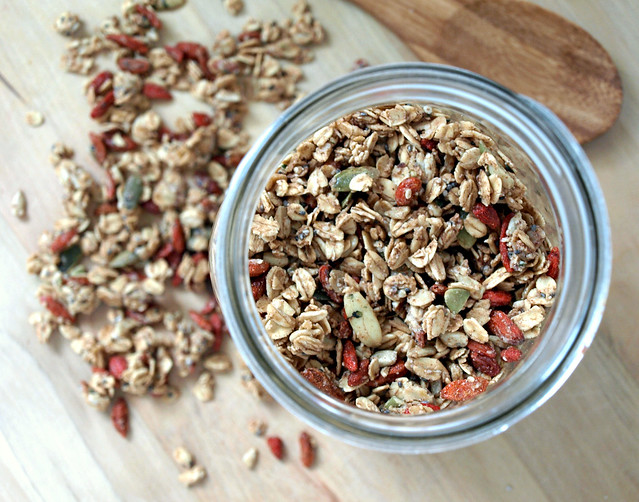
Let's talk granola, seeds and goji berries for a second, shall we? I know there are many recipes out there and it's no wonder why... it's pretty great and handy to have around. Have it as cold cereal, top it on hot oatmeal, non-dairy yogurts or non-dairy ice creams, or simply take some to-go in a small container...it's a great snack or meal that is filling, healthy and just plain good. It's so versatile too. You can pretty much add anything to your base and come out with something wonderful. That happens to be the case here. I have a ton of goji berries in my fridge along with pumpkin (pepitas) and sunflower seeds that needed to be put to good use. A few days ago I ran across this article from Wake Up World entitled, Five Healthy Seeds, which I had posted to the Facebook page. That planted the seed so to speak for this recipe. Seeds are great; especially for those who have nut allergies...they can be a nice alternative. Some of the best seeds in whole form are hemp, sunflower, chia, sesame and pumpkin seeds. Flax seeds are great too but unless they are ground you're not going to get their full benefits as they will pass straight through the body without much notice. As for the goji berries, well I love them because they don't have any added sweeteners like most dried fruits do (I also like raisins for this reason). They are full of anti-oxidants just as other berries like blueberries, acai berries, cranberries, strawberries and cherries. Find out more about their nutritional profile from this article from Live Strong, Goji Berries Nutrition.

Seeds & Goji Berry Granola

Seeds & Goji Berry Granola

Ingredients
  • 2 1/2 cups old fashioned rolled oats (I used GF)
  • 1/3 cup sunflower seeds
  • 1/3 cup pumpkin seeds (pepitas)
  • 1/3 cup goji berries
  • 2 tablespoons chia seeds
  • 2 tablespoons hemp hearts or the entire seed
  • 1 teaspoon cinnamon
  • pinch of salt
  • 1/2 - 3/4 cup pure maple syrup*
  • 1/4 cup sunflower seed butter (sunbutter), optional
  • 1 teaspoon vanilla

Preheat oven to 250 degrees.

Combine all your dry ingredients in a medium size bowl. Add your maple syrup, sunbutter and vanilla. Mix until well coated.

On a greased (I used coconut oil), or ungreased, baking sheet (use two sheets if you like), add your granola, laying it flat and bake for about 30- 35 minutes, stirring the mixture every 10 minutes to ensure even cooking. If using two baking sheets, you may even like to switch their positions in the oven once after stirring. If using a smaller baking dish such as a 9x9 or 11x13, bake for up to 1 hour or so, or until golden throughout. Be sure to stir the mixture every 15 minutes or so.

Once done, remove from oven and let cool completely before storing in an air tight container of choice. Will keep up to one month.

* The more syrup you use the more likely you are to create larger granola chunks throughout. I only used 1/2 cup in mine and felt it was a nice texture with many clumps. It also was a perfect sweetness for my liking, not too sweet. Add additional syrup to your preferences.

Feel free to add 1/4 cup or so unsweetened shredded coconut to the dry mixture as well.

Enjoy!

Creamy Lemon Herb Dressing

Creamy Lemon Herb Dressing

My last post of 2012. What a great year this has been! Food blogging and taking pictures has been a fun and learning experience. I've improved much but still have a ways to go. Meeting like minded people and being inspired everyday has been amazing. I look forward to what adventures lie ahead. I leave you all with this really wonderful dressing. I know many will be eating healthier as a New Year's resolution and this dressing will help you get some freshness in your meal plans. I personally found myself tipping the bowl to get the last of it. It's light and refreshing on its own, adding it to a fresh salad just makes it that much better. I've been waiting to find a great creamy style dressing that's easy to make at home and finally I've found one that fits my needs. This is raw, nut free, soy free, gluten free and of course vegan. I think this will amaze you as much as it amazed me. Happy New Year's to you all....Cheers!

The base of this recipe is hemp hearts. If you're unfamiliar with hemp seed hearts, you will want to add these great little seeds to your lifestyle. They are easy to sprinkle in smoothies, on salads, add some to the top of your toast and jam. In this recipe they create a wonderful creaminess. Hemp seeds are a great source of omega 3 & 6 and are a high quality complete protein. Four tablespoons, or 1/4 cup, of hemp seeds contain 15 grams of protein, and they're also a good source of fiber containing 2.5 grams per quarter cup. They also contain high concentration of vitamins and minerals such as iron, vitamin E, thiamine, riboflavin, folic acid and many other micro-nutrients that your body needs. Another great thing about hemp seeds is that they do not need to be soaked to aid in digestion, they can be eaten raw and the body will absorb and digest all nutrients readily and easily. They contain a lot of nutrition in a small package. If you love hemp hearts, you may also like my other recipes containing hemp hearts. Raw Healthy, Happy, Hemp Seed Cookie Balls & Raw Creamy Miso Soup w/ Mushrooms...a few great ways to use hemp seeds!

Now, let's make some delicious dreamy creamy dressing...

Creamy Lemon Herb Dressing

Creamy Lemon Herb Dressing

Ingredients
  • 1/2 cup hemp hearts
  • 1/3 cup water, plus more as needed for thinning
  • juice of 1 medium lemon
  • a few strands chives, broken into 1 inch pieces
  • a few sprig leaves fresh dill 
  • a few sprig tops fresh cilantro and/or parsley
  • dash or two garlic powder
  • dash or two onion powder
  • himalayan salt to taste 

Using a blender, I used the magic bullet for this, combine ingredients and blend until smooth. Add water 1 tablespoon at a time until desired consistency. Taste for flavor adding anything extra to suit your taste...more lemon?...more herbs?...more garlic or onion powder? Chill before serving. Makes about 5 servings.

Store in an air tight container in refrigerator for up to a week.

Note: I have not made this in a regular blender. The magic bullet works wonders but if you don't have one this should work fine your blender at home. You may consider doubling the recipe if using a larger blender. Mix and match herbs to suit your taste.

Salad shown consists of romaine lettuce, grape tomatoes, cucumbers and topped with cracked pepper...simple and delicious!


How to Freeze Fresh Herbs:

Fresh is always best, but I do find that I buy fresh organic herbs and then they get thrown away. If you find that is the case for you, below is a few simple ways to freeze your herbs making them easily ready for this recipe and others.

Fresh dill sprigs can be frozen for up to a couple months, but they will darken in color. There is no need to thaw before using. Frozen dill weed will still always have more flavor than dried dill. Below are two methods for freezing dill.

Cilantro is best used fresh, freezing turns it mushy, so fresh is best for great flavor.

Parsley is another herb that freezes well. You can freeze parsley the same as dill by using one of the two methods provided below.

Chives also freeze well. Frozen chives have the same flavor as fresh chives. To freeze chives you can cut the strands into small pieces, lay on cookie sheet and place in freezer for about 20 minutes. Once frozen place in air tight container, should last up to year. You can also freeze by using the ice cube tray method below.

Whole Stalks: 

Dill: Place a bunch of dill, stalks and all, in a reusable plastic bag or airtight container. Once the dill freezes, use clean kitchen shears to remove the needed portion, then return the remaining dill to the freezer. Entire stalks can be used to flavor soups and stews, then use a slotted spoon to remove the dill just before serving.

Parsley: Chop parsley into small pieces, place in reusable plastic bag or airtight container.

Ice Cubes:

An ice cube tray provides serving size cubes of herbs that can be tossed into soups, stews and other hot dishes. Dice the herbs, place a small amount in each section of an ice cube tray, add water and freeze. Once frozen, remove the cubes and store them in resealable plastic bag or freezer container. You can also add veggie broth instead of water, or combine herbs as well for a ready to use herbal blend.

Cranberry Pistachio Energy Bars


A homemade granola bar with a bit of a chew and a crunch at the same time. Lot's of flavor and full of goodness you can taste in every bite. So colorful too! Be warned, these are delicious and won't last long. But no worries, they're easy to make so you can whip some up in cinch. :)


I originally started these as a no bake granola bar like the recipe at Gimme Some Oven, but felt they were a bit to sticky to handle, even after chilling in the fridge a while. I decided to bake them in order to harden the maple syrup and stiffen them a bit. They came out really good and still have a bit of chewiness but without the stickiness. If you want them a bit crunchy bake for a little longer. They really are a vibrant and delicious treat! This recipe will give you the option to decide if you want to bake or not...a lot may depend on the date paste and how much moisture there is...but you may find that you prefer it unbaked. 


Cranberry Pistachio Energy Bars

Ingredients
  • 1 cup packed medjool dates, pitted and chopped (about 15 dates)
  • 1/4 cup pure maple syrup
  • 1 tablespoon chia seeds, optional
  • 1 tablespoon hemp hearts, optional
  • 1 tablespoon ground flax seeds 
  • 1/2 teaspoon cinnamon, optional
  • pinch of sea salt
  • 1 1/2 cups rolled oat (I used GF)
  • 1 cup unsalted pistachios
  • 1 cup dried cranberries or fresh chopped
  • 1/4 cup semi-sweet chocolate or a dark chocolate bar chopped into small pieces, optional

Place dates, maple syrup, chia seeds, hemp hearts, flax seed meal, optional cinnamon and salt in food processor/high speed blender and process until it becomes a paste like consistency. Move date paste to a medium size bowl and add the remainder of the ingredients, mix well.

In a loaf pan or 8x8 pan, lined with parchment paper or greased with coconut oil, spread the mixture evenly to all edges and corners, press down gently but firmly to ensure a compact mixture. Place in fridge for 30 minutes before removing from pan and cutting into bars.

Once chilled, gently remove loaf and place on hard surface. Cut into any size bar you like. If you feel that they are just right for you without baking than your done and can enjoy one right now, if not continue....also, you may decide to try a few bars just to see how it works for you.

Preheat oven to 350 degrees. Place bars on a prepared cookie sheet with either the same parchment paper used to chill or greased, bake for 15 minutes. Remove from oven and let cool completely. I put mine in the fridge to cool as I was being a bit impatient with this extra step but well worth it! It may take an hour or two to completely cool, especially if you used chocolate.

Store in an air tight container or keep in the fridge if you like. Eat within two weeks. If using fresh cranberries it's best to eat within a week. (I highly recommend trying some fresh cranberries, they add a nice tartness with the sweetness of the other ingredients)

Enjoy!

A little picture tutorial and more...


Date paste...depending on the freshness of your dates will determine how thin or thick your paste is. The paste shown here was with very fresh dates, they were moist and soft creating this very moist paste...this was almost too moist but I also used 1/3 cup syrup instead of 1/4 cup, probably didn't need to use that much with such soft dates. I've also used older dates with less moisture and added a tablespoon or so extra maple syrup to the paste for added moisture. Use your judgement...if you need any extra moisture at all it should only be a tablespoon or two at most. If you feel your paste is too wet, add extra oats in the next step.


I used fresh chopped cranberries in this batch...the fresh cranberries added a little tartness and paired well with the sweetness of some of the other ingredients without adding refined sugars that are usually in dried cranberries. You can find organic dried cranberries that use pure cane sugar or apple sauce to sweeten the berries. Fresh is always best so give it a try sometime, you may be surprised how good they are in this recipe.


Gently pack the mixture into a lined loaf pan, chill, cut and bake if desired. I spy my little Piper girl, always underfoot waiting for something to drop, or a hand to reach down and give her some love. We've had her since Halloween of 2010, she was a rescue dog and needed a home, and we needed her little spirit...it worked out perfectly. :)

Hope this inspires something wonderful in your future. Happy Holidays. :)


Back to top