CINNAMON APPLESAUCE PANCAKES

Cinnamon Applesauce Pancakes

Hello again!

Its been a very busy month with life in general, all good and I hope everyone is doing well. Things should be back to normal and I hope to post a new recipe once a week from now on. Today I share with you a very easy pancake recipe to add to your pancake repertoire. As the title suggests, these are filled with the goodness of apples and cinnamon. I used an organic jarred unsweetened applesauce here but you can make your own pretty easily following this recipe from Food 52. I did some of the pancakes with apple slices cooked in and some without, feel free to do the same or any way you prefer. I personally loved the ones with the apple slices, they cook up soft and tender while adding a bit of texture. So good! Mix up the spices and flours to suit your taste and/or needs. For this recipe I've used cinnamon and a dash of nutmeg. You may opt to replace the nutmeg with cardamom or allspice, or keep it simple with just cinnamon. For the flour, spelt is my absolute favorite but of course you can sub in your favorite flour or flour blend. These pancakes are every bit as good as they sound. Tender and fluffy, I'm pretty sure you'll be whipping these up often! 

Cinnamon Applesauce PancakesCinnamon Applesauce PancakesCinnamon Applesauce Pancakes

Simple, wholesome and delicious!

Cinnamon Applesauce Pancakes

CINNAMON APPLESAUCE PANCAKES


Ingredients

  • 1 1/2 cups spelt flour, or flour of choice
  • 2 tablespoons coconut or organic pure cane sugar 
  • 1 tablespoon baking powder
  • 1 teaspoon cinnamon
  • 1/8 -1/4 teaspoon nutmeg
  • pinch of mineral salt
  • 1 1/2 cups unsweetened almond milk
  • 3/4 cup unsweetened applesauce 
  • 1 teaspoon vanilla extract
  • 1 tablespoon of coconut oil, for greasing

Preheat your oven to 200 degrees F. Place a baking sheet on the middle rack while oven is heating.

Heat griddle as per instructions or if using a large skillet heat over medium high heat.

In a large mixing bowl, add flour, sugar, baking powder, cinnamon, nutmeg and salt, mix well. Next, add in the applesauce, non-dairy milk and vanilla extract, mix until just combined, do not over mix. Your mixture may seem to foam up a bit due to the baking powder, this is normal.

Clean and quarter an apple, remove the core. Cut into thin slices about 1/8 - 1/4 inch. 

Place about 1 teaspoon of oil on the griddle/skillet and spread evenly over the cooking area (I use a silicon brush). Lay two sliced apples next to each other on the griddle. Using a 1/4 cup measuring cup, scoop batter and place over top apples, gently helping the batter to cover the apples and form a circle. Cook until bubbles form on the top and edges start to look dry, about 2 1/2 - 3 minutes per side, or until golden.

If not adding apple slices, scoop batter as noted above and place on griddle. You won't need to help the batter, it will do its magic on it's own without the apple slices underneath. Continue as directed above.

As pancakes become done, place them in the oven on the warm cookie sheet to keep warm until all pancakes are ready.

Serve with pure maple syrup. A few fresh apple slices would also be great to serve.

Makes 9 pancakes, serving 3.

Notes:

Make a vegan buttermilk by adding a teaspoon of apple cider vinegar or juice of 1/2 small lemon to the milk 10 minutes before using.

I used Fuji apples, they are my favorite. Use your favorite apple.

Vary up your spices with cardamom, allspice or cloves in place of the nutmeg.

For maximum fluffiness, once you place the batter on the griddle, do not flatten out the top to try to spread the pancake. I learned this from experience, my pancakes weren't bad but just not as fluffy as they could've been.

For thicker pancakes use less milk, for thinner use more.


I'd love to see your re-creations!
#thesimpleveganista

VANILLA CHIA PUDDING

CHIA PUDDING

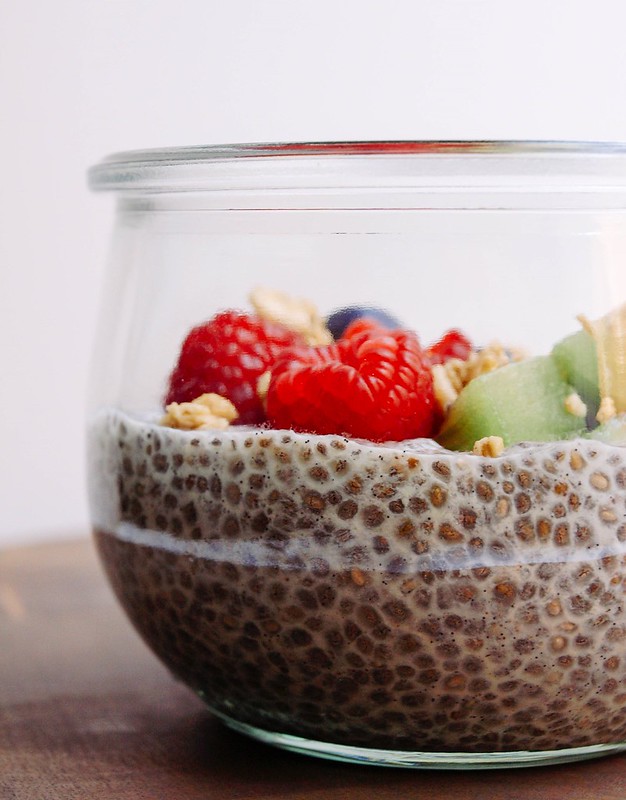
Let's talk chia pudding! It's been my little obsession lately. I love it as breakfast, snack or lunch. When paired with an assortment of fruits it's so fresh, light and surprisingly filling. Add a little granola for even more texture and flavor. It's also extremely easy to make, just chia seeds & plant milk plus a little sweetener or spice if you like. Add them all together, place in your trusty fridge, shake/mix every few hours and within six hours or so you'll have yourself a perfect 'super food' pudding. If you make your own plant milk, you'll have a super food raw pudding! Texture wise this pudding is not too seedy or crunchy at all, these amazing little seeds will absorb the milk making them mostly gelatinous. There is much to love about this quick and easy treat. If you haven't tried chia pudding yet, I suggest you do so asap! 

VANILLA CHIA PUDDING

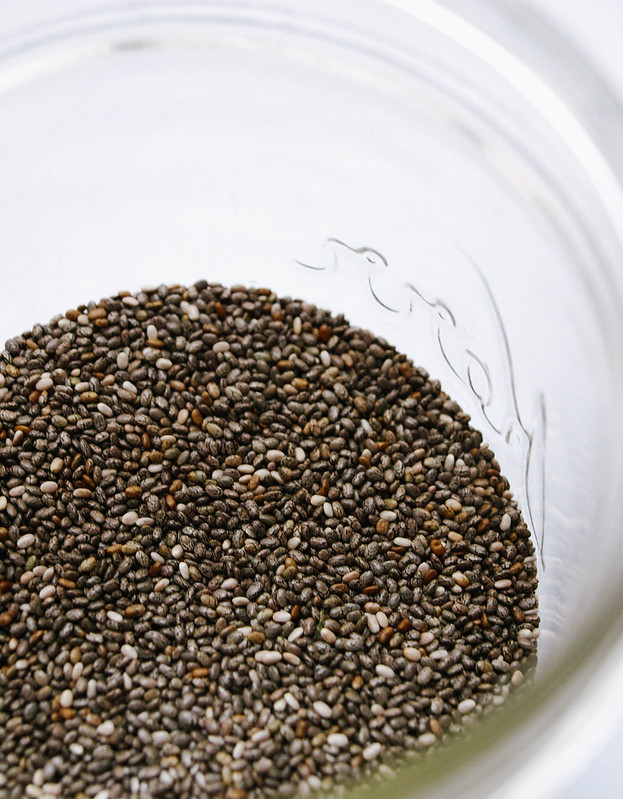
Chia seeds have been around a long time and are finally making it into the mainstream. They are no longer just seen in health food stores and are easily accessible. I see them at Target and all my local grocery stores. They are mostly found dark colored like the ones you see above but you can find white chia seeds online. In the world of vegan food, chia seeds act as a binder to replace eggs and also as a thickener, like for this pudding. When not making chia pudding, you can sprinkle them on smoothies, oatmeal, salads and make chia fresca (a drink). Chia seeds are small but nutritious and should be included in your heart healthy habits! Per 1 ounce serving (2 tablespoons) of chia seeds you'll get 138 calories, 9 grams of fat (I strive for 3 grams per 100 calories but this is healthy fat), 10 grams of fiber (amazing!), 4.7 grams of protein (not too shabby). They contain a concentrated amount of the essential omega-3 fatty acid, although they don't contain all the essential omegas like EPA or DHA, you'll still get a good dose of the others at 5 grams. All their fiber will help aid in digestion and elimination. 

VANILLA CHIA PUDDING

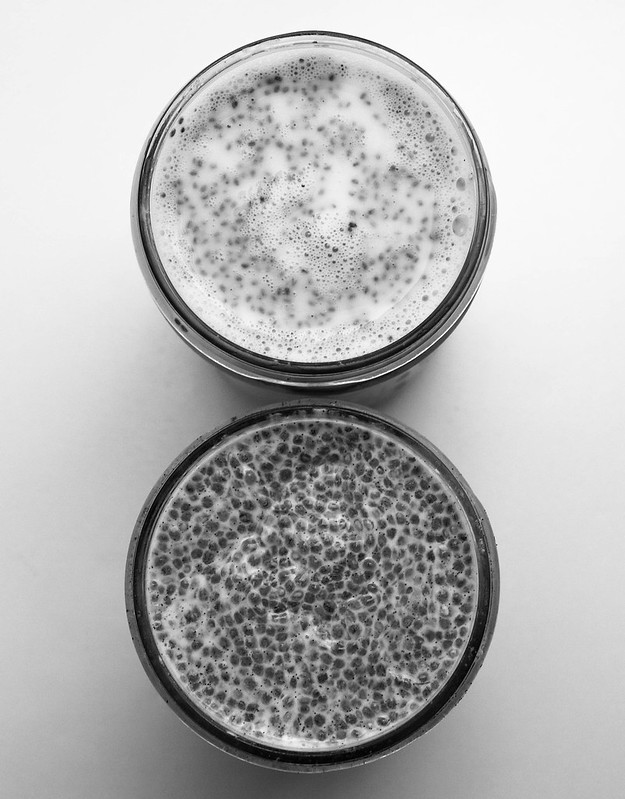
Above you'll see the difference of before and after. The top jar has just been mixed together and the bottom jar is what it will thicken up to look like after six hours or so. I used mason jars to make my chia pudding. The mason jars work great, all you have to do is shake the jar every few hours until it sets. They also make it easy to travel with. Fill your pint size jars half way using half the recipe, once set, fill the other half with fruit. Its a perfect take along lunch or snack!

VANILLA CHIA PUDDING RAINBOWLVANILLA CHIA PUDDING RAINBOWL

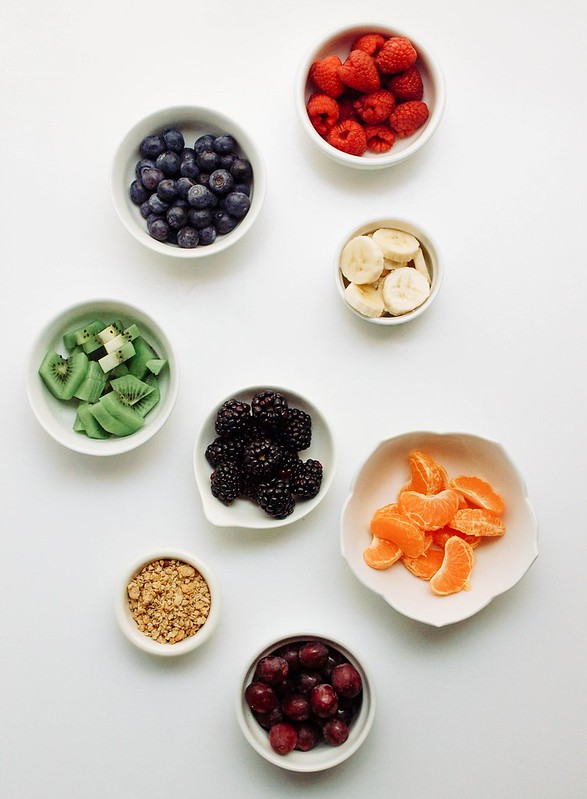
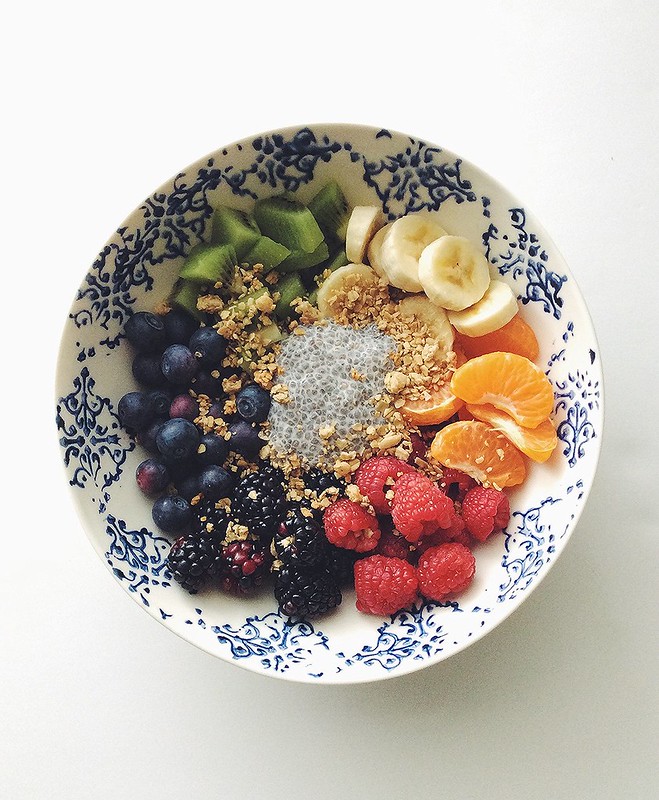
My favorite way to eat chia pudding is with a mix of seasonal fruits. I call this the CHIA PUDDING RAINBOWL. Adding a little granola over top will add some extra texture. It's good to eat the rainbow! :)

VANILLA CHIA PUDDING

VANILLA CHIA PUDDING

Ingredients
  • 2 cups unsweetened almond milk (use your favorite)
  • 1/2 cup chia seeds
  • 2 teaspoons vanilla extract, 1/2 teaspoon vanilla bean powder or seeds of 1 vanilla bean
  • 1 tablespoon pure maple syrup or cocount, turbinado or organic pure cane sugar, optional

Place ingredients in container or bowl and mix well. Place covered in the refrigerator and mix every 1-2 hours until set. Mixing is important since the seeds will fall to the bottom of the container, if not shakin or stirred every now and then it won't set properly. Keep refrigerated, will last up to 5-6 days.

Serve as you like.

Serves 2-4.

Notes:

I usually eat about 1/3 with a bunch of fruit. Use mandarins oranges, kiwi, raspberries, blueberries, blackberries, grapes, strawberries, pineapple, mango, banana, apples, peaches, granola, nuts, seeds, etc. Mix and match your favorite fruits, nuts & seeds!

I use mason jars to prepare the pudding. This way you can shake the jar to mix instead of mixing with a utensil. Mason jars are also great for travelling.

I don't add sugar to my chia pudding but the option is there if you prefer a little sweetness.

Add a sprinkle of cinnamon, cardamom or other dessert type spices for a change of pace. I like simple vanilla and used Williams-Sonoma Ground Tahitian Vanilla Bean for this recipe, about 1/2-1 teaspoon. I love it and the jar goes a long way!

ORANGE & SPICE HOT COCOA

ORANGE & SPICE HOT COCOA

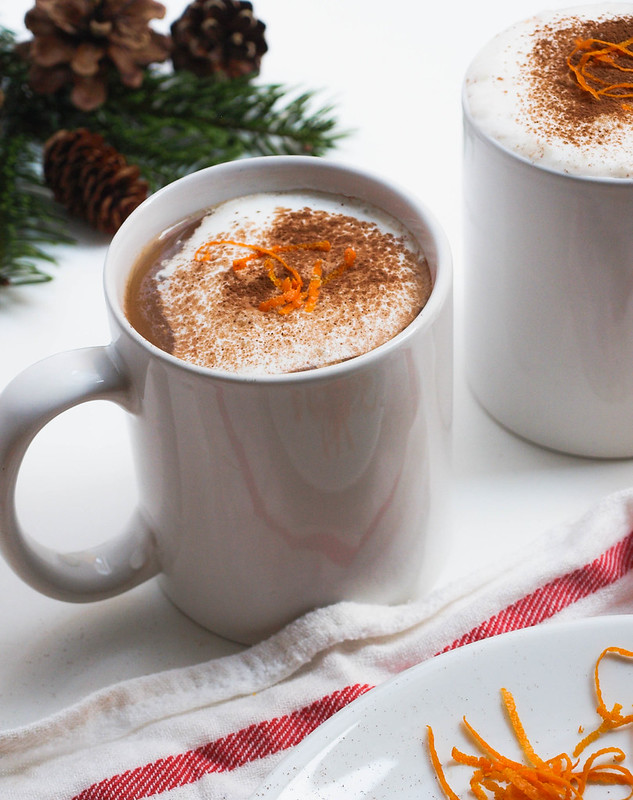
This is a quick n' easy orange hot chocolate to change up the usual hot cocoa routine. The winter weather is finally setting in here with rain and very cool temperatures, it calls for a nice mug of hot cocoa! I love orange and chocolate together and set out to come up with a hot cocoa using this combination. After doing a bit of research on orange hot chocolate, using orange juice is not typical, usually a bit of orange extract is added or even orange flavored liqueur (which sound pretty good too on certain occasions!). Since I happen to only have some oranges on hand, I decided that would do perfectly fine. And it did! Using orange juice instead of flavoring will also give you the added benefit of vitamin C with your cocoa. Add in the cinnamon & ginger and you have yourself a nicely flavored hot cocoa. I even love this without the ginger, using just cinnamon. Use the spices to your liking and preference. For a bit of heat, you may consider adding a dash of cayenne powder. The toppings can be changed up to whatever you like or have on hand. So next time you're thinking about having a cup of hot chocolate give this version a try, I think you'll love it too!

ORANGE & SPICE HOT COCOAORANGE & SPICE HOT COCOA
ORANGE & SPICE HOT COCOA

ORANGE & SPICE HOT COCOA

Ingredients
  • 3 cups unsweetened almond milk
  • 1 cup 100% pure orange juice
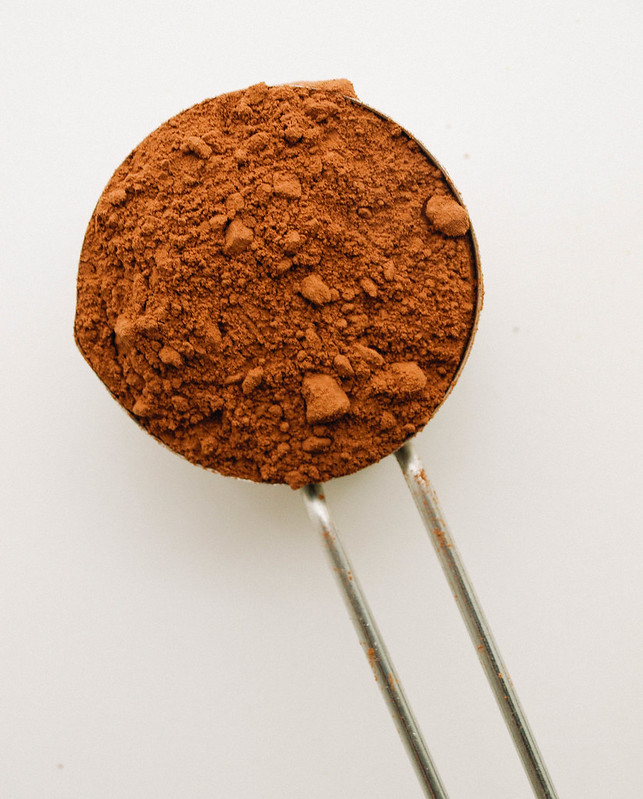
  • 1/4 cup unsweetened cocoa powder 
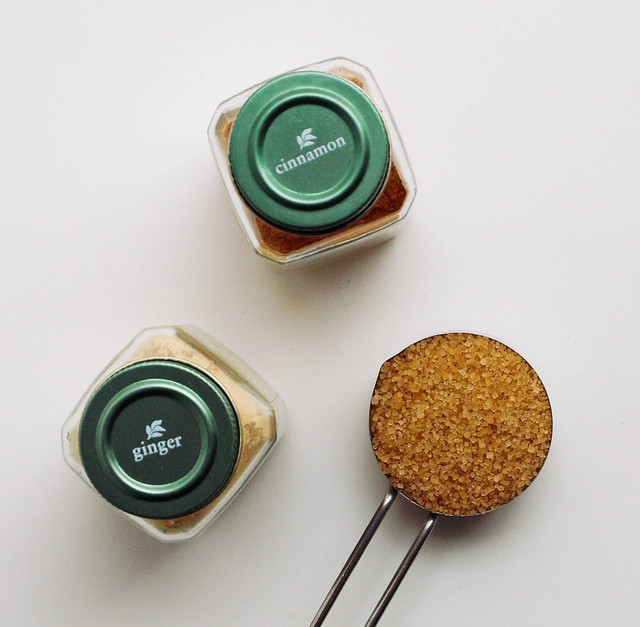
  • 1/4 cup raw sugar, pure maple syrup or coconut nectar/sugar
  • 1 teaspoon ground cinnamon
  • 1/2 teaspoon ground ginger
  • pinch of salt

garnish options:

In a small/medium saucepan, heat milk and orange juice over medium-low heat. Add cocoa, sugar, cinnamon, ginger and pinch of salt, stir until cocoa is completely dissolved. Turn heat to low to keep cocoa warm until ready to serve.

Serve in individual cups topped with any garnish you like. I added coconut cream, dusted with cocoa powder and topped with orange zest.

Serves 2 - 3.

Notes:

Feel free to use water in place of non-dairy milk or use a combo of water & milk equally 3 cups.

For the orange juice, use fresh squeezed or bottled (no pulp to medium pulp pref). If using fresh squeezed, you may like to strain the pulp before using.

Make your 1/4 cup of cocoa heaping if you like a little extra chocolate flavor.


EVERYDAY OATMEAL

Everyday Oatmeal

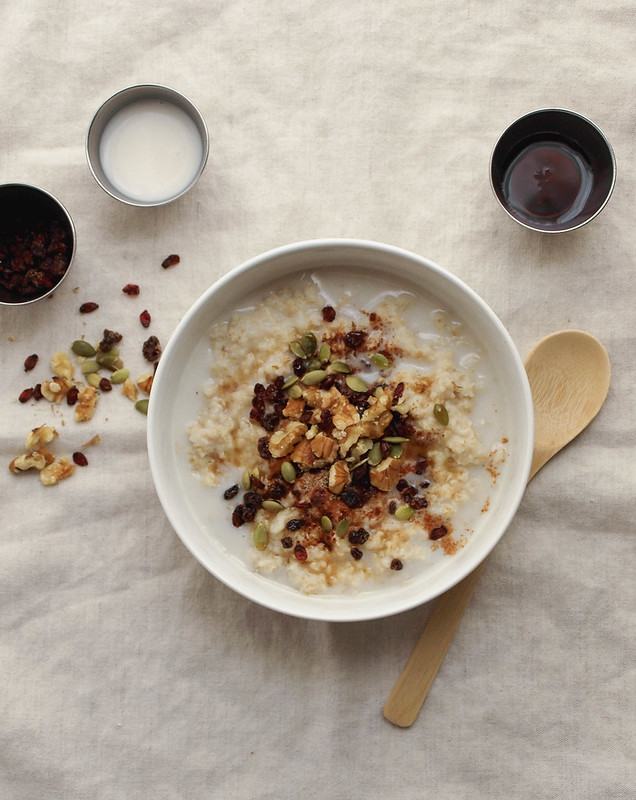
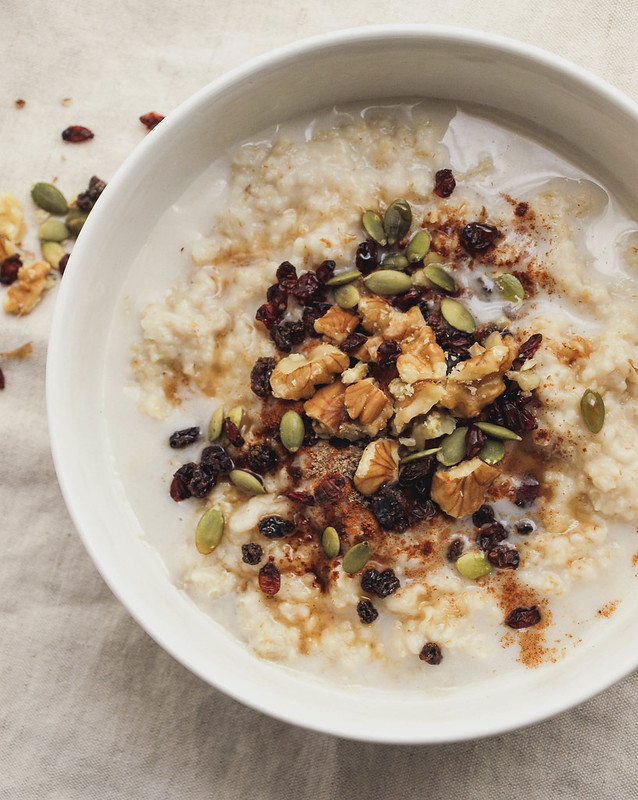
Today I share with you my go-to oatmeal. It's quick and flavorful! On its own, oatmeal is nothing to get excited about. It needs help with warm spices, sweet and/or tart fruits and some crunchy nuts & seeds. Add a drizzle of pure maple syrup and splash of almond milk for the perfect finishing touch. I love oatmeal all year long, but during the fall\winter I especially eat this on a regular basis. It warms me up, fills that morning hunger, supplies me with good carbohydrates and keeps me going for a good part of the day. 

Everyday Oatmeal: The Essentials

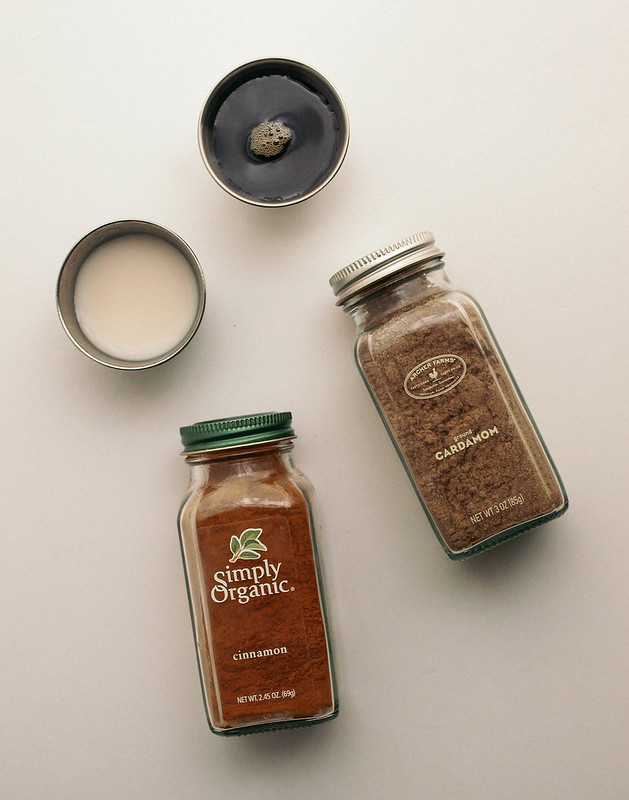
My everyday oatmeal always consists of cinnamon, cardamom, maple syrup and almond milk...these are the essential flavor boosters. The rest of the ingredients will be mixed and matched depending on what I have on hand.

Cinnamon and cardamom are warming spices and both hold health benefits. They are delicious together and will add a ton of flavor to plain oatmeal!

Pure maple syrup is my sweetener of choice and contains a good dose of manganese and zinc.

For the milk, I use unsweetened almond milk but you can use your favorite non-dairy milk. Most non-dairy milks are low in calories, fat and are fortified with important vitamins and minerals (even more so than dairy milk) like calcium, vitamin D, B-12 and E, manganese, potassium, copper and selenium.

The oats can be whatever you prefer. Lately I've been using quick oats, it's what I've been baking with and have tons on hand. You can use rolled or steel cut oats too, just cook according to the package directions.

I usually always add in some sort of fruit, whether dry or not. Usually its dried fruit since I always have some on hand in the pantry or refrigerator. I prefer unsweetened dried fruit like raisins, currants, barberries, blueberries and cranberries. Chopped dates, apricots and cherries are also great. I'm loving the addition of the barberries I picked up awhile back, they add a tartness contrasting the sweetness of the other dried fruits. I've come to learn that barberries are higher in anti-oxidants than dried blueberries, cranberries, goji berries and even pomegranates! These little tart fruits can be found in Middle Eastern grocery stores (you can also order them online) and hold up well in the pantry or refrigerator. When using fresh fruits, I may use blueberries, sliced bananas or apples.

The addition of nuts & seeds will add protein and a nice crunch. Many nuts & seeds contain essential omegas that are heart healthy making them another good reason to add a small handful. You can use any combo of walnuts, pepitas (pumpkin seeds), almonds, hemp hearts, chia seeds and pecans.

It's the perfect everyday oatmeal to get me going, or end my day! Sometimes I have oatmeal for dinner. ♥

Everyday Oatmeal

EVERYDAY OATMEAL

Ingredients
  • 3/4 cup quick oats 
  • 1 1/4 cup water
  • 1/2 cup unsweetened almond milk, divided
  • 1 - 2 tablespoons pure maple syrup
  • 1/4 heaping teaspoon cinnamon
  • 1/8 teaspoon cardamom
  • small handful mixed nuts (I used walnuts and pepitas)
  • small handful dried or fresh fruit ( I used currants and barberries)

Bring water to a boil in a small saucepan. Stir in 3/4 cup oats, reduce heat to medium and cook for 1 1/2 minutes. Add 1/4 cup milk and cook another 30 seconds. Remove from heat, cover and let stand for 2 to 3 minutes. 

Place oatmeal in your serving bowl, top with cinnamon, cardamom, nuts, seeds and berries. Drizzle maple syrup over top and some of the remaining milk. Give a good stir and enjoy!

It tastes great with a morning cup of coffee, green tea or lemon water.

Notes: 

Give or take on both the oatmeal and water when cooking, using more or less as needed.

Use rolled or steel cut oats if you prefer, cook according to package instructions. 

If you don't like the flavor of maple, use coconut nectar or pure cane brown sugar. 

Dried fruits you might like to use...cranberries, blueberries, goji berries, raisins, currants, barberries, chopped dates, apricots and cherries. Fresh fruits can be blueberries, apples and bananas.

Nuts and seeds you might like to use are almonds, walnuts, pecans, pepitas, hemp hearts and chia seeds. 

CARROT BANANA BREAD

CARROT BANANA BREAD

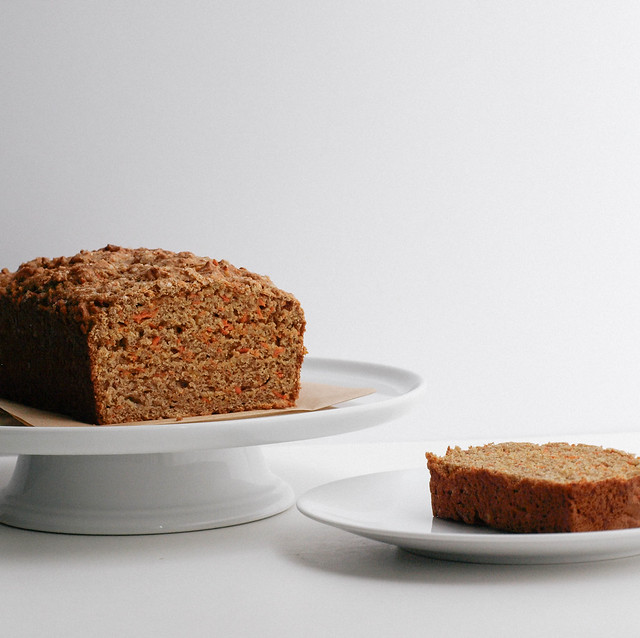
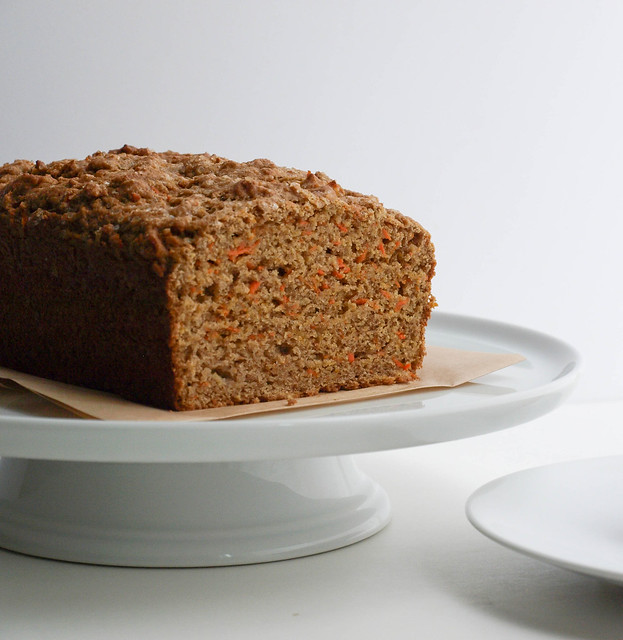
Lots of baking going on around here lately. I've been wanting to make a carrot banana bread and have finally got around to doing it. It's a nice textured bread, moist but not too moist and not too dense. The batter can handle the addition of walnuts and other dried fruits but for the sake of my daughter I've left those out. The recipe is adapted from my Banana Tea Bread which has been a wonderful recipe to work with! I have plenty of notes in this recipe so you can vary it up and change it around when the mood strikes. I don't usually add anything to breads like these when eating but this would be nice with a smidge of Cashew Sweet Cream. I hope you find you love this carrot banana bread as much as I do. It's a keeper and a great way to add in extra vegetables!

P.S. The cooking holiday season is just around the corner! I have a nice collection on pinterest of 250+ vegan recipes for you to consider adding to your holiday table. Am I missing any great recipes you'd like to see? Let me know and I'll add it. You can find the resource here: VEGAN THANKSGIVING AND CHRISTMAS RECIPES 

CARROT BANANA BREADCARROT BANANA BREAD

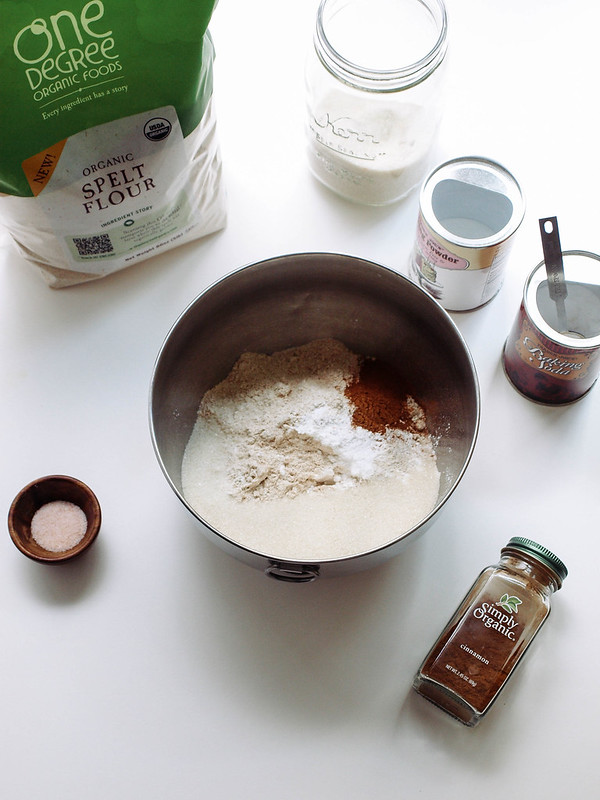
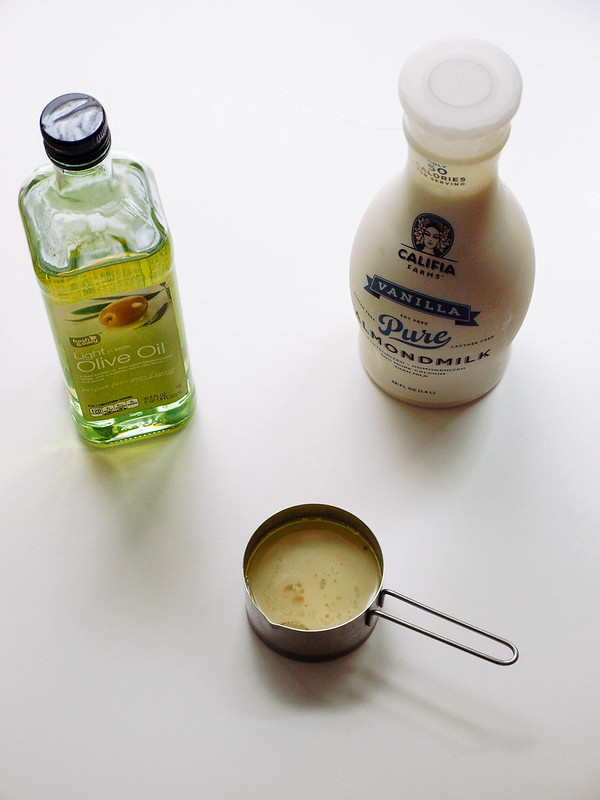
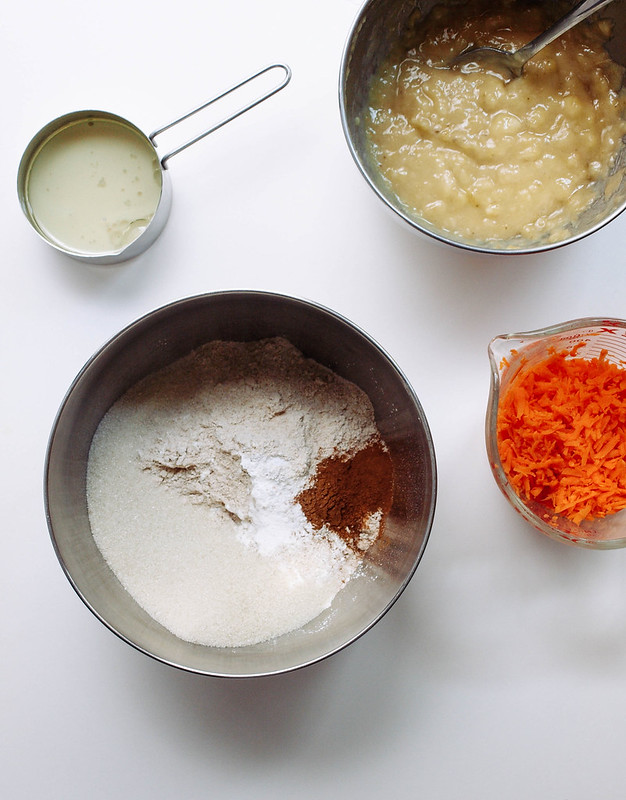
Mix your dry and measure your wet ingredients (I measured the oil and milk in one cup)...

CARROT BANANA BREADCARROT BANANA BREADCARROT BANANA BREAD

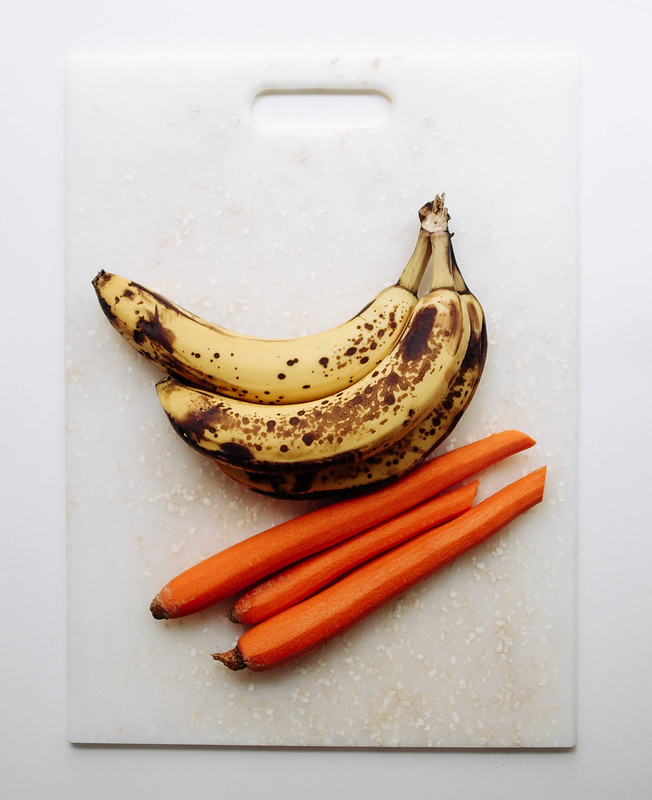
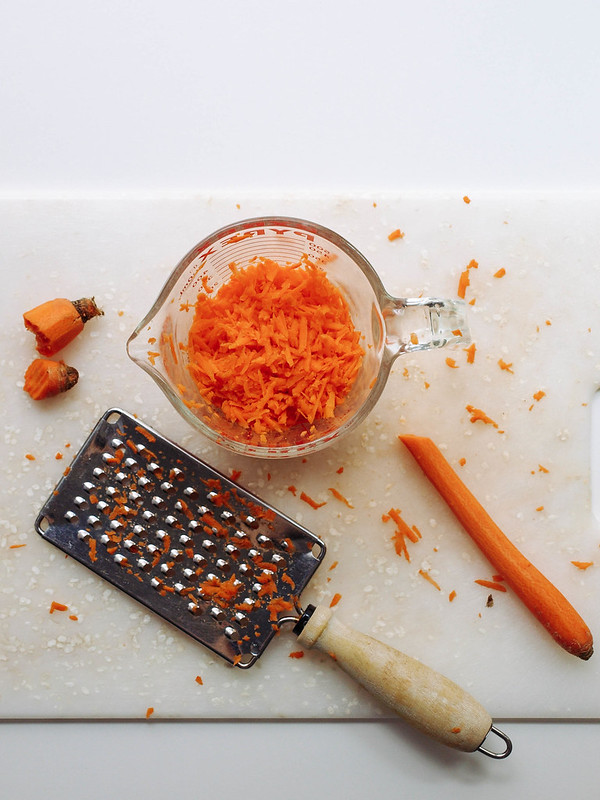
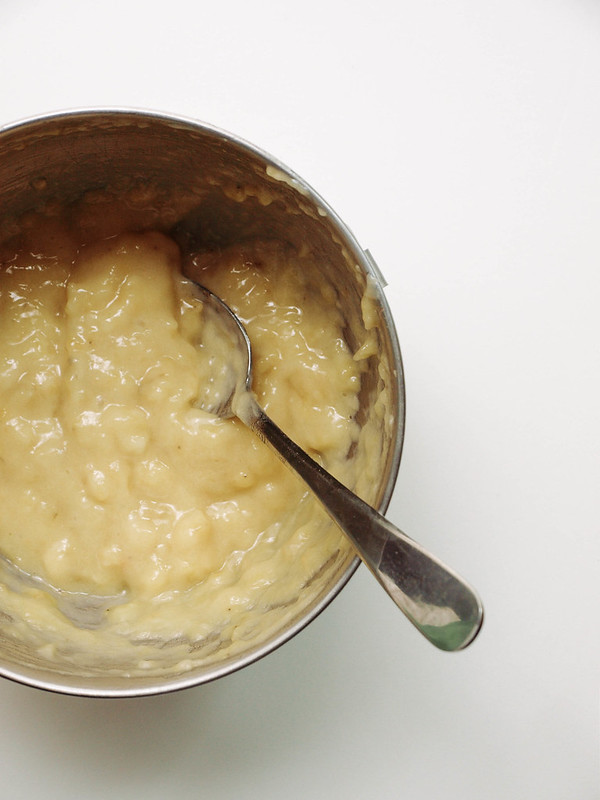
Grate your carrots, mash your bananas...

CARROT BANANA BREADCARROT BANANA BREADCARROT BANANA BREAD

To the dry ingredients, add oil, milk and bananas, mix well but don't over mix. Lastly, fold in carrots.

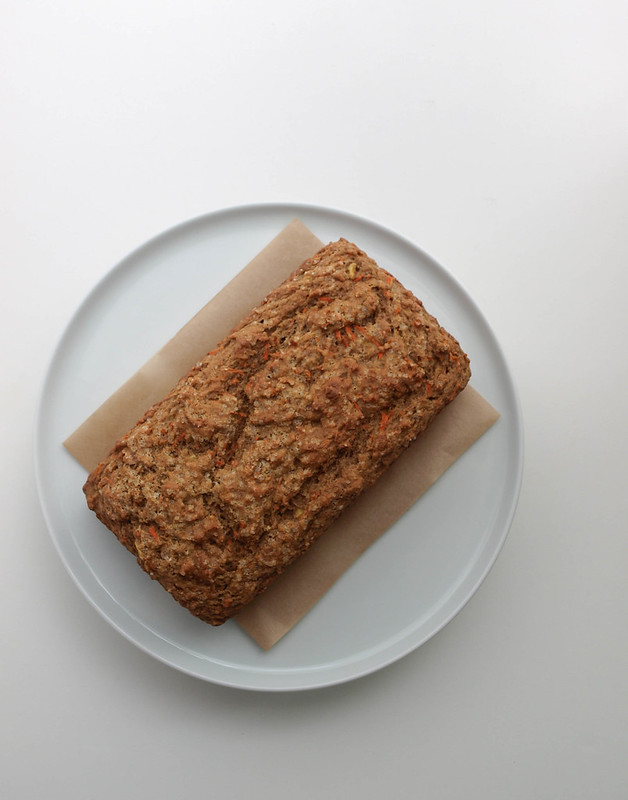
CARROT BANANA BREAD...just slightly cooled

My bread just slightly cooled and moved to it's storage place. Once it's cooled and covered, it will look a bit moister and darken in color. I did another loaf here where you can see the difference, this is 12 hours after being covered. I would've taken more pics of the loaf shown here but it was eaten too quickly!

CARROT BANANA BREAD

CARROT BANANA BREAD

Ingredients
  • 2 cups spelt flour
  • 1/3 cup organic pure cane or coconut sugar
  • 2 teaspoons cinnamon
  • 2 teaspoons baking powder
  • 1/2 teaspoon baking soda
  • pinch of salt
  • 1/2 cup vanilla or unsweetened almond milk
  • 1/4 cup light flavored olive oil or warmed coconut oil (see notes)
  • 3 medium bananas, mashed (about 1 1/2 cup)
  • 3 carrots, grated (about 1 1/4 cup)
  • 3/4 cup chopped walnuts, optional

Optional Toppings
  • sprinkle of raw sugar (pictured, my daughters favorite topping)
  • 1/4 cup chopped walnuts 

Preheat oven to 350 degrees F.

In a large mixing bowl, add flour, sugar, cinnamon, baking powder & soda and salt, mix well with large slotted spoon or fork. Add milk, oil and mashed bananas, mix well, but don't over mix, making sure there are no clumps of flour (especially on the bottom of the bowl). Fold in carrots. In a lightly greased 9 x 5 loaf pan, place mixture and bake for 50 - 55 minutes on the middle rack, rotate pan half way through.

Let cool for 10 minutes, remove from pan and let cool completely. Store covered. Serve warmed or at room temperature. Slices would pair nicely with this Cashew Sweet Cream.

Serves 8.

Notes: 

The riper the bananas, the less sugar you'll need. If your bananas are not very ripe, you may like to add a tablespoon or so more.

If you don't have baking soda on hand, use 1 tablespoon (3 teaspoons) baking powder instead of 2 teaspoons.

If using coconut oil, be sure your milk is at room temperature or warmer. If adding straight from the refrigerator, the coldness will harden the coconut oil.

Replace the oil with applesauce for oil-free bread. Bread may be a little denser. 

Make gluten-free by using a GF flour blend.

Feel free to leave your carrots unpeeled. I felt mine needed it this time but usually skip this step whenever I can.

Fold in 1/3 - 1/2 cup dried fruit of choice. Raisins, currants, cranberries or chopped apricots or dates would work nicely. 

Add in 1/2 teaspoon nutmeg for another layer of flavor and variation. 


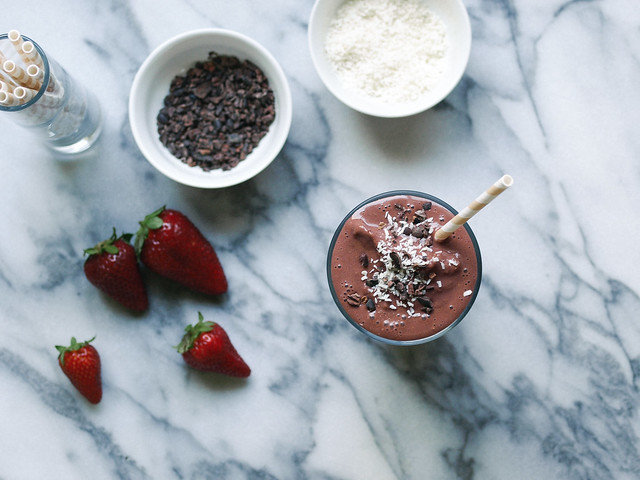
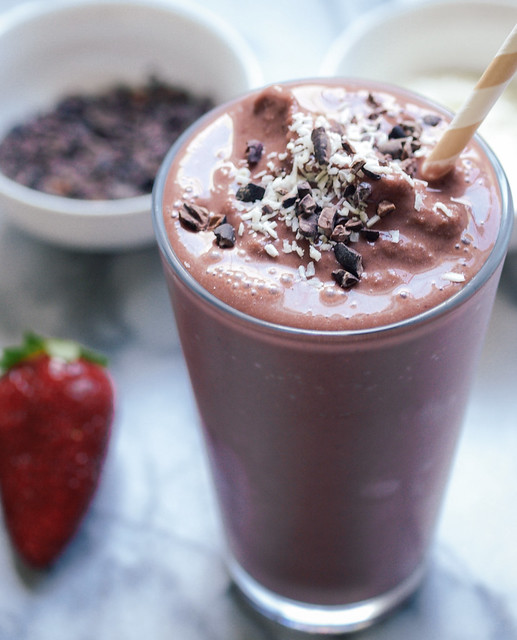
Strawberry Chocolate Milkshake

Strawberry Chocolate Protein Milkshake

Its strawberry season here in California signaling that spring is right around the corner. It's one of my favorite times of year, next to fall. I've been buying strawberries like crazy, freezing them just for times like these when I feel like making a shake. I don't about you but spring happens to be the season when I naturally tend to start eating a bit lighter, making shakes and smoothies a perfect way to get in a quick meal or healthy dessert. Full of good things in this milkshake, you can be sure you're giving your body lots of L-O-V-E...because you deserve it! 

Strawberry Chocolate Milkshake

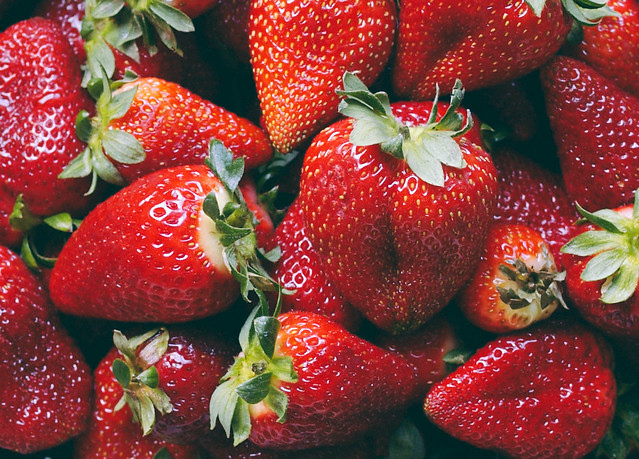
Strawberries are full of anti-oxidants and anti-inflammatory nutrients. These sweet ruby red fruits hold three major benefits to your health: they have the ability to protect and support the cardiovascular system, regulate blood sugar helping to prevent diabetes and protect certain forms of cancer from developing. They are also a rich source of vitamin C, manganese and fiber! It is recommeded that you eat at least one cup of strawberries for the full benefit of their nutritiousness. 

Strawberry Chocolate Milkshake

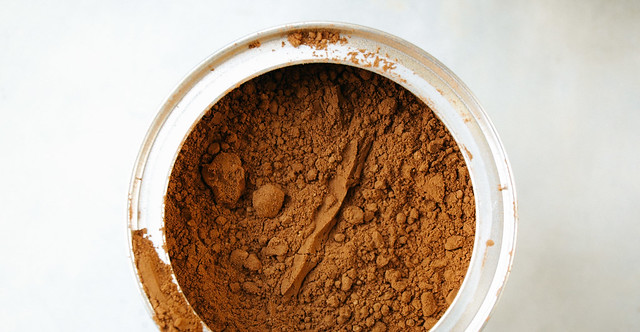
Cocoa is full of powerful anti-oxidants that may help prevent heart disease, cancer and aging effects. It can also be beneficial as an antidepressant with its natural 'happy' opiate effects giving you a feeling of elation. I have actually felt this myself after having a shake made with cocoa powder....feels pretty good! It is recommended that you purchase your cocoa/cacao powder 'organic' as it's less processed and contains more of the beneficial nutrients to keep you at your best. Just a note that cocoa is not included on the World's Healthiest Food List but is still beneficial and can be enjoyed in moderation.

Strawberry Chocolate Milkshake

  Strawberry Chocolate Milkshake

Ingredients
  • 1 cup frozen strawberries
  • 1 cup unsweetened almond milk
  • 1 1/2 tablespoons cocoa/cacao powder
  • 1 - 2 tablespoons pure maple syrup or liquid sweetener of choice
  • 1 teaspoon vanilla extract
  • 1 scoop protein powder, optional 

optional toppings
  • shredded coconut
  • cacao nibs

Place ingredients in blender and blend until combined. Top with optional toppings. Serves one.

Notes:

Depending on the size or cut of your strawberries, you may need to add a little extra milk. Sometimes I have to add an extra 1/4 -1/2 cup.

Adjust the cocoa/cacao powder to suit your taste or protein powder. If using chocolate protein powder you may want to use less cocoa/cacao powder. Same goes for the sweetener. I use a Garden of Life Raw Protein Powder at the moment that doesn't contain any sweetener so I added a bit to mine (sometimes I use hemp protein powder instead). If your strawberries are super sweet you may not need any extra sweetener. With all this in mind, adjust ingredients depending on your circumstances.


Enjoy!


Persimmon & Grape Baked Oatmeal

Persimmon & Grape Baked Oatmeal

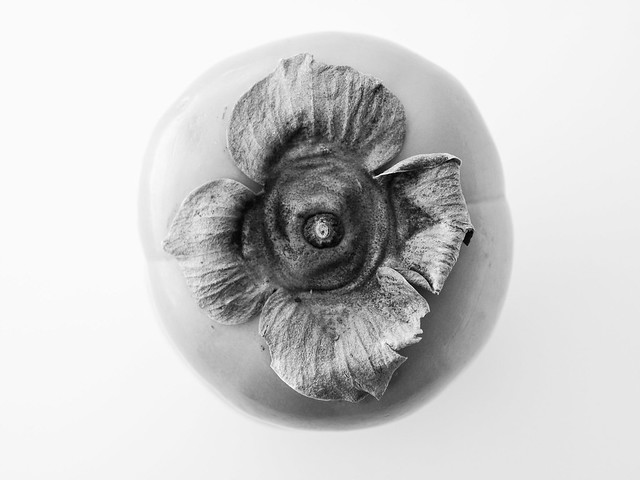
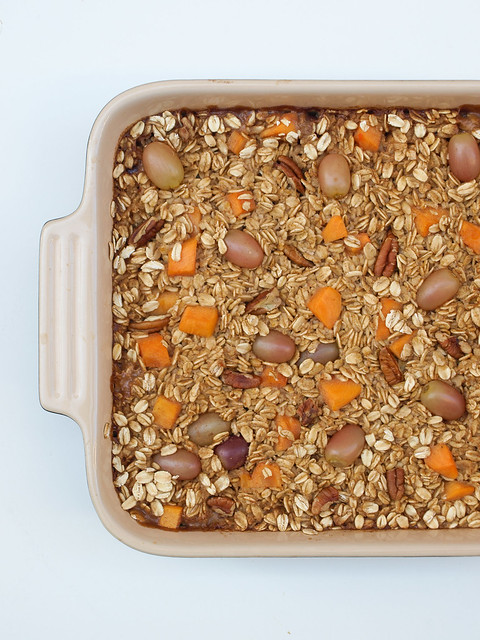
I had my first persimmon about a year ago. I've always admired their bright color and shape. Finally having picked one up, I fell in love at first taste. They have their own unique flavor...a sweet cinnamony flavor that I look forward to when they're in season. This recipe came about as I had a couple lying around. After a quick google search for persimmon recipes I decided to put them in a baked oatmeal, which by the way is a first for me. I found a baked oatmeal recipe for persimmons and cranberries which looked great and also one for persimmon and apple. I happen to have red grapes on hand, and after looking in my trusted Flavor Bible saw that persimmons and grapes compliment each other. I've so been wanting to try grapes from the oven so it was born this persimmon & grape baked oatmeal. The baked grapes are warm and juicy, while the persimmons are soft and flavorful. I also used a vanilla bean as I ran out of vanilla extract which was a nice touch and treat. If you have one on hand give it a try! I was super pleased with this combination of ingredients, although it sounds strange, but it's full of flavor, texture and not to mention your home will smell wonderful as it bakes. This is so easy to put together and well the worth the wait! 

Persimmon & Grape Baked Oatmeal

Persimmon & Grape Baked Oatmeal

Ingredients
  • 1 fuyu persimmon, peeled and diced
  • 1 cup red grapes (use your favorite color grapes)
  • 2 cups rolled oats
  • 1 1/2 teaspoons cinnamon
  • 1/2 teaspoon cardamom
  • 1/2 cup chopped pecans or walnuts
  • pinch mineral salt
  • 2 cups unsweetened almond milk
  • 1/3 cup pure maple syrup
  • 1 vanilla bean, split lengthwise and seeds scraped or 2 teaspoons vanilla extract

Preheat oven to 375 degrees F.

In medium bowl combine the oatmeal, cinnamon, cardamom, pecans and salt. In another bowl combine the milk, syrup and vanilla. Add wet mixture to the dry mixture, mix well. Add in persimmon and grapes, mix again.

Place mixture into a lightly greased 9 x 9 baking dish and bake for 40 minutes. Serve warm with a splash or two of non-dairy milk over top. 


Serves 4 or 2 generously.

Notes:

Sub in fresh cranberries for the grapes. Try using diced apples of choice in place of the persimmon. Use more of either of the fruits if you like. 


Enjoy!


Easy Spicy Mac n' Cheese


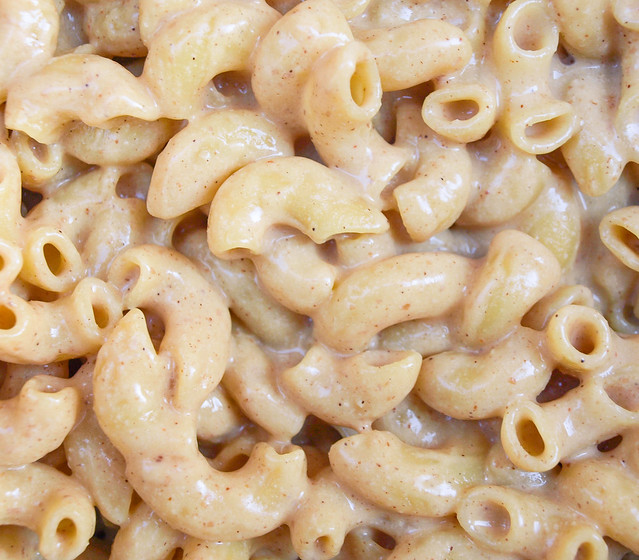
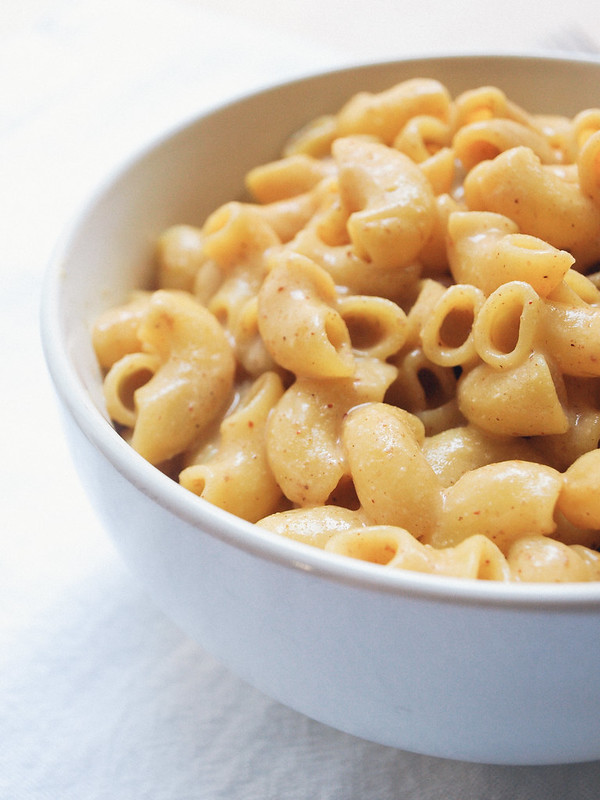
No frills here, just a simple mac n' cheese with a kick!

This is my second mac & cheese recipe to date. My other one, Winner! Mac and Cheese Bake, is supreme to any other's I have tried and is an easy nut based recipe. After much research, I found that vegan mac n' cheese recipes that win contests will undoubtedly contain cashews. Why you may ask. It's because cashews blend into a wonderful creamy texture making for a creamy sauce that can rival dairy based ones...and I agree! But I don't always want to use the high fat nut based recipes. In comes this one which is simply made from non-dairy milk, a little oil, flour, nutritional yeast and a few spices. That's it, and it came out great! I used almond milk for mine but you can opt for your favorite nut free non-dairy milk instead to make this nut free. This is a wonderful easy version that I can see being made again and again in my kitchen, adding steamed or roasted vegetables for variation. It may not win any contests (yet!), but for what it is it's another winner in my book. It hits the spot completely and I think you'll agree!

Easy Spicy Mac n' Cheese

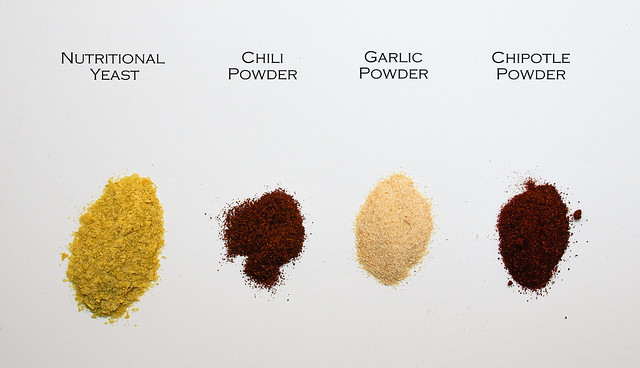
Using these key ingredients will give this mac n' cheese lot's of flavor! 

Nutritional yeast, aka 'nooch' or 'savoury yeast flakes', has a savory/umami characteristic. With its wonderful nutty, cheesy flavor it's perfect for cheesy flavored dishes. It's a great addition to your plant based diet in that it's a complete protein, low in fat and sodium. It also contains B vitamins, some are fortified with B-12 so be sure to seek out those brands. It's also If this is new to you, it's a flavor that you may have to adjust too. I've heard many do not like like it at first, but it will grow on you and you will find it to be a useful and tasty addition to your healthy diet. If your wondering what else you can do with nutritional yeast, you can find a few more ways to use it here: Winter Potato, White Bean & Kale Soup...Spicy Kale Pesto...Tofu Scrambles...Almond Parmesan...Vegetable Frittata...Cashew Ricotta Cheese. Lot's of ways to put nutritional yeast to use in your kitchen. You may even try sprinkling some on your popcorn!

Easy Spicy Mac n' Cheese

This is an easy, versatile mac n' cheese that will win hearts!

Easy Spicy Mac n' Cheese

Easy Spicy Mac n' Cheese

Ingredients
  • 8 oz. favorite pasta (I used quinoa pasta)
  • 1 1/4 cup unsweetened almond milk or your favorite unsweetened non-dairy milk
  • 2 tablespoons olive oil
  • 2 heaping tablespoons flour (spelt, rice, tapioca or all-purpose)
  • 1/2 cup nutritional yeast flakes
  • 1/2 teaspoon garlic powder
  • 1/4 teaspoon chili powder
  • 1/4 teaspoon chipotle powder
  • mineral salt, to taste

Cook your pasta according to package. Drain and place back in pot, set aside.
In a small/medium sauce pan, heat oil over medium heat, add flour and whisk to incorporate. Continue whisking and cook for 2 minutes. Add milk slowly, whisking constantly. Turn heat to low and cook until sauce thickens, about 8 minutes, stirring frequently. Remove from heat. Stir in nutritional yeast, salt, garlic powder, chili powder and chipotle powder. Stir until everything is incorporated and smooth again. Taste for flavor. 
Add sauce to the pasta, toss well, add more milk as needed and serve right away.

Notes: 

This recipe is just a template. Add as much of the salt and spices to suit your taste. You may even like to omit the chili and chipotle opting for a mild mac n' cheese. Or use either the chili or chipotle powder alone.

For the nutritional yeast, if using powder form reduce amount to about 1/4 cup. You can try playing around with the amount. I have used less, 1/4 - 1/3 cup, and still had a nice cheesy flavor. You may opt to start with less and add more to taste. 

Toss in steamed or roasted vegetables of choice with the pasta...broccoli, brussel sprouts, sun-dried tomatoes, tomatoes, spinach, kale and corn are a few that come to mind that will work with the flavors. I'm sure I missed a few and would love to hear your suggestions in the comments below.

To reheat, add a small amount of milk and heat over low until warmed.

You may also like to top with some almond parmesan! 

Enjoy!

Recipe inspired by the Free People Blog

Banana Flapjacks Gluten-Free

Banana Flapjacks Gluten Free

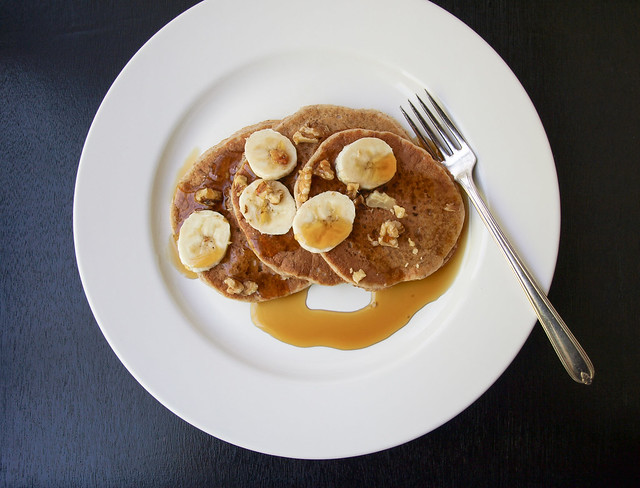
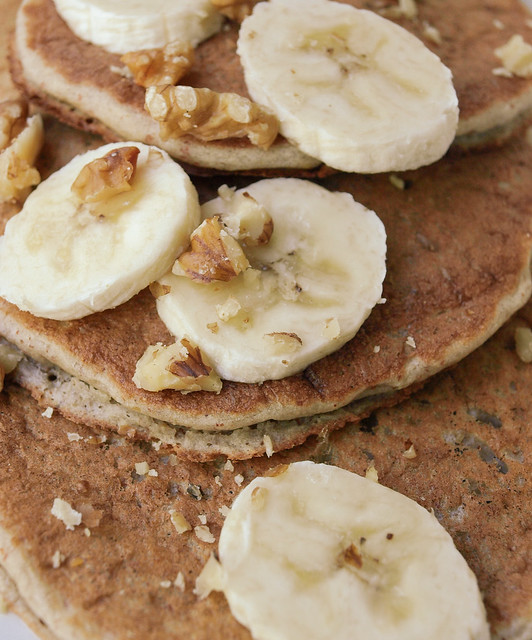
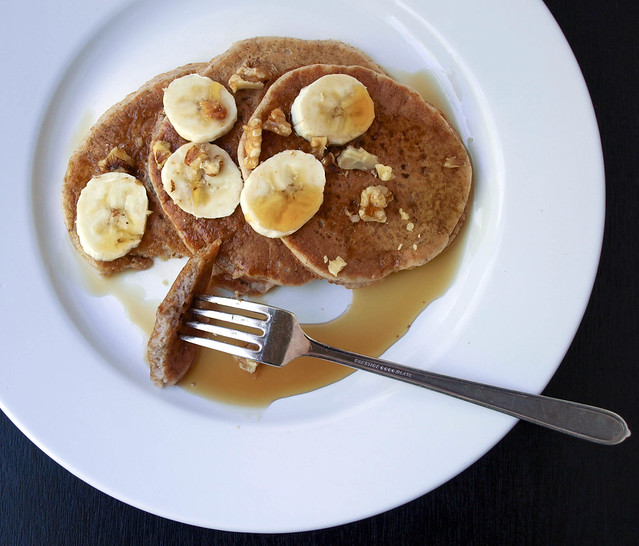
I'm trying to add in more gluten free recipes and this is a great addition to the breakfast list. These came out great with a nice mellow banana flavor. They puffed up nicely for being gluten free and had a nice golden color and soft center. This will happily be on the morning rotations. Feel free to substitute the flours listed with other flours of choice such as spelt, whole wheat or unbleached all purpose flours if your not following a gluten free lifestyle. Delicious and wholesome...a perfect way to start the day!

Banana Flapjacks Gluten Free

Banana Flapjacks - Gluten Free 

Ingredients (serves 2-3)
  • 1 ripe banana, peeled and sliced
  • 1/2 cup unsweetened almond milk, + more as needed 
  • 1 teaspoon vanilla extract
  • 1/3 cup gluten free all purpose flour or pancake mix (I use Bob's Red Mill)
  • 1/3 cup almond meal/flour*
  • 2 tablespoons flaxseed meal (ground flaxseeds), optional
  • 1 heaping teaspoon baking powder
  • 1/2 teaspoon cinnamon, optional
  • pinch of salt
  • 1 tablespoon coconut oil for the skillet/griddle if needed

In blender, process the banana, vanilla and almond milk until smooth (the magic bullet works great for this task). Alternately, using a small/medium bowl mash your banana until smooth, a few small chunks will be fine.

In a medium size bowl, combine the remaining dry ingredients. Add the wet ingredients to the dry ingredients and mix. Add additional milk to thin to desired consistency. (Adding extra milk will depend on the size of your banana and how much banana puree you will have. Add milk slowly until desired consistency. I usually have to add a tad bit more milk.)

Heat skillet/griddle on medium, add oil to grease if needed. Pour your pancakes to the desired size. I like to use just under 1/4 cup for each one. Cook until nicely golden brown on each side, about 2 minutes on each side. Serve with maple syrup and any other topping you may like.

Notes:

You can purchase almond flour or make your own at home by processing raw almonds in a food processor/blender until a flour/meal consistency.

You may like to add one tablespoon coconut palm sugar or pure cane sugar as well. Depending on how ripe your banana is, the added sweetness will compensate if your banana is not fully ripened. Also a dash or two of cinnamon works nicely.

Adapted from this recipe at Food 52


Enjoy!


Banana French Toast

Banana French Toast

French toast, a classic breakfast or brunch food. But we know it's great any time of day. I love French toast and this does not disappoint. Did you know, according to wikipedia, the earliest reference of French toast dates back to the 4th or 5th century and mentions soaking in milk, no eggs were used. It is perfectly possible, as you see here, to have wonderful French toast without the eggs we have become so accustomed to. And as creative creatures we are, we have adopted different variations...like this Banana French Toast or this Orange-French Toast. I find this to be flavorful with great texture bite after bite. It uses healthy ingredients like banana, almond milk, cinnamon and vanilla. This is wonderfully egg and dairy free...nothing but goodness here!

Banana French ToastBanana French Toast

       Bananas are one of the most widely eaten fruits in the world. They are affordable and come in their own package making them ideal options. Bananas also carry many health benefits, like easing depression with their high level of tryptophan, which is converted into serotonin (the good mood enhancer). Bananas also aid in digestion and are a great source of dietary fiber containing 16% of the recommended amount. They help against acid reflux, can help stabilize blood sugar in between meals and are a great source of vitamin B6. Find more about banana's from this article from Food Matters: 25 Powerful Reasons to Eat Bananas

Want to get more bananas into your life? Take a look at my Almond Chunky Monkey Ice Cream...it's raw, no ice cream maker needed and has only four ingredients! It would make for another great breakfast option. :)

Banana French Toast

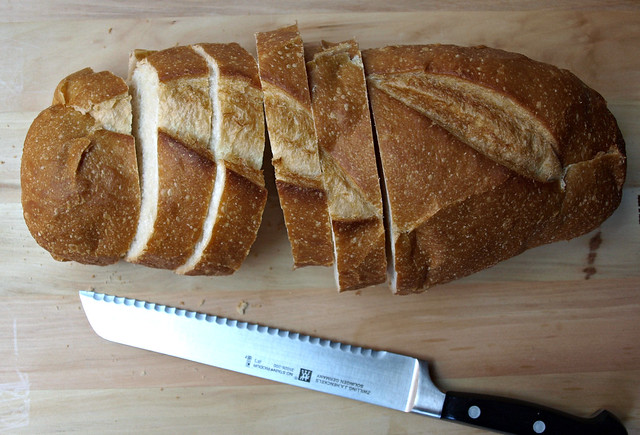
When making my french toast, I love picking up a loaf of bread that I can slice into whatever thickness I want. You can leave it for a day or two before using or if using a fresh loaf cut the pieces and set them out in the air until ready to use. It's better when they are a bit stale and dry. I prefer my slices on the thicker side, leaving a soft pillowy center. I happen to use a sourdough loaf here which gave my french toast an extra tang that I really enjoyed. This recipe works great with whole grain artisan bread, cinnamon swirl bread or any of the usual breads you typically use to make your French toast. 

Banana French Toast

Banana French Toast

Ingredients
  • 1 ripe banana
  • 3/4 cup almond milk, or milk of choice
  • 1/4 teaspoon cinnamon, or to taste
  • dash of nutmeg, optional
  • 1 teaspoon vanilla extract
  • coconut oil, for greasing 
  • French or sourdough loaf cut into any size you like, or use any bread you like (6 slices)
  • pure maple syrup for serving

In a flat bottom, shallow medium size bowl mash the banana until creamy and fairly smooth. Add the cinnamon, vanilla and optional nutmeg, mix well. Lastly, add in the milk and stir until combined.

Heat your skillet or griddle on medium heat. While griddle is heating slice your bread and gather your serving items.

Using about 1 teaspoon of coconut oil, grease the griddle/skillet (do this each time you make add a new batch). Quickly dip bread into wet mixture and flip to coat the other side being not to not let the slices soak, or you may have soggy french toast. Place slices on griddle/skillet and cook about 3 minutes on each side, or until golden on both sides. If slicing into thick slices you may find that you'll need a little extra time to completely cook the center. Serve with pure maple syrup and fresh fruit of choice. Serves three.

Enjoy!


Winner! Mac & Cheese Bake

Vegan Mac & Cheese Bake

Winner, Winner....Mac & Cheese Dinner!

Vegan Mac & Cheese Bake

First off, let me say that this was a supreme hit with my 12 year old daughter who usually turns her nose up at almost everything I make! As a matter of fact, I hear her in the kitchen right now nibbling on the left overs...this is a good day. We have a winner here...this mac & cheese bake will hit the spot for the kids, just don't say a word about what's in it. ;) Now had I added veggies in the bake, it would not have passed which is why this is just a simple recipe. Feel free to add in veggies like broccoli, kale, etc...whatever you may usually add into a mac & cheese bake! 

Vegan Mac & Cheese Bake

As for myself, I seriously could have sat there and ate this whole thing myself. I haven't had a mac & cheese bake in I don't know how long. The cheese is just great! I especially love the bread crumbs and the light dusting of smoked paprika I added on top of my portion. I paired mine with some sauteed Tuscan kale which was terrific! 

Vegan Mac & Cheese Bake

Vegan Mac & Cheese Bake

Ingredients
  • 16 oz. package pasta of choice (I used rice penne pasta) (works with an 8oz package too)
  • paprika, garnish

For the bread crumb topping
  • two pieces of bread or 1 cup bread crumbs 
  • tablespoon olive oil
  • twist or two of the salt grinder

Cheese Sauce
  • 1 1/2 cup raw cashews, preferably soaked for a 2 -3 hours (aides in digestion)
  • 1 3/4 cups water or unsweetened almond milk, or combo like I did
  • 1/3 cup nutritional yeast
  • juice of one large lemon or 1 tablespoon vinegar
  • 1 clove garlic
  • 2 tablespoons of extra virgin olive oil
  • 1 tablespoon white miso
  • 1 teaspoon onion powder
  • 1 teaspoon sea salt, or to taste
  • 1/4 to 1/2 teaspoon chili powder, to taste*
  • 1/8 teaspoon turmeric
  • dash of cayenne powder 

    Preheat oven to 350 degrees.

    Bring a large pot of water to a boil, cook your noodles al dente and set aside.

    While waiting for the water to boil, start with your bread topping first. I toasted two pieces of bread we had on hand really well and processed them in the food processor until crumbly, a high speed blender will work too. Place the crumbs in a small bowl, drizzle with olive oil and a twist or two of the salt grinder, mix well and set aside. Quickly rinse the processor/blender bowl and move on to the cheese sauce.

    For the cheese sauce: In food processor/blender, combine all of the cheese sauce ingredients except for about 1/2 of the water/milk and blend until creamy. Add remaining water/milk and blend again. Taste for flavor adding anything extra to suit your taste.

    Once pasta is cooked and drained. Add pasta back to the pot it was cooked in, add the cheese sauce and combine well. It may seem like too much liquid but the pasta will take care of most of it.

    In baking dish, pour mac & cheese and top with bread crumbs. Bake for 25 - 30 minutes, check after 15 minutes if crumbs are darkening too much for your liking, cover with foil.

    When done, let cool about 10 minutes and serve. The sauce will thicken upon standing.

    * The chili pepper adds a really nice flavor without being too powerful. If your worried about the spiciness, especially for the little ones, I would suggest using the smaller amount, taste and add more if desired.

    Notes: If you use a smaller baking dish or use ramekins, lessen the cooking time to 10 - 20 minutes depending on the size of dish you use.


    Enjoy!

    Why I ♥ this cheese so much is not only does it taste fantastic and its easy to make, but also because not one cow was harmed, or had their baby taken away, or just simply had to live a life of misery in order to satisfy a taste we have come accustomed to without even realizing how these animals are handled, especially through factory farming. That in itself makes all dairy products undesirable to me. I began my vegan journey for health reasons and soon found out just how unpleasant the meat and dairy industry really is. It is not a question of whether it's wrong or right to consume animals and their products...that depends on your circumstances. But I do believe that in this day and age we live in we simply do not need them to survive, and we definitely do not need to factory farm them the way it is being done.

    Veganism for me is liberation for ALL sentient beings! And it most certainly starts with my fork. :)

    To find out more about the life of factory farmed animals and animal rights you can visit PETA.org for more information.
    Back to top