BLACK BEAN FAJITAS + GUACAMOLE

BLACK BEAN FAJITAS + GUACAMOLE

Happy Friday to you all! For most of you, your work week is ending and you’re ready for some days off. Today I hope to inspire something wonderful for you to eat on your time off. I've always loved fajitas and if you’re like me you love them too. Finally, they have arrived to the recipe collection and I'm so happy to share them with you!

 I was so excited the day I was going to put this together, trying to do my full workout at the gym, just knowing I would be coming home to put this recipe together. I imagined a flavorful fajita mix with a big helping of guacamole on top. At last minute I added some shredded cabbage I had on hand, but that is optional. They are everything I wanted them to be and more! These are 'Eat like you mean it' tacos! I loaded mine and ate them just as you see here with no problem at all, hardly any mess either. Although the next couple tacos I had were a bit messier, just because I was at the bottom of the fajita mix where all the juiciness is. Not a bad thing at all, just be sure to have a couple extra napkins handy, and just like your mom might have told you, 'Eat over your plate'. I especially love making tacos, mainly because I love corn tortillas, but if you prefer flour tortillas, your options are open for making tacos or burritos (see notes). However you like, gather your ingredients and get ready to enjoy some of the best darn black bean fajitas you've ever had! At least I think they're pretty darn good. :)

Black Bean Fajitas + Guacamole

Just simple, colorful ingredients that come together in the best way. If you're lucky enough, you may even find a prepared fajita mix where you just add your spice and protein. That's exactly what I have here, 2 packages, but the ingredients will reflect buying and slices your own bell peppers and onion. The tortillas I used are homemade tortillas from Trader Joe's. They are thick and can withstand a large helping.

Black Bean Fajitas + GuacamoleBlack Bean Fajitas + GuacamoleBlack Bean Fajitas + Guacamole

Start with your guacamole. This is a very simple, classic chunky guacamole. I added chopped cilantro just before serving. Feel free to omit/add anything you like!

Black Bean Fajitas + GuacamoleBlack Bean Fajitas + Guacamole

Cook up your fajita mix and warm up the tortillas...

Black Bean Fajita Tacos + Guacamole

  Layer your tacos and serve you & yours some hearty black bean fajita tacos!

Black Bean Fajitas + Guacamole

BLACK BEAN FAJITAS + GUACAMOLE

Ingredients
  • 2 cans (15 oz.) black beans, drained and rinsed (about 3 cups)
  • 1 red bell pepper, cored and sliced
  • 1 yellow bell pepper, cored and sliced
  • 1 green bell pepper, cored and sliced
  • 1 small white onion, sliced
  • 1 tablespoon grapeseed or olive oil or 3 tablespoon water (for water saute)
  • 1 teaspoon chili powder
  • 1 teaspoon cumin
  • 1 teaspoon garlic powder
  • 1/4 - 1/2 teaspoon chipotle or cayenne powder, optional
  • 1/2 teaspoon mineral salt
  • corn or flour tortillas
  • 1/4 head of cabbage, shredded (optional), to serve
  • lime wedges, to serve

Guacamole
  • 2 - 3 avocados
  • 1 small jalapeno, most seeds removed and diced
  • 1/4 red onion, diced
  • small handful cherry tomatoes, quartered or 1 small tomato, diced
  • 1/2 teaspoon mineral salt, or to taste
  • few sprigs cilantro leaves, diced
  • 1 lime, squeezed

Start with your guacamole. Cut avocados in half lengthwise, remove seed and using a spoon scoop out the flesh, place in medium size bowl. Using a fork cut the halves into large chunks and mash about 1/3 - 1/2. Add diced jalapeno, onion, tomatoes, mineral salt and lime juice. Mix to incorporate. Add in chopped cilantro and mix again gently. TIP: To keep your guacamole from browning, pack your guacamole well, add about 1/4 - 1/2 inch water over top and place in the fridge. When ready to serve, drain water, mix and serve. This will keep air away preventing oxidation. 

In a large wok/skillet, heat oil or water over medium high heat. Add bell peppers, onions, and spices, cook for about 3 minutes, stirring occasionally. Add black beans and cook until heated through, about 3 more minutes. Adjust seasoning to taste adding anything extra you like.

Warm your tortillas. I like to heat mine carefully over the open flame of the stove top.

Serve layering the fajita mix on top of each tortilla, then add cabbage and a nice helping of guacamole. Add a squeeze of lime to each taco if you like.

Serves 3 generously.

Notes:

These can easily double as burritos by simply using large flour tortillas. Layer just as you would the taco leaving about 2 inches at one end, fold up the end over the mixture, take one side of the burrito, fold over and roll. This style will leave you with one open end at the top. It's the way I usually make my burritos. For a completely closed burrito, take a look at this tutorial from the Kitchn: How To Wrap A Burrito (So It Doesn't Fall Apart When You Eat It!)

I read about the water trick for the guacamole from an article at Huff Post Taste: How To Make The Best Guacamole: Tips and Mistakes To Avoid


Enjoy!


Mirin & Maple Roasted Almonds

Mirin & Maple Roasted Almonds

Sweet but not too sweet, these mirin & maple roasted almonds are a welcome addition to the recipe collection. This is my first recipe for roasted nuts and it's about time they appear here. The idea for the mirin & maple glaze came about from my Mirin & Maple Tempeh Stir Fry. I wasn't sure how this was going to turn out as this was something unusual for me but they came out great! It's simple flavors with sweetness from the mirin and maple, warmth from the cinnamon and chipotle, and a tad bit salty. And did you know, almonds are the most alkalizing nut. They're balancing, nourishing and contain high levels of potassium and vitamin E. In fact, nine almonds contain all the vitamin E you need for one day. They make for a great snack anytime of day. They're easy to stash and take along with you when you need a little something to get you through. These roasted almonds are really easy to put together and once ready will be done in 30 minutes. No reason to not have a batch of roasted almonds on hand when they're so easy to make!

Mirin & Maple Roasted Almonds

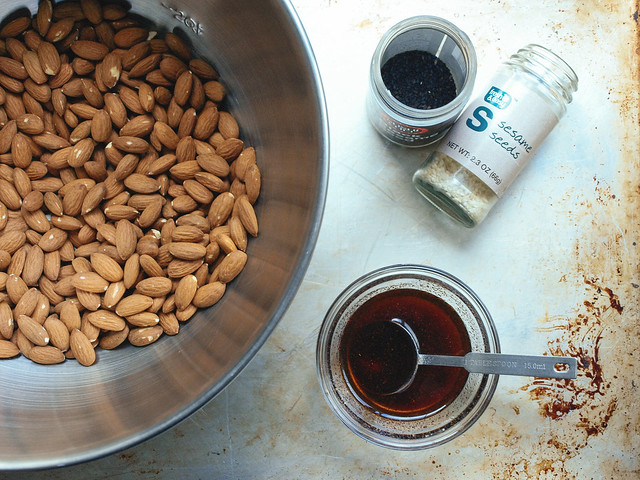
Start with fresh raw almonds. Mix your mirin, maple and spices.

Mirin & Maple Roasted Almonds

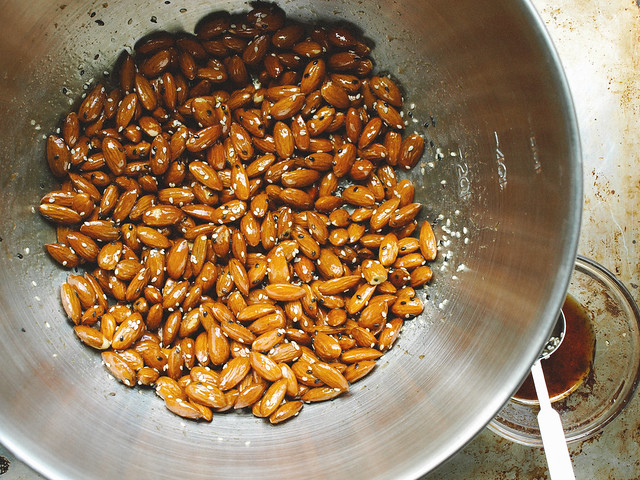
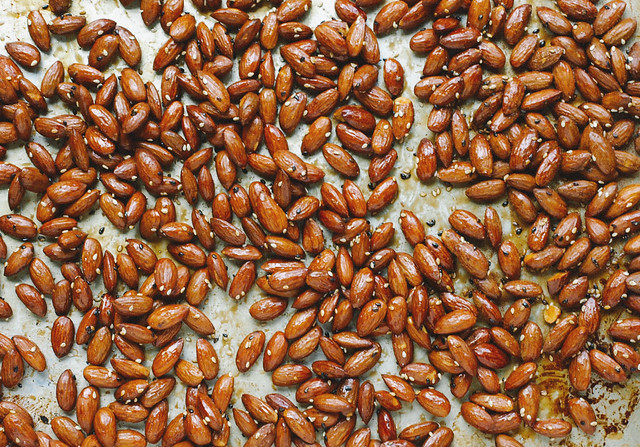
Add in your ingredients and toss to coat. Layer on baking sheet and roast.

Mirin & Maple Roasted Almonds

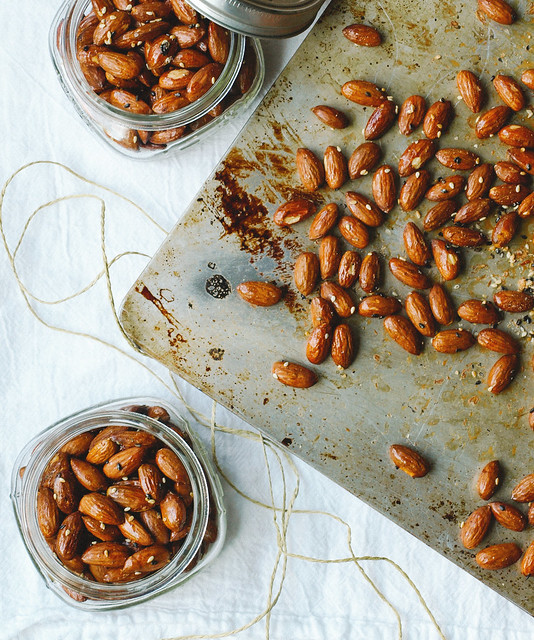
Remove from the oven, let cool and harden. And then you have beautifully glazed almonds that taste wonderful, will please your senses and satisfy your hunger. Be ready, these will be slightly addicting!

These roasted almonds are good things in little packages and make for great gift ideas too! 

Mirin & Maple Roasted Almonds

Mirin & Maple Roasted Almonds

Ingredients
  • 3 cups raw almonds (about 1 lb.)
  • 3 tablespoons mirin
  • 2 tablespoons pure maple syrup
  • 1/2 teaspoon cinnamon
  • 1/8 teaspoon chipotle powder
  • generous pinch or two mineral salt
  • 1 tablespoon white and/or black sesame seeds

Preheat oven to 350 degrees F.

In a small bowl, combine the mirin, maple syrup, cinnamon, chipotle powder and salt, mix well.

Put almonds in a large bowl, add the glaze and toss to coat. Add in sesame seeds and combine.

On a large baking sheet (a rimmed one would be ideal), spread mixture in an even layer...it's ok if some clump up. You may even like to sprinkle a little salt on top of the almonds for a little extra saltiness! Bake for 20 - 25 minutes, stirring once.

Remove from oven, let cool and harden.

Notes:

I recommend sourcing the best mirin you can get. Read the ingredient label and choose ones that are brewed traditionally and do not contain additives like corn syrup or use artificially produced koji enzymes. A good mirin will run you around $10 dollars and is worth the little extra compared to cheaper brands that use additives. You can also use it in the other recipes that call for mirin as mentioned in the first paragraph. It's great to use in marinades and stir fry's. You can use it to glaze your pie crusts and pastries too, giving them a beautiful shiny finish. It may also be used in making desserts such as poached fruit and puddings. 

I went a little easy on the spices so adjust to your preference. If you like a little more heat, add a tad bit more chipotle powder. I find these to be great without any spice as well, simply having the mirin, maple and salt as flavoring.

You may want to line your baking sheet with parchment paper for ease of clean up. I didn't personally use any and once cooled from the oven they did tend to stick to the bottom. I had to do a little scraping which didn't hurt my almonds one bit and just made for a little extra effort when cleaning the baking sheet. It's your call!

Enjoy!

Easy Spicy Mac n' Cheese


No frills here, just a simple mac n' cheese with a kick!

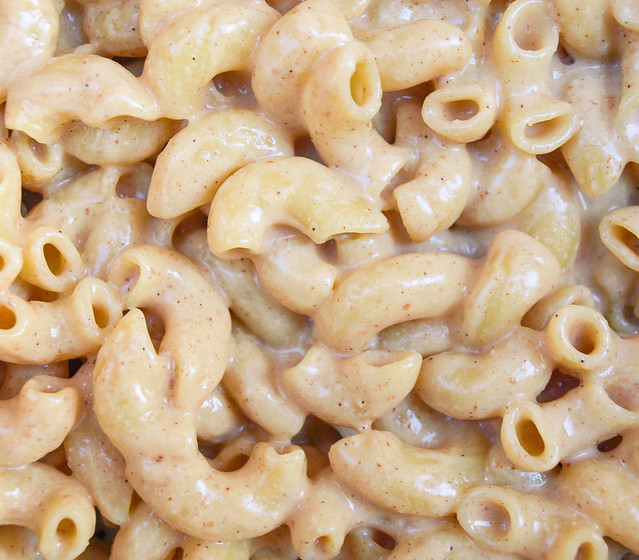
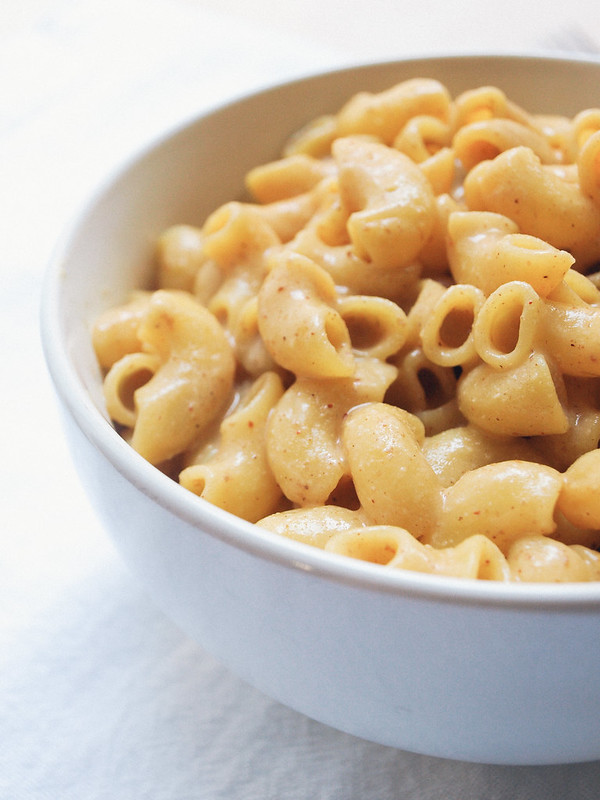
This is my second mac & cheese recipe to date. My other one, Winner! Mac and Cheese Bake, is supreme to any other's I have tried and is an easy nut based recipe. After much research, I found that vegan mac n' cheese recipes that win contests will undoubtedly contain cashews. Why you may ask. It's because cashews blend into a wonderful creamy texture making for a creamy sauce that can rival dairy based ones...and I agree! But I don't always want to use the high fat nut based recipes. In comes this one which is simply made from non-dairy milk, a little oil, flour, nutritional yeast and a few spices. That's it, and it came out great! I used almond milk for mine but you can opt for your favorite nut free non-dairy milk instead to make this nut free. This is a wonderful easy version that I can see being made again and again in my kitchen, adding steamed or roasted vegetables for variation. It may not win any contests (yet!), but for what it is it's another winner in my book. It hits the spot completely and I think you'll agree!

Easy Spicy Mac n' Cheese

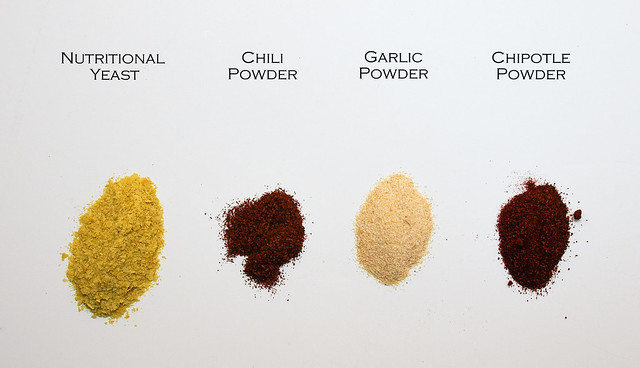
Using these key ingredients will give this mac n' cheese lot's of flavor! 

Nutritional yeast, aka 'nooch' or 'savoury yeast flakes', has a savory/umami characteristic. With its wonderful nutty, cheesy flavor it's perfect for cheesy flavored dishes. It's a great addition to your plant based diet in that it's a complete protein, low in fat and sodium. It also contains B vitamins, some are fortified with B-12 so be sure to seek out those brands. It's also If this is new to you, it's a flavor that you may have to adjust too. I've heard many do not like like it at first, but it will grow on you and you will find it to be a useful and tasty addition to your healthy diet. If your wondering what else you can do with nutritional yeast, you can find a few more ways to use it here: Winter Potato, White Bean & Kale Soup...Spicy Kale Pesto...Tofu Scrambles...Almond Parmesan...Vegetable Frittata...Cashew Ricotta Cheese. Lot's of ways to put nutritional yeast to use in your kitchen. You may even try sprinkling some on your popcorn!

Easy Spicy Mac n' Cheese

This is an easy, versatile mac n' cheese that will win hearts!

Easy Spicy Mac n' Cheese

Easy Spicy Mac n' Cheese

Ingredients
  • 8 oz. favorite pasta (I used quinoa pasta)
  • 1 1/4 cup unsweetened almond milk or your favorite unsweetened non-dairy milk
  • 2 tablespoons olive oil
  • 2 heaping tablespoons flour (spelt, rice, tapioca or all-purpose)
  • 1/2 cup nutritional yeast flakes
  • 1/2 teaspoon garlic powder
  • 1/4 teaspoon chili powder
  • 1/4 teaspoon chipotle powder
  • mineral salt, to taste

Cook your pasta according to package. Drain and place back in pot, set aside.

In a small/medium sauce pan, heat oil over medium heat, add flour and whisk to incorporate. Continue whisking and cook for 2 minutes. Add milk slowly, whisking constantly. Turn heat to low and cook until sauce thickens, about 8 minutes, stirring frequently. Remove from heat. Stir in nutritional yeast, salt, garlic powder, chili powder and chipotle powder. Stir until everything is incorporated and smooth again. Taste for flavor. 

Add sauce to the pasta, toss well, add more milk as needed and serve right away.

Notes: 

This recipe is just a template. Add as much of the salt and spices to suit your taste. You may even like to omit the chili and chipotle opting for a mild mac n' cheese. Or use either the chili or chipotle powder alone.

For the nutritional yeast, if using powder form reduce amount to about 1/4 cup. You can try playing around with the amount. I have used less, 1/4 - 1/3 cup, and still had a nice cheesy flavor. You may opt to start with less and add more to taste. 

Toss in steamed or roasted vegetables of choice with the pasta...broccoli, brussel sprouts, sun-dried tomatoes, tomatoes, spinach, kale and corn are a few that come to mind that will work with the flavors. I'm sure I missed a few and would love to hear your suggestions in the comments below.

To reheat, add a small amount of milk and heat over low until warmed.

You may also like to top with some almond parmesan! 

Enjoy!
Recipe inspired by the Free People Blog

Quinoa & White Bean Veggie Burger

Quinoa & White Bean Veggie Burger

It's burger time...

Quinoa & White Bean Veggie Burger

Quinoa & White Bean Veggie BurgerQuinoa & White Bean Veggie Burger
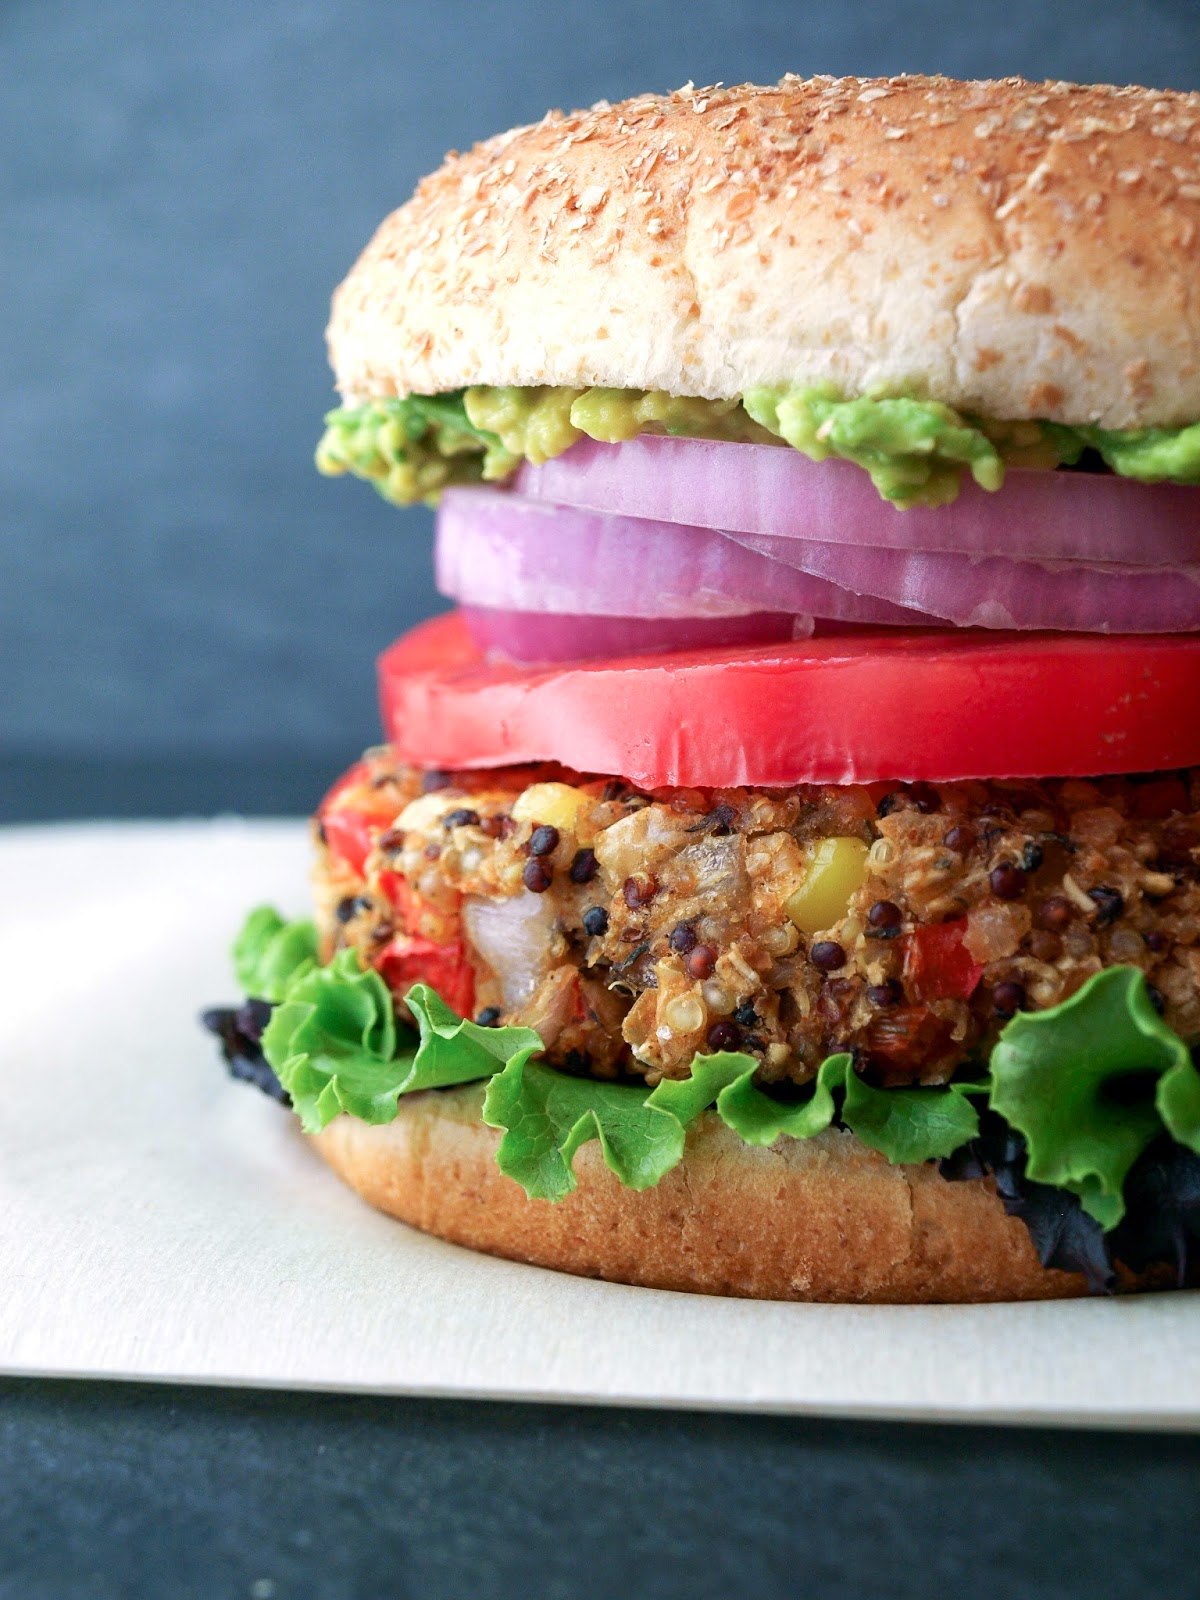
I haven't done a veggie burger in almost a year. It was time to add a new one to the list and this one is as delicious as it gets. These patties are loaded with protein and fiber as well as other beneficial nutrients, and they are very filling. As far as veggie burgers go this is fairly easy. I have to admit that I'm a pretty lazy cook and don't like a lot of steps. I prefer to spend as little time as possible preparing a meal as well as cleaning it up. Fyi, you can make this recipe even simpler by using a pre-made flour instead of processing oats like I did. The patties came out fantastic and held up great without falling apart, and they were not dry at all, nor were they mushy. The texture, taste and visual appeal all hit the mark. Once layered with all the extra goodies this burger was supreme and the best veggie burger I've ever had...am I biased...maybe, but these were divine! And, if you don't feel like having it on a bun, by all means top your veggie burger on a bed of fresh leafy greens with a squeeze of lemon, some avocado, salt and pepper...so good just like that! 

Quinoa & White Bean Veggie Burger

I loaded this beauty up with leafy greens, slice of heirloom tomato, sliced red onion, whole grain mustard, mashed avocado and a nice drizzle of sriracha. Lot's of flavors going on and I loved it. As the saying goes, "Eat like you mean it!" 

Quinoa & White Bean Veggie BurgerQuinoa & White Bean Veggie Burger

Quinoa & White Bean Veggie BurgerQuinoa & White Bean Veggie Burger

Quinoa & White Bean Veggie BurgerQuinoa & White Bean Veggie Burger

And now for the money shot! Having fun with my iphone and the VSCO Cam app (it's free), managed to create this final mouthwatering picture...veggie love at first sight!

Choose your cooking style...stove top

Quinoa & White Bean Veggie Burger

Ingredients (makes four patties)
  • 1/2 cup quinoa (I used tri-color)
  • 1 cup water
  • 1 teaspoon garlic powder
  • 3 teaspoons thyme, divided (oregano would be good too)
  • 1/2 - 1 teaspoon smoked paprika 
  • 1/2 teaspoon ground chipotle pepper, optional
  • 1 can (15 oz.) white beans (I used cannellini), drained and rinsed
  • 1/2 cup corn, fresh or frozen (about 1/2 fresh corn off the cob)
  • 1/2 cup red bell pepper, finely diced (about 1/2 bell pepper)
  • 1/2 cup shallot, finely diced (about 1 medium) or red onion
  • juice of one lemon
  • 1/3 cup oat flour, or flour of choice 
  • 1 Ener-G egg replacer or 1 flax egg (1 Tbs flaxseed meal + 3 Tbs water), optional*
  • mineral salt & cracked pepper, to taste
  • coconut or olive oil, to grease

To Serve:
  • tomato, sliced
  • leafy greens
  • avocado, sliced or mashed
  • red onion, sliced
  • whole grain or dijon mustard (hummus or vegan mayo is great too)
  • sriracha or Sriracha Cashew Cream (use the sriracha cream in place of mustard)
  • burger buns of choice

Start by making your flax egg or ener-g egg replacer and set aside. If baking in the oven, turn oven to 375 degrees F. (It's helpful to read instructions first before making the patties)  

In a medium pot, bring water, quinoa, garlic powder and 1 teaspoon thyme to a boil. Cover, reduce heat and simmer for 15 minutes. Once done, remove cover and let set for 10 minutes.

While quinoa is cooking, prepare your corn, shallot and red pepper. Be sure to dice your onion and red pepper fairly fine, they should be about the same size as the corn kernels.

Next, mash your beans. I mashed about 3/4 of the beans leaving a quarter of the batch whole or somewhat whole.

Once quinoa is ready, add the quinoa to the beans along with the shallots, red pepper, corn, remaining 2 teaspoons thyme, smoked paprika and optional chipotle powder and lemon juice. Mix well. Add in the flour and egg replacer, mix well again. Season to taste with salt, pepper and more of the other spices. We all vary on how strong we like our spices...you can't take out but you can always put in.

Now to divide and make your patties. I like to pat my mixture into the bowl a little and divide it with a knife into 4 sections, making a plus sign if you will. Take each section and pack it tightly into a ball in the palm of your hands. It should be about the size of your hand. Flatten with your palms and place on hard surface. Cup the edges with your palms and tighten them in a bit and flatten the top to the desired size. Mine were about 1/2 inch thick by 3 1/2 - 4 inches.

Cook one of two ways:

In the oven at 375 degrees on a greased or parchment lined cookie sheet for 30 minutes, turning once after 15 minutes. I also added a sprinkle of himalayan salt to the top before baking.

OR

In a large skillet, heat 1 tablespoon coconut oil or olive oil over medium to medium high heat. Cook patties about 4 - 5 minutes on each side.

I cooked both ways and had no preference. They both held up well and cooked great. (pic shows skillet cooked)

Serve on bun or bed of leafy greens with choice of toppings!

Notes:

The patties can be made ahead of time and stored covered in the refrigerator for a couple days prior to cooking.

*I have a sneaky feeling that this can be made without the use of any egg replacer if you don't have it available. I have it here for good measure until I try without (in the comments you will see that it has been done). If you decide not to use an egg replacer, when adding the flour, just try adding two - three tablespoons of water instead if needed...the amount may depend on the flour you're using.

For mashed avocado, cut open avocado, remove seed and using a fork, mash the flesh right in the skin...it's like a bowl. Spread on bun for a great creamy condiment!

I hope this makes you want to get in the kitchen and cook.
I encourage you to make these soon and often...

Enjoy!
Chipotle Roasted Chickpeas in a Jar

Chipotle Roasted Chickpeas in a Jar

When you need a great snack on the go or just around the house, these roasted chickpeas will come in handy. They are full of nutrients, fiber, protein, all the good stuff your body needs and texture and flavor your taste buds with thank you for. These are super versatile, you can do just about anything with them in the way of seasoning. Have fun experimenting with various flavors to keep it interesting and fun!

Chipotle Roasted Chickpeas in a Jar

So easy to put together. I start with dried chickpeas, soak them overnight and cook them before roasting. You can just as easily use canned chickpeas as well, just be sure to drain and rinse them well. Once coated (as shown above) place in the oven...

Chipotle Roasted Chickpeas in a Jar

When done, let cool a few minutes and they are ready to go. Keep them in a jar and they will be handy to take along with you for whenever the snacking urge occurs...

Chipotle Roasted Chickpeas in a Jar

Chipotle Roasted Chickpeas in a Jar

Ingredients
  • 2 cups chickpeas, cooked...or 1 (15 oz) can garbanzo beans (aka chickpeas), drained and rinsed
  • 1 tablespoon sesame or olive oil
  • 1 teaspoon chipotle powder
  • 1/2 teaspoon garlic powder
  • salt to taste

Preheat oven to 400 degrees.

Place ingredients in a small/medium size bowl and combine well. Place in a single layer on a roasting pan or rimmed cookie sheet. Bake for about 40-50 minutes mixing them around every 15 minutes or so until chickpeas have a nice roasted look and are crispy. Let cool for 10 minutes before serving. 

Feel free add extra spice if you like a little spicier. Also, mix up the spices using whatever you like such as chili powder, cayenne pepper, cumin, curry, thyme, smoked paprika, vinegar & salt, cinnamon, sriracha, lime, garam masala, salt & cracked pepper, lemon pepper, nutritional yeast, etc...

Keep your jarred chickpeas crunchy by adding some rice to bottom of your jar or container. They seem to soften up a bit once sealed away, the rice will help soak up extra moisture to keep them crunchy. You can also keep them in a container that let's air flow through so they can keep their crunch and be sure to eat within a few days.

Chipotle Roasted Chickpeas in a Jar

However you spice them...Enjoy!

Yukon Gold and Sweet Potato Home Fries


Home fries are always a welcome addition to any cozy morning in the cool fall and winter months. These have a nice combination of a sweet and spice going on. The addition of a little chipotle powder brings an added warmth to the potatoes. This dish is easy to put together and will surely be enjoyed with those whom are so lucky to be apart of your meal. They were delicious!

On a side note, I was gifted these wonderful wooden utensils for Christmas from my son's girlfriend of two years. Time flies...it's hard to believe they have been together that long. My high school sweethearts they are! You never know what the future holds, my parents were high school sweet hearts and are still together after almost 45 years. These are lovely, and much appreciated, utensils from a lovely girl. And they worked wonders for dishing out these home fries. :)


Yukon Gold & Sweet Potato Home Fries 

Ingredients
  • 5 or 6 Yukon gold potatoes, cut into 1 inch cubes
  • 2 large sweet potatoes, cut into 1 inch cubes
  • 1 red bell pepper, chopped 
  • 1 onion, chopped 
  • 2 tablespoons olive oil or sesame oil 
  • 1 tablespoon thyme, dried or fresh 
  • 1 teaspoon garlic powder 
  • 1/2 teaspoon chipotle powder, or to taste 
  • dash or two allspice or nutmeg, optional 
  •  Himalayan salt & cracked pepper, to taste 

In large skillet over medium heat, heat oil and cook onions and bell peppers until onions are softened, about five minutes. Add potatoes, herbs and spices, cook on medium to medium low heat, uncovered, for about 25 - 30 minutes stirring occasionally. The sweet potatoes may take longer than the Yukon golds, covering the skillet with the lid ajar will help. You want your potatoes to brown and crisp a little on the edges. Be sure to scrap the bottom of the skillet as well to get all the pieces that may stick to the bottom...they will add nice flavor and some crispy texture to your dish. Serve right away. 

Serves 4 generously.

 • • • • • 

I paired mine with a tofu scramble which included sun-dried tomatoes, onions, thyme, garlic powder, turmeric, dash of chili powder, sea salt, cracked pepper and a little bit of chopped parsley. Just simple and easy, using what I had on hand. Spices make all the difference in the world. Hope this inspires something wonderful within. :)


 Enjoy! 
Adapted from this recipe at Epicurious

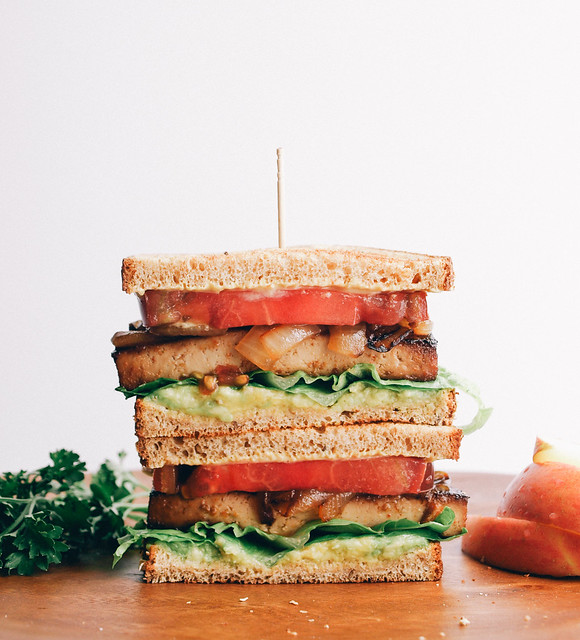
SMOKY CHIPOTLE MAPLE T.L.T.

SMOKY CHIPOTLE T.L.T SANDWICH

This is reminiscent of a B.L.T in some ways, minus the crunchiness of the bacon, but I rather prefer this one! So my version will be called a T.L.T., or better yet, Smoky Chipotle T.L.T. If you've followed my blog long enough, you will know I love adding a little spice to my foods whenever I can! 

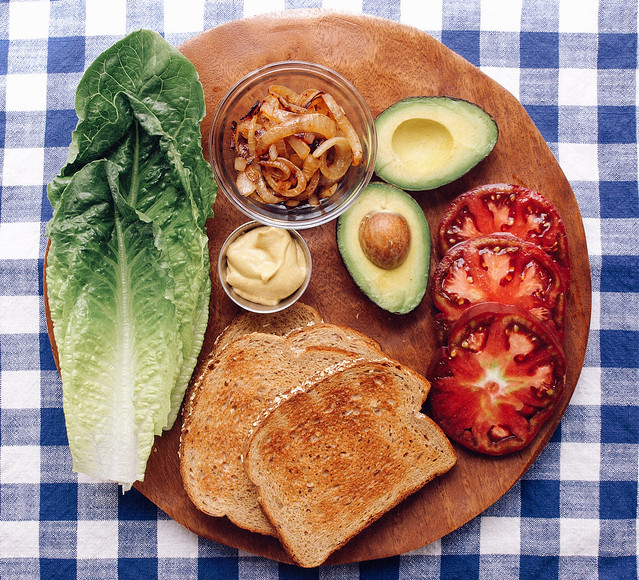
SMOKY CHIPOTLE T.L.T SANDWICH

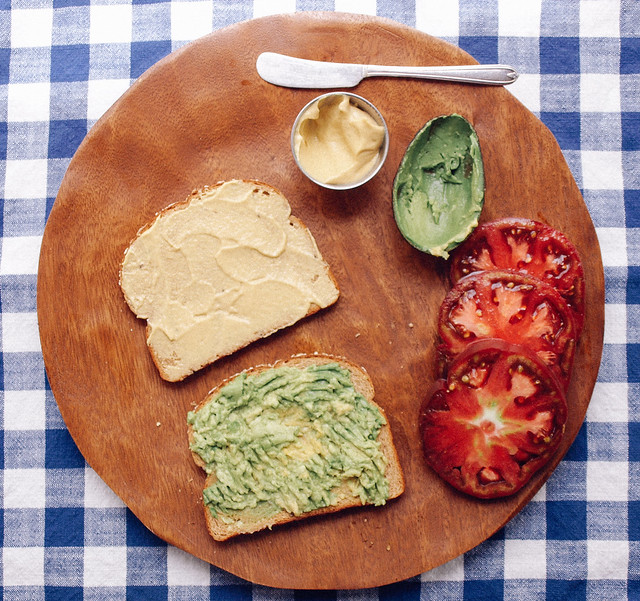
I've had my eye on this recipe from I Love Vegan for a while and finally got around to putting it together. Let me tell you, it did not disappoint! My only additions were adding a little bit of ground chipotle pepper and using a bit more of each ingredient than what is called for in the original recipe. I love the caramelized onions and the avocado mash as the condiment...so good! I tend to use avocado or a light flavored thin hummus as a sandwich spread all the time now. They both are wonderful!  A hummus spread would be great here too. If you use the avocado, I ensure you that you will not miss the old standard spreads. The tomato will also lend some nice juices into the mix. This was a great find and a keeper! Plus, it will leave your home smelling delicious. :)

SMOKY CHIPOTLE T.L.T SANDWICH

Start by spreading your mustard and mashed avocado...

SMOKY CHIPOTLE T.L.T SANDWICH

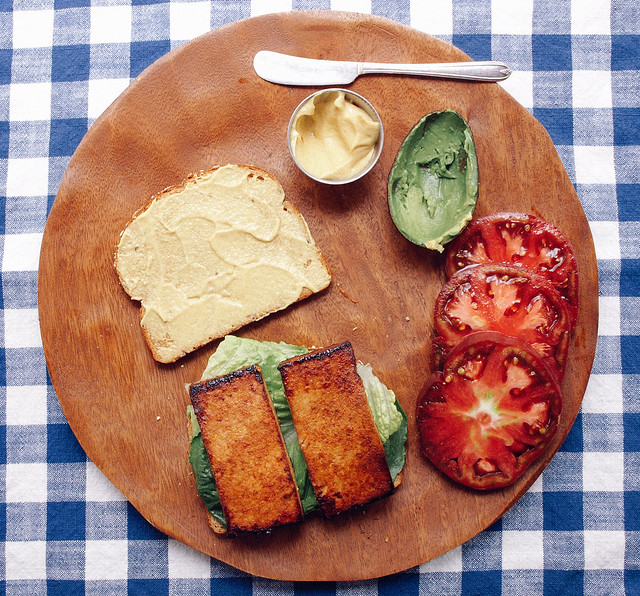
Add your leafy greens and tofu slices...

SMOKY CHIPOTLE T.L.T SANDWICH

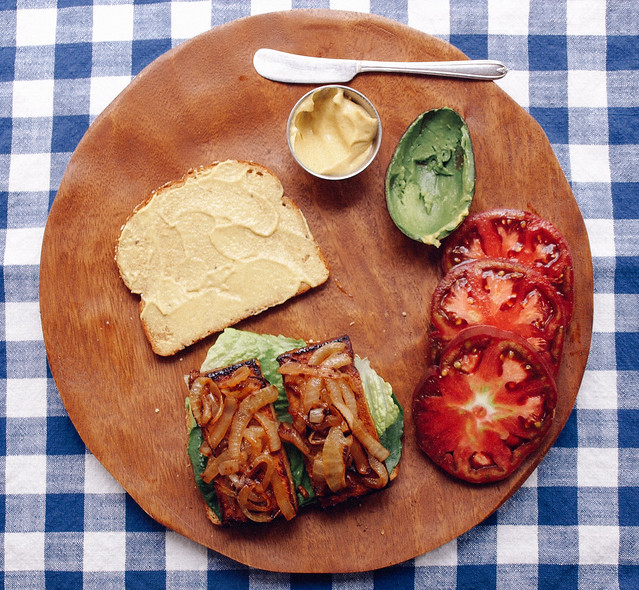
Top with grilled onions...

SMOKY CHIPOTLE T.L.T SANDWICH

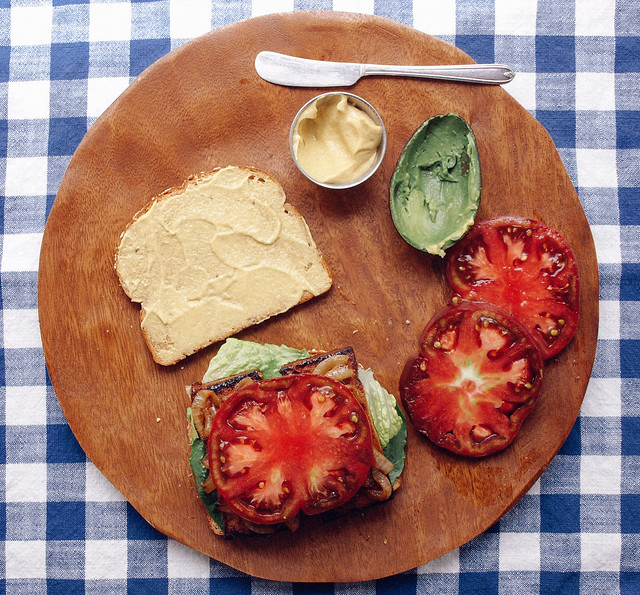
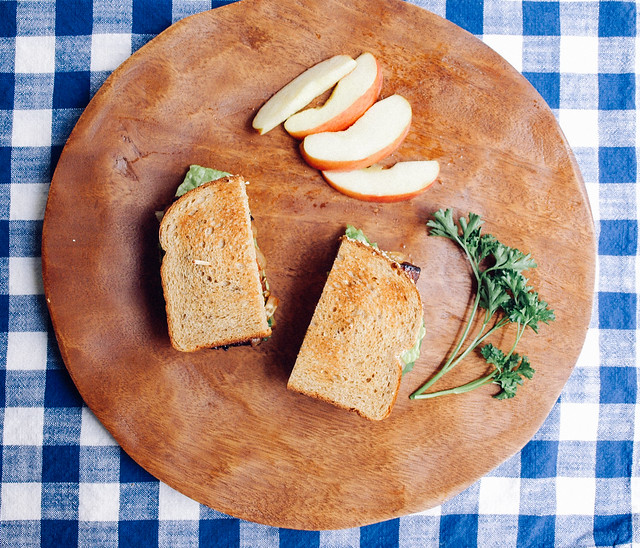
Lastly, add tomato, I used a large deep red heirloom tomato I had on hand. Place remaining slice of bread on top and slice in half. 

Pairs great with fresh sliced apples!

SMOKY CHIPOTLE T.L.T SANDWICH

SMOKY CHIPOTLE MAPLE T.L.T.

Ingredients
  • 1 block (15oz) organic firm or extra firm tofu
  • 1 onion, thinly sliced
  • 2 tablespoons sesame or olive oil, divided
  • 1 medium to large tomato, sliced thin
  • Dijon or stoneground mustard, to spread
  • 1 1/2 avocados, mashed, to spread
  • a few leaves of your favorite sandwich greens, red or green leaf, romaine, iceberg, etc...
  • salt to taste
  • 6 slices bread of choice
Marinade
  • 2 tablespoons pure maple syrup
  • 1 tablespoon tamari, bragg's liquid amino's, coconut amino's or soy sauce
  • 1 tablespoon water 
  • 1/4 teaspoon liquid smoke
  • generous dash of garlic powder or 1 clove garlic, minced
  • dash chipotle powder, to taste

Remove tofu from the package. Turn tofu on its side and slice in thirds, creating 3 large slabs. Gently press each slab between a clean dish towel or paper towels to remove some of the excess water. Cut the slabs in half. You should have six pieces that look like large domino (rectangular) shapes. 

In a medium sized shallow dish, mix together the marinade. Place tofu in the dish and let soak for about 1 hour turning carefully once or twice in between. 

Once the hour is almost up, caramelize your onions using 1 tablespoon oil. Heat oil over medium heat, add onions, turn down heat to medium low, stir often and cook until they start to brown and caramelize. May take 10 to 15 minutes or so. Once done, set aside.

In same skillet, heat remaining oil and cook tofu over medium high heat. Once tofu has browned, about 5 minutes, gently flip and brown the other side. It's ok if it gets a little crispy too! If you feel it is drying out too much, add some of the juices from the bowl it marinated in for extra moisture. When done, remove from heat.

Toast your bread. Spread one side of toast with mustard and the other with a layer of mashed avocado, about 1/2 avocado. Over the avocado, layer your lettuce, tofu, onions and tomato. Top with your other slice of bread. 

Serves three.

Enjoy! 
I'd love to see your masterpieces!
#thesimpleveganista

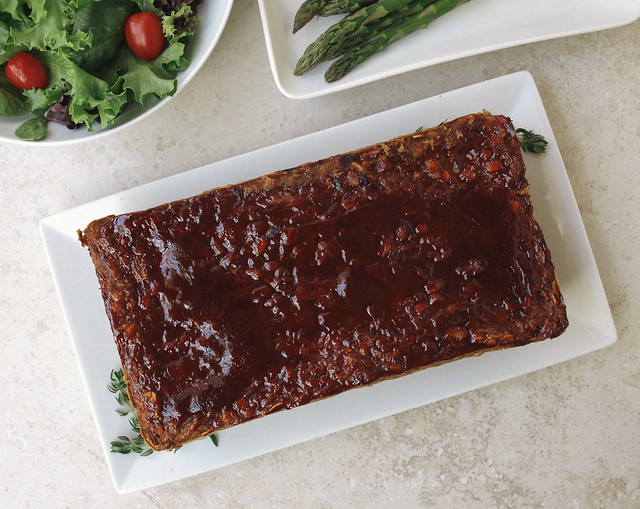
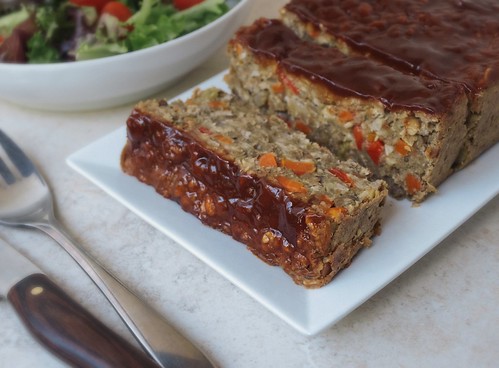
The Ultimate Vegetable Lentil Loaf

The Ultimate Vegetable Lentil Loaf

After a few attempts (five to be exact) at making this lentil loaf, I have finally come up with a veggie version that tastes pretty darn good and is extremely filling. I wanted to keep this easy with ingredients you may already have in your pantry. After doing a little digging I was able to piece this together from a few resources like the one from Made to Create which is wonderfully simple and also had good reviews from when I shared it on my Facebook page! And also this one from Oh She Glows which is a walnut version using apples and raisins but I wanted one with all veggies (Hers looks delicious and I will be trying it too). Last but not least, I referenced this recipe at My Vegan Cookbook. 

I especially love the glaze for the top of this loaf. You could serve some extra on the side, or double the amount if you like and put a little extra on. And if you like spicy, you'll love the ground chipotle pepper in this recipe with the glaze, such a nice combo of sweet and spice! I found the higher amount of chipotle listed below to be just perfect for myself, adjust to your liking starting with the smaller amount if you're not a fan of spice. Be prepared, one slice will most likely fill you up, it does for me! I'm not kidding when I tell you this is one hearty and filling lentil loaf. Leftovers make for great sandwiches. Store the loaf in the refrigerator for up to a 5 - 6 days. Sub in other veggies if you like. Some have left comments of adding in zucchini for the bell pepper. You get the idea, you can adjust to what you have on hand or prefer. Now on with the recipe...make a loaf and share the love!

The Ultimate Vegetable Lentil Loaf

The Ultimate Vegetable Lentil Loaf

Ingredients

Loaf
1 cup dry lentils (use green/brown)
2 1/2 cups water or vegetable broth
3 tablespoons flaxseed meal (ground flaxseeds)
1/3 cup water (6 tablespoons)
2 tablespoons olive oil for sauteing or steam saute using 1/4 cup water
3 garlic cloves, minced
1 small onion, finely diced
1 small red bell pepper, finely diced
1 carrot, finely diced or grated
1 celery stalk, finely diced
3/4 cup oats (I used GF oats)
1/2 cup oat flour or finely ground oats (any flour of choice will work here too)
1 heaping teaspoon dried thyme
1/2 heaping teaspoon cumin
1/2 teaspoon each garlic powder & onion powder...for good measure!
1/4 - 1/2 teaspoon ground chipotle pepper, optional
cracked pepper & sea salt to taste

Glaze
3 tablespoons organic ketchup
1 tablespoon balsamic vinegar
1 tablespoon pure maple syrup


Rinse lentils. In large pot add 2 1/2 cups water with lentils. Bring to a boil, reduce heat, cover and simmer for about 40 minutes, stirring occasionally. It's ok if they get mushy, we are going to roughly puree 3/4 of the mixture when cooled. Once done, remove lid and set aside to cool (do not drain), they will thicken a bit upon standing, about 15 minutes is good.

Preheat oven to 350 degrees.

In small bowl combine flaxseed meal and 1/3 cup water, set aside for at least 10 minutes, preferably in the refrigerator. This will act as a binder and will thicken nicely upon sitting.

Prepare vegetables. In saute pan heat oil or water over medium heat. Saute garlic, onion, bell pepper, carrots and celery for about 5 minutes. Add spices mixing well to incorporate. Set aside to cool.

Using an immersion blender or food processor, blend 3/4 of the lentil mixture. For me this was an important part, I tried it other ways and this worked to help as a binder. If using an immersion blender, tilt your pot slightly to the side for easier blending. Alternately, you can mash the lentils with a potato masher or fork.

Combine sauteed vegetables with the lentils, oats, oat flour and flax egg, mix well. Taste, adding salt and pepper as needed, or any other herb or spice you might like. Place mixture into a loaf pan lined with parchment paper, leaving it overlapping for easy removal later. Press down firmly filling in along the edges too.

Prepare your glaze by combining all ingredients in a small bowl, mix until incorporated. I recommend making each tablespoon heaping so you have plenty of this great sauce on top. Spread over top of loaf and bake in oven for about 45 - 50 minutes. Let cool a bit before slicing.

Serves 8.

 Your work is done...except for the dishes...maybe you can delegate that to someone else. :)

The Ultimate Vegetable Lentil Loaf

Enjoy!

Back to top