QUINOA CHILI VERDE

QUINOA CHILI VERDE

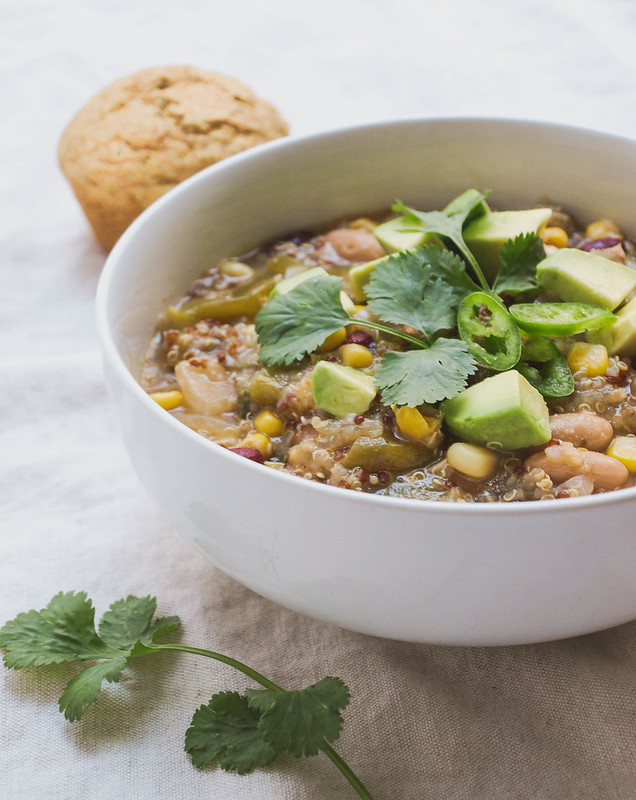
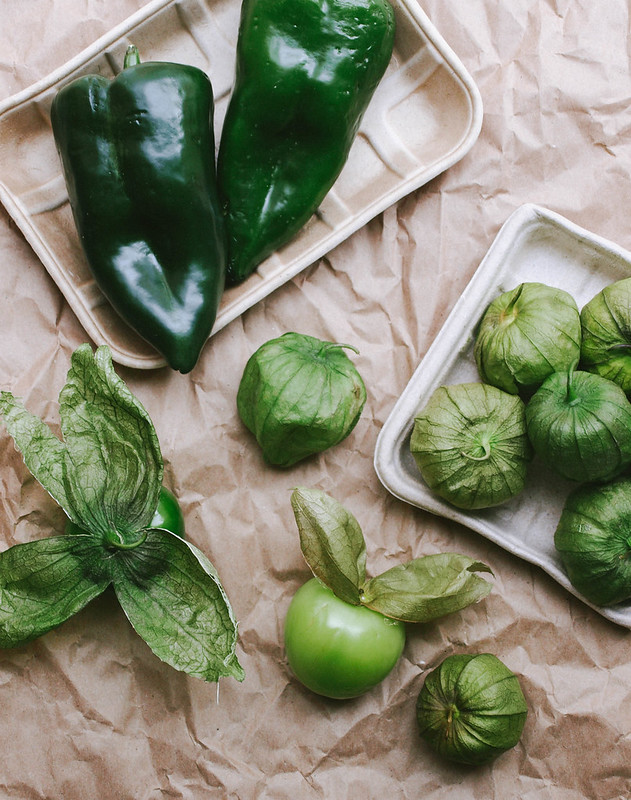
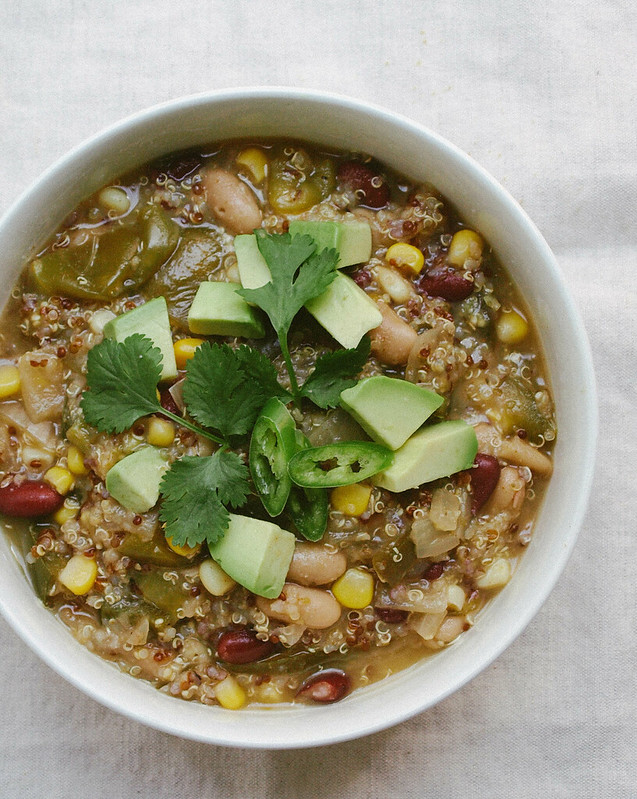
Here I am again with another recipe for the Soups, Stews & Chilis collection (I just can't help myself!). This recipe has been in the works since December and I'm finally getting around to adding it to the collection. The poblanos and tomatillos have been sitting in my refrigerator for long enough (not since December though lol). So without further ado, I share with you my recipe for Quinoa Chili Verde. It's a hearty and brightly flavored chili. The tomatillos are what brighten this chili with their citrus notes. I've added just enough herbs and spices to be noticed, I didn't want to overpower it, but you can add more if you like. I used a flavorful vegetable broth so if using water you'll most likely want to up the amounts to suit your taste. My first attempt at this I added tempeh but for this recipe I've left it out. It wouldn't hurt to add a package when combining everything while crumbling it between your fingers. Tempeh will make it that much heartier (and its an excellent soy product for most!). I also added some corn which adds color and a nice sweetness. For the beans, you can use any mix. I would stick with any mix of cannellini, kidney, pinto or black. This chili is a one pot wonder and will be ready in under an hour from start to finish. You can be sure this green quinoa chili is going to be a nice departure from the usual chili routine. Round up your ingredients and give it a try!  
QUINOA CHILI VERDE

I know tomatillos and poblanos are in season and abundant during the summer months, but here in California we have them year round tempting me every time I see them to take them home and make something wonderful. Corn is the only ingredient in the recipe that isn't fresh year round so I used 1 cup frozen. Hopefully you can find all the produce in the winter months with ease or you'll have to wait for the warmer season.
QUINOA CHILI VERDE

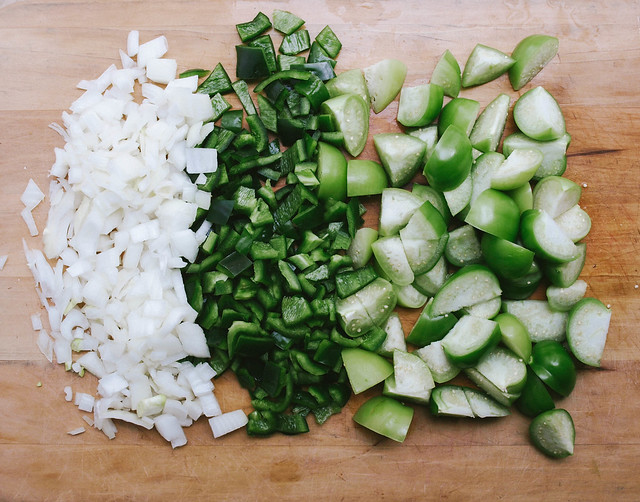
The only thing you have to chop and dice are the onion, peppers and tomatillos. I left my tomatillos on the chunky side, they will soften and fall apart, but you can dice them up as small as you like. 

Get ready, gather your ingredients and start cooking!
QUINOA CHILI VERDE

QUINOA CHILI VERDE

Ingredients
  • 1 tablespoon olive oil or 3 tablespoons water 
  • 1 onion, diced
  • 1 teaspoon garlic powder
  • 1 heaping teaspoon dried oregano
  • 1 teaspoon cumin
  • 1 teaspoon chili powder
  • 12 oz tomatillos, diced or quartered or 1 can (15oz) crushed
  • 2 poblano or Anaheim peppers, de-seeded and diced
  • 1 corn off the cob or 1 cup frozen or canned sweet corn
  • 1 can (15 oz) cannellini beans or pinto beans, drained and rinsed
  • 1 can (15 oz) kidney beans, drained and rinsed
  • 1 cup dry quinoa
  • 4 cups vegetable broth
  • salt to taste

optional garnish

In a large pot or dutch oven, heat oil/water over medium heat and sautee onions until softened, about 5 minutes. Add garlic powder, oregano, cumin and chili powder, cook for 1 minute more stirring frequently, or just until spices and herbs become fragrant. Add tomatillos, poblanos, corn, beans, quinoa and vegetable broth, bring to a boil, cover, reduce heat to low and simmer for 30 minutes. Remove from heat, uncover and let rest about 10 minutes before serving.

Serve in individual bowls topped with garnish of choice. Pairs well with corn bread too, either on the side or broken up in your chili!

Serves 4 - 6.

Notes:

Add in a package of organic tempeh for added hardiness. This Three Grain Tempeh is my favorite flavorwise.

You can rinse your quinoa if you like. I honestly usually skip this step but if you prefer you can run the quinoa under cool running water using a fine mesh seive.

Adjust the spices to your taste. If using broth you may like it as is, if using water you may like to add more.

This can also be made in the crock pot/slow cooker, add all the ingredients, cover with the vegetable broth and cook on medium or medium-low for 4 hours.
MEDITERRANEAN KALE SALAD

MEDITERRANEAN KALE SALAD

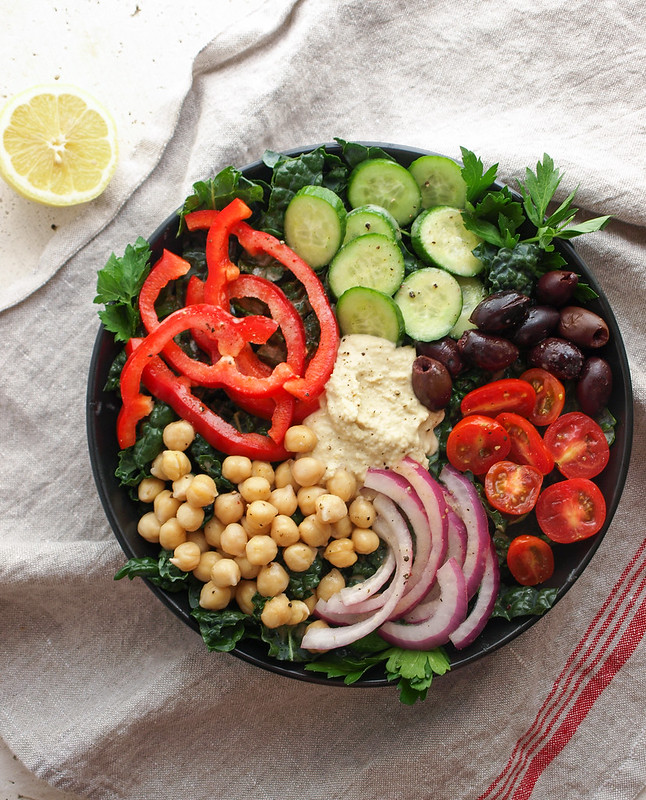
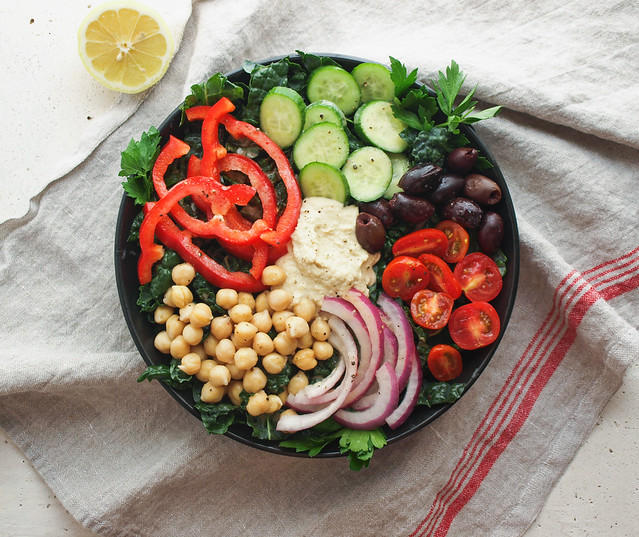
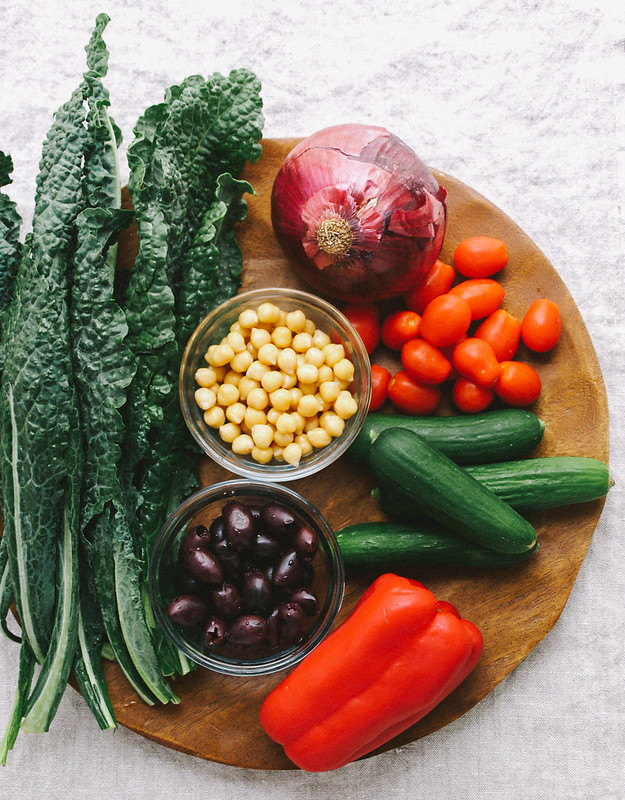
Summer in California is setting in, the temperatures are rising and salads are always welcome. I've been on an olive loving kick lately, as well as a chickpea kick (I'll tell you why soon), so this salad hit the spot with some salty olives, fresh sweet grape tomatoes & red bell peppers, refreshing cucumbers, red onion and fresh cooked chickpeas. All dressed up with a light vinaigrette and nice dollop of hummus. This salad didn't start with a dollop of hummus, but half way through eating I added a scoop and decided it needed to be included in the recipe (and photo), although I list it as optional. It adds such nice creaminess and rounds it out the salad well. If you find raw kale too hard to eat, even after letting it relax in lemon juice, a dollop of hummus will definitely do a world of good for you. It adds a nice creaminess to the overall salad while masking some of kale's bitterness. Similar to the Every Day Nourish Bowl, we now have another option of whole hearted goodness to choose from when a craving for salads occur! It's simple, accessible, not too expensive and good for you. Cheers to all of those things! :)

I have some fun news to share! I'm going to be immersed in all things chickpeas the next few months. I figured this post is a great place to introduce a project I've been working so hard on called, CHICKPEA: THE CHICKPEA HANDBOOK/COOKBOOK. It's all you need to know about chickpeas, with chapters containing information on nutrition, history, types, sprouting, growing (gardening), storing & selecting, flour, cooking and a few other relevant chapters. Plus, it will include upwards of 100+ recipes (not sure where to stop since there's so many good ones I want to add), including pictures of each one. It will include all of the favorite chickpea recipes from the blog and a ton of new ones. I'm excited out of my mind for this project! I was asked a few months ago what was the one ingredient that was important in my kitchen and my answer was chickpeas. They are so versatile and I use them often, especially for my hummus which is so much more than just a dip. After toying around with a couple cookbook ideas, doing a chickpea cookbook seemed so right. I want to celebrate the chickpea in all its glory and showcase its versatility, all the way from breakfast to desserts. It's a perfect fit for me and I know it will be a useful addition to any kitchen library! It's meant to be used often and will have my signature simplicity with a few recipes to kick it up a notch. I'm shooting for the end of the year but am really in no hurry as I want this book to be amazing. I ♥ chickpeas and think we should all eat more of them!

Enjoy the salad, and of course, this will be in the book! :)

MEDITERRANEAN  KALE SALADkale MEDITERRANEAN KALE SALADMEDITERRANEAN KALE SALADMEDITERRANEAN KALE SALAD

MEDITERRANEAN  KALE SALAD

Ingredients 
  • 3/4 bunch kale, stems removed and julienned
  • 1 large lemon, juice of
  • 1/2 small red bell pepper, sliced
  • 1/8 small red onion, sliced
  • 1/4 cucumber, sliced
  • small handful cup cherry tomatoes, sliced in half or campari tomatoes, quartered
  • small handful cup kalamata olives, pitted
  • 1/2 cup cooked chickpeas (garbanzo beans)
  • dollop of hummus, optional (but so good!), to serve
  • fresh chopped parsley, to serve
Vinaigrette
  • 2 tablespoons red wine vinegar
  • juice of one lemon
  • 1 heaping teaspoon dijon mustard
  • 1/4 teaspoon dried oregano, optional
  • 1 tablespoon extra virgin olive oil
  • salt & pepper, to taste

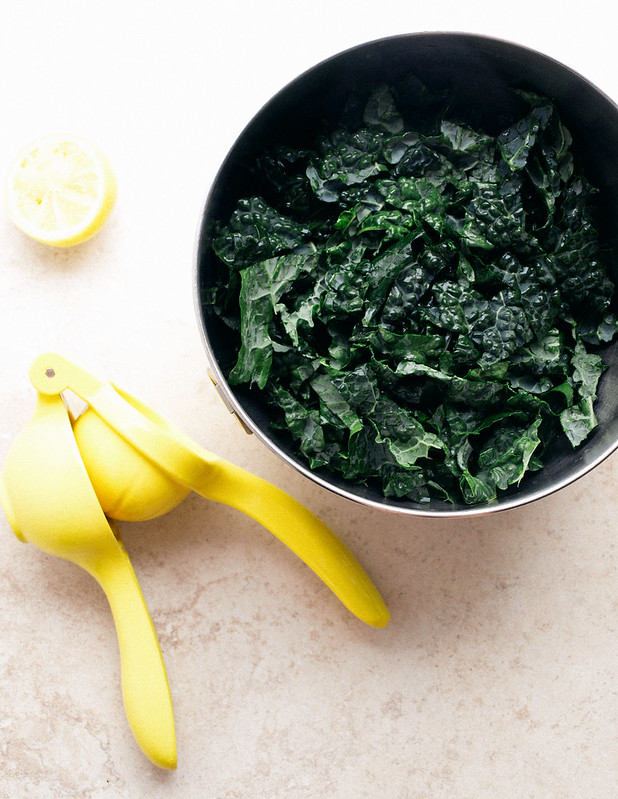
Remove the stems from the center of the kale leaves, as least the thickest parts. Julienne kale leaves and place in a medium size bowl, add lemon juice, mix to coat the leaves and let set while you prepare the rest of the ingredients. The lemon juice will help soften the kale leaves. Toss every few minutes or so.

In a small bowl, add the ingredients for the vinaigrette. Whisk together until emulsified. It usually takes me about one minute, set aside.

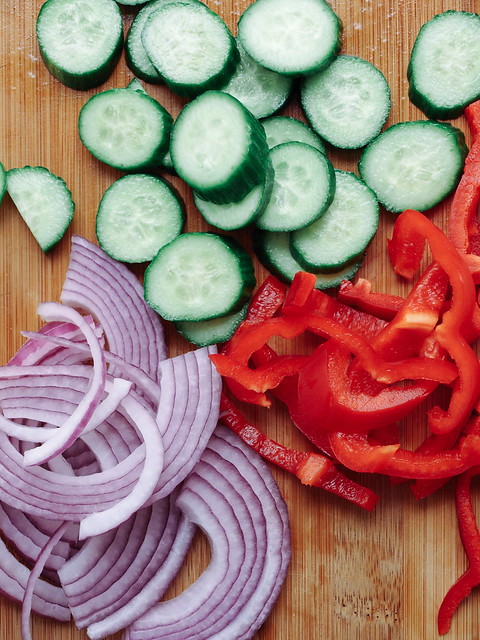
Once you've prepped your other ingredients you're ready to assemble your salad. In a serving dish, add kale and top with bell pepper, onion, cucumber, tomatoes, olives and chickpeas. Add your vinaigrette over top and a dollop of hummus anywhere you like.

Serves one generously.

Notes:

Depending on the size of your produce, amounts will vary. Adjust accordingly to suit your taste and situation. For instance, I used small Persian cucumbers here but used a whole small one. Typically, you'll be using a regular or English cucumber and will only use about 1/4 of it, as per the recipe.


Enjoy!


Lazy Pasta

Lazy Pasta

This one should really be called, 'Lazy Pasta, Lazy Post', but I don't want to give too much away. It's entirely ok to have those lazy days, as well as a lazy post every now and then! I find I am not posting as much as I used to. I feel one recipe, maybe two a week, is all I can manage these days. I do try to share some of my everyday eats on facebook and instagram which is where this recipe comes from and felt it really should be in the recipe collection, iphone photo and all (VSCOcam app it's awesome and free), as inspiration for something easy you can make on a weekly basis. It's a wonderfully rustic and cozy dish that can be whipped up in a cinch. These everyday meals are filling, nutritious and delicious!  Feel free to change up the veggies using whatever appeals to you best...bell peppers, carrots, broccoli, eggplant, etc. Let your imagination, or whatever needs to be used up in the fridge, be your guide!

quinoa pasta
Lazy Pasta

Lazy Pasta

Ingredients
  • 8 oz. mushrooms, sliced (I used baby bella)
  • 2 medium zucchini, thinly sliced and cut in half
  • 1 onion, diced
  • 2 - 3 garlic cloves, diced
  • 2 cans (15oz.) diced tomatoes (pref. fire roasted)
  • 1/2 teaspoon red pepper flakes
  • 1 teaspoon dried oregano
  • mineral salt & cracked pepper to taste
  • 2 tablespoons olive oil
  • 8 oz. pasta of choice (I used quinoa linguini pasta)
  • almond parmesan, to serve

Cook your pasta of choice according to package directions. Set aside.

In a large skillet/wok, heat oil on medium high, add mushrooms, zucchini, onion, garlic and spices, cook for about five minutes, or until mushrooms and zucchini are tender. Stir in tomatoes and cook until heated through. Taste for seasoning.

Serve over a bed of pasta with a good sprinkling of almond parmesan.

Notes: If you want, you can saute your onions and garlic first for five minutes and then add the other ingredients and saute again until tender. That is how it is usually done in recipes, but this is 'lazy pasta' and I cut that part out with great results....at least I think it was fine!

So easy and so good...

Pairs well with this song from Theivery Corp. Un Simple Histoire

Enjoy!


Follow TSV on Instagram

SWEET POTATO & QUINOA CHILI


Meals that can easily fit into your meal rotation are what I really love to share. As we can get a bit bored with the usual meals, it's nice to have more easy options that come together in a cinch. I love finding these simple dishes that truly work and can be made over and over again. That is what I share with you today. Nothing complicated in this recipe, everything is probably in your kitchen right now or you can find right away at your favorite grocery store. Eating vegan meals every day that are healthy and tasty is really easy once you get the hang of it. This chili has plenty of protein and essential fiber, vitamins and minerals while being flavorful and satisfying. I know you're going to love this one and find yourself making it often during the chili weather season. This lovely chili is a one pot meal that is ready in under an hour. Leftovers hold up extremely well too!

Bring on the chili...

Sweet Potato & Quinoa Chili

SWEET POTATO & QUINOA CHILI

Ingredients (serves 6)
  • 1 can (15 oz) black beans, drained and rinsed
  • 1 can (15 oz) kidney beans, drained and rinsed
  • 1 can (15 oz) fire roasted diced tomatoes or 1 1/2 cup diced fresh tomatoes
  • 1 can (6 oz) tomato paste
  • 1 large sweet pototo, diced (with or without the skin...I leave the skin on)
  • 1 cup dry quinoa
  • 1 onion, diced
  • 5 - 6 garlic cloves, minced
  • 1 tablespoon olive oil
  • 1 1/2 tablespoons chili powder
  • 1 tablespoon cumin
  • 1 teaspoon dried oregano
  • a few dashes of garlic powder
  • a few dashes of onion powder
  • himalayan salt to taste
  • 4 cups (32 oz) water or vegetable broth, + more as needed
  • avocado, cilantro and/or diced onion, for garnish (optional)

In large pot or dutch oven, heat oil over medium heat. Add onions, cook until soft and they start to turn brown (about 7 - 10 minutes). Add garlic, cook for another minute or so. Add the tomato paste, chili powder, cumin, oregano, garlic powder and onion powder, cook for 2 more minutes stirring constantly. Add tomatoes, liquids, beans and sweet potato, stir until combined. Add quinoa, bring to a boil, reduce heat, cover slightly ajar and cook for 30 - 40 minutes, stirring occasionally. Chili is ready when sweet potatoes are tender. Add additional water if chili is too thick for your liking.

Serve with optional garnishes. You may also like to top it with this easy Cilantro Lime Cashew 'Sour Cream'.

Notes:

As with all recipes, adjust seasoning to taste. Add a 1/2 teaspoon or so chipotle powder for some added heat. Also, use whatever beans you prefer. You may even like to use one kind of bean instead of two.

Easy and delicious...Enjoy!

Adapted from this recipe at Milk Free Mom


Raw Pasta Primavera & Meatballs

Raw Pasta Primavera & Meatballs

Let's uncook something wonderful...

Need I say much about this dish except that is amazing and fresh! This is a nice escape from the salads of the day. I love salads but these raw pasta dishes take it to another level of raw foods that I can really get into. Using fresh herbs will also add to the freshness and flavor. The oregano in the meatballs was just delicious. And sprinkle some of the herbs on top too. Not only are they pretty but the flavors will all mingle and come together for a tasty sensation. You may find yourself craving this raw dish again and again. 


Raw Pasta Primavera & Meatballs

Raw Pasta Primavera + Meatballs

Ingredients (serves 4)
  • 1 orange bell pepper, diced
  • 1 yellow bell pepper, diced
  • tomatoes of choice, diced
  • 1/2 large zucchini, diced
  • 1 -2 green onions, thinly sliced

Pasta
  • 3 zucchini, spiralize or julienne
  • 3 yellow squash, spiralize or julienne

Primavera Sauce
  • 4 roma tomatoes, 8 campari or 2 large tomatoes of choice
  • 1/2 cup sun dried tomatoes, soaked apprx 30 minutes to 1 hour
  • 1 small shallot or 1/2 large
  • 2 tablespoon extra virgin olive oil, optional
  • 1 tablespoon lemon juice
  • 1 tablespoon garlic powder or 1-2 fresh garlic cloves
  • 1/2 cup fresh basil
  • pinch or two red pepper flakes
  • himalayan salt to taste

Meatballs
  • 2 cups mushrooms, sliced (baby bella's or cremini)
  • 2 rounded tablespoons tahini
  • 3/4 cup walnuts, soaked for 4 hours and left to dry 1 hour*
  • 3 tablespoons quick oats or oat flour
  • 1 clove garlic
  • 1/2 small shallot
  • 2 teaspoons tamari or nama shoyu
  • 2 tablespoons fresh oregano, packed
  • himalayan salt & cracked pepper to taste

Start by preparing your veggies while the sun-dried tomatoes are soaking. Spiralize or julienne (either by hand or with a julienne tool) your zucchini & squash for the pasta. Prepare your diced veggies. Set aside.

Next, place ingredients for the meatballs into your food processor/high speed blender, blend until well combined but still a bit chunky(not too chunky but just a very minimal amount). Taste for seasoning. Scoop out using heaping tablespoons and form into balls. I gently flipped them back and forth between my palms, and once rounded I used my fingers to mold making a nice circle shape. Makes 8. Set aside.

Rinse equipment that the meatballs were made in and start the marinara sauce by placing all ingredients in food processor/high speed blender and combine until smooth or desired consistency. Taste for seasoning. Makes two cups.

Layer pasta in individual serving dishes, top with marinara, a handful of veggies and a couple meatballs. Finish it off by topping with a light dusting of almond parmesan and some fresh cracked pepper.

* There are benefits to soaking your nuts and seeds whenever possible. In this recipe they need to dry out after soaking or the mixture is too wet. For that reason this is an option here, especially if it's not convenient with your time frame. The reason why soaking is a good idea is that it enables your body to digest the nuts & seeds more easily. It also increases the nutrients and allows your body to absorb them more readily. But don't worry if you can't soak, your still getting health benefits. Here is quick article with the essential information and a nice chart of all the nuts/seeds soaking & sprouting times: Benefits of Soaking Nuts

Clean and vibrant...Enjoy!


    Spaghetti Squash & Italian Bean Balls

    Spaghetti Squash & Italian Bean Balls

    If you've never had spaghetti squash, you are in for a surprise. It really is a great replacement for pasta for those looking for a change, or just wanting to stay away from the wheat and rice pasta alternatives. It does have a little crunch but it's very pleasant, the texture reminds me a little of kelp noodles if you're familiar with those. Spaghetti squash contains lots of nutrients, including folic acid, potassium, vitamin A & C, and it's low in calories containing about 42 calories per serving. It's just so colorful too. I can definitely get used to this and incorporate it into my meal rotations every now and then.

    Spaghetti Squash & Italian Bean Balls

    This is my second time having spaghetti squash. The first time was with just sauce and that was delicious by itself. But I decided if I was going to do a recipe it would be best to add in some bean balls as well just to make it a more rounded meal. And it was, this was very filling and the bean balls came out great. They definitely added more protein per serving to this meal and left me completely content for quite a few hours.

    Spaghetti Squash & Italian Bean BallsSpaghetti Squash & Italian Bean Balls

    I really wanted the bean ball recipe to be easy, using things you may already keep on hand so you can whip these up without too much planning and/or work involved. I also wanted to make this with an option for being low fat, as well as for people with nut allergies, you can add the nuts/seeds if you wish. I did this batch without any nuts/seeds. Adding them into the mixture will give an extra dose of protein, texture and hardiness to the bean balls. You may think they look a little dry coming from the oven (dipping them in sauce right before serving will greatly help that), but once you put some sauce on top they come to life. Honestly, I actually found myself munching on the leftover bean balls the rest of the day without any sauce. They held together extremely well too!

    Spaghetti Squash & Italian Bean Balls

    Spaghetti Squash & Italian Bean Balls

    Ingredients
    • 1 large or 2 small spaghetti squash, seeds removed
    • 1 jar (25oz.) organic pasta sauce of choice
    Bean Balls
    • 1 heaping cup of mushrooms (about 4 oz), sliced (I used cremini)
    • 1 small yellow onion, diced
    • 2 cloves garlic, minced
    • 1 tablespoon olive or grapeseed oil, to saute
    • 1/2 cup walnuts or sunflower seeds, optional
    • 1 can (15oz) cannellini, kidney or black beans, drained and rinsed (I used cannellini)
    • 1 cup of quick oats
    • 1 tablespoon dried oregano, basil, thyme or Italian seasonings (or a mixture of these)
    • 1/2 teaspoon garlic powder
    • dash or two of cayenne pepper or red pepper flakes, to taste
    • sea salt and cracked pepper, to taste

    Preheat oven to 375 degrees.

    Cut spaghetti squash in half lengthwise, remove seeds and place in roasting pan or baking dish, cut side up. If you like you can coat with a thin layer of olive oil and a sprinkle of salt & pepper. Add about 1/4 inch of water to the dish and bake on bottom rack for 45 - 50 minutes. (You will be adding the bean balls to the middle rack about half way through.) EDIT: Alternately, you can place squash cut side down (without oil and seasonings), add 1/4 inch of water to the dish and bake the same as above (this has been my preferred method lately). 

    Start assembling the bean balls. Saute onions, mushrooms and garlic over medium heat for 5 minutes and let cool. If using the nuts/seeds, place in food processor first and pulse until coarsely ground, and continue. Also, if using old fashioned oats place them in the with the nuts to chop then up a bit. In food processor place beans, sauteed veggies, oats and herbs and spices. Pulse until just combined. Taste for seasoning adding anything extra you may like. I added in some fresh chopped basil I had on hand.

    Roll into balls, about 1 1/2 - 2 inches, and place on a baking sheet. I was able to get 9 jumbo sized bean balls. Put in the oven on the middle rack for the remaining 25-30 minutes of the squash cooking time, they should get at least 20 minutes. Remove both when time is up and let cool. OR...you can also cook the balls in a saute pan using a little olive oil over medium to medium high heat, turning often enough so that all sides brown (I used the oven method here).
    spaghetti squash

    In the meantime, heat your sauce. When ready to assemble, using a fork scrape the insides of the squash horizontally all the way around. It will pull easily from the sides resembling 'noodles'. You will have more squash noodles than you might expect, enough to serve two with one good sized squash.

    Serve squash 'noodles' topped with bean balls, sauce, fresh cracked pepper, salt and some chopped fresh parsley or basil. A nice dusting of Almond Parmesan will also enhance this dish!

    Serves 3 - 4. Store leftovers in an air tight container for up to five days. Leftovers were great!

    Notes:

    If you don't have quick oats, use regular oats but process gently into a very rough flour. Also, replace the oats with breadcrumbs if you prefer.

    Try dipping your bean balls in the sauce just before serving, this will greatly enhance the visual appeal as well giving it a nice flavorful coating.

    Sub in zucchini noodles, gently heated, or any pasta of choice if spaghetti squash is not available. 

    Spaghetti Squash & Italian Bean Balls

    Enjoy!

    Adapted from these recipes: Whole Foods and The Vegan Stoner

    Raw Veggie Chili with Taco Nut Meat

    Raw Veggie Chili with Taco Nut Meat

    This is a welcome meal after all the Thanksgiving festivities. Nothing like adding a raw meal into the mix and this was superb! I have to hand it to Ani Phyo for not being afraid to use spices, this packs great flavor with fresh produce to create a raw chili that I absolutely adore and am craving already. Adapted from this recipe 'Fresh Tomato Chili with Taco Nut Meat'. I will definitely be adding this to my to go lunches as well as my at home meals. Feel free to add/subtract any vegetable you wish. Get in as many as you can to really make this a well rounded garden chili recipe. Use as much or as little as you like of each ingredient. This could've really used a dollop of raw Sour Cream or this flavorful Lime Cilantro Cashew 'Sour Cream', it would've added that final touch.

    Raw Veggie Chili with Taco Nut Meat

    Mine didn't seem to come out with as much soupyness as Ani's photo shows. But never the less, this is so very fresh, hearty and delicious...simply great! Be sure to take a peek at her photo to see what I mean. You can find it here, just scroll down a bit. She also has other recipes you may be interested in. Her focus in on raw food only.

    Raw Veggie Chili with Taco Nut Meat

    Dice up your vegetables and fresh oregano (if using fresh)...

    Raw Veggie Chili with Taco Nut Meat

    Combine with seasoning, I also added in some cilantro as an after thought...

    Raw Veggie Chili with Taco Nut Meat

    Using a food processor, puree half of the mixture... 

    Raw Veggie Chili with Taco Nut Meat

    Bring back pureed vegetables to diced vegetables and combine. Then, onto your nut meat...

    Raw Veggie Chili with Taco Nut Meat

    Add nut meat ingredients to food processor and pulse just until crumbly...

    Fairly simple...just slicing, dicing, pureeing and pulsing. So fresh and good. I always feel the best after eating meals like this! Don't forget to add some raw Sour Cream or Lime Cilantro Cashew 'Sour Cream' on top for even more added deliciousness, or simply add some avocado slices to round it out even more.

    Raw Veggie Chili with Taco Nut Meat

    Vegetable Chili
    • 3 cups tomatoes (I used roma and grape)
    • 1 small red bell pepper (orange would be great too), diced
    • 1 large celery stalk, diced
    • 1/2 yellow or red onion, diced
    • 1 small zucchini, diced
    • 1 corn off the cob
    • 1 - 2 garlic cloves, minced
    • cilantro (as much as you like), chopped
    • 1 - 2 teaspoon chili powder, to taste
    • 1 teaspoon cumin
    • 3/4 teaspoon oregano, fresh or dried
    • 1/4 teaspoon sea salt, to taste

    Prepare vegetables and combine all ingredients in large size bowl. Place 1/2 or so of the mix into a food processor and blend until pureed. Return puree to diced vegetables and toss well.


    Nut Meat
    • 1 cup walnuts
    • 1 cup mushrooms
    • 1 tablespoon cumin
    • 2 teaspoons coriander
    • 1 teaspoon tamari, bragg's or nama shoyu, or 1/4 teaspoon sea salt, to taste

    Place all ingredients into food processor and pulse until crumbly. You don't want to over blend or it will be a paste.

    To serve, place vegetable chili in bowls and top with nut meat adding any additional garnishes you like. Serves four, or two generously. Store left overs, if there is any, in an air tight container in the refrigerator. Chili will last for five to six days. Nut meat will last up to two to three days, depending on the freshness of the mushrooms. Before eating let sit at room temp as it tastes best this way.


    Enjoy the freshness!


    Back to top